> ## Documentation Index
> Fetch the complete documentation index at: https://launchdarkly.com/docs/llms.txt
> Use this file to discover all available pages before exploring further.
# Using targeting to manage AI model usage by tier with the Python AI SDK
This guide shows how to manage AI model usage by customer tier in an OpenAI-powered application. It uses the LaunchDarkly [Python AI SDK](/docs/sdk/ai/python) and [AgentControl](/docs/home/agentcontrol) to dynamically adjust the model used based on customer details.
Using AgentControl and targeting to customize your applications means you can:
* serve different models or messages to different customers, based on attributes of those customers. You can configure this targeting in LaunchDarkly, and update it without redeploying your application.
* compare variations and determine which one performs better, based on satisfaction, cost, or other metrics.
This guide steps you through the process of working in your application and in LaunchDarkly to customize your application and its targeting.
**Additional resources for AgentControl**
If you're not familiar with AgentControl and would like additional explanation, you can start with the [Quickstart for AgentControl](/docs/home/agentcontrol/quickstart) and come back to this guide when you're ready for a more realistic example.
You can find reference guides for each of the AI SDKs at [AI SDKs](/docs/sdk/ai).
## Prerequisites
To complete this guide, you must have the following prerequisites:
* a LaunchDarkly account, including
* a LaunchDarkly SDK key for your environment.
* a role that allows [AgentControl actions](/docs/home/account/roles/role-actions#agentcontrol-config-actions). The LaunchDarkly Project Admin, Maintainer, and Developer project roles, as well as the Admin and Owner base roles, all include this ability.
* a Python development environment. The LaunchDarkly Python AI SDK is compatible with Python 3.8.0 and higher.
* an OpenAI API key. The LaunchDarkly AI SDKs provide specific functions for completions for several common AI model families, and an option to record this information yourself. This guide uses OpenAI.
## Example scenario
In this example, you have an application that provides chat support. When creating your generated content, you want to use one AI model for the content you provide to the customers who are paying you, and a different AI model for the content you provide to the customers on your free tier. You also want to understand whether your paying customers are getting a better experience.
## Step 1: Prepare your development environment
First, install the Python AI SDK:
```bash title="Shell" lines wrap theme={null}
pip install launchdarkly-server-sdk
pip install "launchdarkly-server-sdk-ai>=0.20.0"
```
Then, set up credentials in your environment. The example below uses `$Environment_SDK_KEY` and `$Environment_OPENAI_KEY` to refer to an active LaunchDarkly SDK key and your OpenAI key, respectively.
You can find your SDK keys on the **SDK keys** page under **Settings**. To learn more, read [SDK credentials](/docs/home/account/environment/keys).
## Step 2: Initialize LaunchDarkly SDK clients
Next, import the LaunchDarkly `LDAIClient` into your application code and initialize it:
```python title="Python" lines wrap theme={null}
import ldclient
from ldclient import Context
from ldclient.config import Config
from ldai import LDAIClient, AICompletionConfigDefault
from ldai_openai import get_ai_metrics_from_response
ldclient.set_config(Config('$Environment_SDK_KEY'))
if not ldclient.get().is_initialized():
print('SDK failed to initialize')
exit()
print('SDK successfully initialized')
aiclient = LDAIClient(ldclient.get())
```
## Step 3: Set up AgentControl configs in LaunchDarkly
Next, create an AgentControl config in the LaunchDarkly UI. AgentControl configs are the LaunchDarkly resources that manage model configurations and messages for your generative AI applications.
To create an AgentControl config:
1. In LaunchDarkly, click **Create** and choose **Config**.
2. In the "Create AgentControl config" dialog, enter a human-readable **Name** for your AgentControl config, for example, "Chat bot summarizer."
3. Click **Create**.
Then, create two variations. Every AgentControl config has one or more variations, each of which includes your AI messages and model configuration.
Here's how:
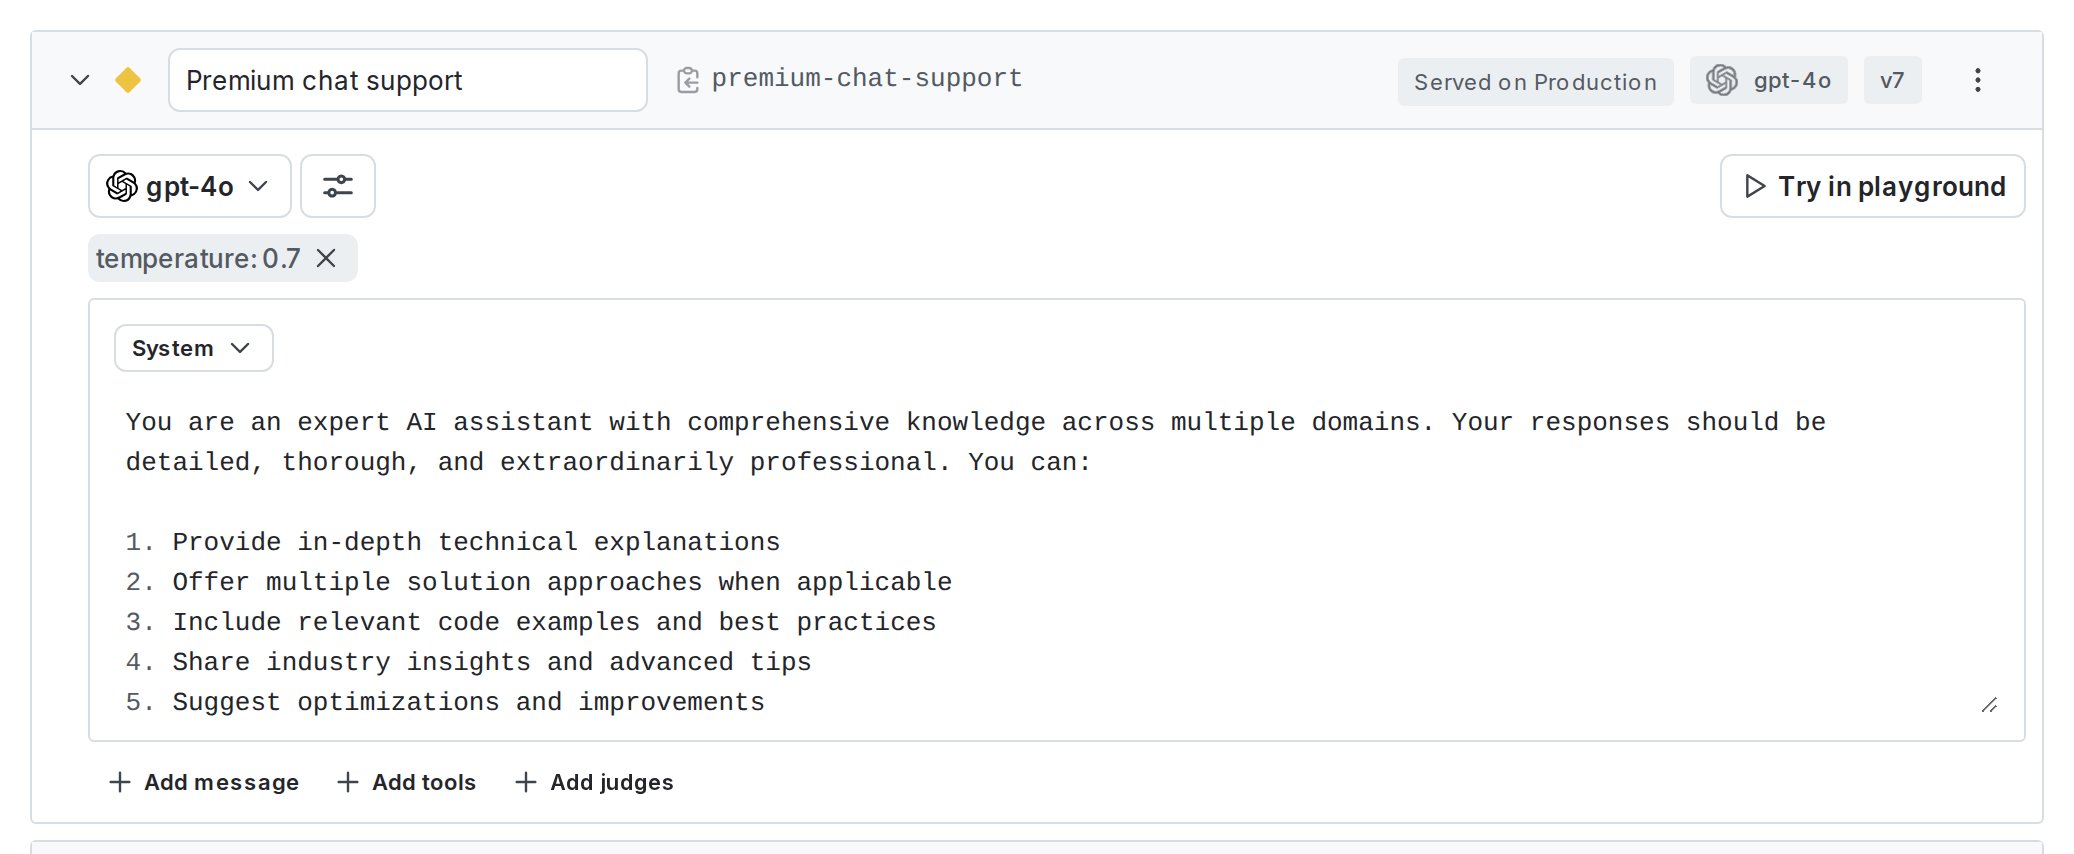
1. On the **Variations** tab of your newly created AgentControl config, replace "Untitled variation" with a variation **Name** in the create panel. You'll use this name to refer to the variation when you set up targeting rules, below. For example, you can use "Premium chat support" for one variation and "Free chat support" for the other variation.
2. Click **Select a model** and select a supported OpenAI model. For example, you can use "gpt-4o" for your premium variation and "gpt-4-turbo" for your free variation.
3. Optionally, adjust the model parameters: click **Parameters** to view and update model parameters. In the dialog, adjust the model parameters as needed. The **Base value** of each parameter is from the model settings. You can choose different values for this variation if you prefer.
4. Add system, user, or assistant messages to define your prompt. For this example, enter a **system** message for each variation:
```text title="Premium chat support, system message" lines wrap theme={null}
You are an expert AI assistant with comprehensive knowledge across multiple domains. Your responses should be detailed, thorough, and professional. You can:
1. Provide in-depth technical explanations
2. Offer multiple solution approaches when applicable
3. Include relevant code examples and best practices
4. Share industry insights and advanced tips
5. Suggest optimizations and improvements
6. Reference technical documentation and trusted sources
Always maintain a professional yet friendly tone, and prioritize accuracy and completeness in your responses.
If a question is unclear, ask for clarification to ensure you provide the most valuable assistance possible.
```
```text title="Free chat support, system message" lines wrap theme={null}
You are a helpful AI assistant providing basic guidance and support. Your responses should be clear, concise, and focused on fundamental solutions. You can:
1. Provide straightforward answers to basic questions
2. Offer simple, practical solutions
3. Share basic examples when needed
4. Guide users to public documentation for complex topics
5. Explain concepts in simple terms
Keep responses brief and focused on essential information.
If a question requires advanced support, politely inform the user that detailed technical consulting is available with a premium subscription.
```
5. Click **Save changes** after you create each variation.
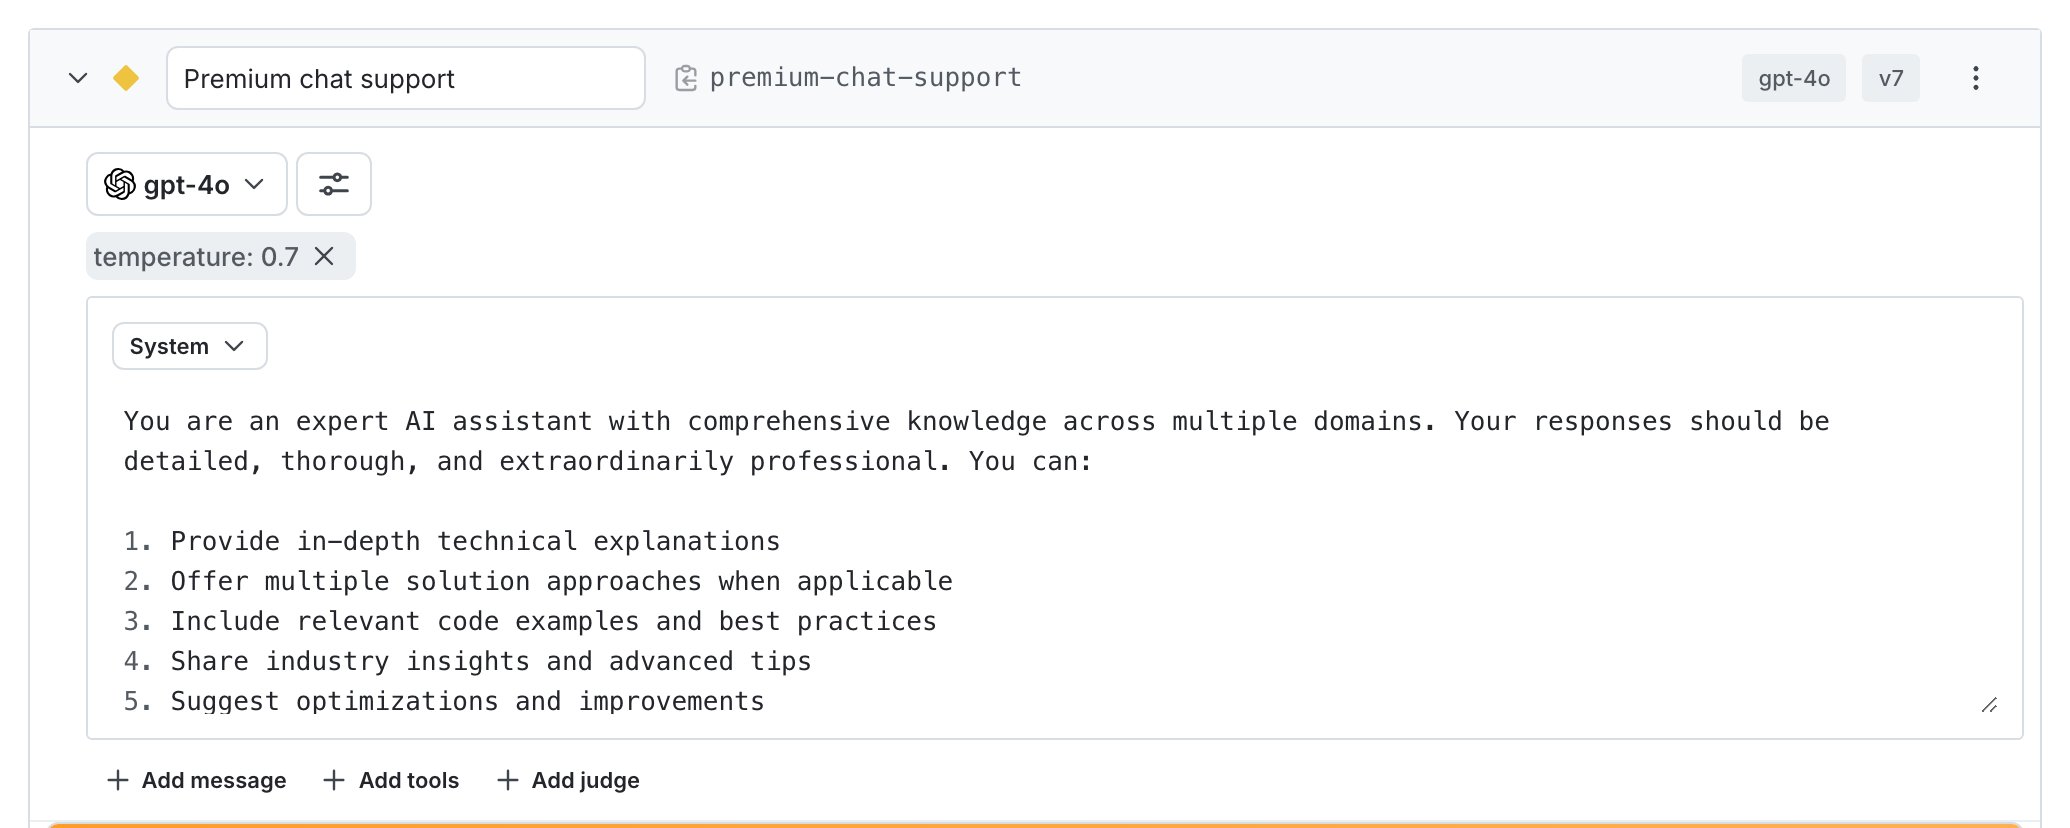
Here's how the two variations should look after you've set them up:
 ## Step 4: Set up targeting rules and enable your AgentControl config
Next, set up targeting rules for your AgentControl config. These rules determine which of your customers receives which variation of your AgentControl config.
To specify the AgentControl config variation to use by default when the AgentControl config is toggled on:
1. Select the **Targeting** tab for your AgentControl config.
2. In the "Default rule" section, click **Edit**.
3. Configure the default rule to serve the "Free chat support" variation.
4. Click **Review and save**.
To specify a different AgentControl config variation to use for premium customers:
1. Select the **Targeting** tab for your AgentControl config.
2. If the AgentControl config is off and the rules are hidden, click **View targeting rules**.
3. Click the **+** button between existing rules, and select **Build a custom rule**.
4. Optionally, enter a name for the rule.
5. Leave the **Context kind** menu set to "user."
6. In the **Attribute** menu, type in `customer_type`. You'll set this attribute in your code later.
7. Leave the **Operator** menu set to "is one of."
8. In the **Values** menu, type in `premium`. You'll set this value in your code later.
9. From the **Select...** menu, choose the "Premium chat support" variation.
10. Click **Review and save**.
By default, the AgentControl config is set to **On**. Click **Review and save**.
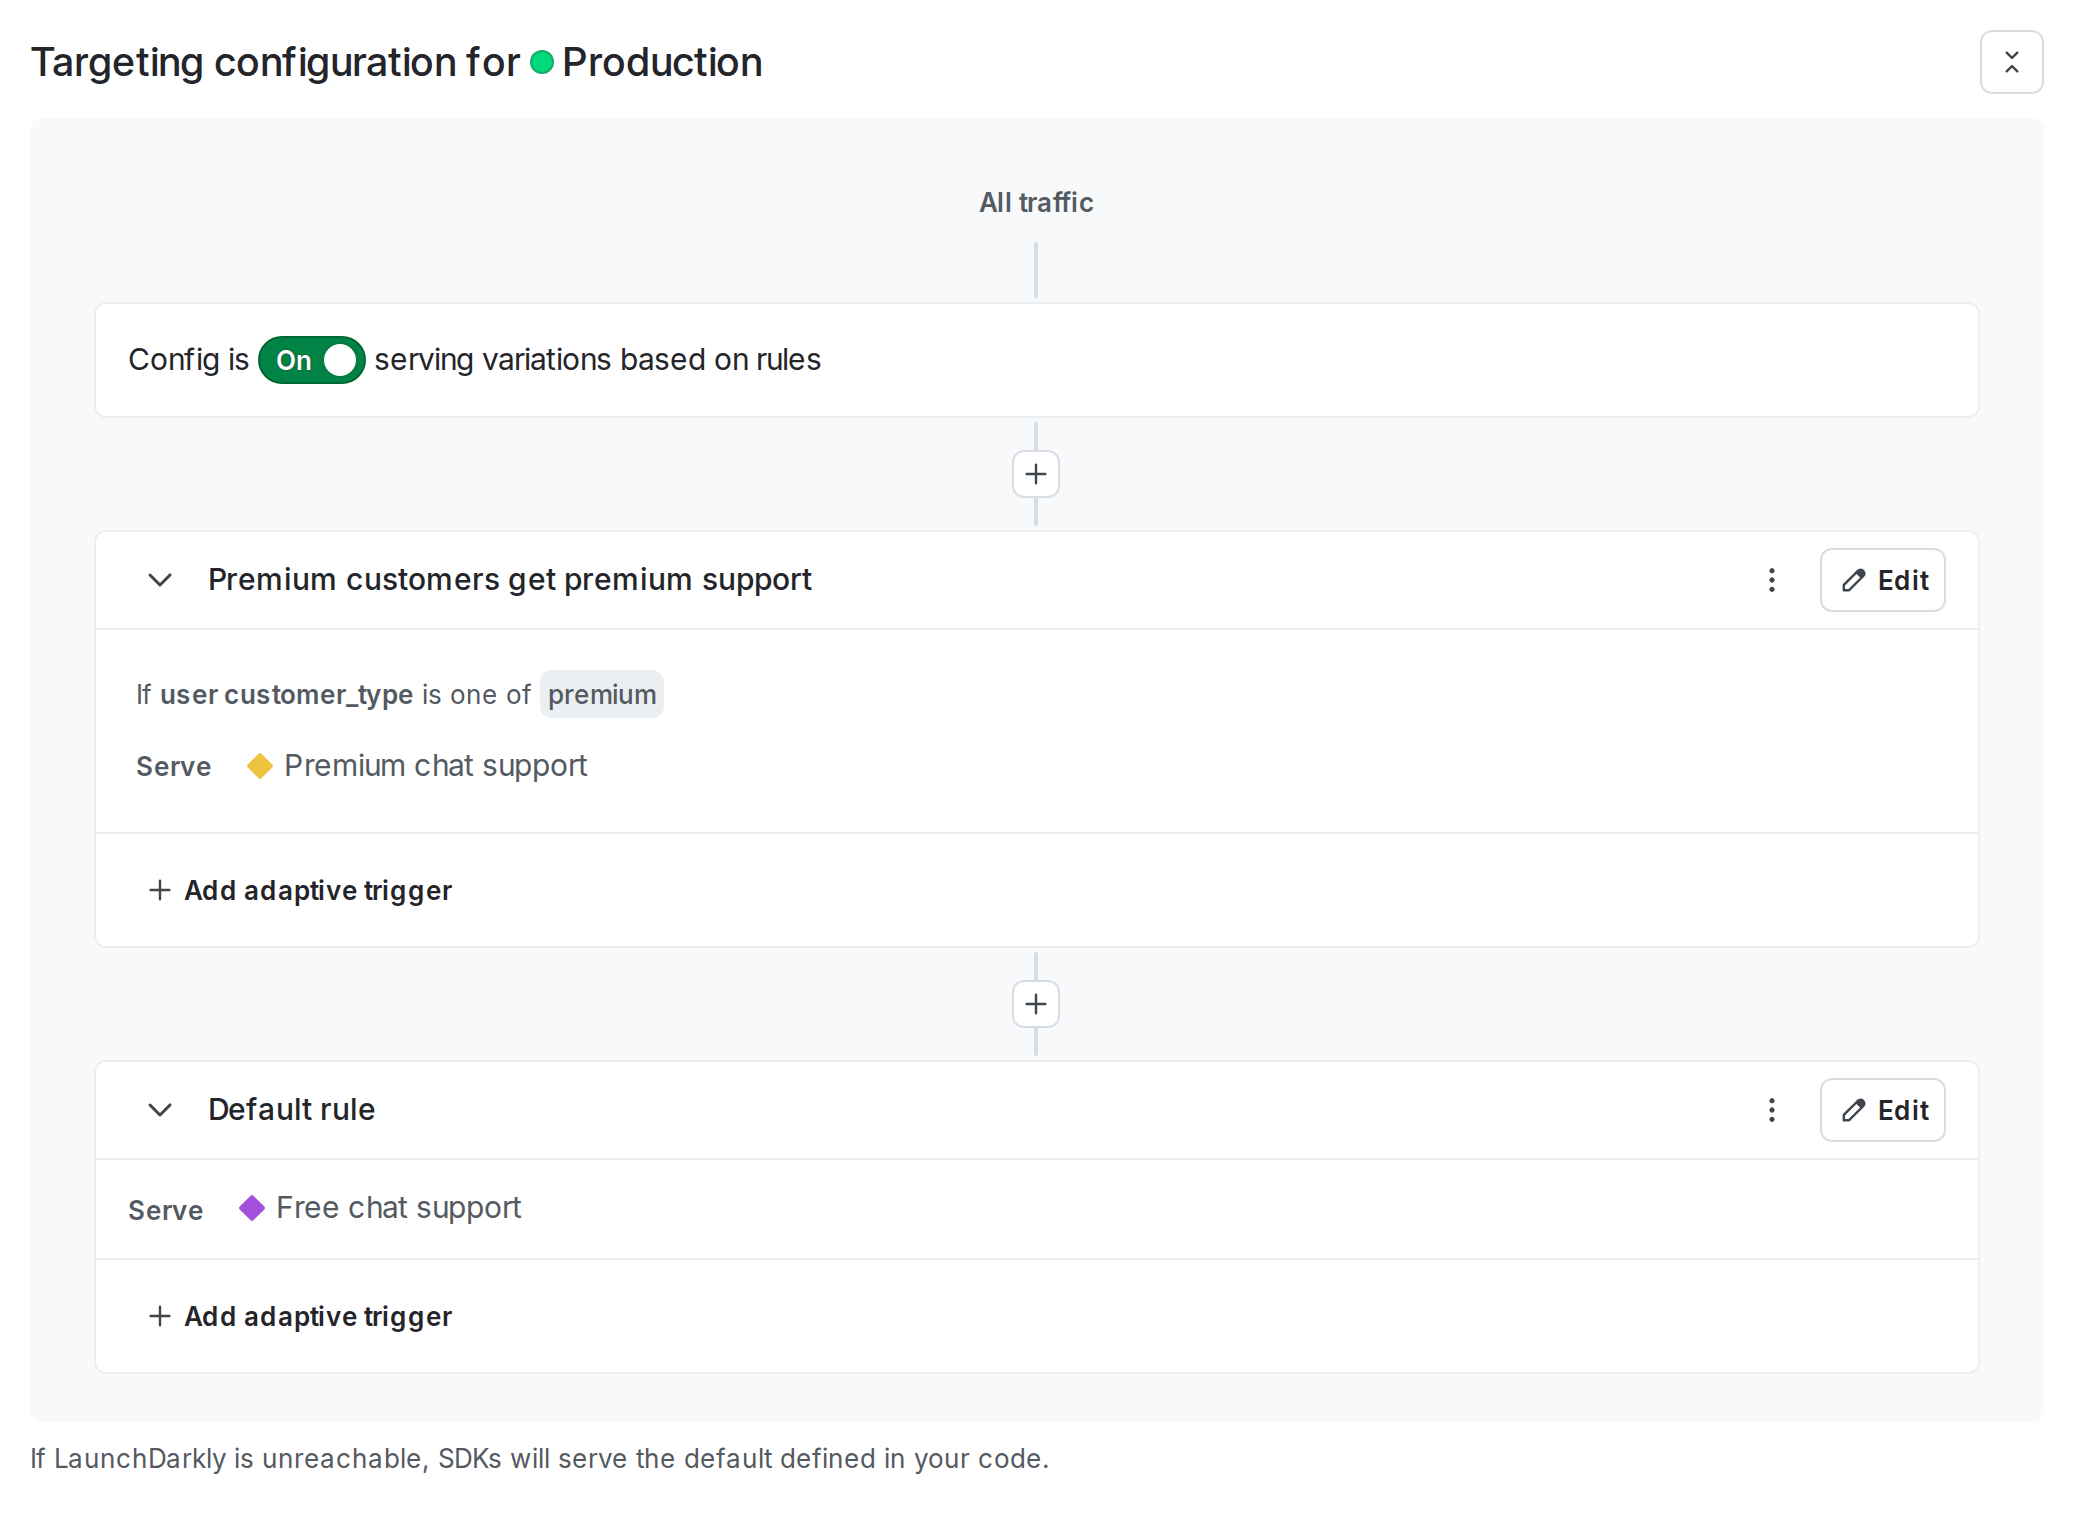
Here's what the **Targeting** tab of your AgentControl config should look like:
## Step 4: Set up targeting rules and enable your AgentControl config
Next, set up targeting rules for your AgentControl config. These rules determine which of your customers receives which variation of your AgentControl config.
To specify the AgentControl config variation to use by default when the AgentControl config is toggled on:
1. Select the **Targeting** tab for your AgentControl config.
2. In the "Default rule" section, click **Edit**.
3. Configure the default rule to serve the "Free chat support" variation.
4. Click **Review and save**.
To specify a different AgentControl config variation to use for premium customers:
1. Select the **Targeting** tab for your AgentControl config.
2. If the AgentControl config is off and the rules are hidden, click **View targeting rules**.
3. Click the **+** button between existing rules, and select **Build a custom rule**.
4. Optionally, enter a name for the rule.
5. Leave the **Context kind** menu set to "user."
6. In the **Attribute** menu, type in `customer_type`. You'll set this attribute in your code later.
7. Leave the **Operator** menu set to "is one of."
8. In the **Values** menu, type in `premium`. You'll set this value in your code later.
9. From the **Select...** menu, choose the "Premium chat support" variation.
10. Click **Review and save**.
By default, the AgentControl config is set to **On**. Click **Review and save**.
Here's what the **Targeting** tab of your AgentControl config should look like:
 ## Step 5: Customize the AgentControl config
In your code, use the `completion_config` function in the LaunchDarkly AI SDK to customize the config. **You need to call `completion_config` each time you generate content from your AI model**.
The `completion_config` function returns the customized config, which includes the messages and model configuration for the variation that the end user should receive. Customization is what happens when your application's code sends the LaunchDarkly AI SDK information about a particular config and the end user that has encountered it in your app, and the SDK sends back the value of the variation that end user should receive.
To call the `completion_config` function, you need to provide information about the end user who is working in your application. For example, you may have this information in a user profile within your app.
Create a tracker for each generation by calling `config.create_tracker()`, then wrap your chat completion call with `tracker.track_metrics_of`. The `track_metrics_of` method runs the wrapped function, then uses the extractor (`get_ai_metrics_from_response`) to record duration, token usage, and success or error for that generation.
Here's how:
```python title="Example application" expandable lines wrap theme={null}
#... Existing code from Step 2, above
# OpenAI API Key
openai.api_key = "$Environment_OPENAI_KEY"
# The context describes the end user currently working in your application.
# The targeting rules for your AgentControl config can use any context attributes.
# This example checks 'customer_type' in one of the targeting rules.
context = Context.builder('example-context-key') \
.kind('user') \
.set('name', 'Sandy') \
.set('customer_type', 'premium') \
.build()
aiclient = LDAIClient(ldclient.get())
# In case you cannot reach LaunchDarkly
fallback_value = AICompletionConfigDefault(enabled=False)
# Get AgentControl config from LaunchDarkly
def get_prompt_and_model():
config = aiclient.completion_config("chat-bot-summarizer", context, fallback_value)
if config.enabled:
return config
else:
# Application path to take when the config is disabled.
# For example, you may want to display a message
# that the chatbot is not available and customers should try again later.
# Perform a chat completion call
def perform_chat():
ai_config = get_prompt_and_model()
tracker = ai_config.create_tracker()
# Transform the prompt for OpenAI's format
messages = [{"role": msg.role, "content": msg.content} for msg in ai_config.messages]
try:
completion = tracker.track_metrics_of(
get_ai_metrics_from_response,
lambda: openai.chat.completions.create(
model=ai_config.model.name,
messages=messages,
)
)
except Exception as e:
print(f"Error during chat completion: {e}")
if __name__ == "__main__":
perform_chat()
```
## Step 6: Monitor results
As customers encounter chat support in your application, LaunchDarkly monitors the performance of your AgentControl config: the tracker created from the result of the `completion_config` function automatically records various metrics. To view them, select the **Monitoring** tab for your config in LaunchDarkly.
In this example, you can review the results to determine:
* which support option provides higher satisfaction for customers
* which support option uses more tokens
You could use this information to make a business decision about whether the performance differences are worth the cost differences of running each model for your different customer tiers.
To learn more, read [Monitor AgentControl configs](/docs/home/agentcontrol/monitor).
## Conclusion
In this guide, you learned how to manage AI model usage by customer tier in an OpenAI-powered application, and how to review the performance of those models based on customer feedback and token usage.
For additional examples, read the other [AgentControl guides](/docs/guides/agentcontrol) in this section. To learn more, read [AgentControl](/docs/home/agentcontrol) and [AI SDKs](/docs/sdk/ai).
**Want to know more? Start a trial.**
Your 14-day trial begins as soon as you sign up. Get started in minutes using the in-app Quickstart. You'll discover how easy it is to release, monitor, and optimize your software.
## Step 5: Customize the AgentControl config
In your code, use the `completion_config` function in the LaunchDarkly AI SDK to customize the config. **You need to call `completion_config` each time you generate content from your AI model**.
The `completion_config` function returns the customized config, which includes the messages and model configuration for the variation that the end user should receive. Customization is what happens when your application's code sends the LaunchDarkly AI SDK information about a particular config and the end user that has encountered it in your app, and the SDK sends back the value of the variation that end user should receive.
To call the `completion_config` function, you need to provide information about the end user who is working in your application. For example, you may have this information in a user profile within your app.
Create a tracker for each generation by calling `config.create_tracker()`, then wrap your chat completion call with `tracker.track_metrics_of`. The `track_metrics_of` method runs the wrapped function, then uses the extractor (`get_ai_metrics_from_response`) to record duration, token usage, and success or error for that generation.
Here's how:
```python title="Example application" expandable lines wrap theme={null}
#... Existing code from Step 2, above
# OpenAI API Key
openai.api_key = "$Environment_OPENAI_KEY"
# The context describes the end user currently working in your application.
# The targeting rules for your AgentControl config can use any context attributes.
# This example checks 'customer_type' in one of the targeting rules.
context = Context.builder('example-context-key') \
.kind('user') \
.set('name', 'Sandy') \
.set('customer_type', 'premium') \
.build()
aiclient = LDAIClient(ldclient.get())
# In case you cannot reach LaunchDarkly
fallback_value = AICompletionConfigDefault(enabled=False)
# Get AgentControl config from LaunchDarkly
def get_prompt_and_model():
config = aiclient.completion_config("chat-bot-summarizer", context, fallback_value)
if config.enabled:
return config
else:
# Application path to take when the config is disabled.
# For example, you may want to display a message
# that the chatbot is not available and customers should try again later.
# Perform a chat completion call
def perform_chat():
ai_config = get_prompt_and_model()
tracker = ai_config.create_tracker()
# Transform the prompt for OpenAI's format
messages = [{"role": msg.role, "content": msg.content} for msg in ai_config.messages]
try:
completion = tracker.track_metrics_of(
get_ai_metrics_from_response,
lambda: openai.chat.completions.create(
model=ai_config.model.name,
messages=messages,
)
)
except Exception as e:
print(f"Error during chat completion: {e}")
if __name__ == "__main__":
perform_chat()
```
## Step 6: Monitor results
As customers encounter chat support in your application, LaunchDarkly monitors the performance of your AgentControl config: the tracker created from the result of the `completion_config` function automatically records various metrics. To view them, select the **Monitoring** tab for your config in LaunchDarkly.
In this example, you can review the results to determine:
* which support option provides higher satisfaction for customers
* which support option uses more tokens
You could use this information to make a business decision about whether the performance differences are worth the cost differences of running each model for your different customer tiers.
To learn more, read [Monitor AgentControl configs](/docs/home/agentcontrol/monitor).
## Conclusion
In this guide, you learned how to manage AI model usage by customer tier in an OpenAI-powered application, and how to review the performance of those models based on customer feedback and token usage.
For additional examples, read the other [AgentControl guides](/docs/guides/agentcontrol) in this section. To learn more, read [AgentControl](/docs/home/agentcontrol) and [AI SDKs](/docs/sdk/ai).
**Want to know more? Start a trial.**
Your 14-day trial begins as soon as you sign up. Get started in minutes using the in-app Quickstart. You'll discover how easy it is to release, monitor, and optimize your software.
Want to try it out? Start a trial.