> ## Documentation Index
> Fetch the complete documentation index at: https://launchdarkly.com/docs/llms.txt
> Use this file to discover all available pages before exploring further.
# IP allowlist
**IP allowlists are available to customers on select plans**
IP allowlists are only available to customers on select plans. To learn more, [read about our pricing](https://launchdarkly.com/pricing/). To upgrade your plan, [contact Sales](https://launchdarkly.com/contact-sales/).
This topic explains how to create and maintain an IP address allowlist to help manage access to the LaunchDarkly app and the [REST API](/docs/api).
Maintaining an IP allowlist lets you configure specific IP addresses that can access your LaunchDarkly app using a browser, the LaunchDarkly REST API, or both. This gives you control over the locations from which your members can access their LaunchDarkly account.
The IP allowlist supports both individual IP addresses and classless inter-domain routing (CIDR) ranges. The allowlist supports IPv4 values. LaunchDarkly does not support connections over IPv6.
If you're looking for the list of LaunchDarkly public IP addresses, read [Public IP list](/docs/home/infrastructure/ip-list).
## View the IP address allowlist
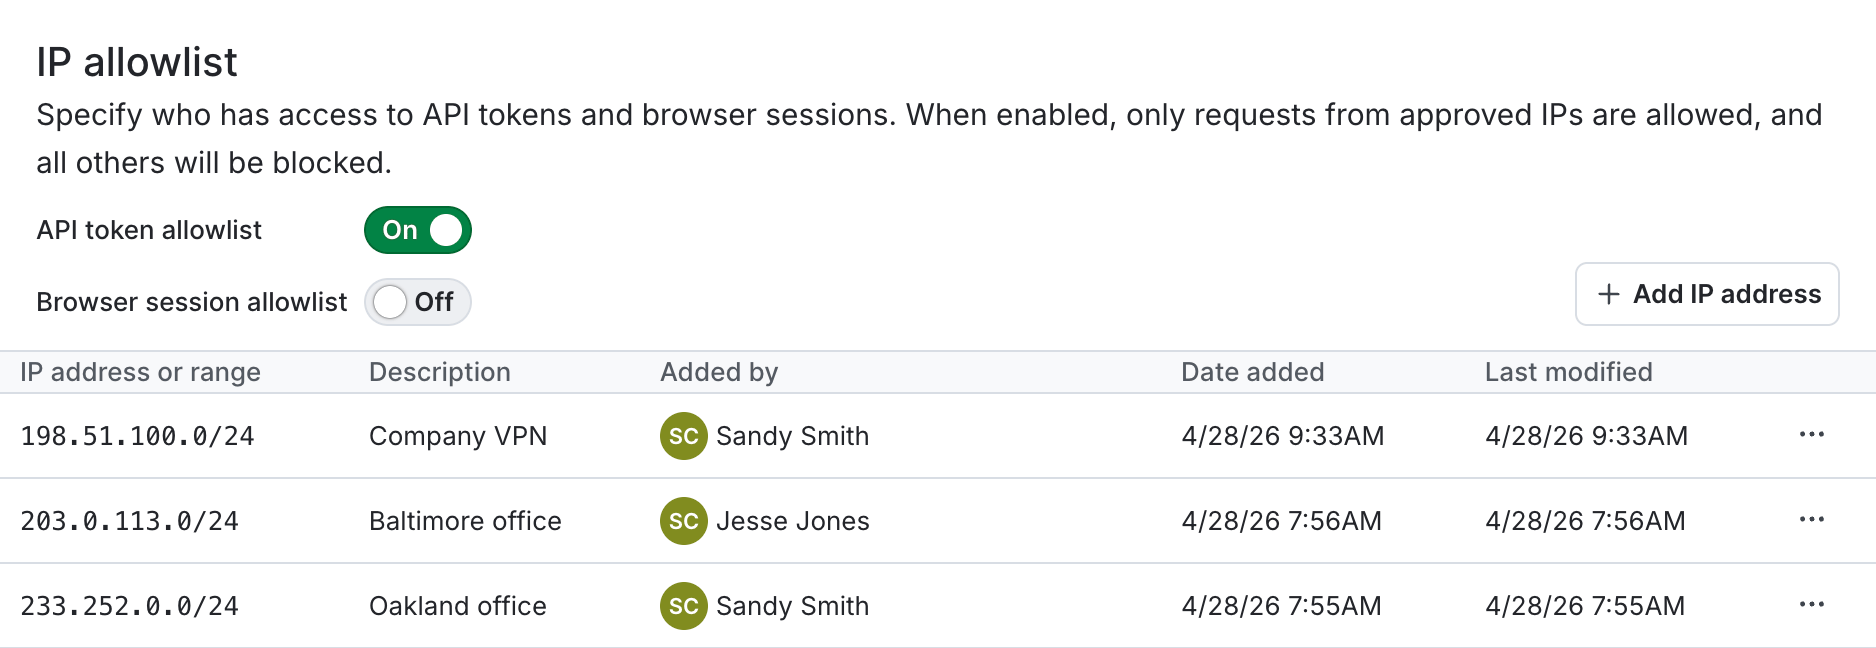
To view your IP address allowlist, click the **gear** icon in the left sidebar to view organization settings. Then, click **Security** and scroll to the "IP allowlist" section:
 ## Add an address or range to the IP allowlist
You can add a single IP address or a CIDR range to the allowlist. Here are examples of how to format them:
* single IP address: `198.51.100.0`
* CIDR range: `198.51.100.0/24`
To add a new IP address or CIDR range:
1. Click the **gear** icon in the left sidebar to view Organization settings.
2. Click **Security**.
3. Scroll to the "IP allowlist" section.
4. Click **Add IP address**. An "Add IP address" dialog appears.
5. Enter an **IP address or range**.
6. (Optional) Enter a **Description**.
7. Click **Add to allowlist**.
The IP address or range appears in the list.
## Restricting or allowing access
For the IP addresses and CIDR ranges in the allowlist, you can allow or restrict access to the LaunchDarkly app in a browser, the REST API, or both.
### Manage access to the app in a browser
To restrict access to the app in a browser, toggle the "Browser allowlist" toggle **On**. When toggled on, your members can only interact with the app in a browser from the IP addresses and ranges in the allowlist.
To allow your members to interact with the app in a browser from any IP address or range, toggle the "Browser allowlist" **Off**.
The default setting for both toggles is **Off**.
### Manage access to the REST API
To restrict access to the REST API, toggle the "API token allowlist" toggle **On**. When toggled on, your members can only interact with the REST API from the IP addresses and ranges in the allowlist.
To allow your members to interact with the REST API from any IP address or range, toggle the "API token allowlist" **Off**.
### Manage access to both the REST API and the app in a browser
To restrict access to both the app in a browser and the REST API, toggle both the "API token allowlist" and the "Browser allowlist" toggles **On**.
## Delete an address or range from the IP allowlist
To delete an IP address or CIDR range:
1. Click the **gear** icon in the left sidebar to view Organization settings.
2. Click **Security**.
3. Scroll to the "IP allowlist" section.
4. Click the **three-dot** overflow menu next to the IP address you want to delete.
5. Select **Remove from allowlist**. A "Remove from allowlist" dialog appears.
6. Enter the IP address or range to **Confirm**.
7. Click **Remove from allowlist**.
The IP address or range is removed from the list.
## Add an address or range to the IP allowlist
You can add a single IP address or a CIDR range to the allowlist. Here are examples of how to format them:
* single IP address: `198.51.100.0`
* CIDR range: `198.51.100.0/24`
To add a new IP address or CIDR range:
1. Click the **gear** icon in the left sidebar to view Organization settings.
2. Click **Security**.
3. Scroll to the "IP allowlist" section.
4. Click **Add IP address**. An "Add IP address" dialog appears.
5. Enter an **IP address or range**.
6. (Optional) Enter a **Description**.
7. Click **Add to allowlist**.
The IP address or range appears in the list.
## Restricting or allowing access
For the IP addresses and CIDR ranges in the allowlist, you can allow or restrict access to the LaunchDarkly app in a browser, the REST API, or both.
### Manage access to the app in a browser
To restrict access to the app in a browser, toggle the "Browser allowlist" toggle **On**. When toggled on, your members can only interact with the app in a browser from the IP addresses and ranges in the allowlist.
To allow your members to interact with the app in a browser from any IP address or range, toggle the "Browser allowlist" **Off**.
The default setting for both toggles is **Off**.
### Manage access to the REST API
To restrict access to the REST API, toggle the "API token allowlist" toggle **On**. When toggled on, your members can only interact with the REST API from the IP addresses and ranges in the allowlist.
To allow your members to interact with the REST API from any IP address or range, toggle the "API token allowlist" **Off**.
### Manage access to both the REST API and the app in a browser
To restrict access to both the app in a browser and the REST API, toggle both the "API token allowlist" and the "Browser allowlist" toggles **On**.
## Delete an address or range from the IP allowlist
To delete an IP address or CIDR range:
1. Click the **gear** icon in the left sidebar to view Organization settings.
2. Click **Security**.
3. Scroll to the "IP allowlist" section.
4. Click the **three-dot** overflow menu next to the IP address you want to delete.
5. Select **Remove from allowlist**. A "Remove from allowlist" dialog appears.
6. Enter the IP address or range to **Confirm**.
7. Click **Remove from allowlist**.
The IP address or range is removed from the list.