> ## Documentation Index
> Fetch the complete documentation index at: https://launchdarkly.com/docs/llms.txt
> Use this file to discover all available pages before exploring further.
# PingIdentity
**PingIdentity is not officially supported**
We provide guidance for setting up SAML-based single sign-on (SSO) with PingIdentity, but PingIdentity is not an officially supported identity provider (IdP). We cannot provide additional support or configuration guidance for this configuration.
This topic explains how to set up SAML-based single sign-on (SSO) with PingIdentity.
Setting up SSO with PingIdentity requires the following steps:
1. Retrieving your Entity ID and ACS URL from LaunchDarkly
2. Adding the LaunchDarkly application in PingIdentity
3. Updating LaunchDarkly with URL and exchange certificate details
You can also set up member roles using the following steps:
1. Defining user attributes in PingIdentity
2. Mapping user attributes to LaunchDarkly
3. Creating a PingIdentity group for LaunchDarkly access
4. Assigning the group to the LaunchDarkly app
## Prerequisites
To give your organization access to LaunchDarkly through PingIdentity, you need the following components:
* A LaunchDarkly Admin organization role, or an Admin or Owner base role, or another role with [permissions to update account SSO settings](/docs/home/account/roles/role-actions#account-actions)
* PingIdentity Admin permissions
## Retrieve your Entity ID and ACS URL from LaunchDarkly
To begin, retrieve your Entity ID and assertion consumer service (ACS) URL from LaunchDarkly:
1. In LaunchDarkly, click the **gear** icon in the left sidebar to view Organization settings.
2. Click **Security**.
3. Click **Edit SAML configuration**.
4. In the "SAML application details" section, copy the **Assertion consumer service URL** and the **Entity ID**, and save them for use in the next section.
## Add the LaunchDarkly application in PingIdentity
To add the LaunchDarkly application in PingIdentity:
1. Log in to the PingIdentity admin console.
2. Navigate to **Applications**.
3. Click the **+** icon to add a new application.
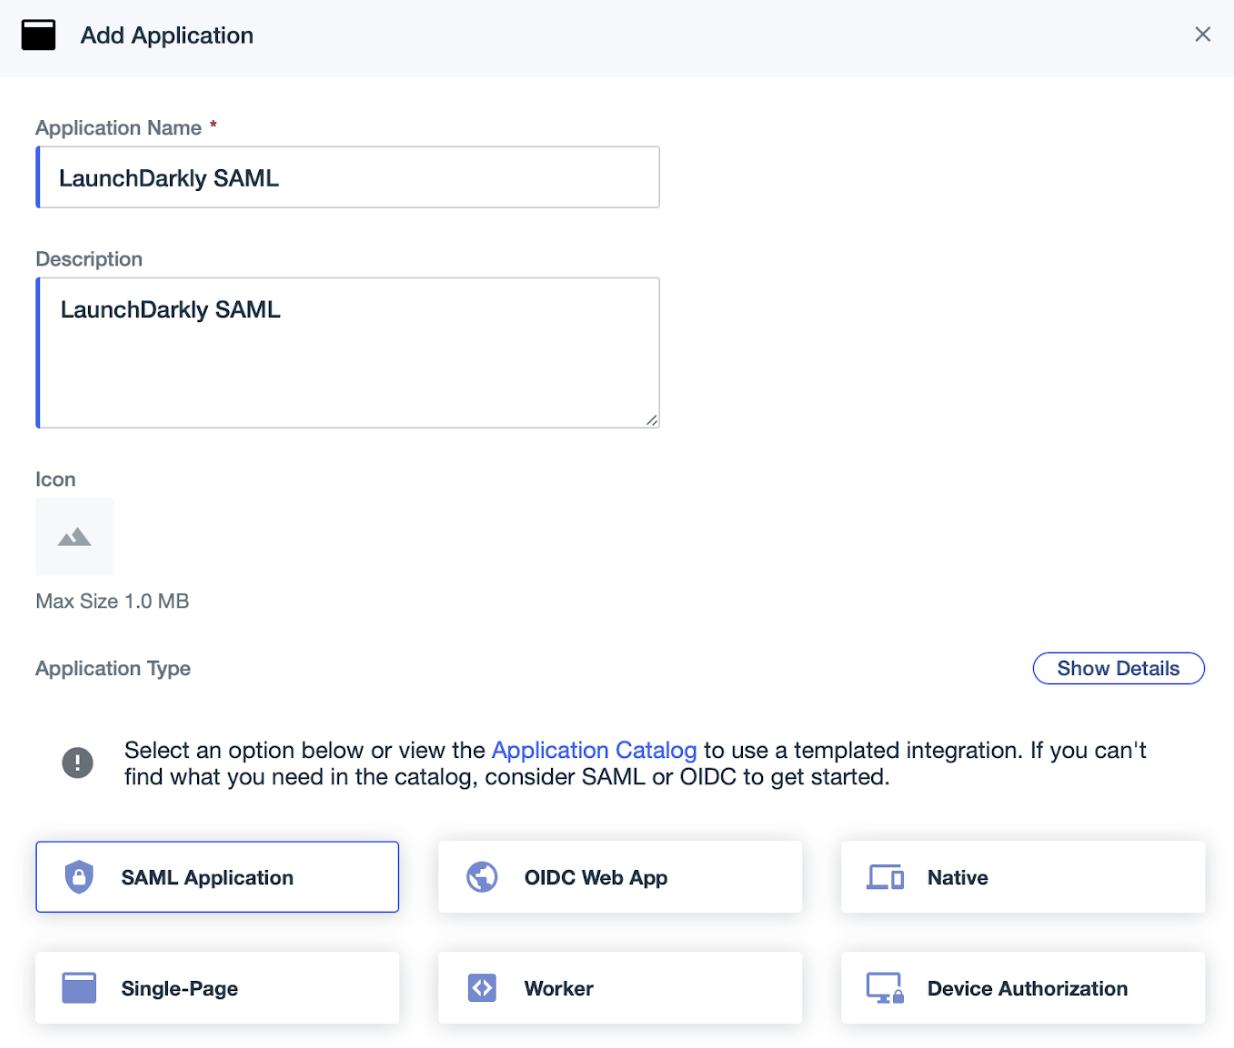
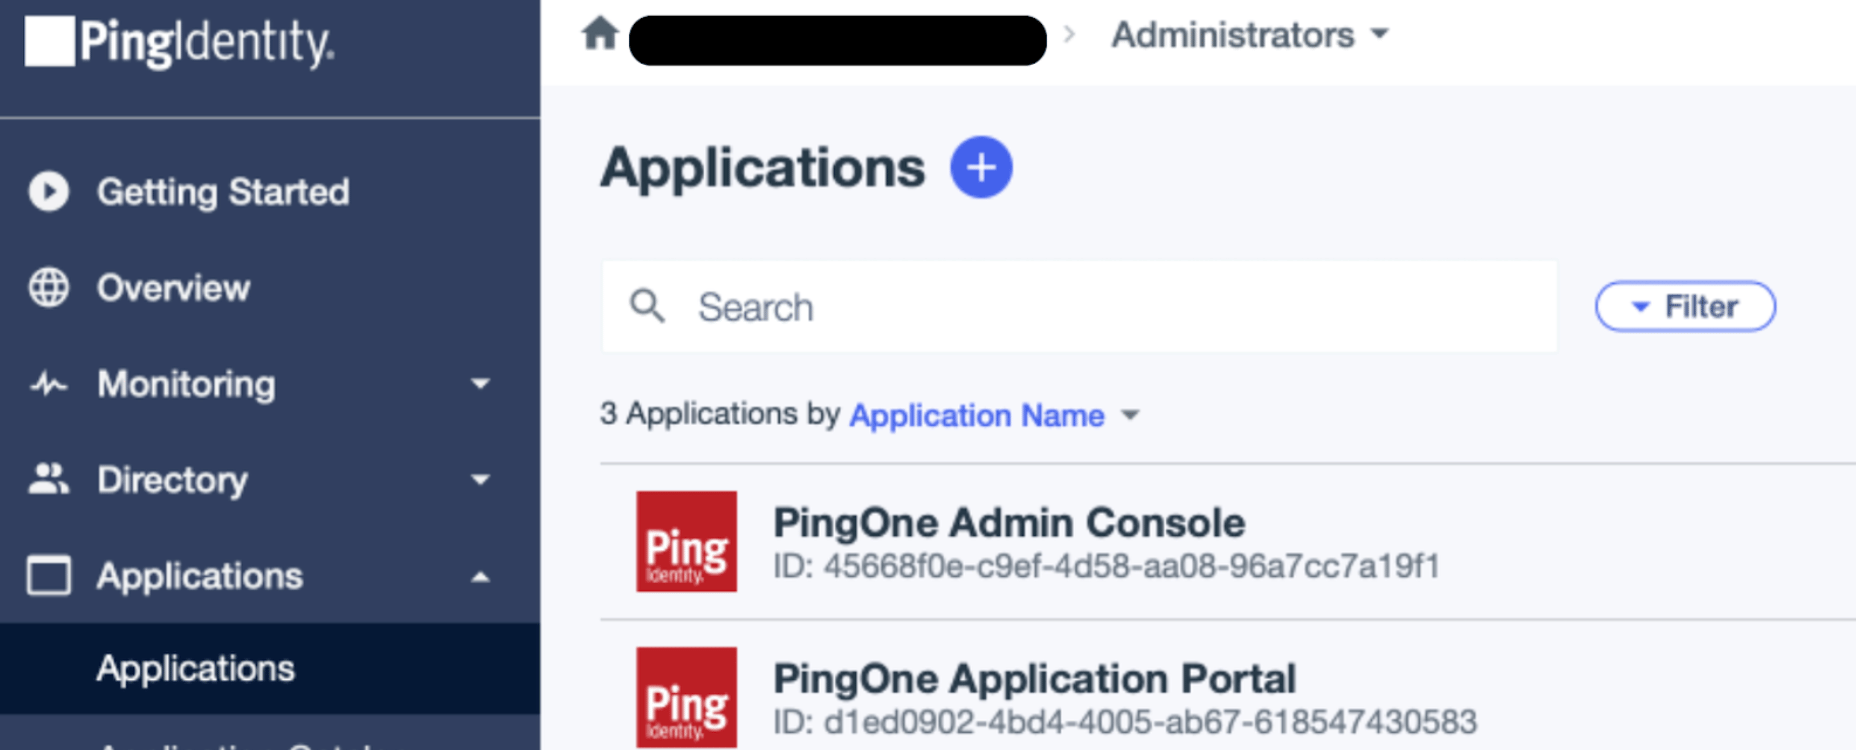 4. Enter "LaunchDarkly SSO" as the **Application Name**.
5. (Optional) Add a **Description** and **Icon**.
6. Click **SAML Application**.
4. Enter "LaunchDarkly SSO" as the **Application Name**.
5. (Optional) Add a **Description** and **Icon**.
6. Click **SAML Application**.
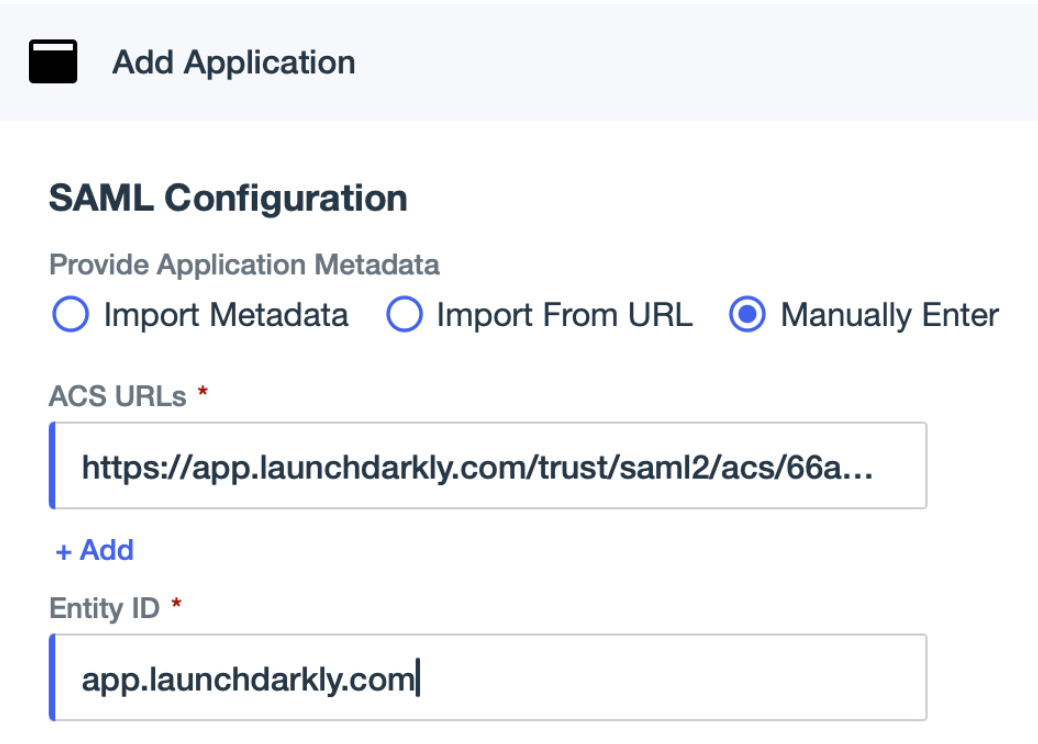
 7. Select **Manually enter**.
8. Enter the LaunchDarkly ACS URL you copied from the previous section into the **ACS URLs** field.
9. Enter the LaunchDarkly Entity ID you copied from the previous section into the **Entity ID** field.
7. Select **Manually enter**.
8. Enter the LaunchDarkly ACS URL you copied from the previous section into the **ACS URLs** field.
9. Enter the LaunchDarkly Entity ID you copied from the previous section into the **Entity ID** field.
 10. Click **Save**. The LaunchDarkly application appears in the Applications list.
11. Copy the **Signon URL** and save it for use in the next section.
12. Click **Download Signing Certificate** and select the "X509 PEM (.crt)" format. The X.509 certificate downloads to your machine.
You will use the Signon URL and X.509 certificate in the next section.
## Update LaunchDarkly with URL and exchange certificate details
Next, update LaunchDarkly with the SSO URL and the X.509 exchange certificate:
1. In LaunchDarkly, click the **gear** icon in the left sidebar to view Organization settings.
2. Click **Security**.
3. Click **Edit SAML configuration**.
4. in the "SAML identity provider details" section, enter the Signon URL you copied from PingIdentity into the **Sign-on URL** field.
5. Click **Upload one** to upload the X.509 certificate you downloaded from PingIdentity. Or, paste the certificate contents into the **X.509 certificate** field.
6. Click **Save**.
## Define user attributes in PingIdentity
You can assign LaunchDarkly roles to account members through PingIdentity. In PingIdentity, your account members are called "users."
First, define user attributes in PingIdentity:
1. In PingIdentity, navigate to **Directory**, then **User Attributes**.
2. Click the **+** icon to add a new attribute.
10. Click **Save**. The LaunchDarkly application appears in the Applications list.
11. Copy the **Signon URL** and save it for use in the next section.
12. Click **Download Signing Certificate** and select the "X509 PEM (.crt)" format. The X.509 certificate downloads to your machine.
You will use the Signon URL and X.509 certificate in the next section.
## Update LaunchDarkly with URL and exchange certificate details
Next, update LaunchDarkly with the SSO URL and the X.509 exchange certificate:
1. In LaunchDarkly, click the **gear** icon in the left sidebar to view Organization settings.
2. Click **Security**.
3. Click **Edit SAML configuration**.
4. in the "SAML identity provider details" section, enter the Signon URL you copied from PingIdentity into the **Sign-on URL** field.
5. Click **Upload one** to upload the X.509 certificate you downloaded from PingIdentity. Or, paste the certificate contents into the **X.509 certificate** field.
6. Click **Save**.
## Define user attributes in PingIdentity
You can assign LaunchDarkly roles to account members through PingIdentity. In PingIdentity, your account members are called "users."
First, define user attributes in PingIdentity:
1. In PingIdentity, navigate to **Directory**, then **User Attributes**.
2. Click the **+** icon to add a new attribute.
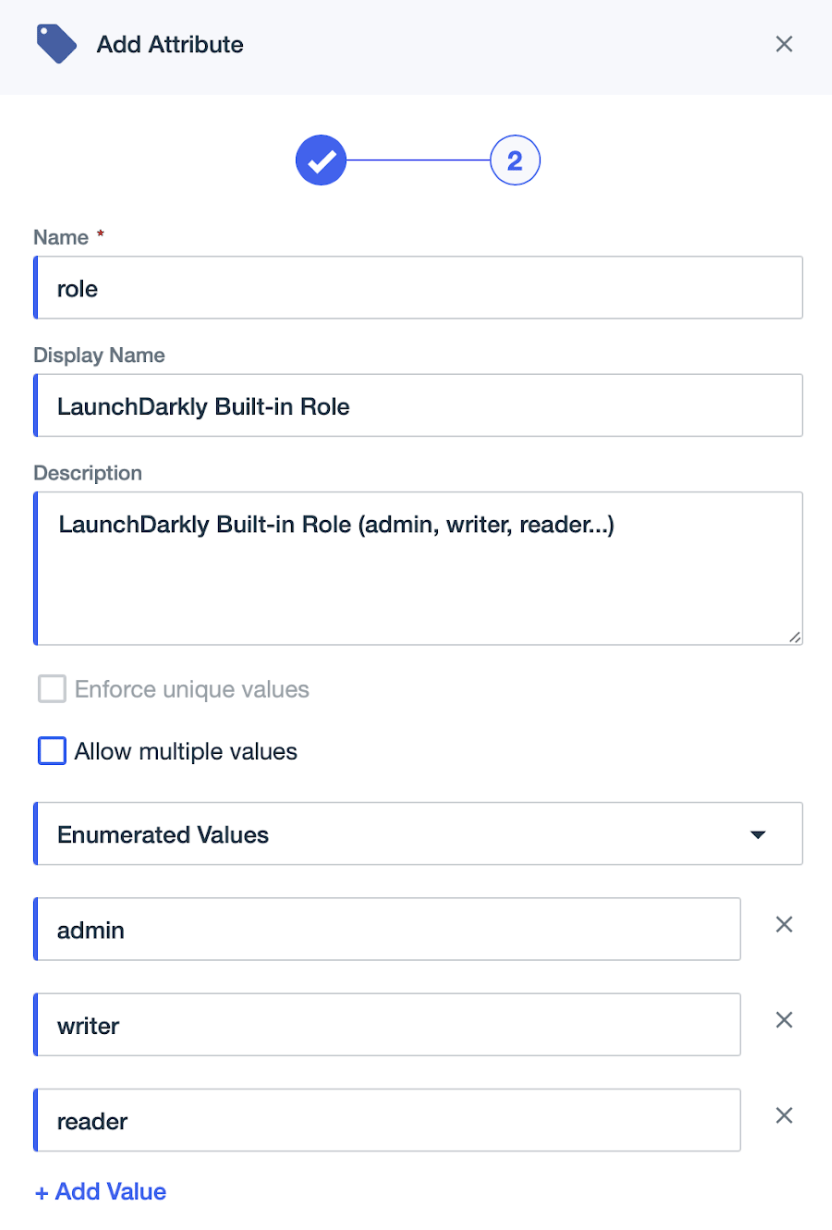
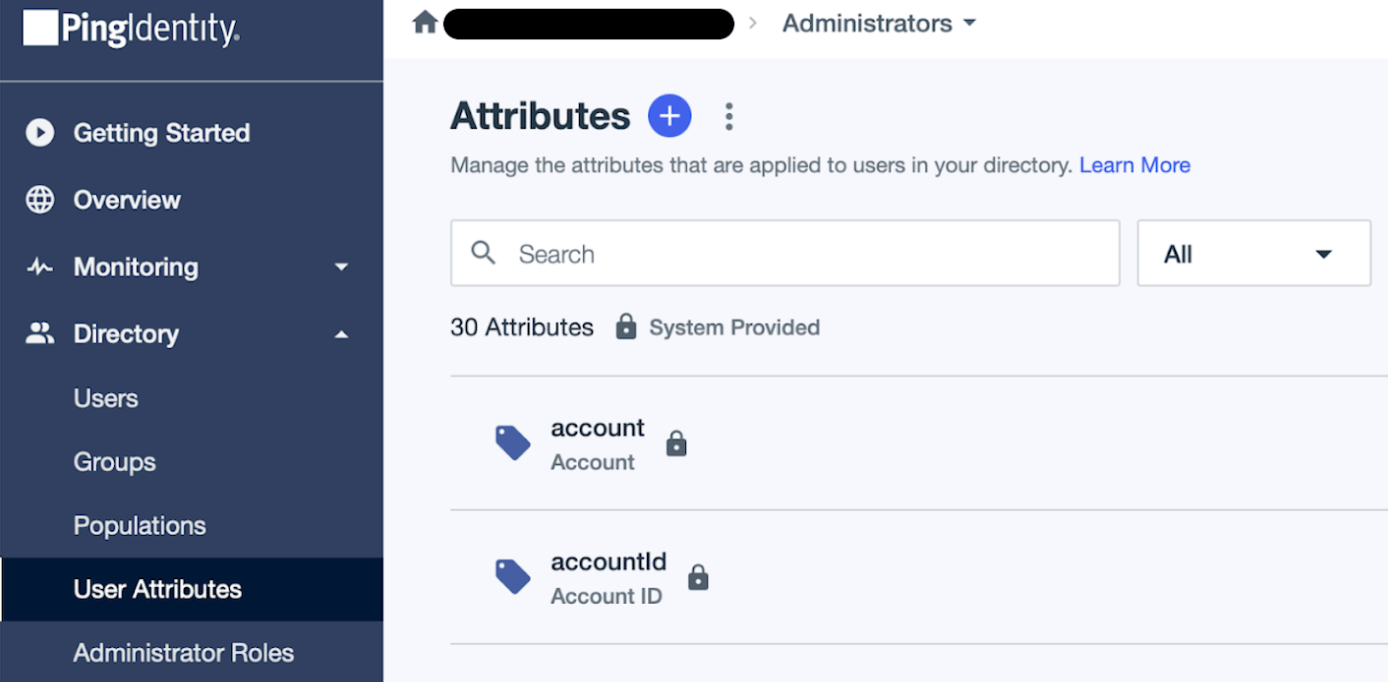 3. Select **Declared**.
4. Enter "role" as the **Name**.
5. Enter "LaunchDarkly Built-in role" as the **Display Name**.
6. (Optional) Enter a **Description**.
7. Select **Enumerated values**.
8. Click **+ Add Value** and enter "admin."
9. Repeat step 8 for "writer" and "reader."
10. Click **Save**.
3. Select **Declared**.
4. Enter "role" as the **Name**.
5. Enter "LaunchDarkly Built-in role" as the **Display Name**.
6. (Optional) Enter a **Description**.
7. Select **Enumerated values**.
8. Click **+ Add Value** and enter "admin."
9. Repeat step 8 for "writer" and "reader."
10. Click **Save**.
 11. To repeat the process for custom roles, click the **+** icon to add a new attribute and select **Declared**.
12. Enter "customRole" as the **Name**.
13. Enter "LaunchDarkly Custom Roles" as the **Display Name**.
14. (Optional) Enter a **Description**.
15. Select **No Validation**.
16. Click **Save**.
The role and customRole attributes appear in your PingIdentity user directory.
## Map user attributes to LaunchDarkly
Next, map PingIdentity user attributes to LaunchDarkly:
1. In PingIdentity, navigate to **Applications**.
2. Select the "LaunchDarkly SSO" application.
3. Click the **Attributes Mappings** tab.
4. Click **+Add**.
5. Enter "role" in the **Attributes** field.
6. Select "LaunchDarkly Built-in role" from the **PingOne Mappings** menu.
7. Click **+Add**.
8. Enter "customRole" in the **Attributes** field.
9. Select "LaunchDarkly Custom Roles" from the **PingOne Mappings** menu.
11. To repeat the process for custom roles, click the **+** icon to add a new attribute and select **Declared**.
12. Enter "customRole" as the **Name**.
13. Enter "LaunchDarkly Custom Roles" as the **Display Name**.
14. (Optional) Enter a **Description**.
15. Select **No Validation**.
16. Click **Save**.
The role and customRole attributes appear in your PingIdentity user directory.
## Map user attributes to LaunchDarkly
Next, map PingIdentity user attributes to LaunchDarkly:
1. In PingIdentity, navigate to **Applications**.
2. Select the "LaunchDarkly SSO" application.
3. Click the **Attributes Mappings** tab.
4. Click **+Add**.
5. Enter "role" in the **Attributes** field.
6. Select "LaunchDarkly Built-in role" from the **PingOne Mappings** menu.
7. Click **+Add**.
8. Enter "customRole" in the **Attributes** field.
9. Select "LaunchDarkly Custom Roles" from the **PingOne Mappings** menu.
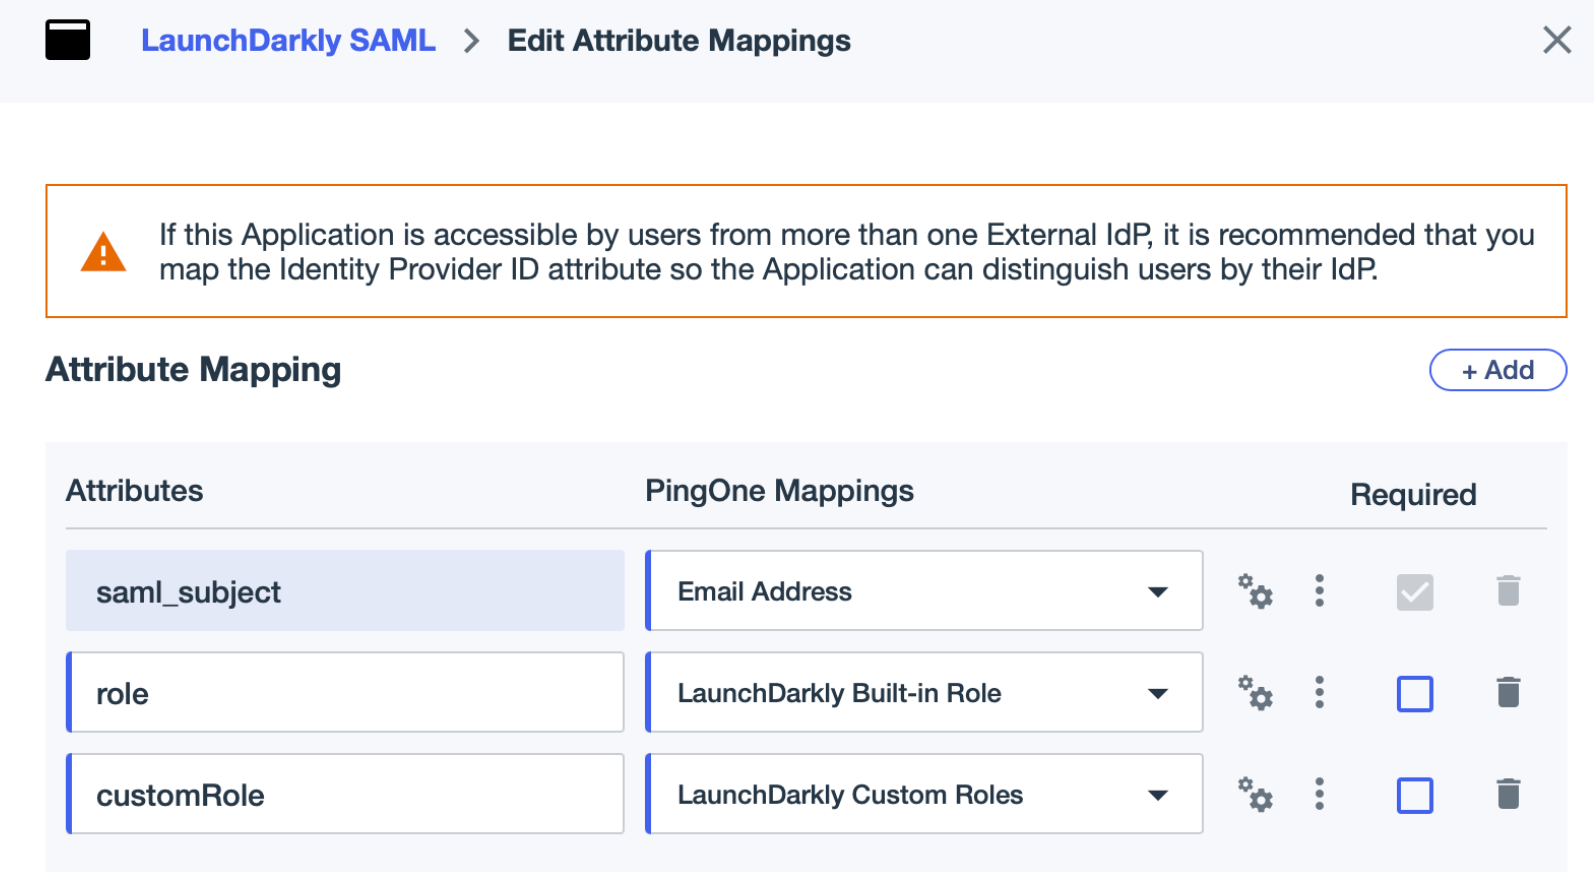 PingIdentity user attributes are now mapped to LaunchDarkly roles and custom roles.
## Create PingIdentity groups for LaunchDarkly access
Next you can allow LaunchDarkly access using PingIdentity groups:
1. In PingIdentity, navigate to **Directory**, then **Groups**.
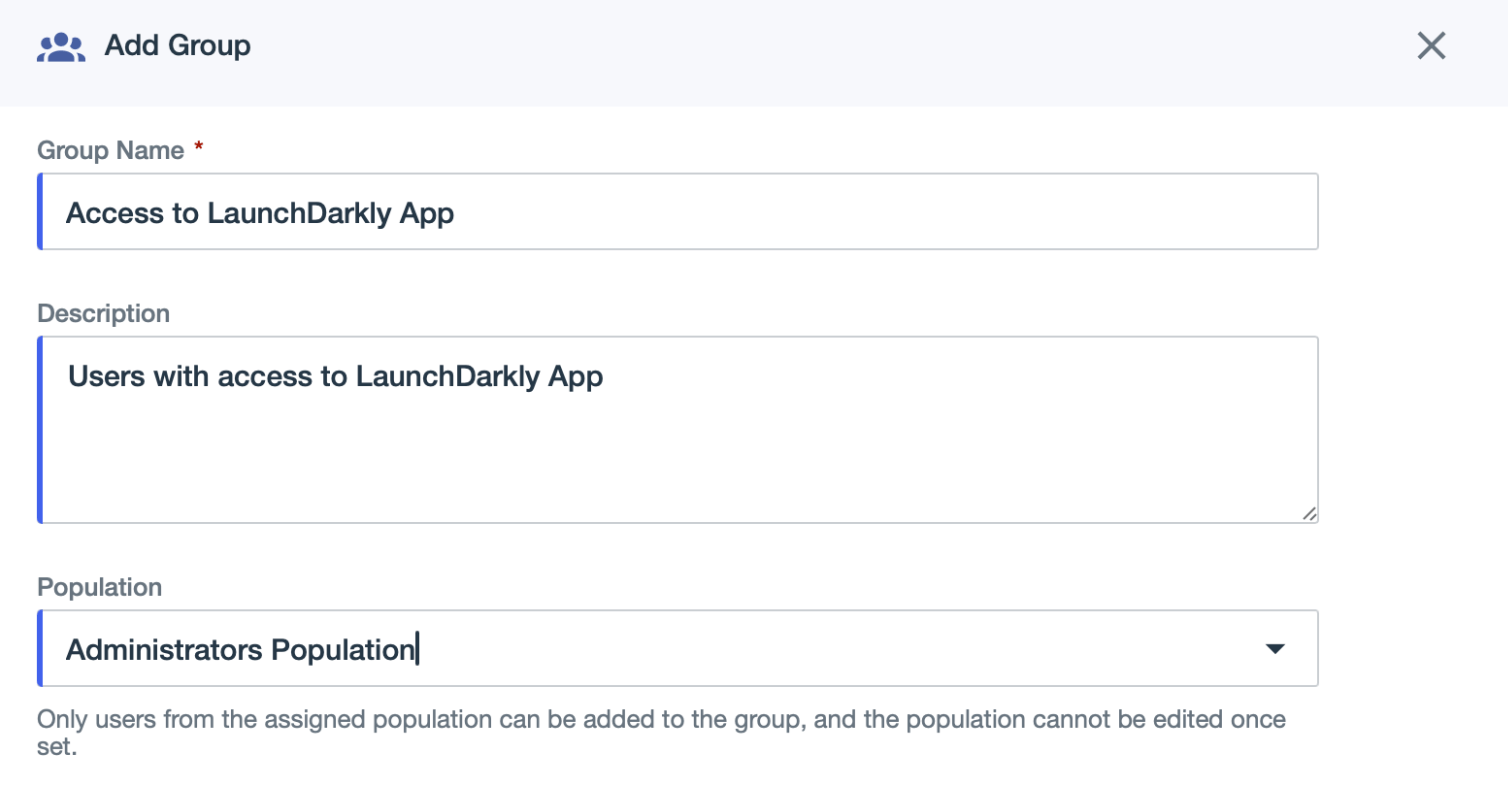
2. Click **Add Group**.
3. Enter "Access to LaunchDarkly App" or similar as the **Name**.
4. (Optional) Add a **Description**.
5. Select a PingIdentity **Population** that should have access to LaunchDarkly.
6. Click **Save**.
PingIdentity user attributes are now mapped to LaunchDarkly roles and custom roles.
## Create PingIdentity groups for LaunchDarkly access
Next you can allow LaunchDarkly access using PingIdentity groups:
1. In PingIdentity, navigate to **Directory**, then **Groups**.
2. Click **Add Group**.
3. Enter "Access to LaunchDarkly App" or similar as the **Name**.
4. (Optional) Add a **Description**.
5. Select a PingIdentity **Population** that should have access to LaunchDarkly.
6. Click **Save**.
 ## Assign the group to the LaunchDarkly app
Next, assign the group to the LaunchDarkly app:
1. In PingIdentity, navigate to **Applications**.
2. Select the "LaunchDarkly SSO" application.
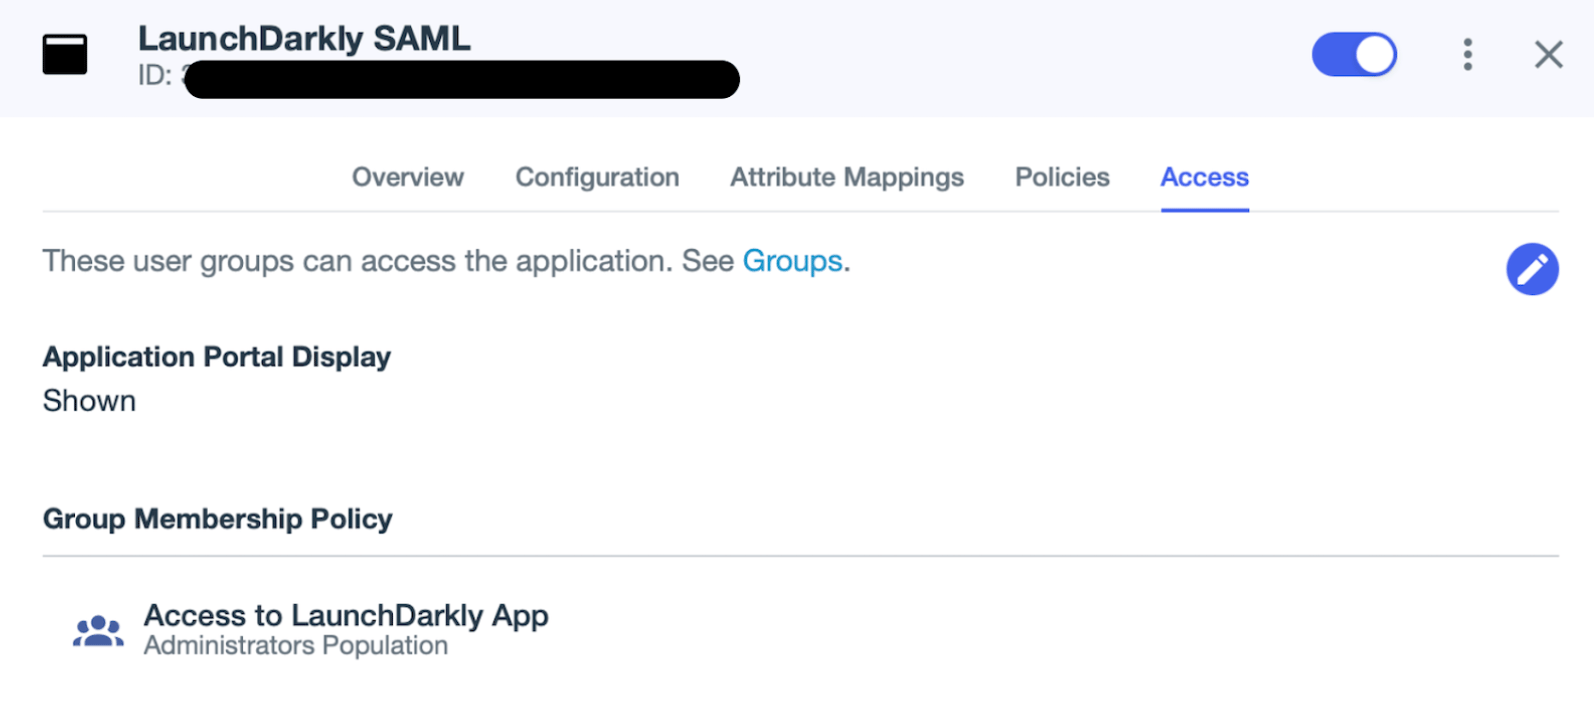
3. Click the **Access** tab.
4. Click the **pencil** icon.
5. Search for and select the "Access to LaunchDarkly App" group.
6. Click **Save**.
## Assign the group to the LaunchDarkly app
Next, assign the group to the LaunchDarkly app:
1. In PingIdentity, navigate to **Applications**.
2. Select the "LaunchDarkly SSO" application.
3. Click the **Access** tab.
4. Click the **pencil** icon.
5. Search for and select the "Access to LaunchDarkly App" group.
6. Click **Save**.
 ## Test your setup
Finally, you can test your SSO setup using [Test drive mode](/docs/home/account/saml#test-drive-mode).
## Test your setup
Finally, you can test your SSO setup using [Test drive mode](/docs/home/account/saml#test-drive-mode).