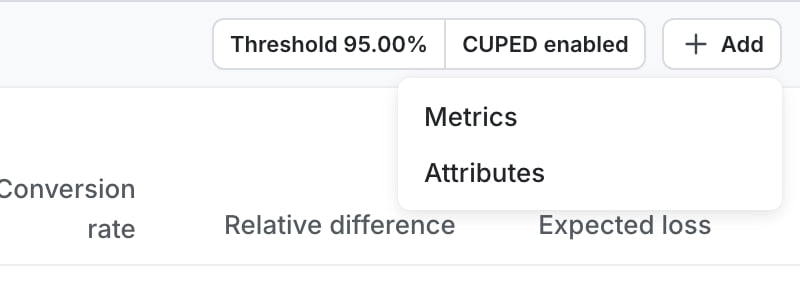
 4. Select additional metrics or metric groups.
5. Click **Add metrics**.
When you add a metric to a running experiment, the experiment handles historical data differently depending on the metric type:
* LaunchDarkly hosted metrics retroactively display results from the last 100 days or from the start of the experiment's current iteration, whichever is more recent.
* Warehouse native metrics retroactively display results from the start of the experiment's current iteration.
#### Metric event update timing
After you add metrics to an existing experiment, the time it takes for LaunchDarkly to begin sending events for those metrics depends on the metric type and age of the experiment iteration:
4. Select additional metrics or metric groups.
5. Click **Add metrics**.
When you add a metric to a running experiment, the experiment handles historical data differently depending on the metric type:
* LaunchDarkly hosted metrics retroactively display results from the last 100 days or from the start of the experiment's current iteration, whichever is more recent.
* Warehouse native metrics retroactively display results from the start of the experiment's current iteration.
#### Metric event update timing
After you add metrics to an existing experiment, the time it takes for LaunchDarkly to begin sending events for those metrics depends on the metric type and age of the experiment iteration:
| Metric type | Iteration age | Time to update |
|---|---|---|
| [LaunchDarkly hosted](/docs/home/metrics) | Less than one day | Approximately five minutes |
| LaunchDarkly hosted | 1-60 days | Approximately one hour |
| LaunchDarkly hosted | More than 60 days | Approximately one day |
| [Warehouse native](/docs/home/warehouse-native/metrics) | Any | 15-20 minutes |
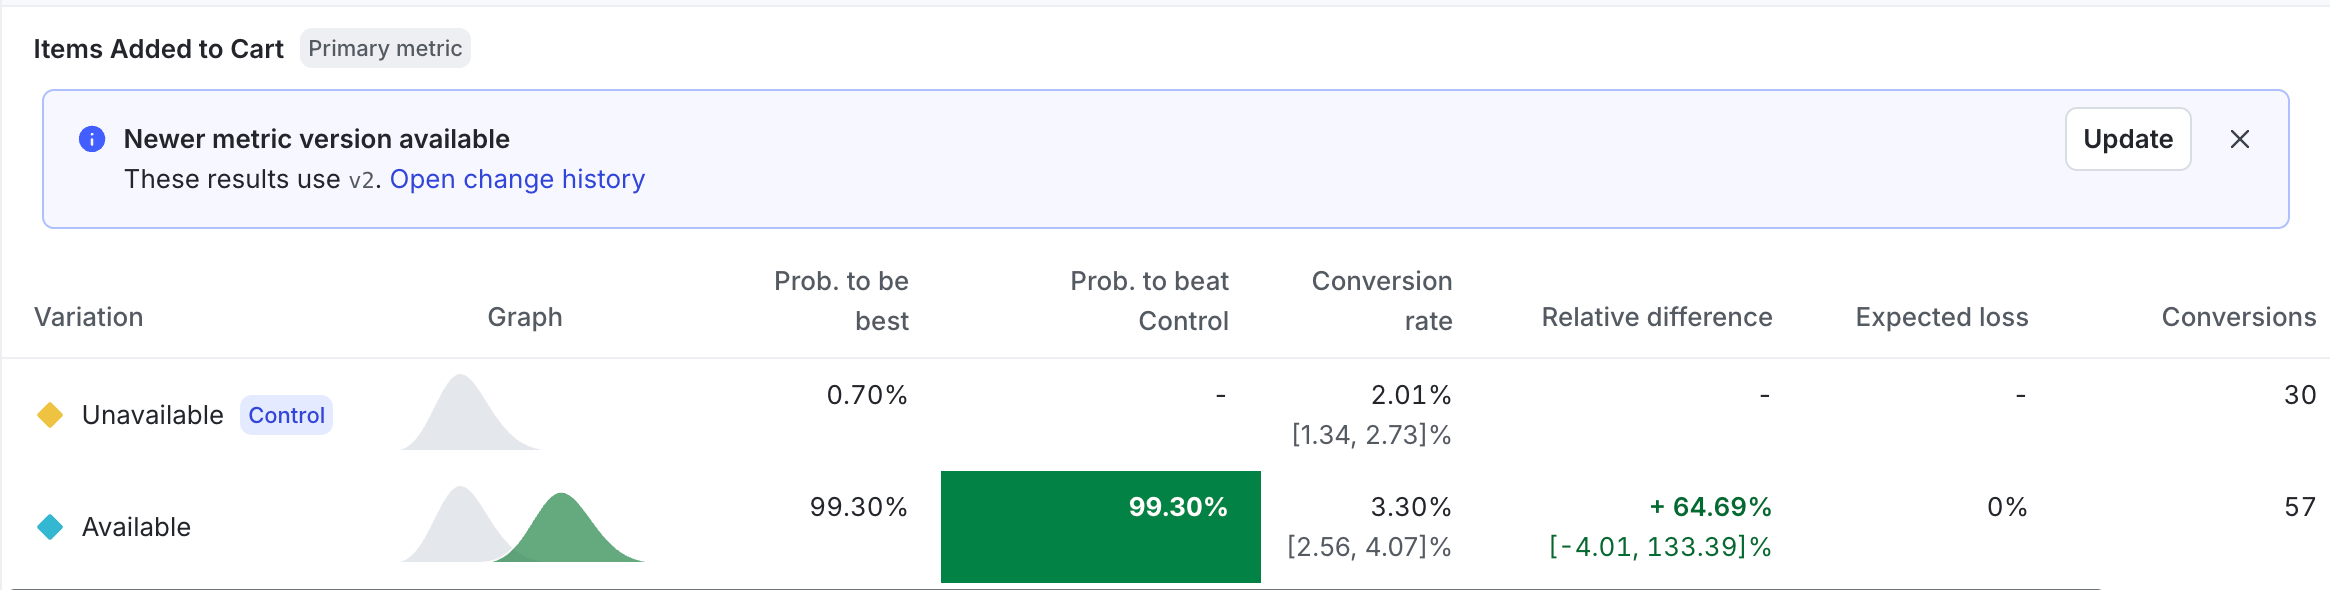 To learn more about metric versions, read [Metric versions](/docs/home/metrics/manage-metrics#metric-versions).
### Change an experiment's audience allocation
To learn more about metric versions, read [Metric versions](/docs/home/metrics/manage-metrics#metric-versions).
### Change an experiment's audience allocation
 4. Scroll to the top of the page and click **Save & start new iteration**, or if your environment requires approvals, **Save & request approval for new iteration**.
5. Enter a **Reason for changes**.
* If your environment requires approvals, click **Continue**.
* Choose one or more reviewers from the **Reviewer(s)** menu.
* Enter a **Comment**.
6. Click **Save changes and start new iteration** or **Request to start new iteration**.
### Change an experiment's variations split or images
To change the percentage of contexts assigned to each variation, or to change or upload images associated with variations:
1. Navigate to the **Design** tab of your experiment.
2. Click **Edit design**.
3. Navigate to the "Variations split" section.
4. (Optional) Click **Edit** to change the percentage of contexts assigned to each variation. The "Variation split" dialog appears.
* Click **Split equally** to evenly divide contexts between variations, or use the input fields to assign a percentage of contexts to each variation.
* Click **Save audience split**.
5. (Optional) Click the **image** icon next to a variation to upload an image associated with that variation.
* Click **Upload image** next to a variation you want to associate an image with.
* Select a PNG, JPEG, or WebP file from your machine.
* Click **Save**.
6. Scroll to the top of the page and click **Save & start new iteration**, or if your environment requires approvals, **Save & request approval for new iteration**.
7. Enter a **Reason for changes**.
* If your environment requires approvals, click **Continue**.
* Choose one or more reviewers from the **Reviewer(s)** menu.
* Enter a **Comment**.
8. Click **Save changes and start new iteration** or **Request to start new iteration**.
### Change an experiment's flag rule
To change the flag rule an experiment is running on, you must stop the experiment iteration, change the rule, and start a new iteration. This lets you select a flag variation to serve to any contexts that will no longer be included in the experiment.
To change the flag rule:
1. Navigate to the **Design** tab of your experiment.
2. Click **Stop experiment**. The "Stop experiment" dialog appears.
3. Select a winning variation to serve while the experiment is stopped.
4. Enter a **Reason for stopping**.
5. Click **Stop experiment**.
6. Click **Edit design**.
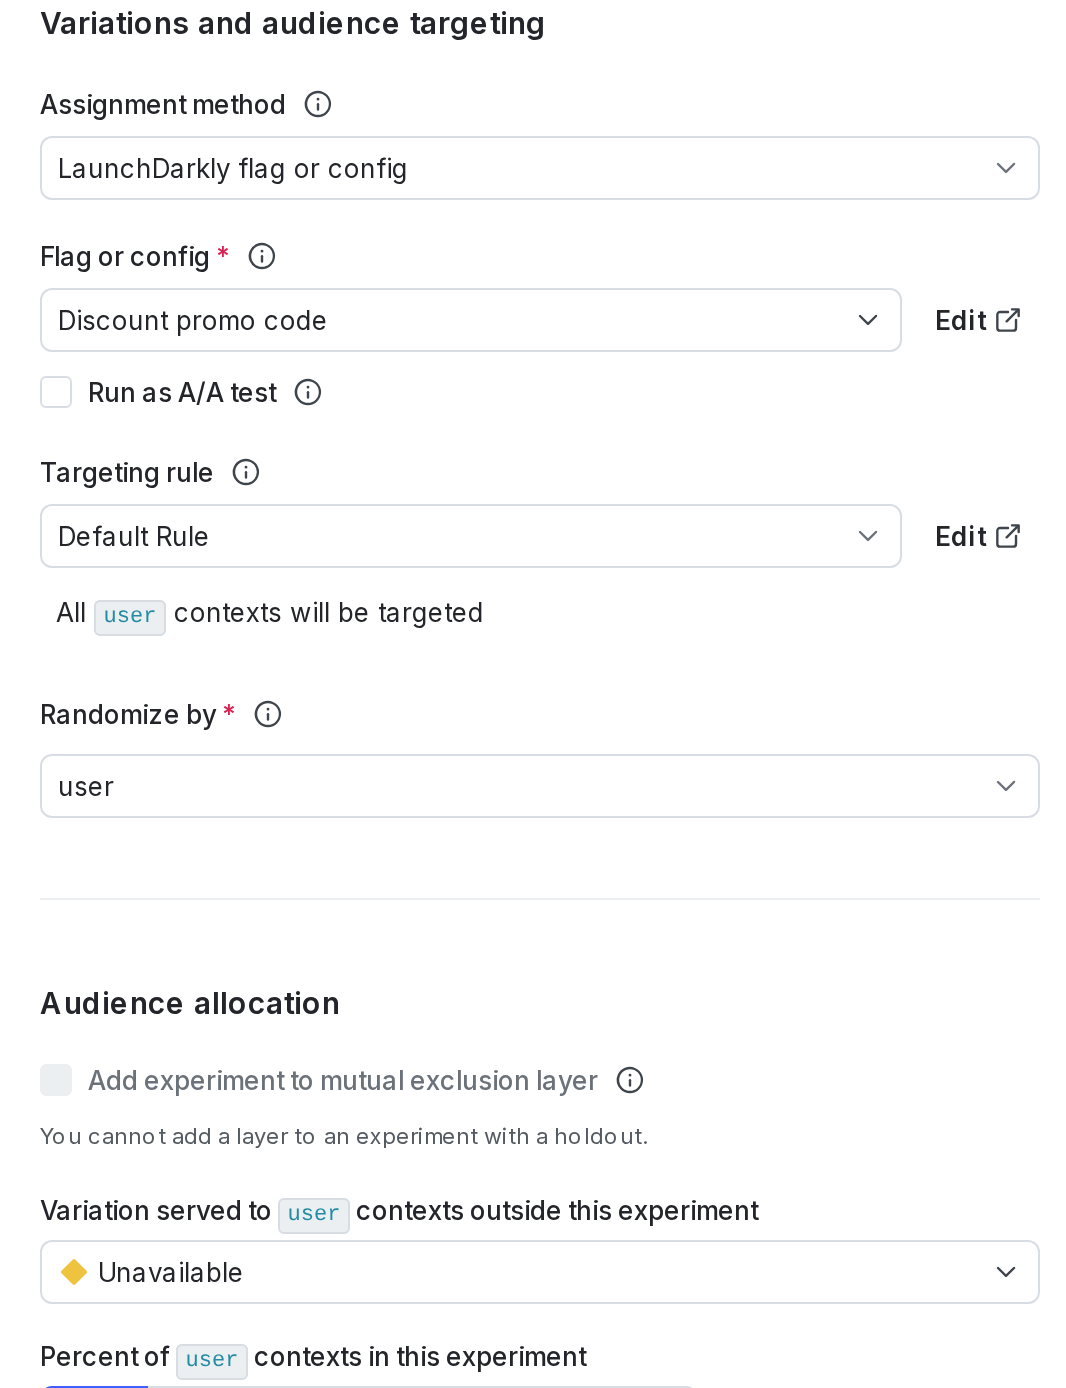
7. Navigate to the "Variations and audience targeting" section and update the **Targeting rule** as needed.
* You can also update the percentage of contexts to include in the experiment.
8. Scroll to the top of the page and click **Save**, or if your environment requires approvals, **Save & request approval for new iteration**.
* If the experiment was running when you made edits, a "Save experiment design?" dialog appears. Enter a reason for the change and click **Save & start new iteration**, or if your environment requires approvals, click **Continue** and then **Request to start new iteration**.
## Clone experiments
You can clone an existing experiment into a new environment and make edits to the new experiment's configuration.
To clone an experiment:
1. Navigate to the **Experiments** list.
2. Click on the **three-dot** overflow menu for the experiment you want to clone.
3. Select **Clone experiment**. The "Clone experiment" dialog opens.
4. Select a destination environment for the new experiment.
5. Click **Clone experiment**.
After cloning, the **Design** tab of the new experiment appears. Review the configuration and make any necessary edits before starting the experiment.
When you clone an experiment, the new experiment is not automatically included in any [holdouts](/docs/home/holdouts) or [layers](/docs/home/experimentation/mutually-exclusive). You cannot make a clone of an experiment within the same environment.
## Archive experiments
You can archive experiments that have concluded, as well as the flags and metrics attached to them, but you cannot permanently delete experiments. Archiving experiments preserves the results so you can refer to them in the future.
Before you can archive an experiment:
* The experiment must not be running. To learn how to stop an experiment, read [Stop experiment iterations](/docs/home/experimentation/start-stop-exp#stop-experiment-iterations).
* The experiment must not be included in a layer. To learn how to remove an experiment from a layer, read [Remove experiments from layers](/docs/home/experimentation/mutually-exclusive#remove-experiments-from-layers).
LaunchDarkly hides archived experiments from the **Experiments** list. You cannot start new iterations for archived experiments.
To archive an experiment:
1. Navigate to the **Experiments** list in the environment you want to archive an experiment in.
2. Click on the **three-dot** overflow menu of the experiment you want to archive.
3. Select **Archive**.
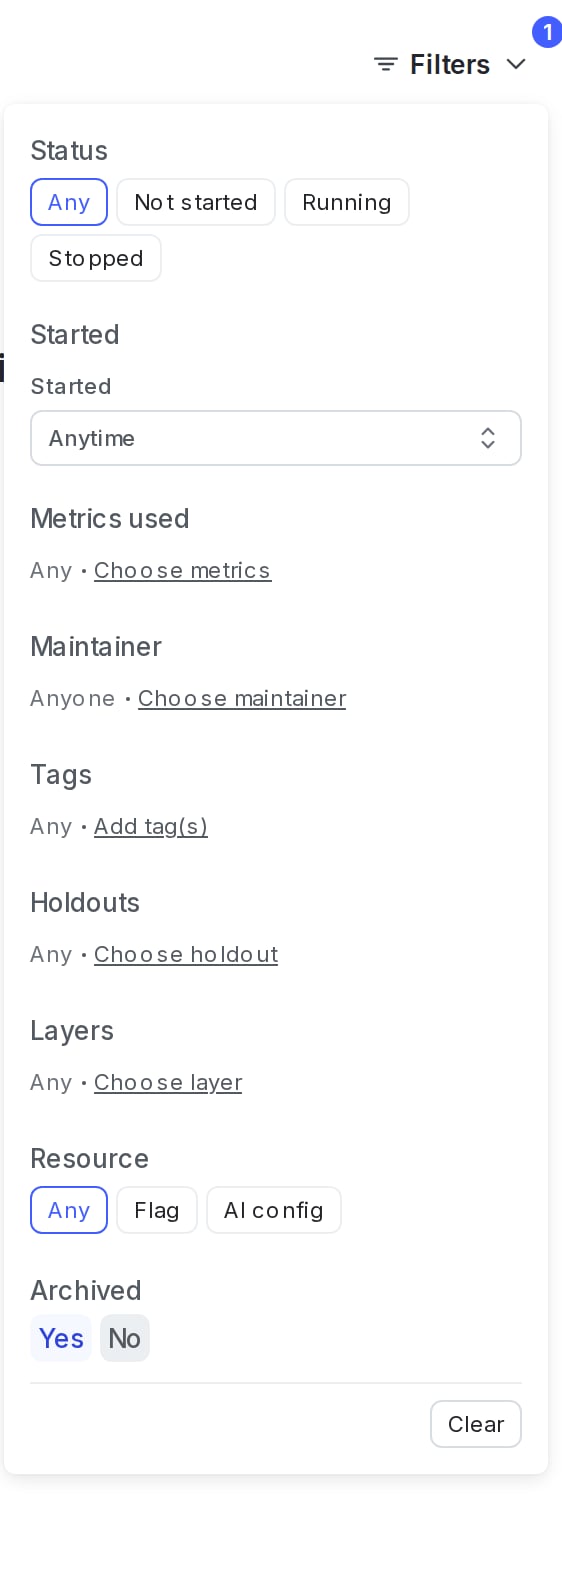
To view archived experiments on the **Experiments** list, click **Filters** and select **Yes** in the "Archived" section. To restore an experiment, navigate to the experiment's **Design** tab and click **restore this experiment**.
To switch back to viewing active experiments, click **View** and select **No** in the "Archived" section.
4. Scroll to the top of the page and click **Save & start new iteration**, or if your environment requires approvals, **Save & request approval for new iteration**.
5. Enter a **Reason for changes**.
* If your environment requires approvals, click **Continue**.
* Choose one or more reviewers from the **Reviewer(s)** menu.
* Enter a **Comment**.
6. Click **Save changes and start new iteration** or **Request to start new iteration**.
### Change an experiment's variations split or images
To change the percentage of contexts assigned to each variation, or to change or upload images associated with variations:
1. Navigate to the **Design** tab of your experiment.
2. Click **Edit design**.
3. Navigate to the "Variations split" section.
4. (Optional) Click **Edit** to change the percentage of contexts assigned to each variation. The "Variation split" dialog appears.
* Click **Split equally** to evenly divide contexts between variations, or use the input fields to assign a percentage of contexts to each variation.
* Click **Save audience split**.
5. (Optional) Click the **image** icon next to a variation to upload an image associated with that variation.
* Click **Upload image** next to a variation you want to associate an image with.
* Select a PNG, JPEG, or WebP file from your machine.
* Click **Save**.
6. Scroll to the top of the page and click **Save & start new iteration**, or if your environment requires approvals, **Save & request approval for new iteration**.
7. Enter a **Reason for changes**.
* If your environment requires approvals, click **Continue**.
* Choose one or more reviewers from the **Reviewer(s)** menu.
* Enter a **Comment**.
8. Click **Save changes and start new iteration** or **Request to start new iteration**.
### Change an experiment's flag rule
To change the flag rule an experiment is running on, you must stop the experiment iteration, change the rule, and start a new iteration. This lets you select a flag variation to serve to any contexts that will no longer be included in the experiment.
To change the flag rule:
1. Navigate to the **Design** tab of your experiment.
2. Click **Stop experiment**. The "Stop experiment" dialog appears.
3. Select a winning variation to serve while the experiment is stopped.
4. Enter a **Reason for stopping**.
5. Click **Stop experiment**.
6. Click **Edit design**.
7. Navigate to the "Variations and audience targeting" section and update the **Targeting rule** as needed.
* You can also update the percentage of contexts to include in the experiment.
8. Scroll to the top of the page and click **Save**, or if your environment requires approvals, **Save & request approval for new iteration**.
* If the experiment was running when you made edits, a "Save experiment design?" dialog appears. Enter a reason for the change and click **Save & start new iteration**, or if your environment requires approvals, click **Continue** and then **Request to start new iteration**.
## Clone experiments
You can clone an existing experiment into a new environment and make edits to the new experiment's configuration.
To clone an experiment:
1. Navigate to the **Experiments** list.
2. Click on the **three-dot** overflow menu for the experiment you want to clone.
3. Select **Clone experiment**. The "Clone experiment" dialog opens.
4. Select a destination environment for the new experiment.
5. Click **Clone experiment**.
After cloning, the **Design** tab of the new experiment appears. Review the configuration and make any necessary edits before starting the experiment.
When you clone an experiment, the new experiment is not automatically included in any [holdouts](/docs/home/holdouts) or [layers](/docs/home/experimentation/mutually-exclusive). You cannot make a clone of an experiment within the same environment.
## Archive experiments
You can archive experiments that have concluded, as well as the flags and metrics attached to them, but you cannot permanently delete experiments. Archiving experiments preserves the results so you can refer to them in the future.
Before you can archive an experiment:
* The experiment must not be running. To learn how to stop an experiment, read [Stop experiment iterations](/docs/home/experimentation/start-stop-exp#stop-experiment-iterations).
* The experiment must not be included in a layer. To learn how to remove an experiment from a layer, read [Remove experiments from layers](/docs/home/experimentation/mutually-exclusive#remove-experiments-from-layers).
LaunchDarkly hides archived experiments from the **Experiments** list. You cannot start new iterations for archived experiments.
To archive an experiment:
1. Navigate to the **Experiments** list in the environment you want to archive an experiment in.
2. Click on the **three-dot** overflow menu of the experiment you want to archive.
3. Select **Archive**.
To view archived experiments on the **Experiments** list, click **Filters** and select **Yes** in the "Archived" section. To restore an experiment, navigate to the experiment's **Design** tab and click **restore this experiment**.
To switch back to viewing active experiments, click **View** and select **No** in the "Archived" section.
 When you archive or restore an experiment, LaunchDarkly sends the maintainer and anyone following the experiment an email, an in-app notification, and, if you have the Slack app integration configured, a Slack notification.