> ## Documentation Index
> Fetch the complete documentation index at: https://launchdarkly.com/docs/llms.txt
> Use this file to discover all available pages before exploring further.
# Individual targeting
This topic explains how to control which individual contexts receive a variation of a feature flag, based on the context key.
## Target individual contexts
The flag's **Targeting** tab allows you to assign individual contexts to a particular flag variation, based on the context key. You can target individual users or any custom [context kind](/docs/home/flags/context-kinds) that exists in your project.
To individually target contexts:
1. In the flags dashboard, scroll or search to find the flag you want.
2. Click the flag's name to open the flag's **Targeting** tab.
3. If the flag is off and the rules are hidden, click **View targeting rules**.
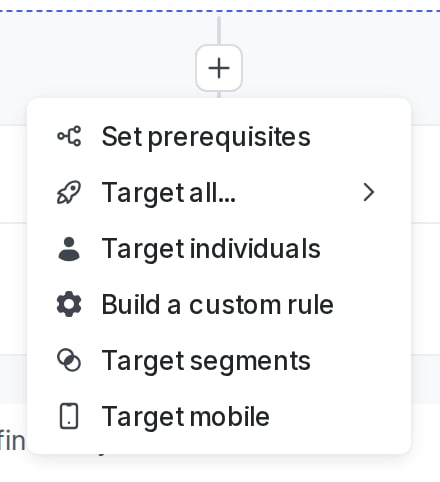
4. Click the **+** button beneath the toggle section and select **Target individuals**.
 5. In the "Select or add a context" field, search for and select the context you want to target.
6. Alternatively, you can create a new context from the search menu. To do so:
* Enter the new context key.
* Click **Click to target context with the key...**.
* Select a context kind from the context kind menu.
7. Select a variation to **Serve**.
8. To add more contexts, repeat steps 5-7.
9. Click **Review and save**.
Contexts that LaunchDarkly has evaluated within the last 30 days are indicated by a solid circle icon. Contexts that LaunchDarkly has not evaluated within the last 30 days are indicated by a dotted circle icon. Click on an individual context name to view its context details.
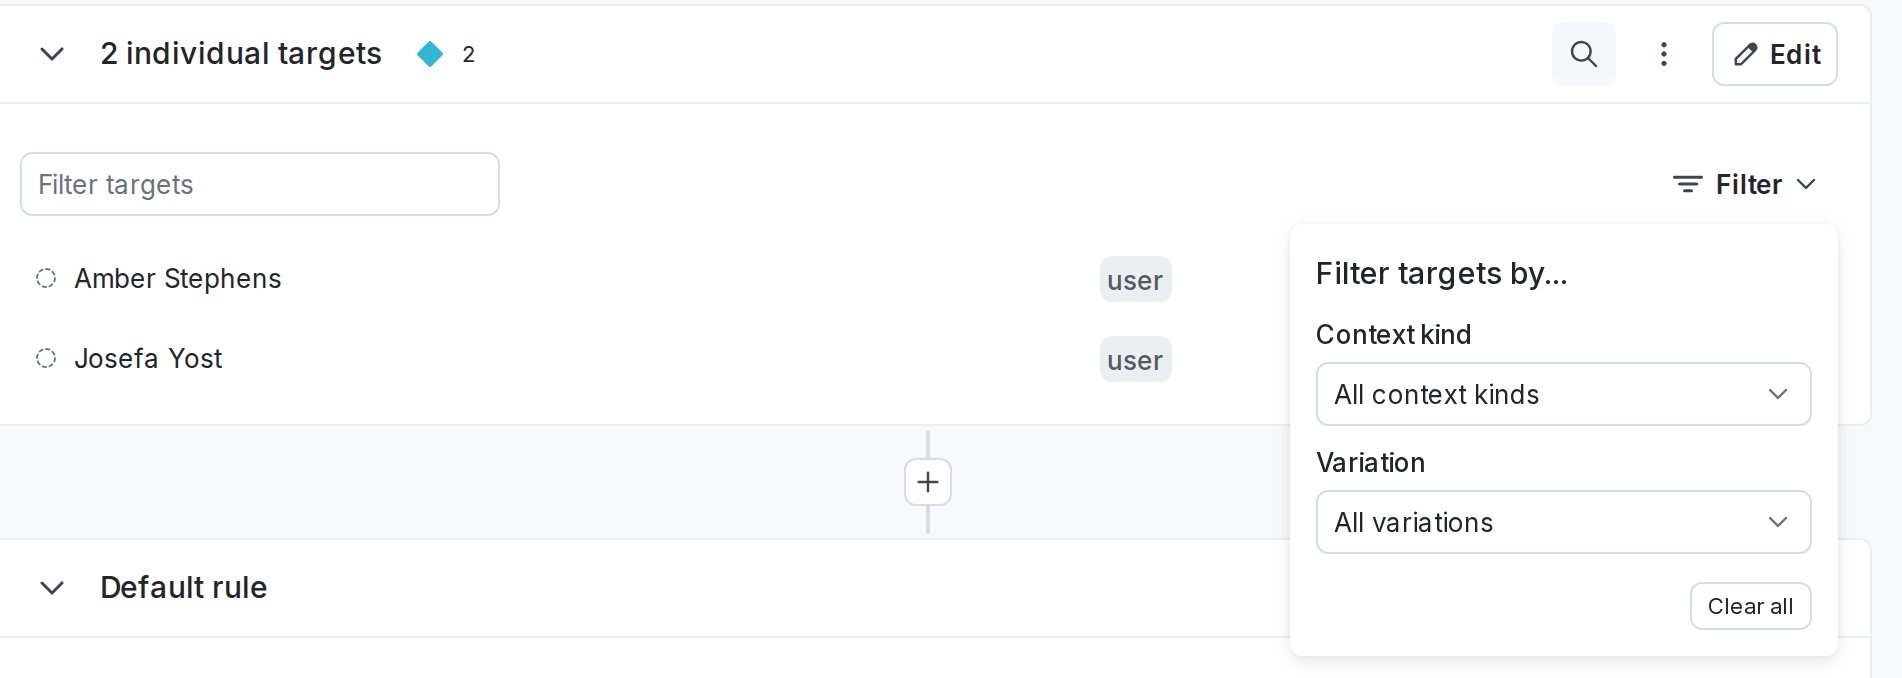
You can filter the list of individually targeted contexts by context kind or variation by clicking the **magnifying glass** icon:
5. In the "Select or add a context" field, search for and select the context you want to target.
6. Alternatively, you can create a new context from the search menu. To do so:
* Enter the new context key.
* Click **Click to target context with the key...**.
* Select a context kind from the context kind menu.
7. Select a variation to **Serve**.
8. To add more contexts, repeat steps 5-7.
9. Click **Review and save**.
Contexts that LaunchDarkly has evaluated within the last 30 days are indicated by a solid circle icon. Contexts that LaunchDarkly has not evaluated within the last 30 days are indicated by a dotted circle icon. Click on an individual context name to view its context details.
You can filter the list of individually targeted contexts by context kind or variation by clicking the **magnifying glass** icon:
 **Only target small numbers of contexts individually**
We recommend using individual targeting only for very small numbers of individual contexts. Individually targeting more than 10,000 contexts per environment may cause performance degradation, because the SDK takes longer to initialize when the targeting rules payload is large.
Instead, we recommend using targeting rules or segments to target large numbers of contexts. To learn how, read [Custom targeting rules](/docs/home/flags/custom-rules) and [Targeting segments](/docs/home/flags/segment-targeting).
If your application is already sending data back to LaunchDarkly, you can search for any context kind by name or key. These strings are case sensitive.
If you need to target a context that LaunchDarkly doesn't know about, you can enter its key manually. These contexts display in yellow until they encounter a feature flag.
In the screenshot below, specific contexts are receiving the "True" variation of a flag:
**Only target small numbers of contexts individually**
We recommend using individual targeting only for very small numbers of individual contexts. Individually targeting more than 10,000 contexts per environment may cause performance degradation, because the SDK takes longer to initialize when the targeting rules payload is large.
Instead, we recommend using targeting rules or segments to target large numbers of contexts. To learn how, read [Custom targeting rules](/docs/home/flags/custom-rules) and [Targeting segments](/docs/home/flags/segment-targeting).
If your application is already sending data back to LaunchDarkly, you can search for any context kind by name or key. These strings are case sensitive.
If you need to target a context that LaunchDarkly doesn't know about, you can enter its key manually. These contexts display in yellow until they encounter a feature flag.
In the screenshot below, specific contexts are receiving the "True" variation of a flag:
 **You can also use the JSON editor**
To learn how to create individual targeting rules using JSON, read [Individual targeting](/docs/home/flags/json-targeting#individual-targeting).
You can also use the REST API: [Individual context targets](/docs/api/feature-flags#individual-context-targets)
### Remove individual targets
You can remove individual targets from a flag:
1. Navigate to the flag's **Targeting** tab.
2. If the flag is off and the rules are hidden, click **View targeting rules**.
3. Find the individual targeting rule and click **Edit**.
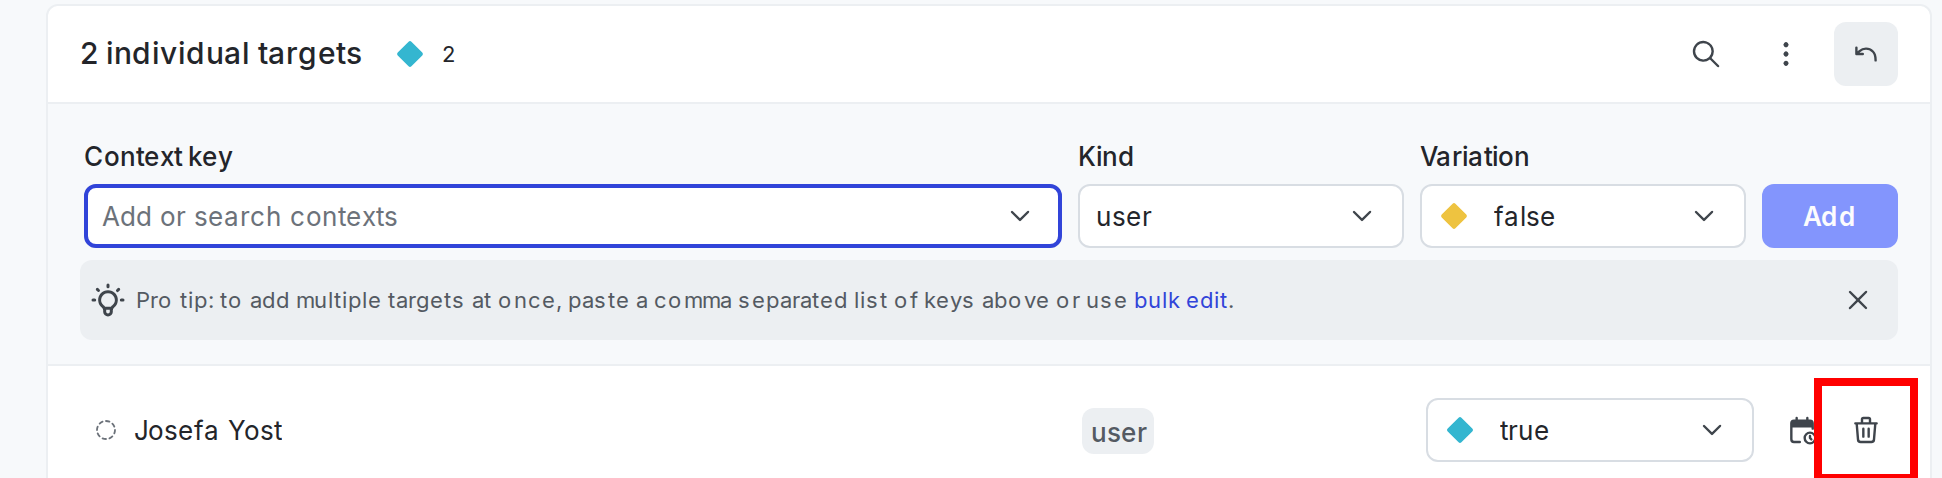
4. Click the **trash** icon next to the context you want to remove:
**You can also use the JSON editor**
To learn how to create individual targeting rules using JSON, read [Individual targeting](/docs/home/flags/json-targeting#individual-targeting).
You can also use the REST API: [Individual context targets](/docs/api/feature-flags#individual-context-targets)
### Remove individual targets
You can remove individual targets from a flag:
1. Navigate to the flag's **Targeting** tab.
2. If the flag is off and the rules are hidden, click **View targeting rules**.
3. Find the individual targeting rule and click **Edit**.
4. Click the **trash** icon next to the context you want to remove:
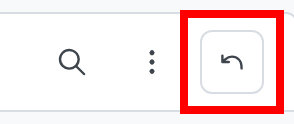
 5. (Optional) If you need to undo the changes you just made, click the **undo arrow** icon to discard all changes:
 * A "Discard unsaved changes" dialog appears. Click **Discard changes** to undo all the changes you have made, or **Cancel** to return to the details page.
6. Click **Review and save**.
## Schedule removal dates for individual targeting
**Scheduling removal dates is available to customers on select plans**
Scheduling removal dates is only available to customers on select plans. To learn more, [read about our pricing](https://launchdarkly.com/pricing/). To upgrade your plan, [contact Sales](https://launchdarkly.com/contact-sales/).
You can schedule a removal date and time for each individual context that is targeted by a flag. By doing this, you can specify a future date and time after which the context will no longer be targeted for the specific flag. You can do this when you add a new individual target, or for existing individual targets.
This is useful if you want to give customers trial access to a feature, run a controlled beta test, or just keep your flags organized by not having too many flags working at once.
You can also schedule a context to be removed from a segment, rather than from flag targeting. To learn more, read [Scheduling removal from segments](/docs/home/flags/rule-based-segments#schedule-context-removal-from-segments).
To schedule a removal date for an individual target:
1. In the left sidebar, click **Code**. The CodeControl menu appears.
2. Click **Flags**.
3. Choose the flag you wish for which you want to configure a removal date. The flag's **Targeting** tab opens.
4. If the flag is off and the rules are hidden, click **View targeting rules**.
5. Find the individual targeting rule and click **Edit**.
6. Click the **calendar** icon next to the context you want to schedule a removal date for:
* A "Discard unsaved changes" dialog appears. Click **Discard changes** to undo all the changes you have made, or **Cancel** to return to the details page.
6. Click **Review and save**.
## Schedule removal dates for individual targeting
**Scheduling removal dates is available to customers on select plans**
Scheduling removal dates is only available to customers on select plans. To learn more, [read about our pricing](https://launchdarkly.com/pricing/). To upgrade your plan, [contact Sales](https://launchdarkly.com/contact-sales/).
You can schedule a removal date and time for each individual context that is targeted by a flag. By doing this, you can specify a future date and time after which the context will no longer be targeted for the specific flag. You can do this when you add a new individual target, or for existing individual targets.
This is useful if you want to give customers trial access to a feature, run a controlled beta test, or just keep your flags organized by not having too many flags working at once.
You can also schedule a context to be removed from a segment, rather than from flag targeting. To learn more, read [Scheduling removal from segments](/docs/home/flags/rule-based-segments#schedule-context-removal-from-segments).
To schedule a removal date for an individual target:
1. In the left sidebar, click **Code**. The CodeControl menu appears.
2. Click **Flags**.
3. Choose the flag you wish for which you want to configure a removal date. The flag's **Targeting** tab opens.
4. If the flag is off and the rules are hidden, click **View targeting rules**.
5. Find the individual targeting rule and click **Edit**.
6. Click the **calendar** icon next to the context you want to schedule a removal date for:
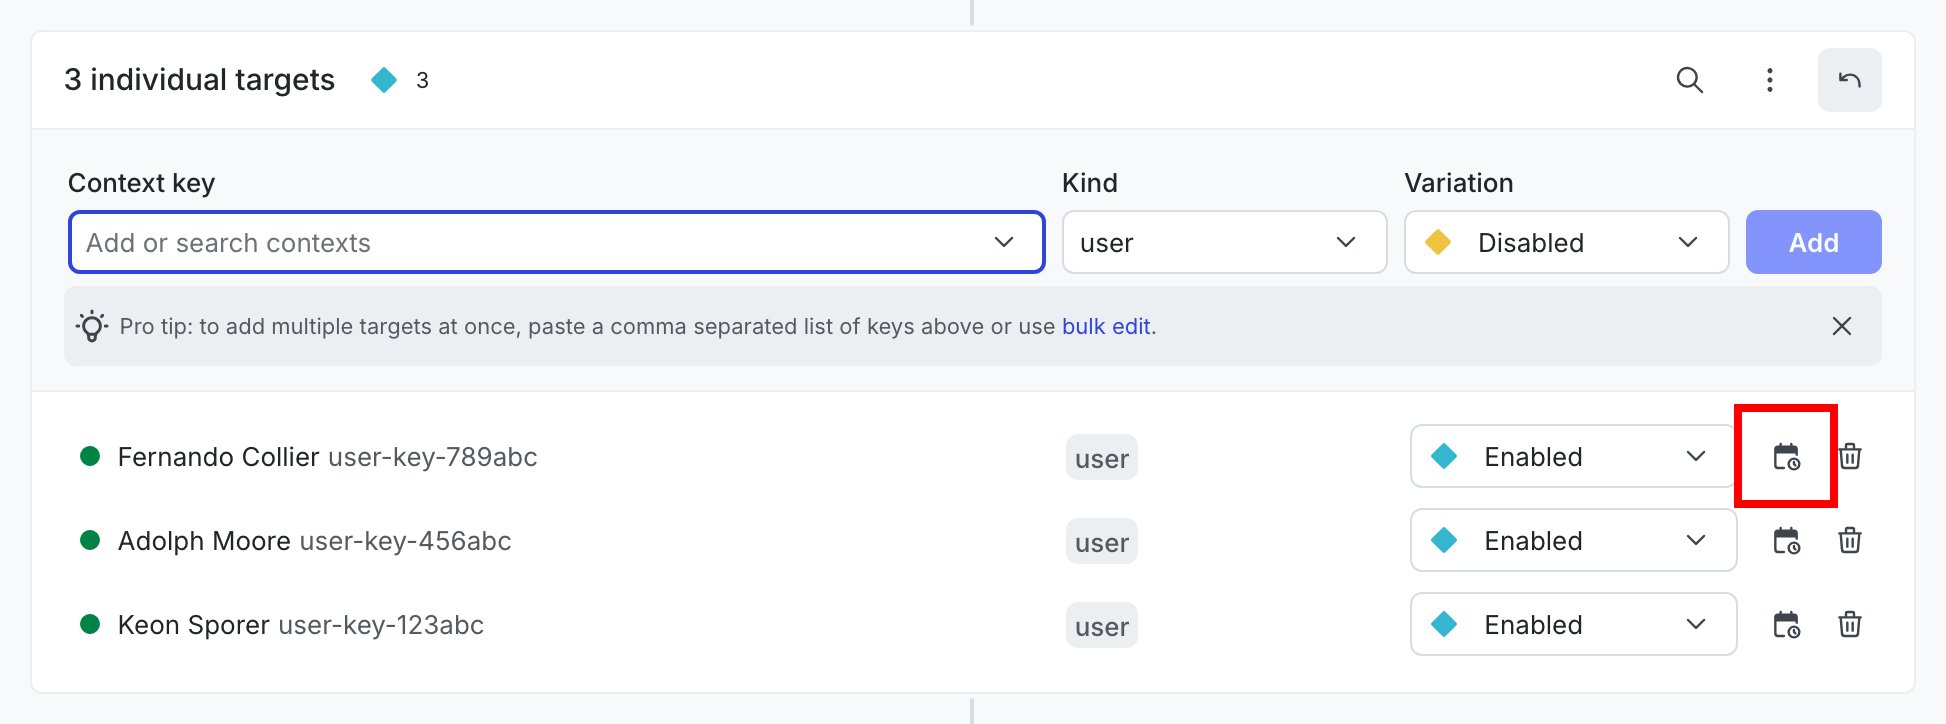 7. Set a date and time for the context to be removed from the flag.
8. Click **Save**.
9. (Optional) If you need to undo the changes you just made, click the **undo arrow** icon to discard all changes.
10. Click **Review and save**. The "Save changes" dialog appears.
11. Review your targeting changes, [add comments](/docs/home/releases/comments), or [request approval](/docs/home/releases/approvals) as needed.
12. (Optional) Click **Test run** to preview the percentage of contexts that will receive each flag variation.
13. Click **Save changes**.
The individual targets are now scheduled for removal on the date and time you specified.
### Edit existing scheduled removal dates
Individual targets that already have a removal date scheduled appear with a red calendar icon.
To edit a scheduled removal date:
1. Click **Edit** next to the individual targeting rule.
2. Click the red **calendar** icon next to the individual context.
3. Update the removal date, and click **Save**. To remove the date completely, click **Remove**.
The removal date is now updated.
You can also use the REST API: [Update expiring context targets for feature flag](/docs/api/feature-flags/update-expiring-context-targets-on-feature-flag)
7. Set a date and time for the context to be removed from the flag.
8. Click **Save**.
9. (Optional) If you need to undo the changes you just made, click the **undo arrow** icon to discard all changes.
10. Click **Review and save**. The "Save changes" dialog appears.
11. Review your targeting changes, [add comments](/docs/home/releases/comments), or [request approval](/docs/home/releases/approvals) as needed.
12. (Optional) Click **Test run** to preview the percentage of contexts that will receive each flag variation.
13. Click **Save changes**.
The individual targets are now scheduled for removal on the date and time you specified.
### Edit existing scheduled removal dates
Individual targets that already have a removal date scheduled appear with a red calendar icon.
To edit a scheduled removal date:
1. Click **Edit** next to the individual targeting rule.
2. Click the red **calendar** icon next to the individual context.
3. Update the removal date, and click **Save**. To remove the date completely, click **Remove**.
The removal date is now updated.
You can also use the REST API: [Update expiring context targets for feature flag](/docs/api/feature-flags/update-expiring-context-targets-on-feature-flag)