

Data Export is an add-on featureData Export is available as an add-on feature to select plans. To learn more, read about our pricing. To add Data Export to your plan, contact Sales.
Prerequisites
To configure the BigQuery Data Export integration, you must have the following prerequisites:- You must have a LaunchDarkly base role of Admin, Owner, or Writer, or a custom role with the following permissions:
- integrations actions:
createIntegration,updateConfiguration, andvalidateConnection - destinations actions:
createDestination,updateConfiguration, andupdateOn
- integrations actions:
- You must create a VPC firewall rule that allows the LaunchDarkly data transfer service’s static IP address:
35.192.85.117
One Data Export destination per environmentYou can configure only one Data Export destination per LaunchDarkly environment, regardless of destination kind. If you need more than one Data Export destination for the same data, configure them in different environments.
Choose an authentication method
Workload identity federation authentication is in betaDevelopment work on workload identity federation authentication is ongoing. Elements of this feature may change without notice.
- Service account impersonation: The LaunchDarkly export service account impersonates a service account in your Google Cloud project. This is the default method. To use it, skip to the Create a Google Cloud service account section.
- Workload identity federation: LaunchDarkly authenticates with an OAuth client from your own identity provider (IdP) and exchanges the credentials for Google Cloud access through the Google Security Token Service (STS). To use it, read Set up workload identity federation.
Set up workload identity federation
If you use workload identity federation instead of service account impersonation, LaunchDarkly does not need access to your Google Cloud service account. Instead, LaunchDarkly exchanges credentials from your identity provider for a token that impersonates your destination service account. If you are setting up workload identity federation in Google Cloud for the first time, read Google’s Workload identity federation documentation.Prepare your identity provider and Google Cloud project
Before you configure the destination in LaunchDarkly, you need:- An OAuth client in your identity provider for LaunchDarkly to use. Save the client ID, the client secret, and your identity provider’s OAuth token endpoint URL.
- A workload identity pool and provider in your Google Cloud project, configured to trust your identity provider. Save the provider’s full resource name.
- A destination service account that holds the BigQuery dataset and Google Cloud Storage staging permissions. To set this up, follow Create a Google Cloud service account and Create staging bucket, and skip Grant LaunchDarkly access to your Google Cloud service account. That section only applies to service account impersonation.
- The “Workload Identity User” role,
roles/iam.workloadIdentityUser, granted to your workload identity principal on the destination service account. This lets the federated identity impersonate the destination service account after the token exchange.
Configure the destination with workload identity federation
To configure the destination:- Navigate to the Integrations page in LaunchDarkly and find “BigQuery Data Export.”
- Click Add integration. The “Create a destination” panel appears.
- Give the integration a human-readable Name.
- Select a LaunchDarkly Project and environment to export data from.
- Enter the GCP project ID.
- Enter your GCS bucket name.
- Enter your GCS bucket region.
- Enter an Export dataset ID to name your dataset. If your dataset does not already exist, LaunchDarkly creates it automatically.
- Under “Authentication method,” select Workload identity federation.
- Enter your Identity provider token URL. This is the OAuth2 token endpoint of your identity provider.
- Enter your Client ID.
- Enter your Client secret. LaunchDarkly does not display the client secret after you save the destination.
- Enter the Workload identity provider resource name. This is the full resource name of your workload identity pool provider, for example
//iam.googleapis.com/projects/123/locations/global/workloadIdentityPools/pool/providers/provider. You can find it in the Google Cloud console under “Workload Identity Federation.” - Enter your Destination service account email.
- (Optional) Enter Identity provider scopes if your identity provider requires scopes in the token request. Separate multiple scopes with spaces.
- Click Test connection to ensure your configuration is correct.
- After reading the Integration Terms and Conditions, check the I have read and agree to the Integration Terms and Conditions checkbox.
- Click Save destination. The new destination appears in the list of destinations.
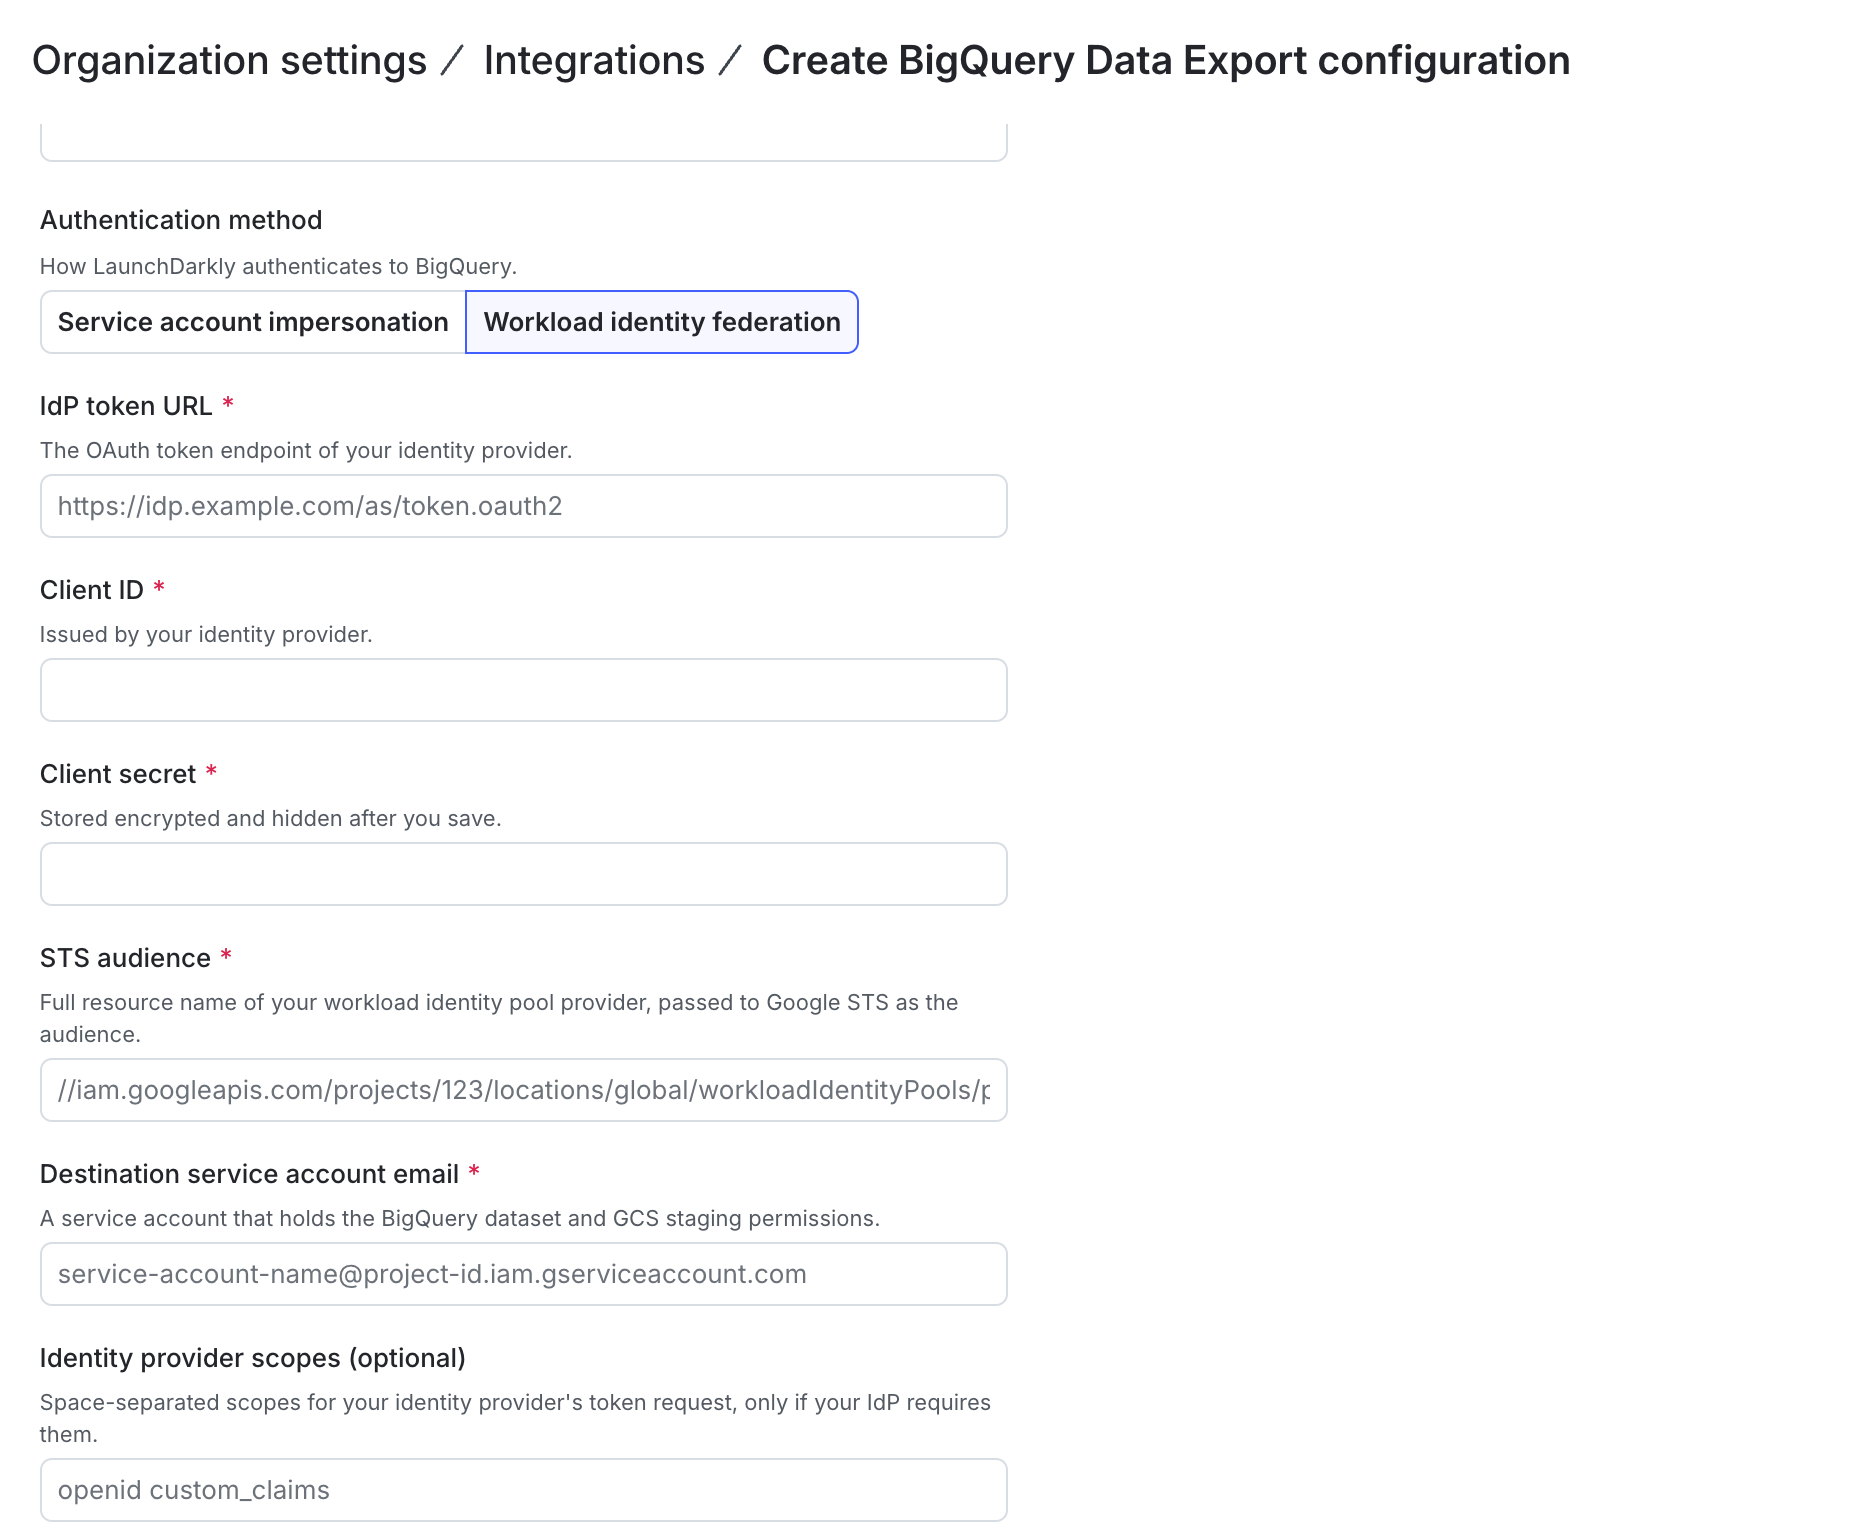
The BigQuery Data Export configuration panel in LaunchDarkly, displaying the workload identity federation credential fields.
Create a Google Cloud service account
To begin, we recommend that you use a Google Cloud service account to provide the LaunchDarkly export service account access to your BigQuery warehouse. To do this, follow the Google Cloud instructions to create a service account. In the “Permissions” step, grant the account the BigQuery User role.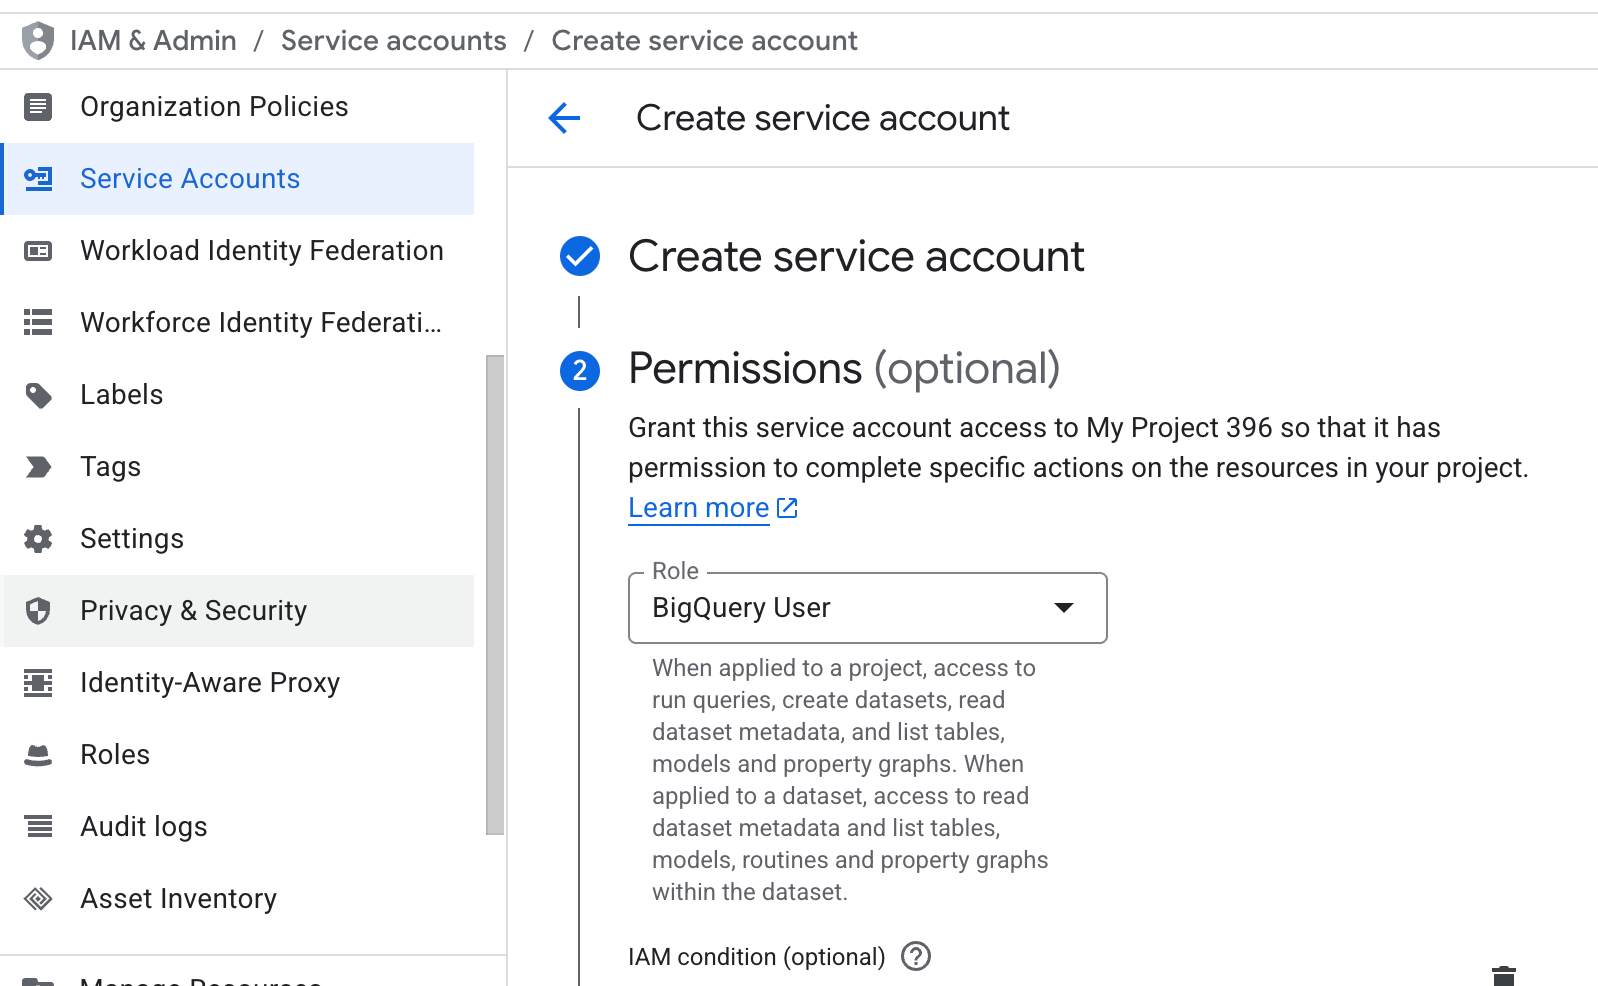
The service account permissions section in Google Cloud.
- In Google Cloud, navigate to Service Accounts under “IAM & Admin” and open your service account for the LaunchDarkly export service.
- Click on the Permissions tab.
- Click Manage access.
- In the Role field, select “BigQuery User.”
- Click Save.
Grant LaunchDarkly access to your Google Cloud service account
Then, grant your LaunchDarkly export service account access to your Google Cloud service account. To find your LaunchDarkly export service account email address:- In LaunchDarkly, navigate to the Integrations page and find “BigQuery Data Export.”
- Click Add integration. The “Create a destination” panel appears.
- Copy the Export service account email address and save it for use in the next step.
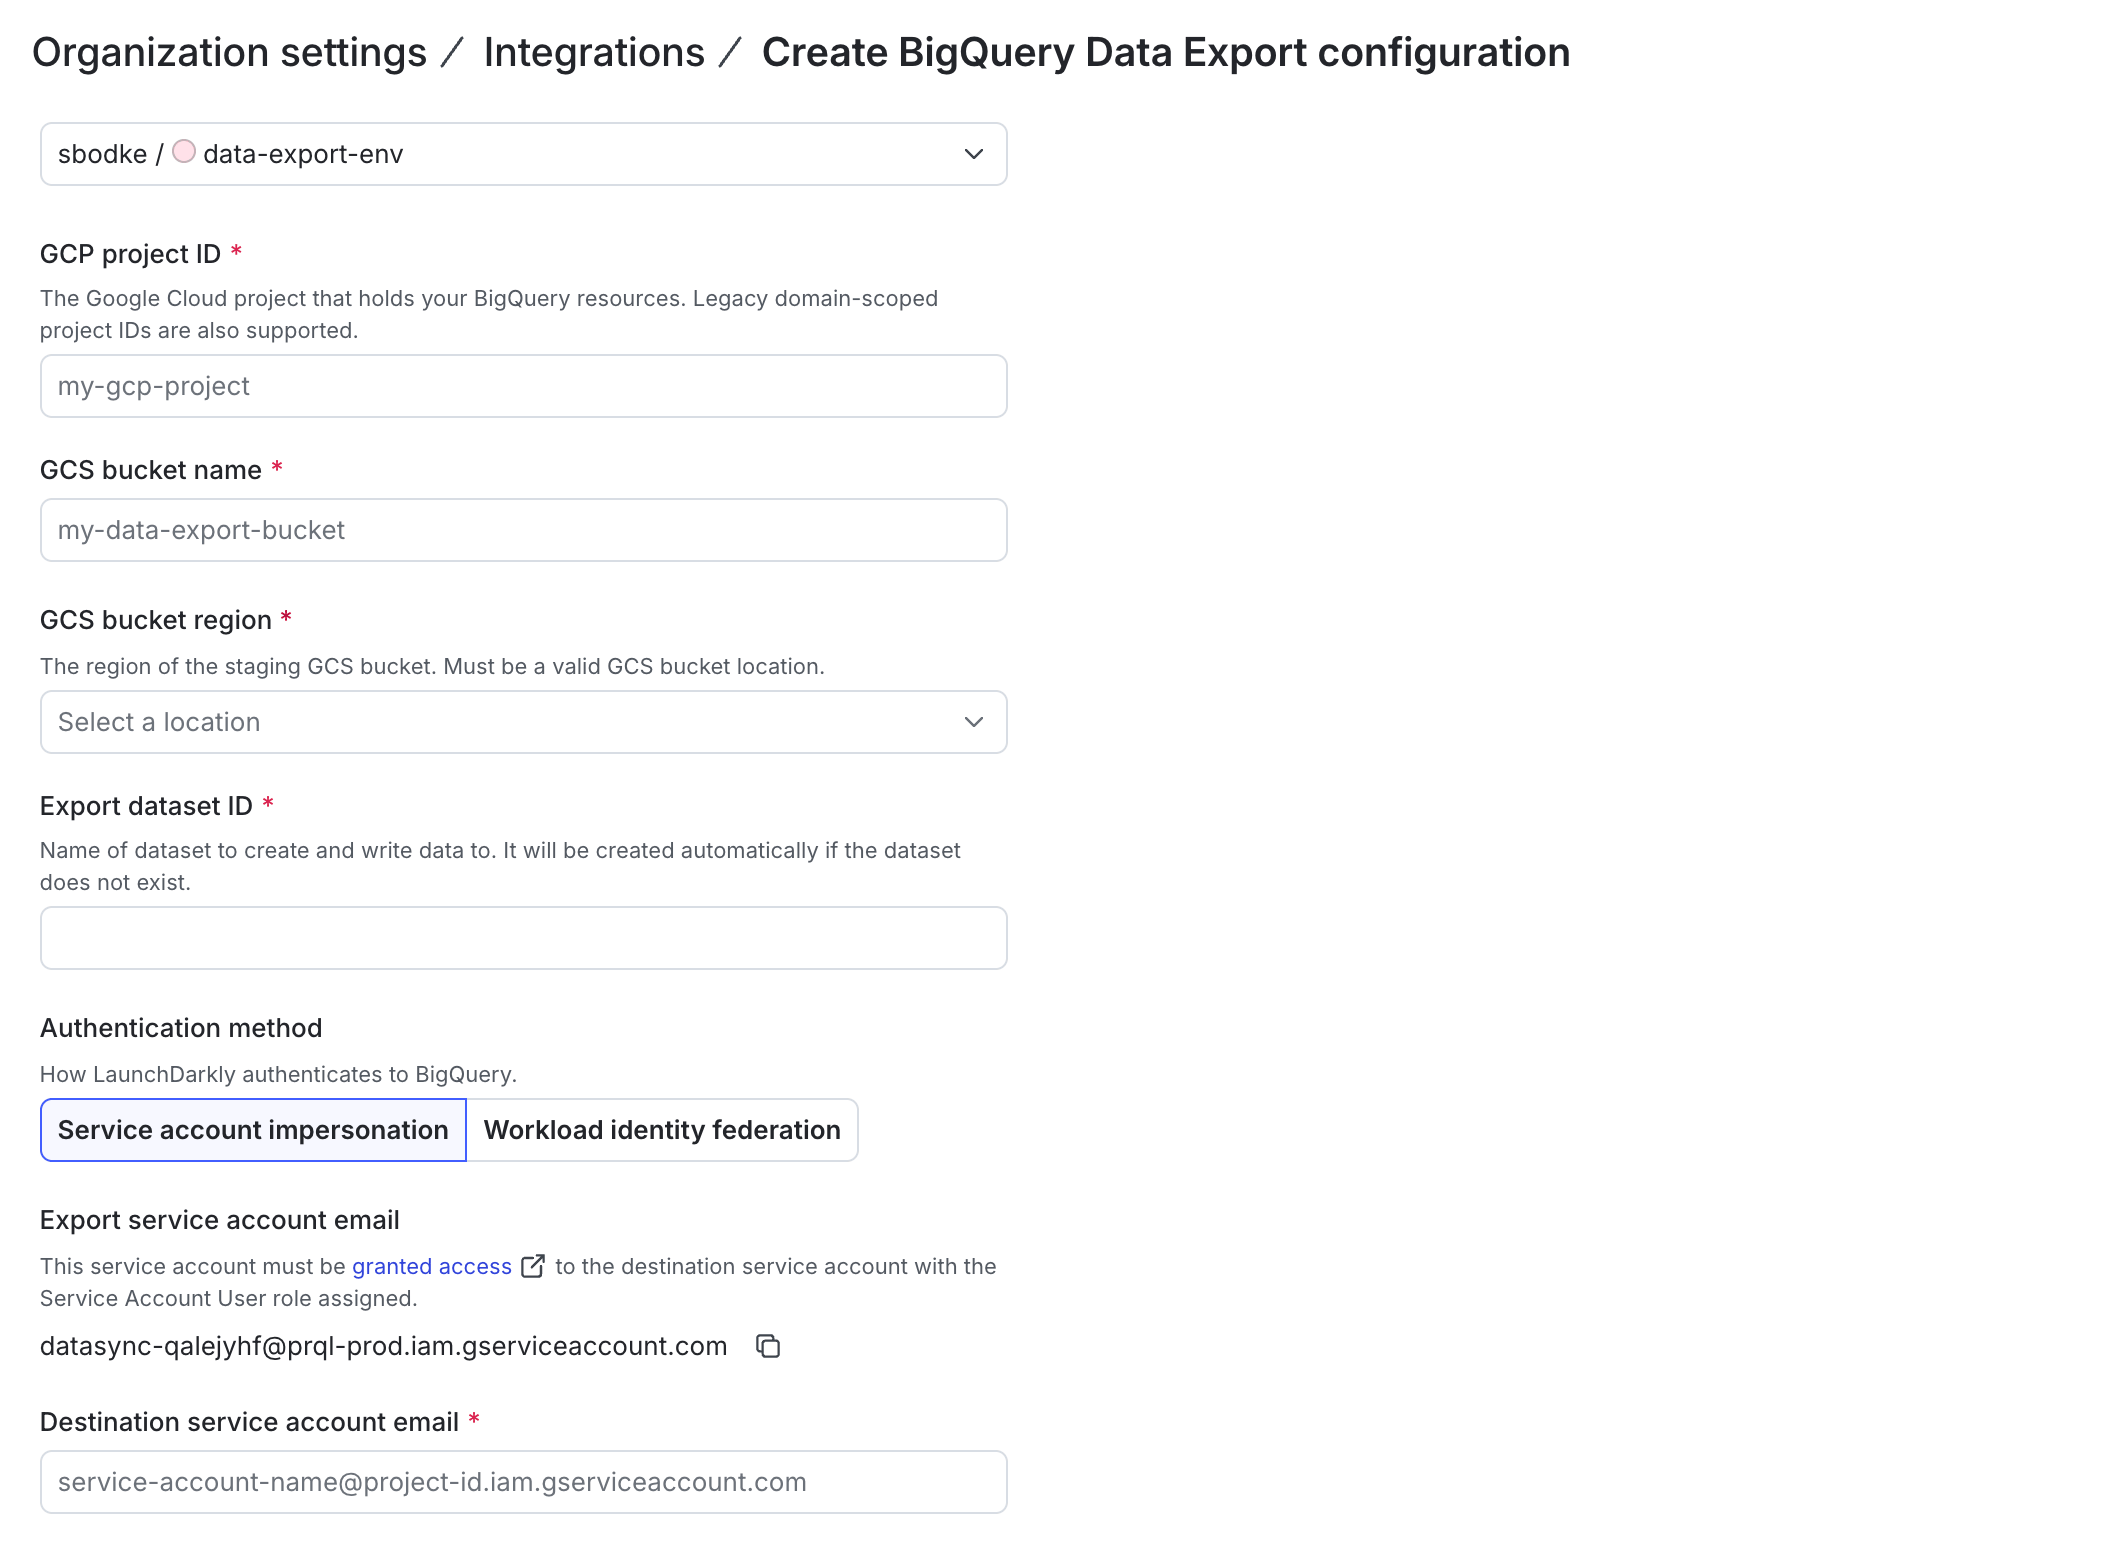
The BigQuery Data Export configuration panel in LaunchDarkly, displaying the "Export service account email" field.
- In Google Cloud, navigate to Service Accounts and select the service account you created or configured in the previous section.
- Click the Principals with access tab.
- Click Grant access.
- In the “Add principals” section, paste your LaunchDarkly export service account email address into the New principals field.
- In the “Assign roles” section, assign the “Service Account User” role in the role field.
- Click Add another role.
- Assign the Service account token creator role in the second Role field.
- Click Save.
Create staging bucket
Next, create a Google Cloud storage bucket for staging data, and grant your service account access to it. To do this:- Create a Google Cloud storage bucket. Save the bucket name for use later when you set up the integration in LaunchDarkly.
- In the “Choose where to store your data” section, choose a Region that matches the location of your destination dataset in BigQuery. Save this region for use later when you set up the integration in LaunchDarkly.
- From the bucket’s Permissions tab, grant your service account access to the bucket
- In the Select a role field, assign the “Storage Admin” role.
Configure the BigQuery Data Export integration
Finally, in LaunchDarkly, configure the BigQuery Data Export integration. To do this, you first need to retrieve the following information from your Google Cloud account:- Your GCP project ID.
- The GCS bucket name and region from the bucket you created in the previous step.
- Your Destination service account email from the service account you created in a previous step. It will be formatted like
accountname@abc123.gserviceaccount.com.
- In LaunchDarkly, return to the Integrations page and find “BigQuery Data Export.”
- Click Add integration. The “Create a destination” panel appears.
- Give the integration a human-readable Name.
- Select a LaunchDarkly Project and environment to export data from.
- Enter the GCP project ID.
- Enter your GCS bucket name.
- Enter your GCS bucket region.
- Enter an Export dataset ID to name your dataset. If your dataset does not already exist, LaunchDarkly creates it automatically.
- Enter your Destination service account email.
- Click Test connection to ensure your configuration is correct.
- After reading the Integration Terms and Conditions, check the I have read and agree to the Integration Terms and Conditions checkbox.
- Click Save destination. The new destination appears in the list of destinations.
Existing datasets need additional permissionsIf you provide an existing dataset, your service account needs the “BigQuery Data Editor” role in addition to the “BigQuery User” role.