

Prerequisites
To complete this topic, you must meet the following prerequisites:Integration permissions in LaunchDarkly
You must have a LaunchDarkly account with a Writer, Admin, Owner, or a custom role that allows thecreateIntegration action on the integration resource.
Admin permissions in ServiceNow
You must have an existing ServiceNow account with the admin role.IP address access in ServiceNow
If your ServiceNow instance has IP address access control enabled, you must create inbound ServiceNow IP access control rules corresponding to theoutboundAddresses from LaunchDarkly’s public IP list.
To learn how to create IP access control rules, search for “IP Address Access Control” in ServiceNow’s documentation and choose the article for your ServiceNow version. For example, if your ServiceNow version is Zurich, read IP Address Access Control.
Create a ServiceNow standard change template
To begin, create a ServiceNow standard change template that you want to use for all proposed changes originating from LaunchDarkly. We recommend creating a dedicated template for LaunchDarkly changes. To learn how to propose a new standard change template, search for “Propose a standard change template” in ServiceNow’s documentation and choose the article for your ServiceNow version. For example, if your ServiceNow version is Zurich, read Propose a standard change template. If you do not use a ServiceNow standard change template, we recommend using the Custom approvals integration instead.Create an application registry entry in ServiceNow
Next, create an application registry entry in ServiceNow. This provides the OAuth Client ID and Client Secret you will use when you set up the integration in LaunchDarkly. To do this, first find the Redirect URL in LaunchDarkly:- In LaunchDarkly, navigate to the Integrations page and find “ServiceNow.”
- Click Configure. The integration menu appears.
- Click Connect to ServiceNow. An OAuth provider registration dialog appears.
- Copy the Redirect URL to your clipboard.
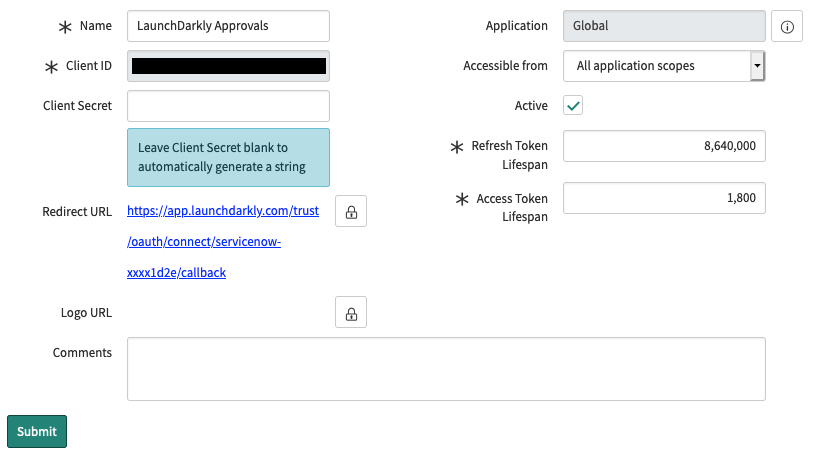
The ServiceNow external client endpoint registration form with the Redirect URL configured.
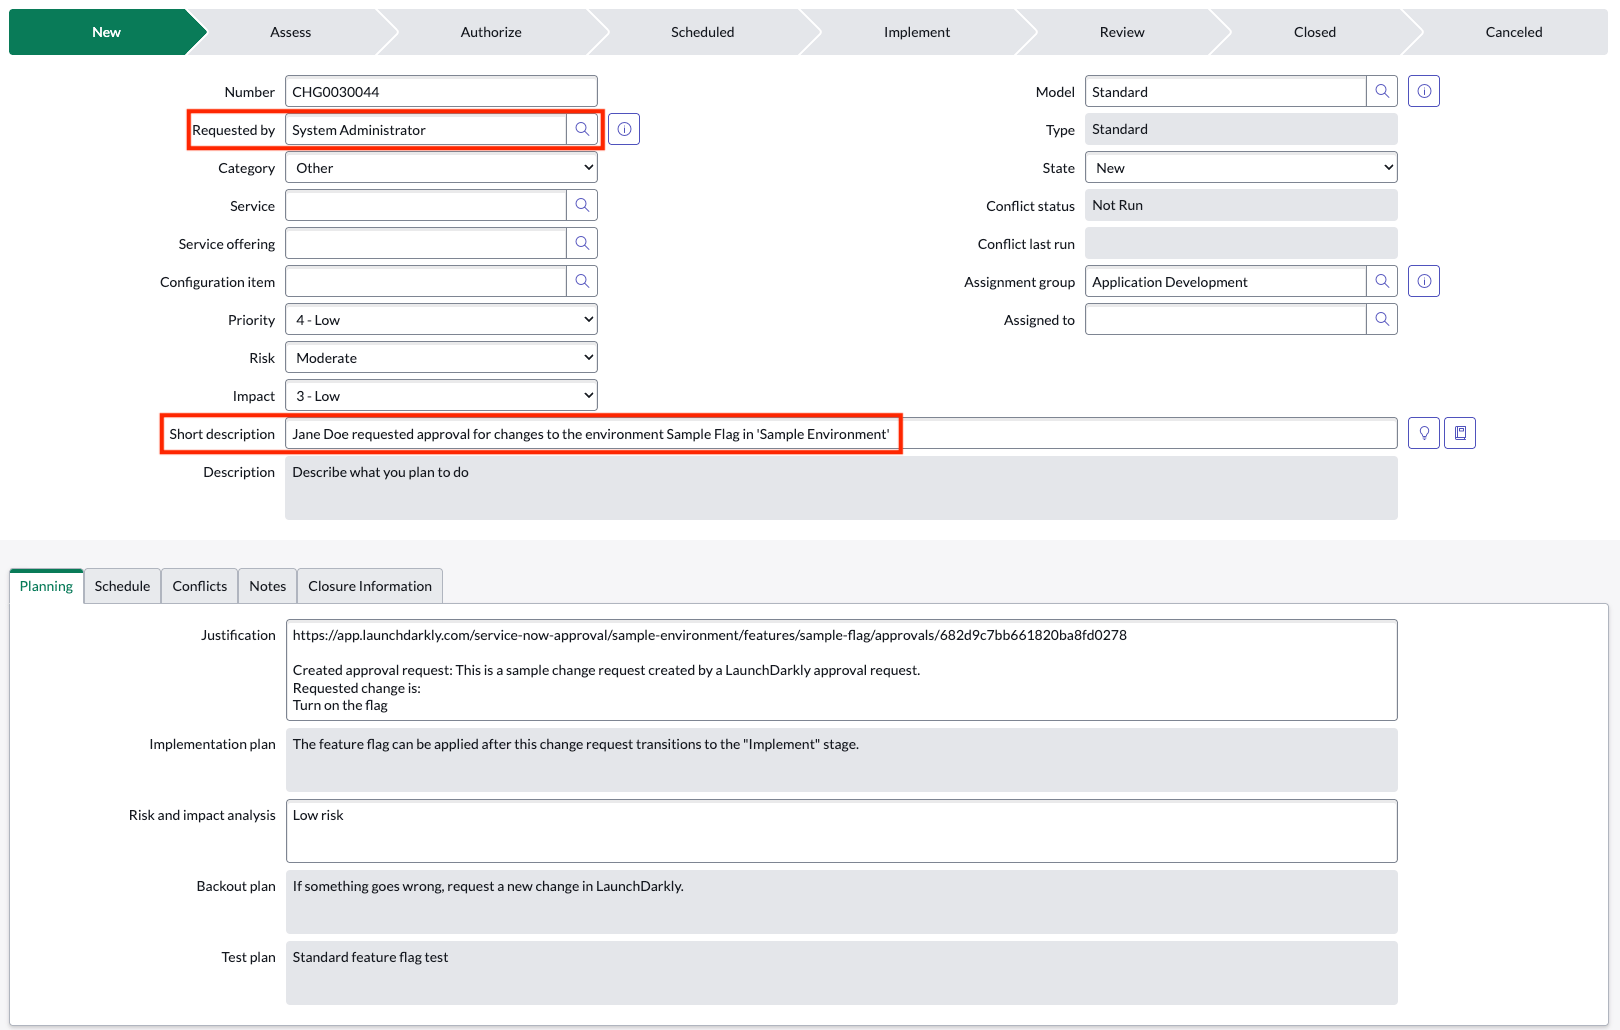
A ServiceNow change request created by LaunchDarkly, with the ServiceNow and LaunchDarkly requestors called out.
Set up the ServiceNow integration in LaunchDarkly
To use the ServiceNow integration to manage approvals, you must first establish an OAuth connection between your LaunchDarkly and ServiceNow accounts. After you create the connection, you can either: To establish an OAuth connection:- In LaunchDarkly, navigate to the Integrations page and find “ServiceNow.”
- Click Configure. The integration menu appears.
- Click Connect to ServiceNow. An OAuth provider registration dialog appears.
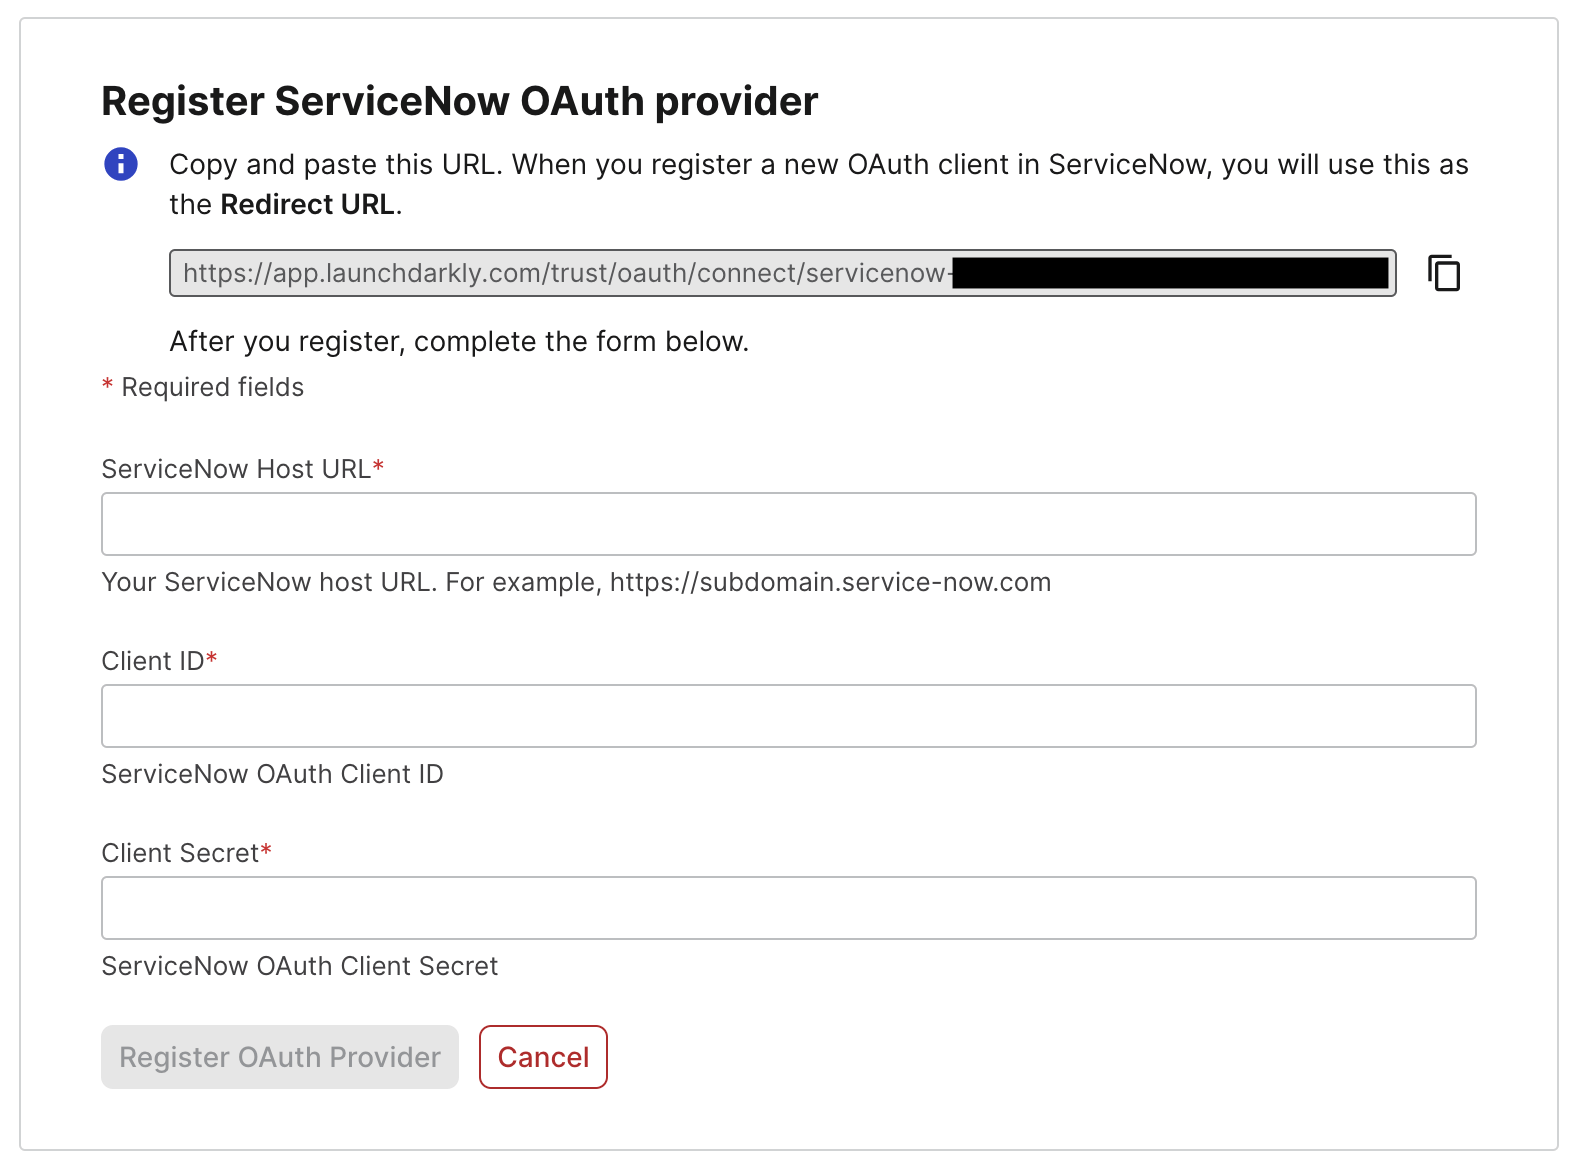
LaunchDarkly's ServiceNow OAuth provider registration form.
- Enter your ServiceNow host URL. It may look something like
https://launchdarkly.service-now.com. - Enter the Client ID and Client Secret from the ServiceNow application registry entry you saved in the application registry step.
- Click Register OAuth Provider.
- Click Allow. ServiceNow may prompt you to log in to your ServiceNow account at this step.
Configure a LaunchDarkly environment to use ServiceNow for approvals
By default, the LaunchDarkly approvals request feature only creates approval requests in LaunchDarkly. You can change this behavior so LaunchDarkly creates change requests in ServiceNow. To do this, you must update your chosen environment’s approval settings. The ServiceNow approvals integration supports approval requests for feature flag and experiment changes. Here’s how:- Click the project dropdown. The project menu appears:
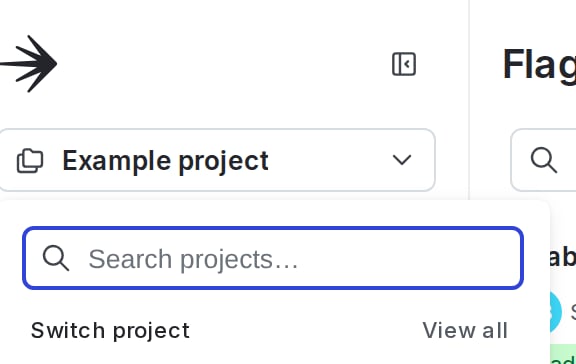
The project menu.
- Select Project settings. The list of project settings appears.
- Click Approval settings.
- In the “Flag and experiment approvals” section, select an environment.
- Click Edit approval setting. The “Approval settings for [environment]” dialog appears.
- Change the Approval system from “LaunchDarkly” to “ServiceNow.”
- Select the ServiceNow standard change template you wish to use for all proposed changes in this environment. All change requests created by LaunchDarkly will include relevant details for the Short description, Justification, and Requested by fields. We recommend choosing a template with all other change request fields pre-populated.
- (Optional) Fill in the Detailed information column name field with the name of the ServiceNow Change Request column you would like LaunchDarkly to populate with detailed approval request information. This field defaults to
justificationif you do not provide a value. - (Optional) Select the Require approvals for this environment checkbox to require approval for changes in this environment. If you select this, then you must also choose:
- Whether to require approval for all flags and experiments, or only for flags and experiments with matching tags. While tags are global across environments, this setting applies only to flags and experiments in the current environment.
- Whether to allow scheduled changes for a flag to be deleted without approval in this environment.
- Choose whether to Automatically apply changes in LaunchDarkly when associated external change requests are approved.
- Click Save changes.
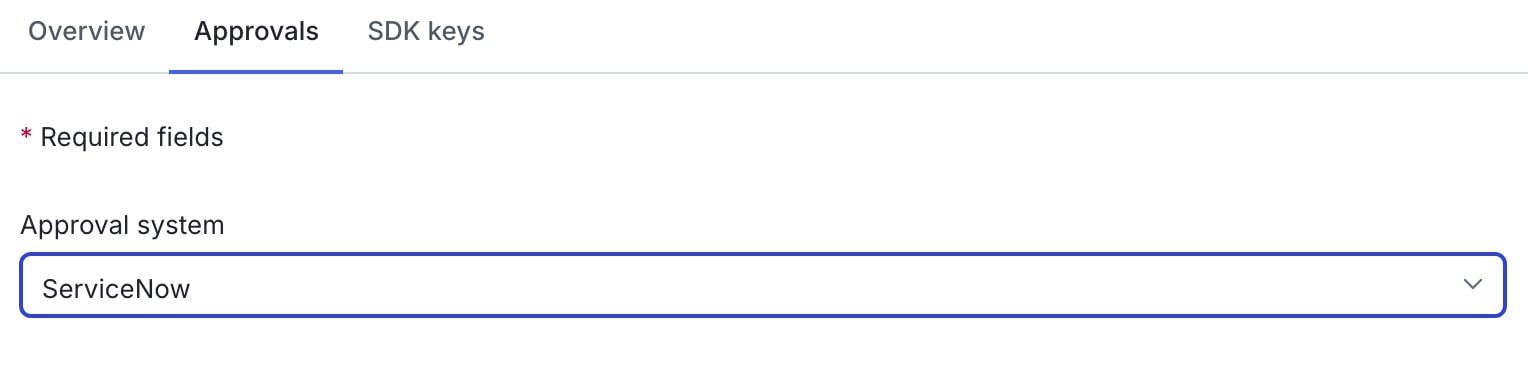
LaunchDarkly environment approval settings with ServiceNow configured.
Create a LaunchDarkly workflow in ServiceNow for manual approvals
You can create your workflow using either of these two ServiceNow workflow creation methods:- Flow Designer
- Workflow Editor
- Create a new Workflow Trigger for record “Created” on the “Change Request [change_request]” table. To learn how to do this, search for “Create Security Operations workflow triggers” in ServiceNow’s documentation and choose the article for your ServiceNow version.
- Set two conditions on your trigger: “State”
is“New” and “Standard Change Template version,” “Template,” “Name”is“LaunchDarkly template.”
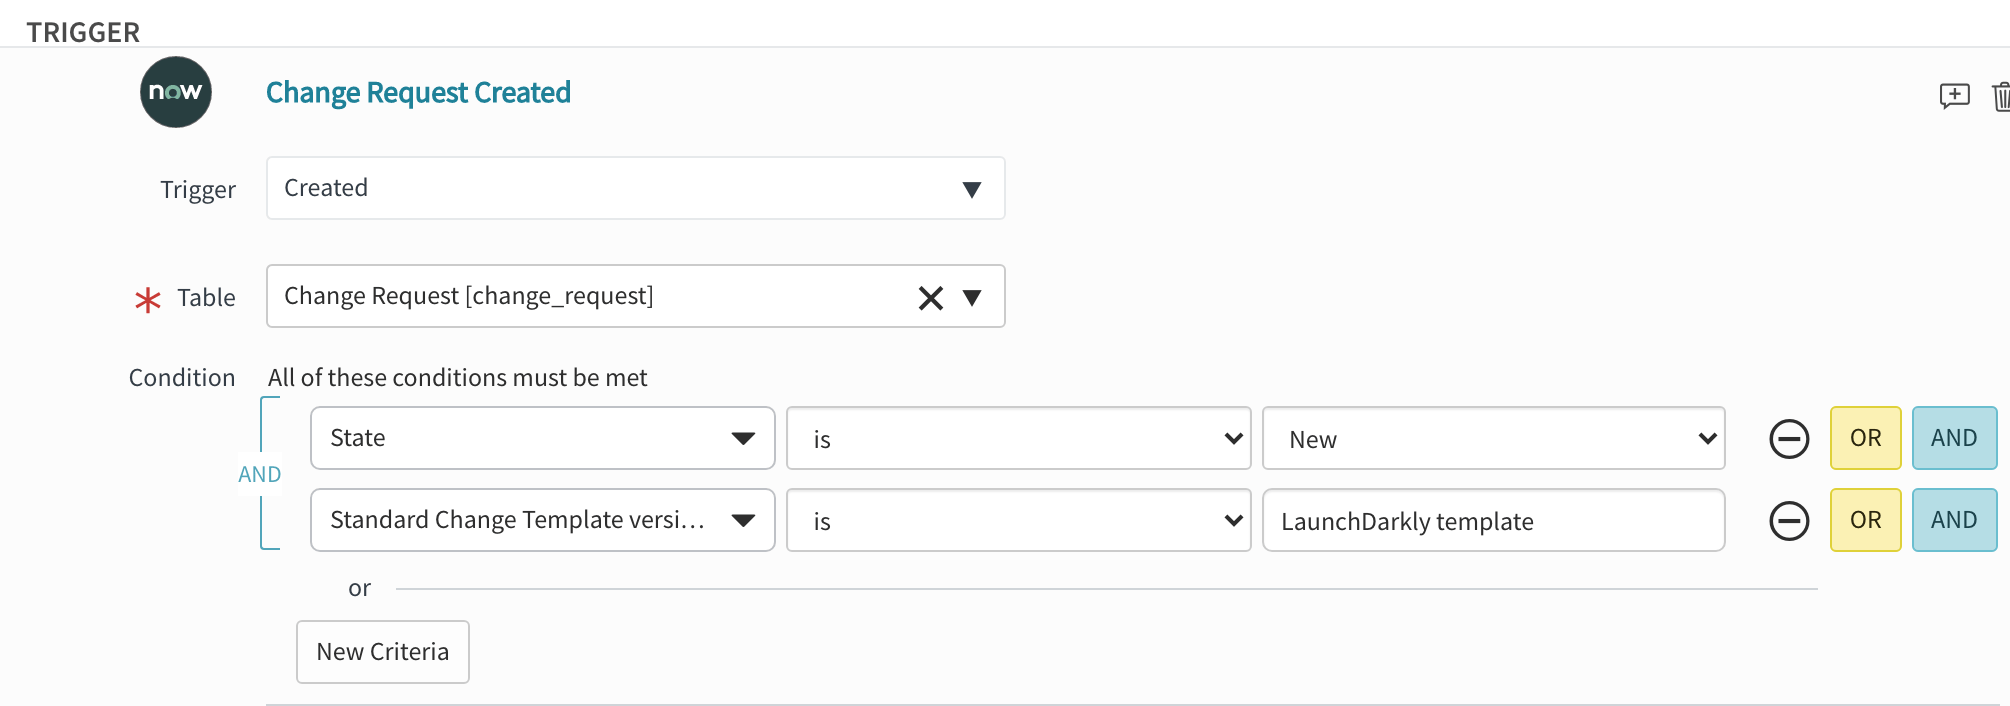
A configured Workflow Trigger in the ServiceNow Flow Designer.
- Add a new “Ask For Approval” Action on your Trigger Change Request Record and set the approval rules.
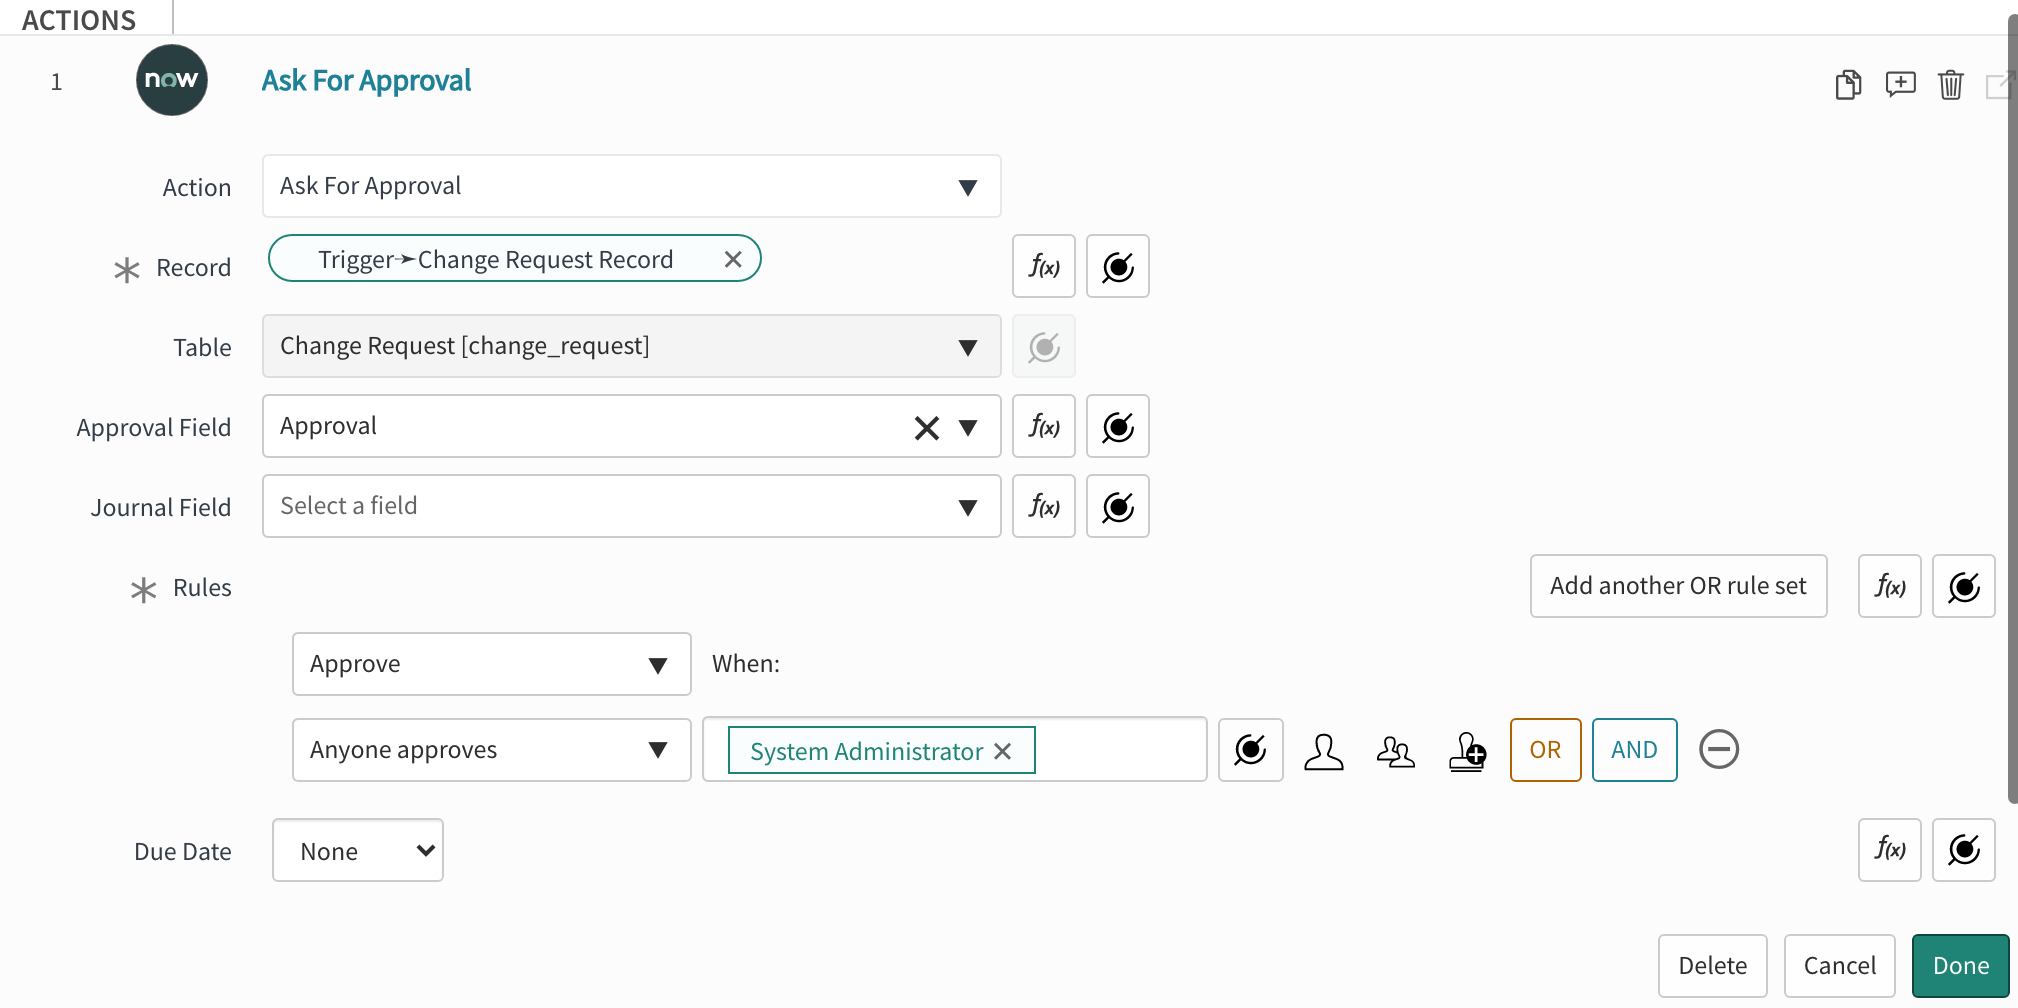
A ServiceNow "Ask For Approval" action configuration.
- Add an
ifcondition that requires Approval Stateis“Approved.”
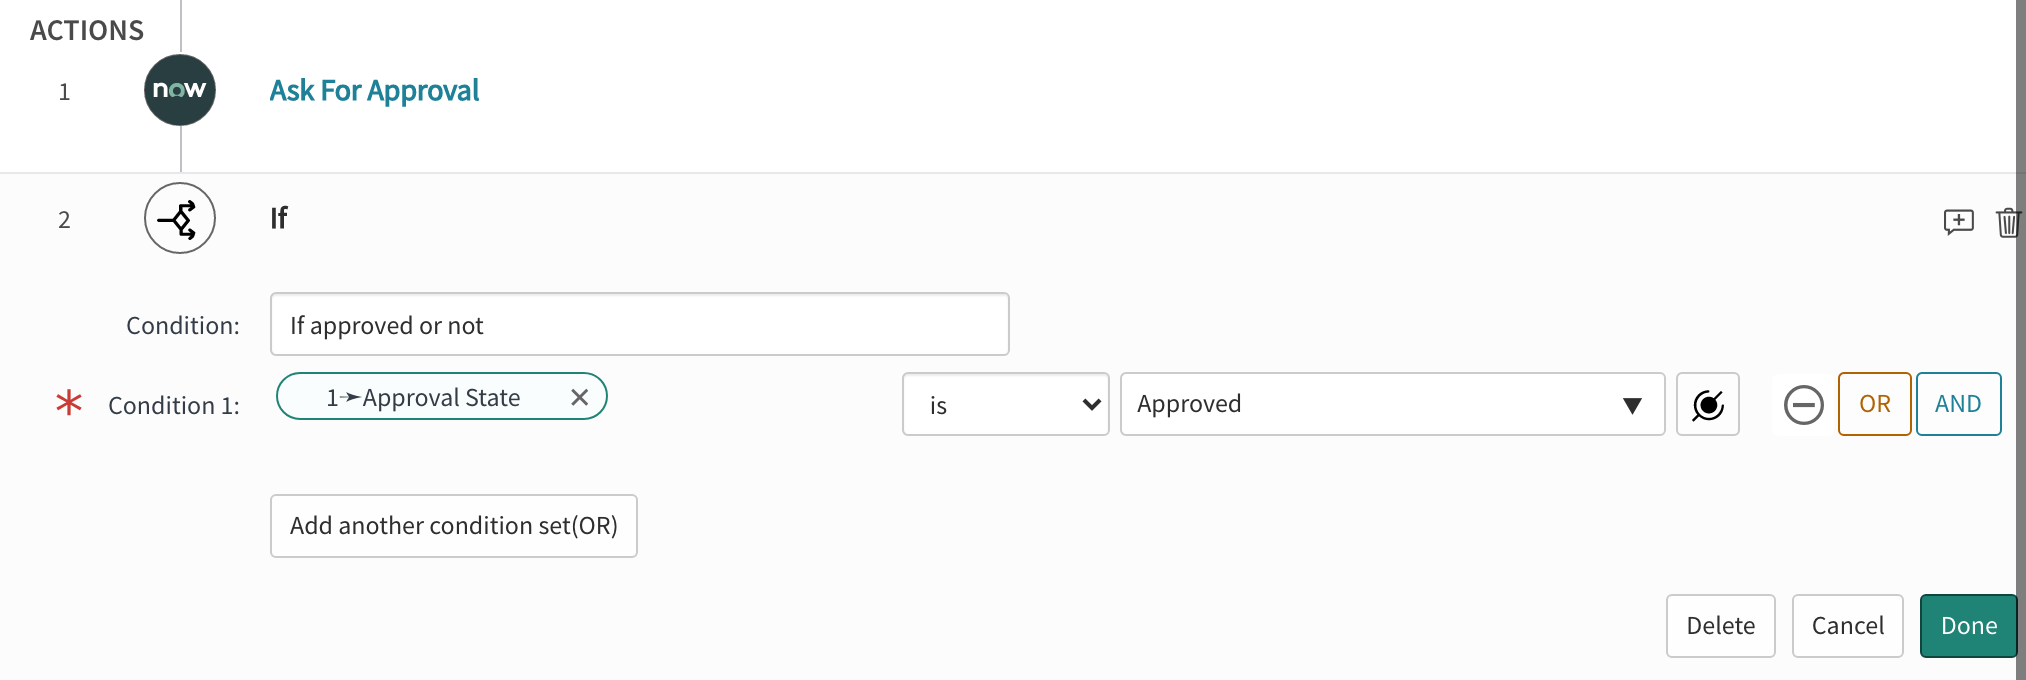
A ServiceNow if condition configured for change request approvals.
- Add two “Update Change Request Record” Actions as extensions of the
ifcondition.
- Set the first Action to “Update Record” with “State” “Scheduled” on the latest version of the triggering Change Request Record.
- Set the second Action to “Update Record” with “State” “Implement” on the latest version of the triggering Change Request Record.
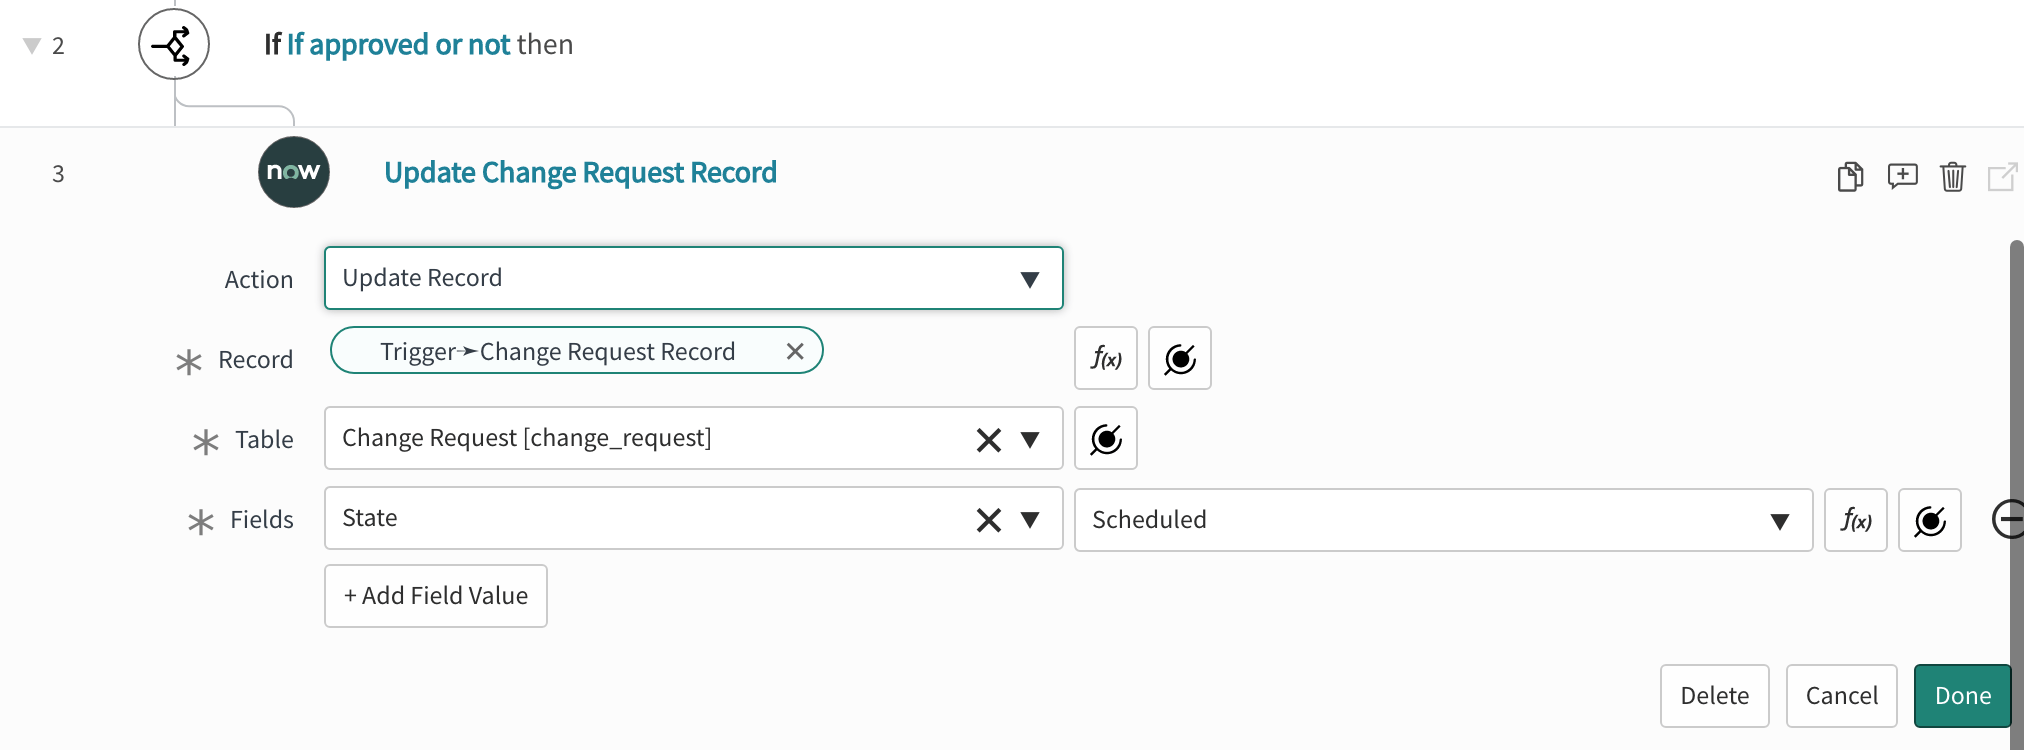
A ServiceNow update change request record action that moves the "State" to "Scheduled."
- As an extension of the
elsecondition, add an “Update Change Request Record” Action that moves the “State” to “Canceled.” LaunchDarkly uses this state to determine that the approval request has been rejected.
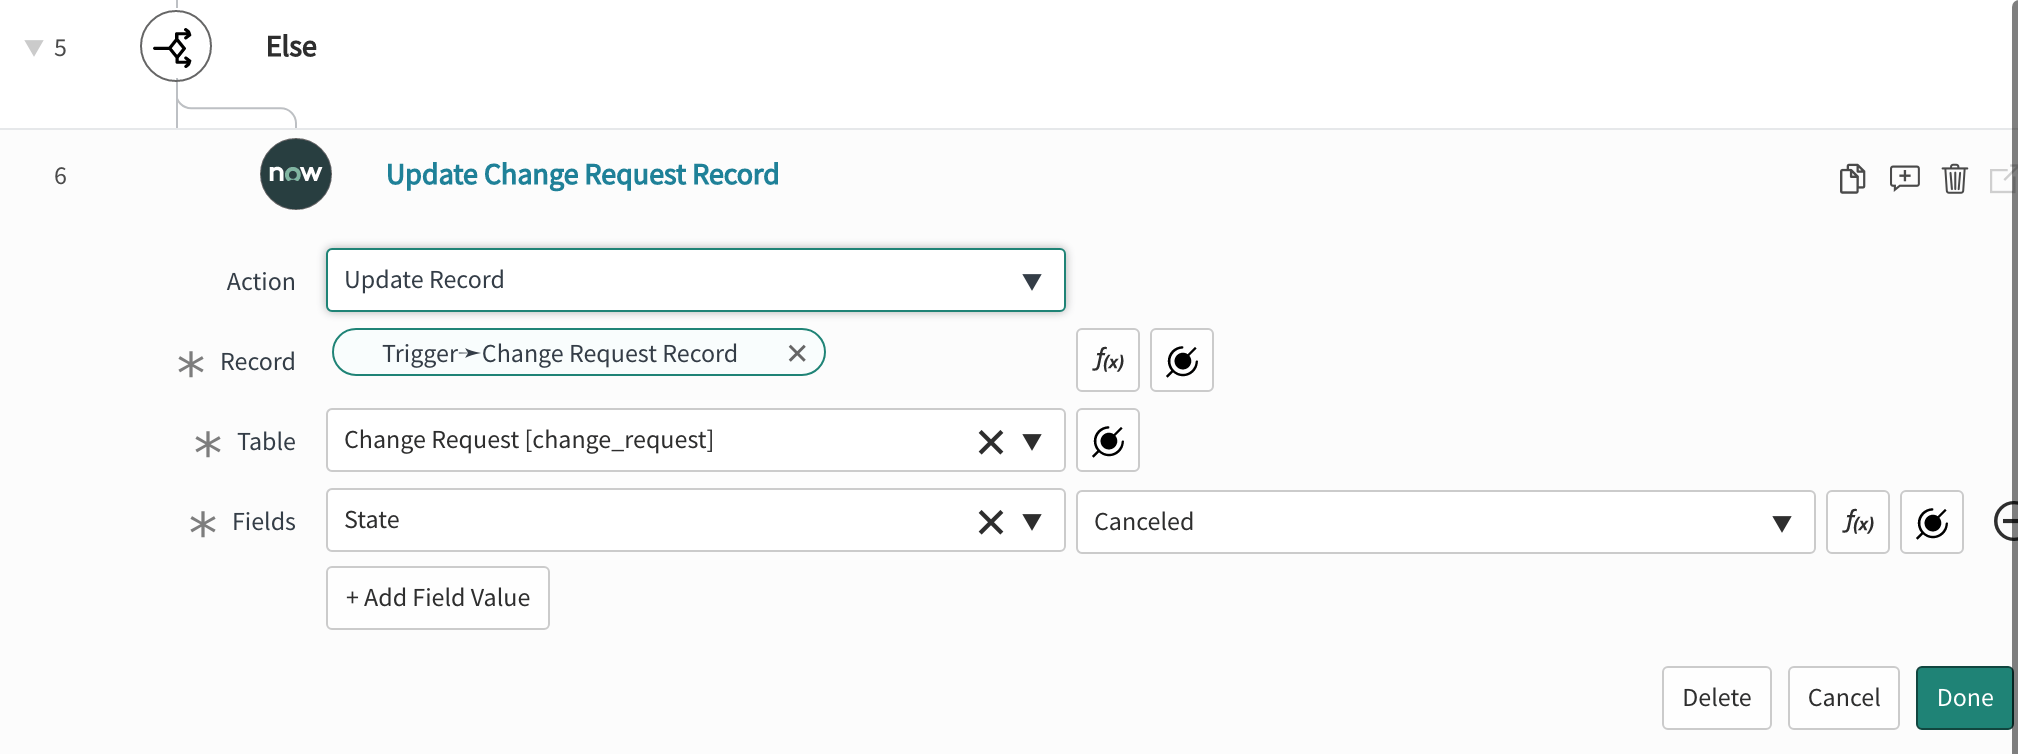
A ServiceNow update change request record action that moves the "State" to "Canceled."
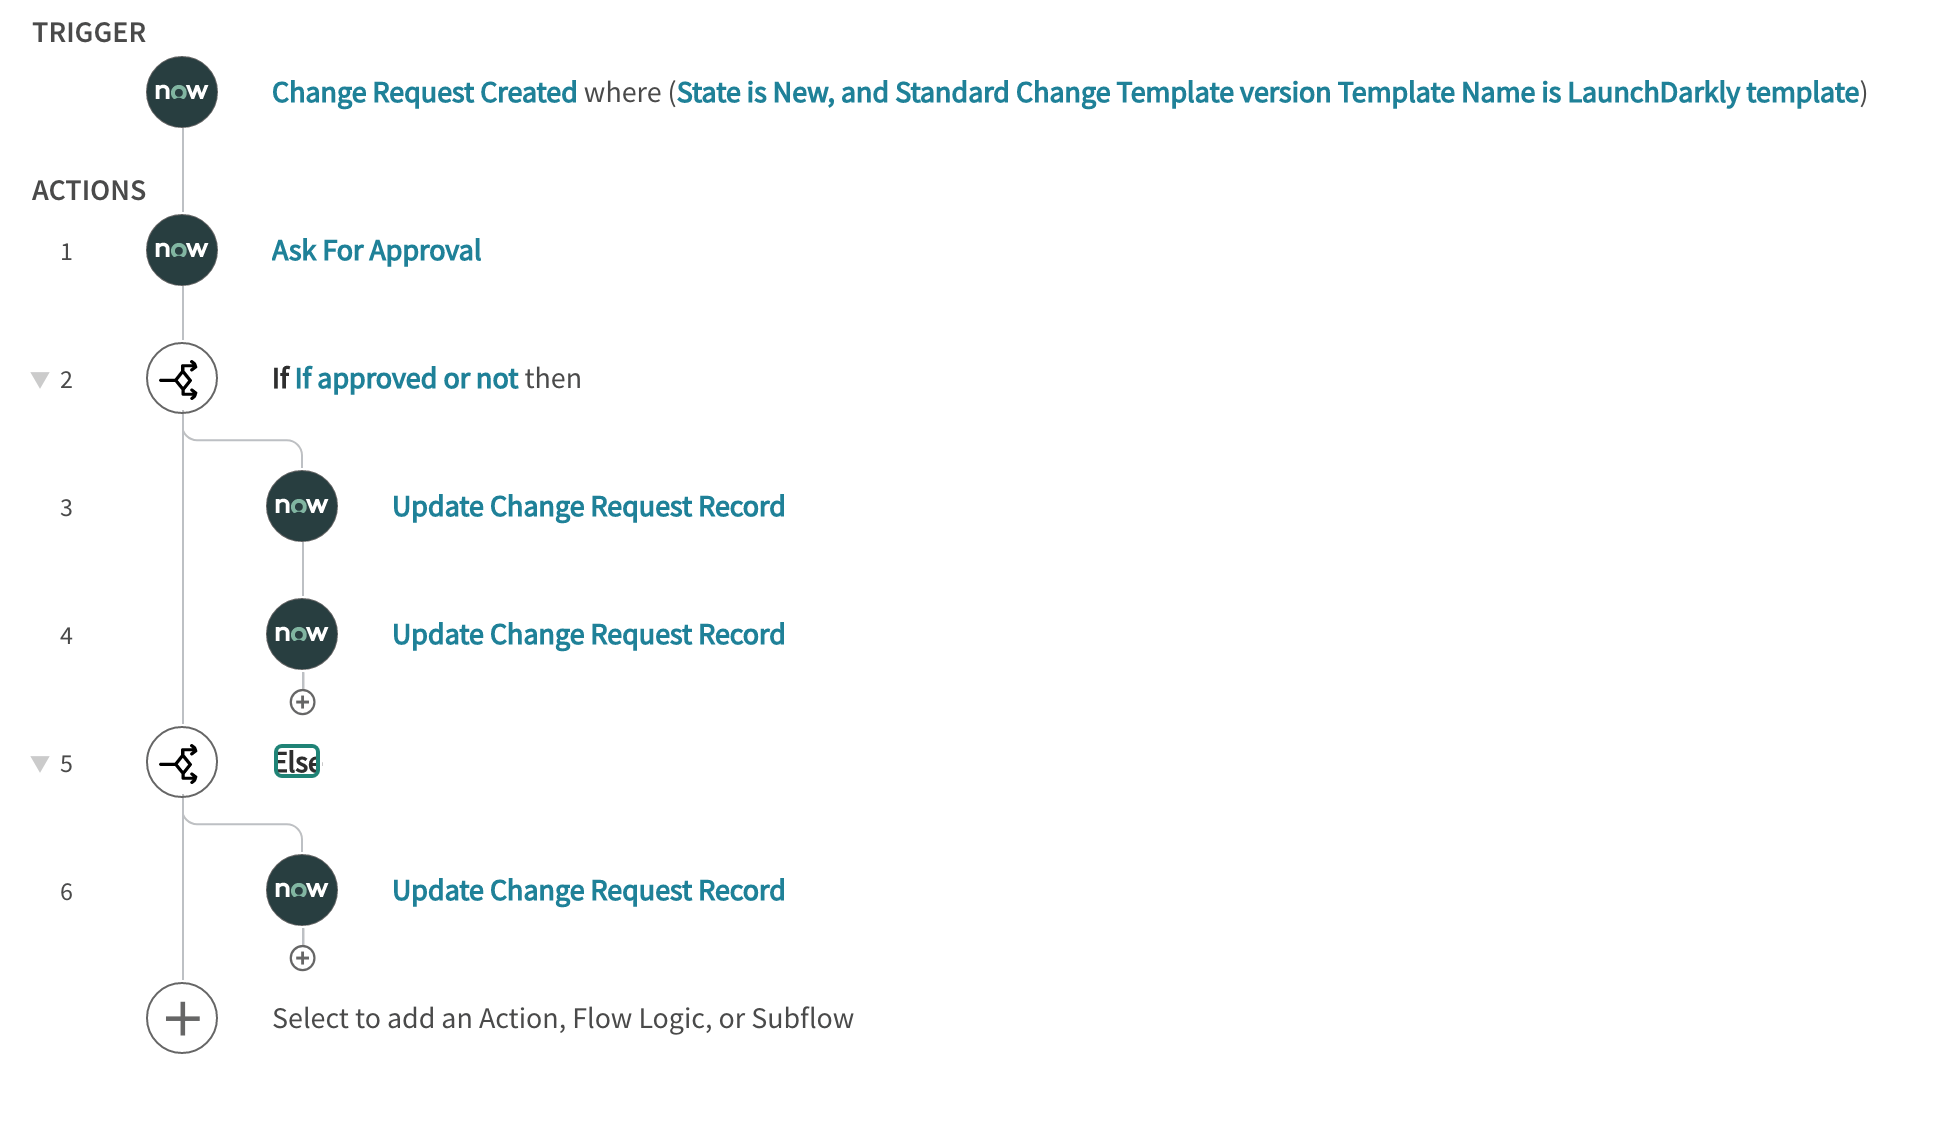
A complete ServiceNow workflow for LaunchDarkly manual flag approvals.
Create a LaunchDarkly workflow in ServiceNow for automatic approvals
Automatic approval workflows create a correlating ServiceNow Change Request for any LaunchDarkly flag or experiment changes. Automatic approvals are for record-keeping only and no actual approval is requested. Automatic approval workflows resemble manual approval workflows but without the approval Action. To create an automatic approval workflow:- Create a new Workflow Trigger for record “Created” on the “Change Request [change_request]” table. To learn how to do this, search for “Create Security Operations workflow triggers” in ServiceNow’s documentation and choose the article for your ServiceNow version.
- Set two conditions on your trigger:
- “State”
is“New” - “Standard Change Template version,” “Template,” “Name”
is“LaunchDarkly auto-approve template”
A Workflow Trigger in the ServiceNow Flow Designer.
- Add two “Update Change Request Record” Actions as extensions of the
ifcondition. - On the first Action, set the Action to “Update Record” on the latest version of the triggering Change Request Record. Set “State” to “Scheduled.”
- On the second Action, set the Action to “Update Record” on the latest version of the triggering Change Request Record. Set “State” to “Implemented.”
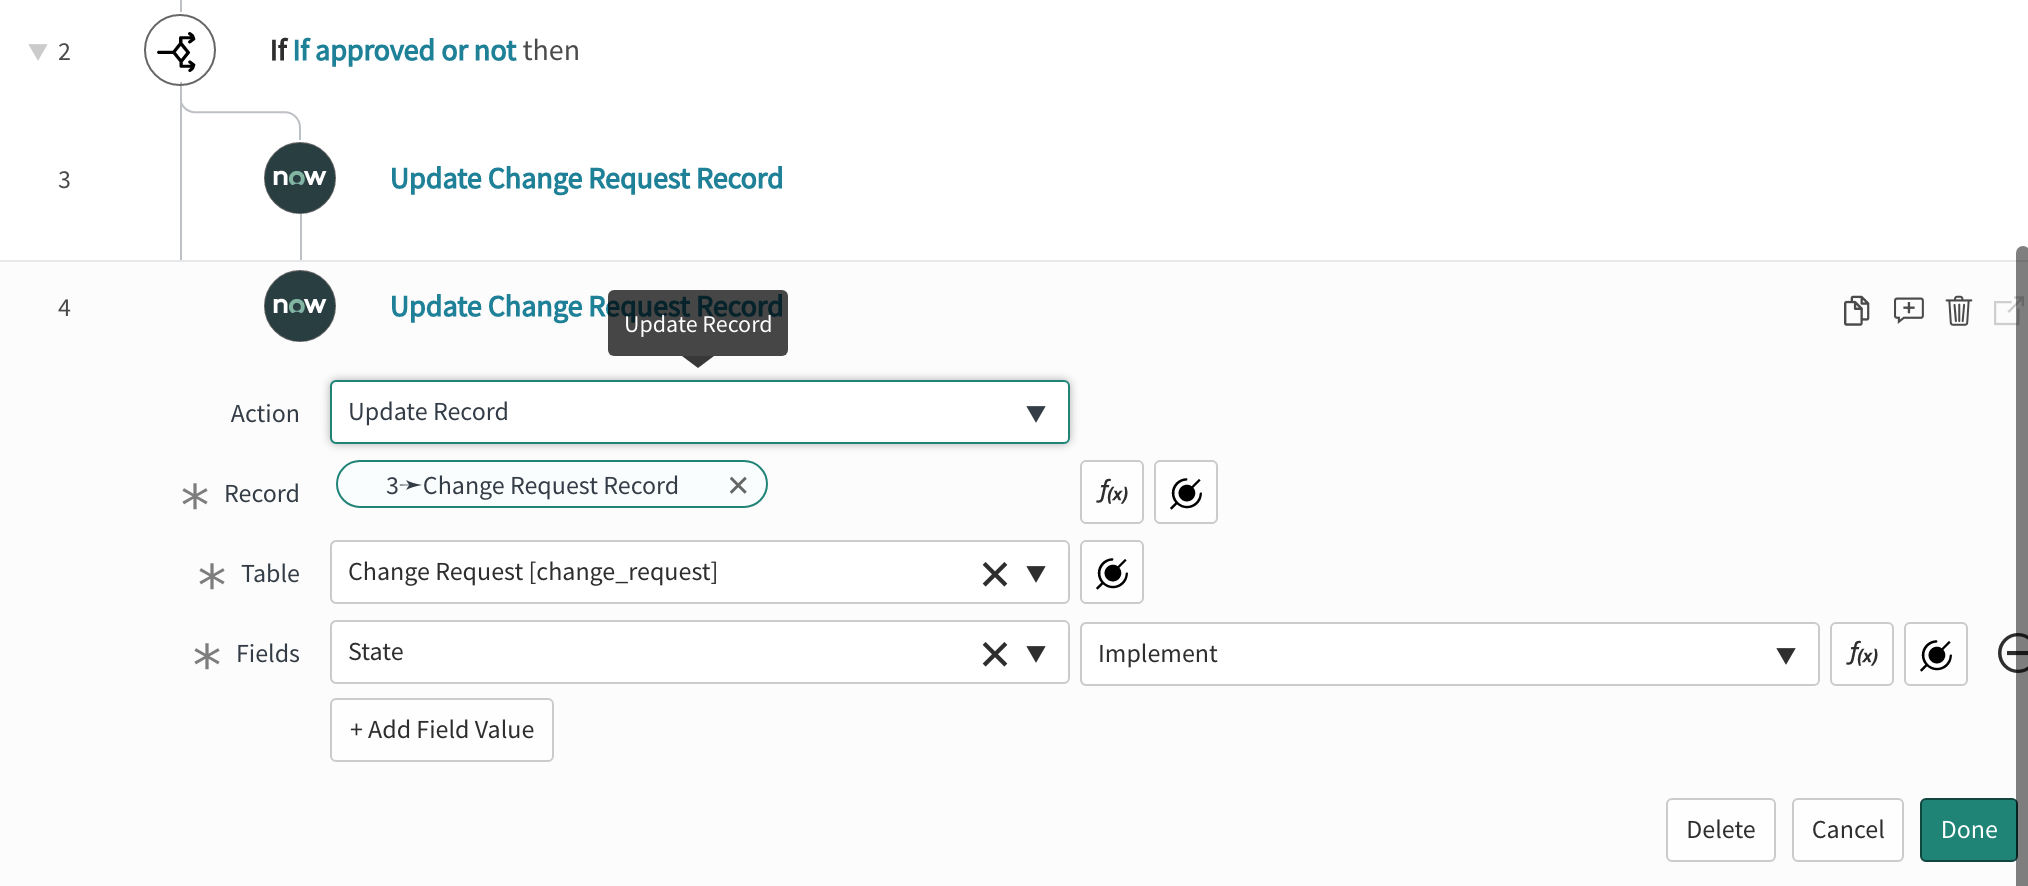
A ServiceNow update change request record action that moves the "State" to "Implemented."
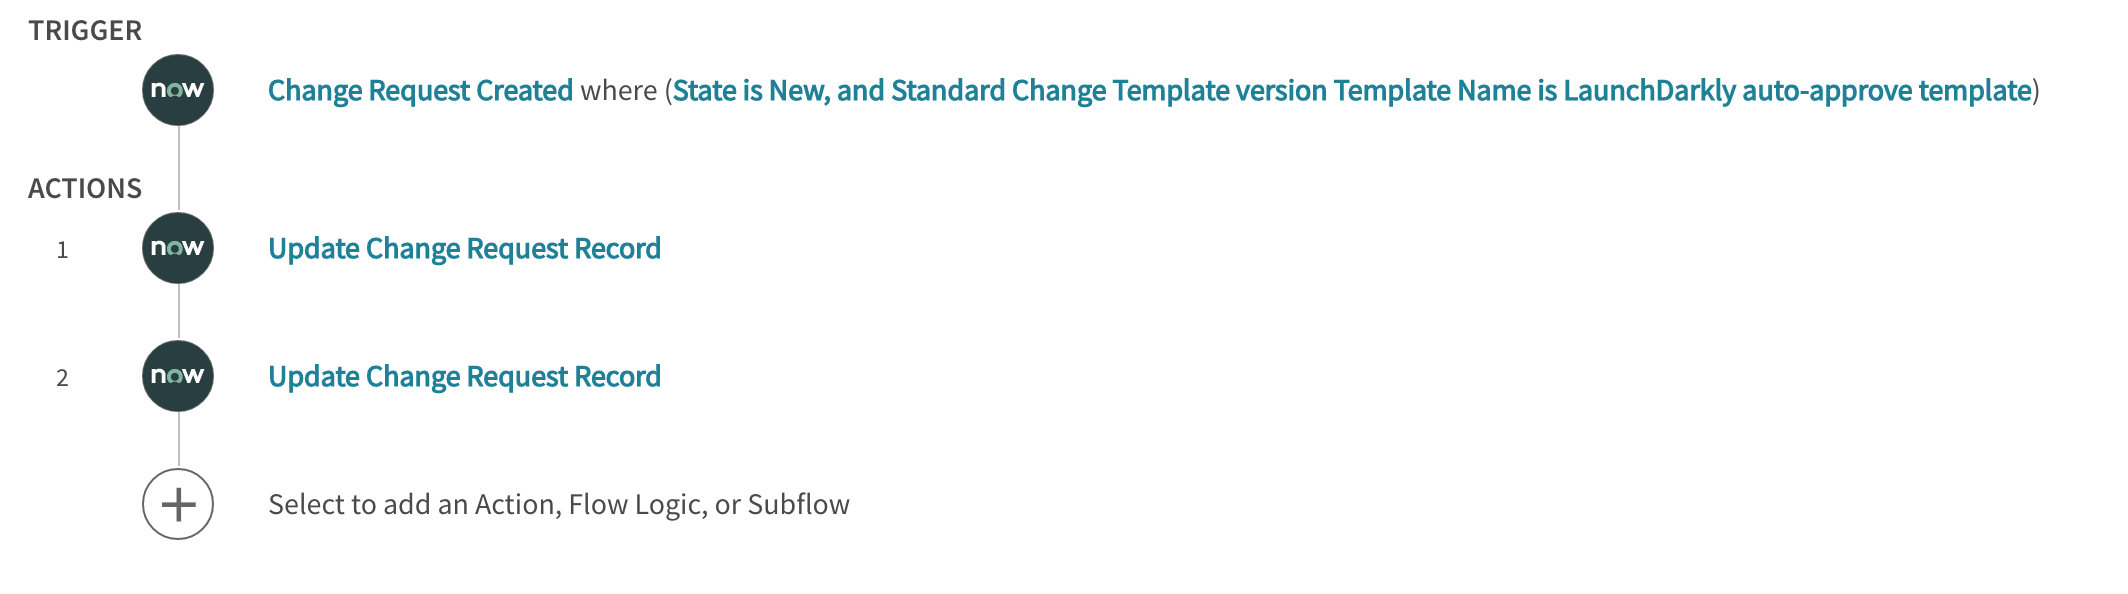
A completed ServiceNow workflow for LaunchDarkly "automatic" approvals.