

Attention: EU CustomersRead the EU documentation for instructions on using this integration with the LaunchDarkly European Union (EU) instance.
Prerequisites
To complete this procedure, you must have the following prerequisites:- The “LaunchDarkly for Jira” app from the Atlassian Marketplace in your Jira Cloud instance.
- A personal or service API access token. To learn more, read API access tokens.
Set up the Jira integration
To set up the Jira integration, you must complete the following steps:- Give your API access token the required permissions:
- Configure the LaunchDarkly integration in Jira with the API access token.
Give your API access token the required permissions
You can create a role with appropriate permissions, then add the role to a personal or service access token, or you can add the Writer base role to your personal access token.Create a role and add it to an API access token
Expand Create a role and add it to an API access token
Expand Create a role and add it to an API access token
Service tokens and creating your own roles are available to customers on select plansService tokens and creating your own roles are only available to customers on select plans. To learn more, read about our pricing. To upgrade your plan, contact Sales.
- Click the gear icon to view Organization settings. The General settings page appears.
- Click Roles.
- Click New role. The “New role” page appears.
- Enter a human-readable Name for the role.
- Enter a Key for the role.
- (Optional) Enter a Description to explain what the role does.
- In the “Edit policy” section, click View JSON to open the advanced editor.
- Enter this policy in the “Editor” field:
- Click Create role.
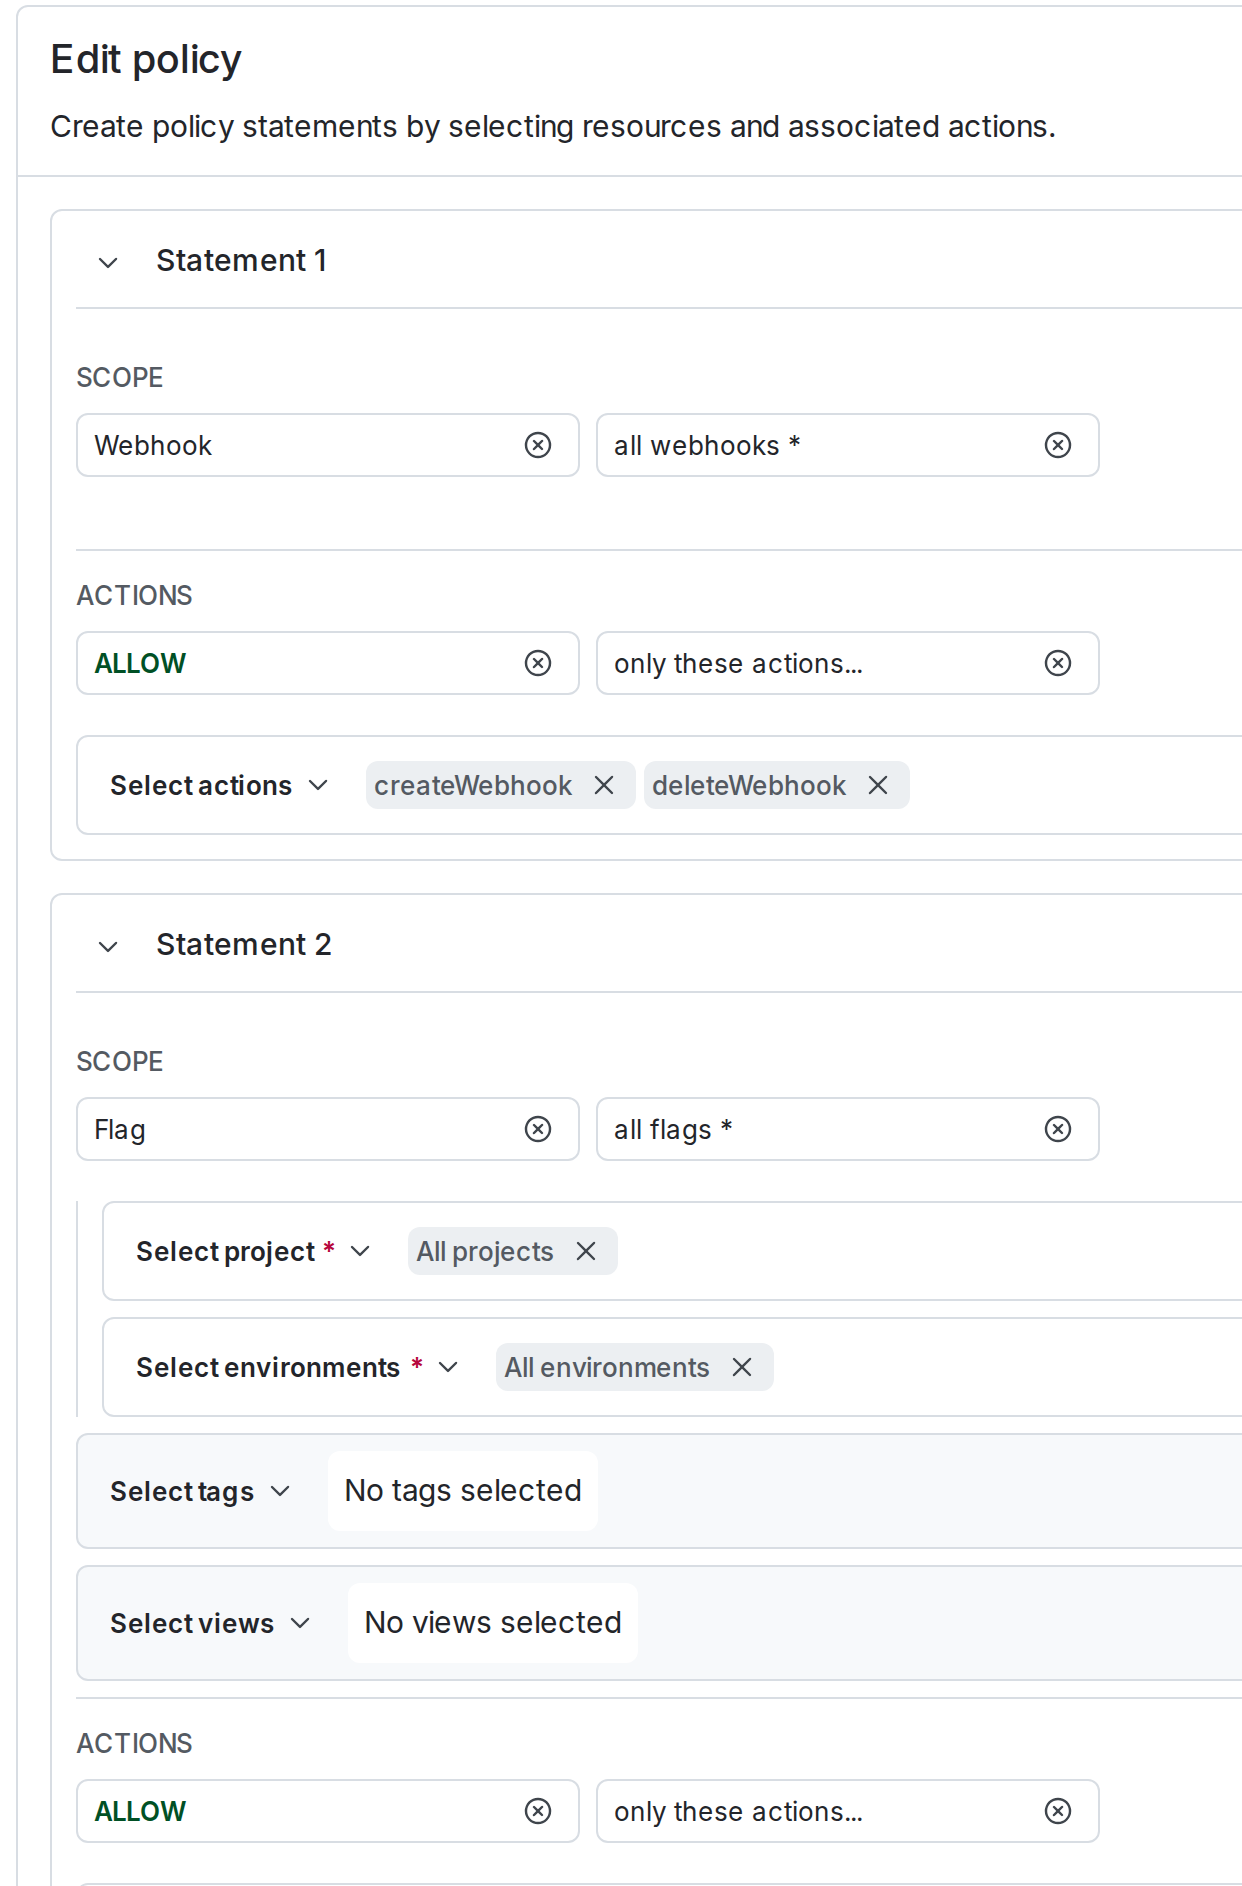
An access token's role configured to grant access to webhooks and flag links.
This means that the Jira integration can only do the following:
- Create, update, and delete flag links: This allows the Jira integration to update the links section of the feature flag to provide a link back to the Jira issue.
- Show all of your organization’s LaunchDarkly projects: This is a necessary permission to allow the Jira integration to take any action in your LaunchDarkly project.
- Create and delete integrations: This is a necessary permission to allow the Jira integration to be uninstalled.
- Click the gear icon to view Organization settings. The General settings page appears.
- Click Authorization.
- Find the API access token you want to add permissions to and select “Edit token” from its overflow menu. The “Edit” dialog appears.
- Select “Custom” from the Role menu.
- Check the checkbox next to the role you just created.
- Click Save token.
Add the Writer role to your personal access token
Expand Add the Writer role to your personal access token
Expand Add the Writer role to your personal access token
To add the Writer base role to a personal access token:
- Click the gear icon to view Organization settings. The General settings page appears.
- Click Authorization.
- Find the personal access token you want to add permissions to and select “Edit token” from its overflow menu. The “Edit” dialog appears.
- Select “Writer” from the Role menu.
- Click Save token.
Configure the LaunchDarkly integration in Jira
Use your access token to configure the Jira integration for your LaunchDarkly account.- Navigate to your Jira instance’s app management page, and click the Configuration button for the LaunchDarkly app. The “Configure LaunchDarkly Integration” screen appears.
- Set your API access token.
- Select which environments the app tracks for each of your LaunchDarkly projects. By default, the app tracks your critical environments.
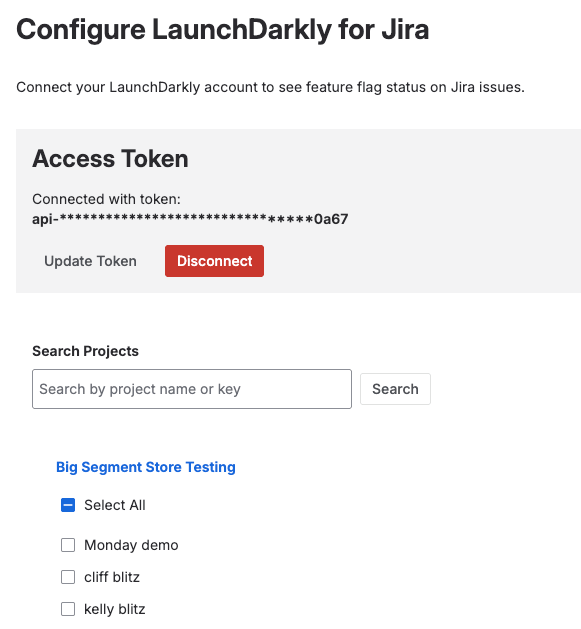
The Jira configuration screen.
Enable the release panelThe Jira issue view, which contains the release panel, is a per-user setting. If it is off, the release panel does not appear. To learn more, read Jira’s documentation.
Create a new feature flag from a Jira issue
To create a new flag with Jira issues:- Navigate to your Jira issue’s feature flag panel.
- In the “Details” section, click Add feature flag.
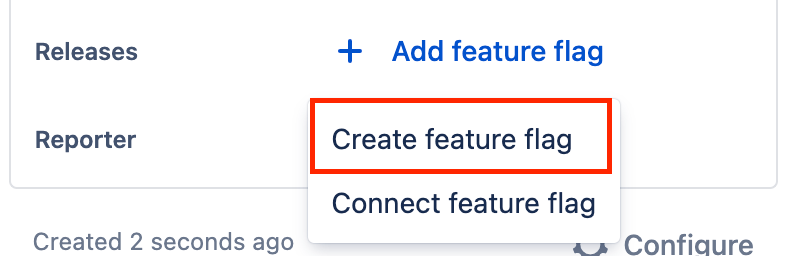
The "Releases" menu with the "Create feature flag" option called out.
- Select “Create feature flag.” The LaunchDarkly “Create a feature flag” panel appears with the Jira issue pre-populated.
- Finish configuring your flag and click Save flag.
Feature flag information may take time to appear in JiraIt can take up to 20 minutes for flag status and targeting changes to appear in your Jira issue.
Connect an existing feature flag to a Jira issue from LaunchDarkly
If you have already created a feature flag for your Jira issue, you can add a Jira issue to your existing flag by creating a custom property for your flag. To create a custom property:- Navigate to the Flags list and open the flag you want to add a custom property to.
- Click the three-dot overflow menu.
- Select Add custom property.
- Select “Jira issues” as the Type.
- Enter a list of Jira issue keys in the Values field. You can list multiple issues if applicable.
- Click Save.
Feature flag information may take time to appear in JiraIt can take up to 20 minutes for flag status and targeting changes to appear in your Jira issue.
View a flag’s status in a Jira issue
To view a flag’s status in a Jira issue:- Navigate to your Jira issue’s feature flag panel.
- In the “Details” section, click on the name of the feature flag. A dialog with a Feature flags tab appears:
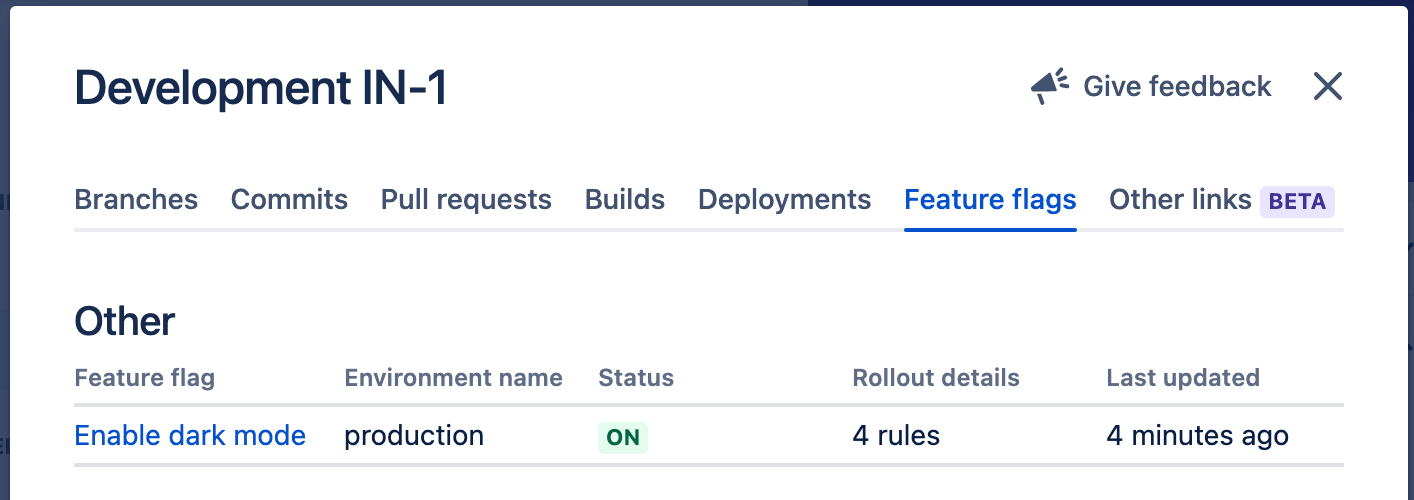
The "Feature flags" tab of a Jira issue displaying the flag's information and status.
Using Jira Query Language (JQL) to search for Jira issues with feature flags
You can use JQL to query for Jira issues that are connected to feature flags. To learn more about JQL, read Atlassian’s documentation.Remove a feature flag from a Jira issue
To remove a flag from a Jira issue:- Navigate to the Flags list and open the flag you want to remove an issue from.
- Click the x on the Jira issue custom property you want to remove in the “Jira issues” section.
- Click Save.
Create Jira issues from observability data
You can create Jira issues directly from alerts and errors in LaunchDarkly observability. For alerts, you can create issues on demand or automatically every time the alert triggers. For errors, you create issues on demand. When you create an issue, LaunchDarkly files a ticket in your connected Jira Cloud project and links it back to the observability data that prompted it. Your team can track remediation work in Jira without leaving the context of the alert or error. To create Jira issues from observability data, you need the following:- The Jira Cloud integration configured using Jira Forge, as described earlier in this topic. Issue creation is not available with the older Jira Connect integration. To learn more, read Migrating to Jira Forge.
- A role with the
createJiraIssueaction for the alert resource. To learn more, read Alert actions. - LaunchDarkly observability enabled for your project. To learn more, read Observability.
Create a Jira issue from an alert
When an observability alert surfaces a problem in your application, you can open a Jira issue to track the work to resolve it. To create a Jira issue from an alert:- Open the Telemetry section and navigate to the Alerts list.
- Click the alert for which you want to create an issue. The alert details page appears.
- Open the actions menu and select Create Jira issue. The “Create Jira issue” dialog appears.
- Select a Project. This is the Jira project where the issue will be created.
- Select an Issue type, such as “Bug” or “Task.”
- Review the Description. LaunchDarkly pre-populates a link back to the alert in LaunchDarkly Observability. Edit the description to add more detail if you want.
- Click Create issue.
Create Jira issues automatically from alerts
You can add Jira as a notification destination for an observability alert instead of creating issues one at a time. Each time the alert enters an alert or warning state, LaunchDarkly creates a Jira issue using the project and issue type you select. To add Jira as an alert notification destination:- Open the Telemetry section and navigate to the Alerts list.
- Find the alert you want to add the destination to, then select Edit alert from its three-dot overflow menu. The “Edit” page appears.
- Click + Add notification.
- Select Jira as the notification destination.
- Select the Project where LaunchDarkly creates the issues.
- Select an Issue type, such as “Bug” or “Task.”
- Click Save.
observability and alert labels to the issue.
LaunchDarkly creates a Jira issue only when an alert enters an alert or warning state. It does not create an issue when an alert resolves or when you create or update the alert’s configuration. If issue creation fails, LaunchDarkly still sends the alert’s other notifications, such as member, Slack, and webhook notifications.
To learn more about alert notifications, read Alerts.
Create a Jira issue from an error
You can also create a Jira issue from an observability error to track the work to fix it. To create a Jira issue from an error:- Open the Telemetry section and navigate to the Errors list.
- Click the error you want to create an issue for. The error details page appears.
- Open the actions menu and select Create Jira issue. The “Create Jira issue” dialog appears.
- Select a Project. This is the Jira project where the issue will be created.
- Select an Issue type, such as “Bug” or “Task.”
- Review the Description. LaunchDarkly pre-populates a link back to the error in LaunchDarkly observability. Edit the description to add more detail if you want.
- Click Create issue.