

- Constant alerts trigger when a metric crosses a value threshold you define (for example, error count above 100).
- Anomaly alerts trigger when LaunchDarkly detects unusual behavior or patterns in your observability data.
- Member notifications send an email to each LaunchDarkly member added to the alert notification. If you have configured the LaunchDarkly Slack app, member notifications are also sent through Slack.
- Slack notifications send alert notifications to configured Slack channels.
- Jira notifications create an issue in a Jira Cloud project each time the alert enters an alert or warning state. To learn more, read Send alert notifications to Jira.
-
Webhook notifications send alert messages to one or more URLs. When the alert trigger condition occurs, LaunchDarkly sends a POST request to configured URLs using a message of the following format:
Payloads for constant alerts also include
ThresholdConditionandConditionfields, which describe the threshold comparison the alert uses. To learn more about the available comparisons, read Constant alert configuration. Webhook destinations in some projects receive an expanded payload with additional notification metadata. To learn more, read Alert webhook payload versions.
Prerequisites
To use alerts in LaunchDarkly, you must enable observability features to instrument logs, traces, sessions, errors, product analytics events, or observability metrics. To learn more, read Observability. To configure Slack notifications for alerts:- Install the LaunchDarkly Slack app.
- Sign in to LaunchDarkly using the
/launchdarkly accountSlack command.
View alerts
All configured alerts appear as entries on the main Alerts page in the Telemetry section. Each row of the Alerts table shows the alert name, status, configured notification types, and a condensed graph of alert activity.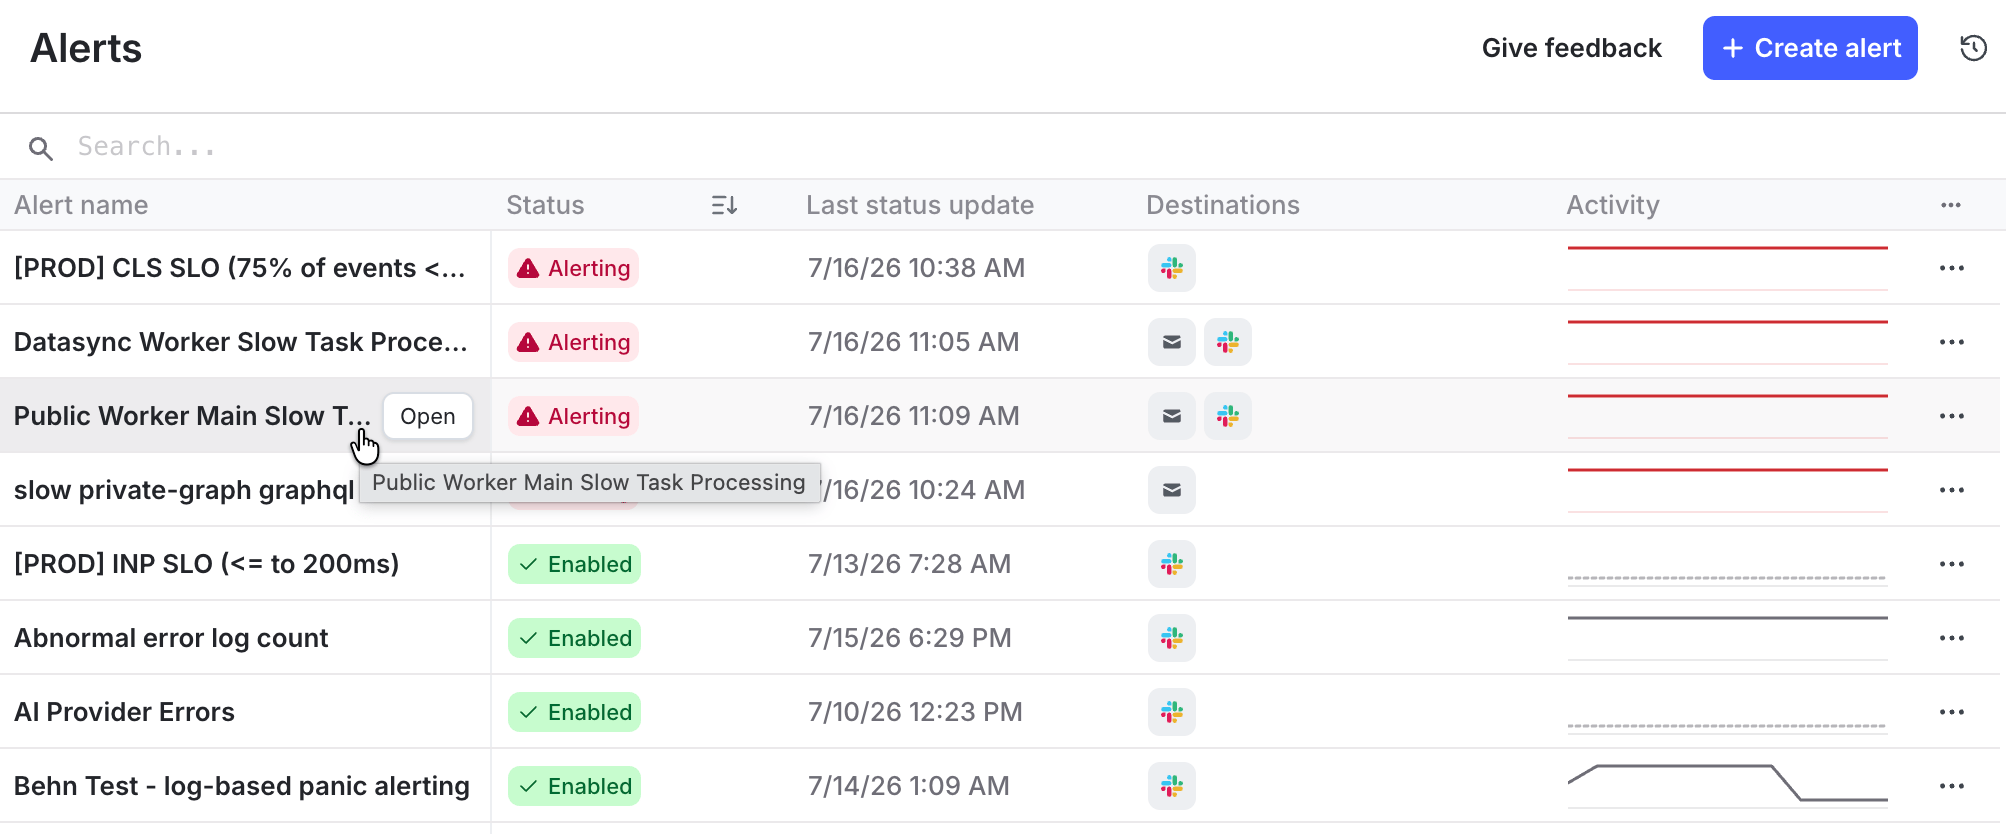
The Alerts table.
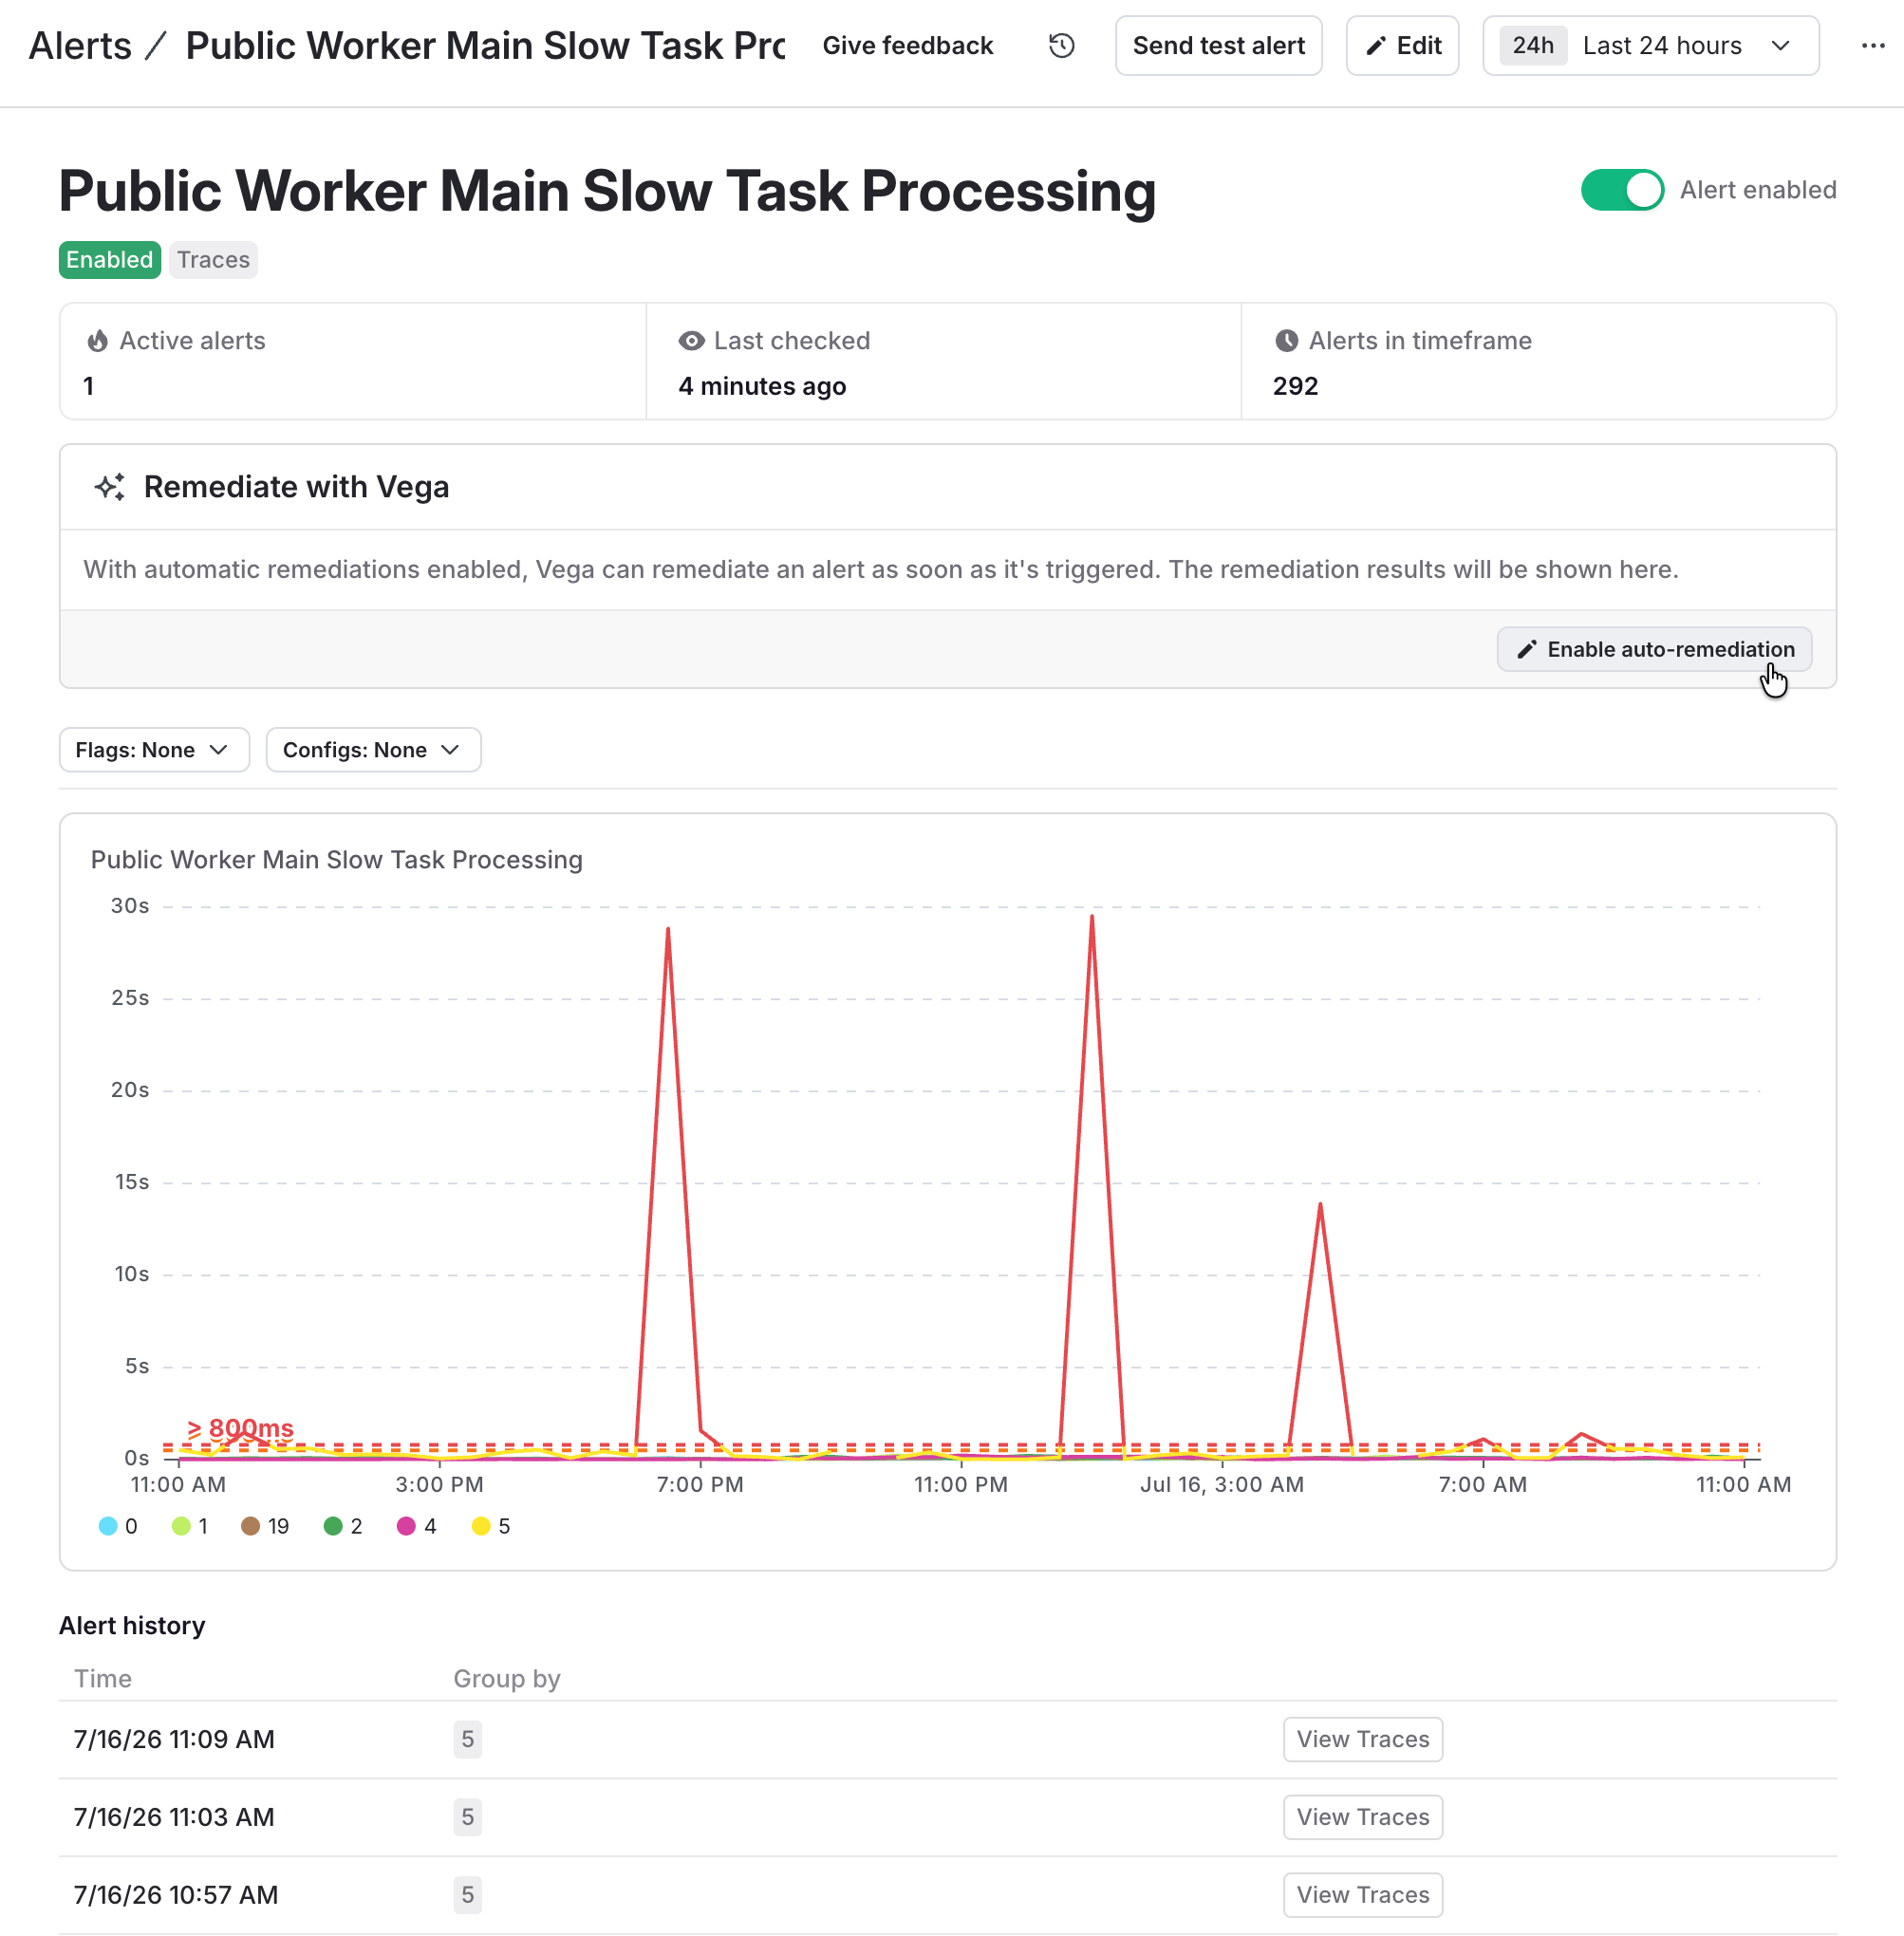
The alert detail page.
service_name, that alert appears in the Alerts tab for the matching service. To learn more, read Service details.
Create an alert
To add a new alert based on your LaunchDarkly observability data:- Open the Telemetry section and navigate to the Alerts list.
- Click Create alert.
- Enter an Alert title.
-
Select a Source to query. You can add alerts based on data from any of the following:
- logs
- traces
- sessions
- errors
- events
- observability metrics
Alert events come from session replayIn the alert configuration, “events” refer to track, click, and navigate events that occur in a session replay. -
(Optional) Click Add filter to filter data points from your selected source before aggregating. For example, if you only want to generate alerts from data in the production environment, add a filter for the
environmentattribute that matches your production environment. To learn how to add filters, read Build queries with the query builder. - (Optional) Select a Function from the menu to aggregate the source data. If you choose a function that requires a parameter, such as “Min,” select the attribute to use as well. Functions are not available for all sources.
-
(Optional) Click Group by and select an attribute to use for grouping your query results into separate series. For example, you might group your log results by
level. Grouping is not available for all sources. - Use the Type menu in the Triggers section to choose the type of trigger that generates the alert: Constant (threshold-based) or Anomaly (detects unusual patterns in your data).
- Configure the alert conditions based on the trigger type you selected. To learn more, read Constant alert configuration or Anomaly alert configuration.
- (Optional) Use the Notifications section to customize the markdown message associated with alert notifications. Use the Variables menu to insert variables that correspond to alert configuration options, such as the threshold or cooldown settings.
- (Optional) Click + Add notification and select the destinations for notifications when the threshold is met or an anomaly is detected.
-
(Optional) If you have enabled Vega, click the Auto remediation toggle to enable automatic investigation after the trigger condition creates an alert. Then configure optional investigation options as necessary:
- Investigation cooldown: Enter the amount of time to wait before subsequent investigations start for the same alert.
- Agent mode: Select Read-only to have Vega analyze your observability data to find the underlying issue, or Agent to also let Vega create GitHub pull requests that address the problem. Agent requires a connected GitHub account. To learn more, read Vega agent.
- Custom context: Add natural-language instructions to use as context when remediating this alert.
- Click Save.
Constant alert configuration
Follow these steps to trigger an alert using a constant threshold:- Select a comparison from the Condition menu to configure how LaunchDarkly compares the observed value to your threshold. The available conditions are:
- Above: The observed value is greater than the threshold.
- Above or equal to: The observed value is greater than or equal to the threshold.
- Below: The observed value is less than the threshold.
- Below or equal to: The observed value is less than or equal to the threshold.
- Equal to: The observed value matches the threshold exactly.
- Not equal to: The observed value is any value other than the threshold.
- Enter the numerical value for the Alert threshold.
- (Optional) Click + Warning threshold to define an alternative threshold value that generates a warning rather than an alert. Warning thresholds are not supported with the Equal to or Not equal to conditions.
- (Optional) Click ^ Advanced threshold settings to configure any of the following settings:
- Alert window: Select the time range during which data points are searched and aggregated. Shorter windows can help if you need to be alerted quickly about an issue, while longer windows can help reduce noise by aggregating across a longer time range.
- Cooldown: Select the amount of time that must pass after an initial notification, before LaunchDarkly generates an additional notification for the event. If the alert condition still exists after the cooldown, LaunchDarkly sends another notification.
- Evaluation delay (min): Enter the number of minutes to delay evaluating the alert after the alert window closes. Using an evaluation delay helps you to capture relevant alert data that may arrive late from the configured event source. The configuration panel shows a caution icon when data from the selected source has been received with regular delays. Hover on the icon to view a percentile breakdown of delay durations.
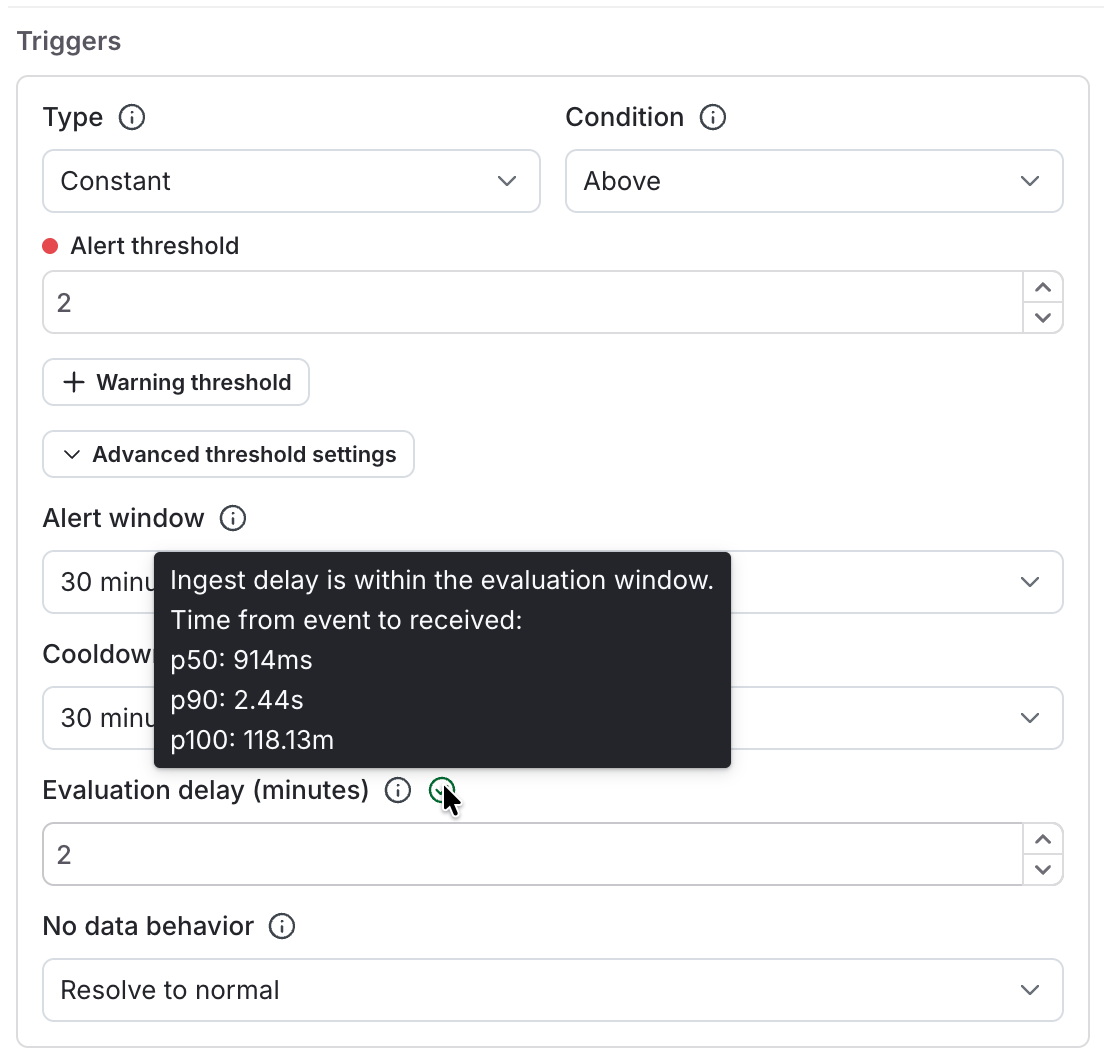
The configuration panel for a constant alert, showing ingest delay.
Anomaly alert configuration
Follow these steps to trigger an alert with an anomaly threshold:- Select Above or Below from the Condition menu to configure whether LaunchDarkly generates an alert when conditions are observed above or below your threshold.
- Set the Alert threshold to the confidence level of the anomaly prediction (a higher confidence is more likely to be an anomaly).
- (Optional) Click ^ Advanced threshold settings to configure any of the following settings:
- Alert window: Select the time range during which data points are searched and aggregated. Shorter windows can help if you need to be alerted quickly about an issue, while longer windows can help reduce noise by aggregating across a longer time range.
- Cooldown: Select the amount of time that must pass after an initial notification, before LaunchDarkly generates an additional notification for the event. If the alert condition still exists after the cooldown, LaunchDarkly sends another notification.
- Evaluation delay (min): Enter the number of minutes to delay evaluating the alert after the alert window closes. Using an evaluation delay helps you to capture relevant alert data that may arrive late from the configured event source. The configuration panel shows a caution icon when data from the selected source has been received with regular delays. Hover on the icon to view a percentile breakdown of delay durations.
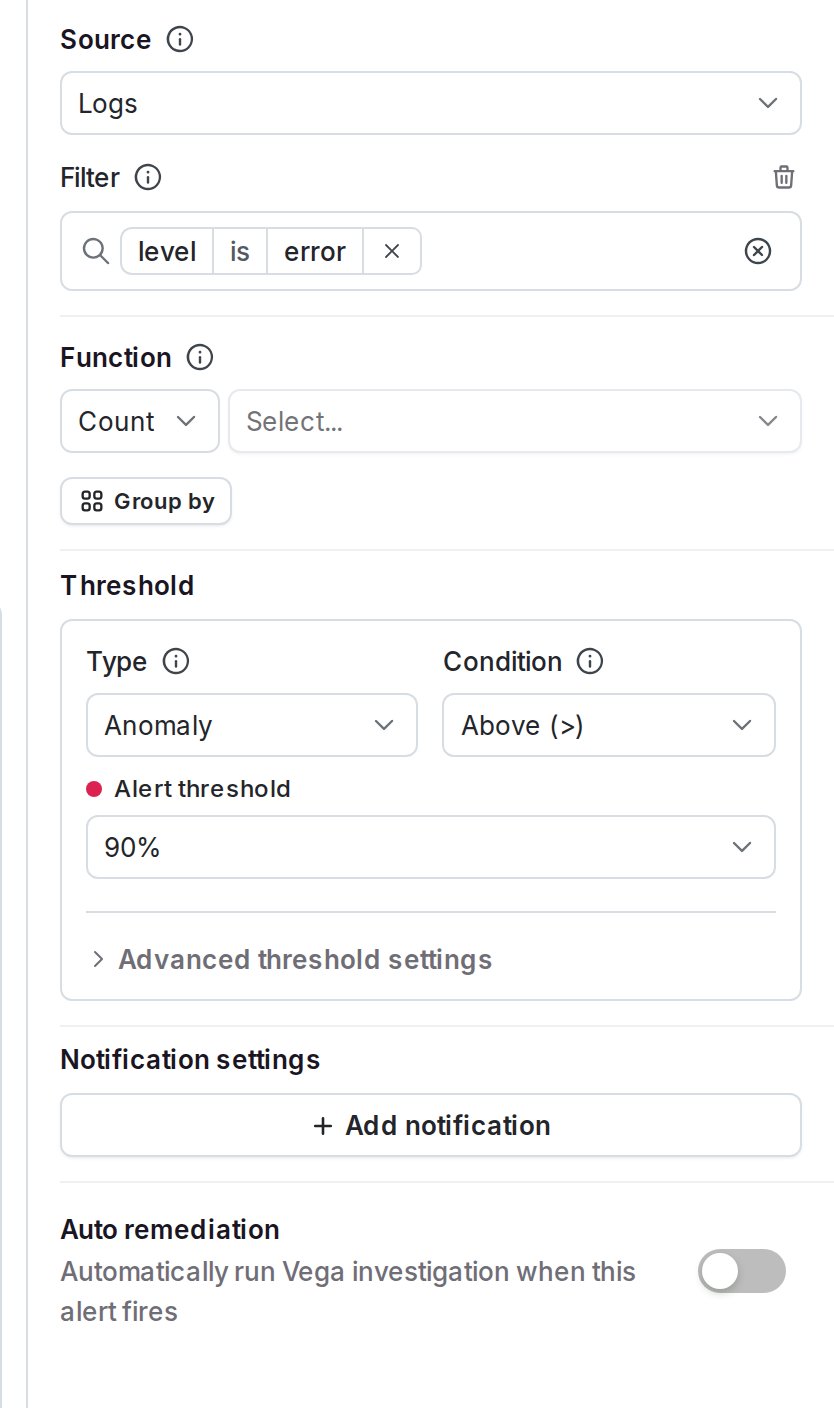
The configuration panel for an anomaly alert.
How anomaly detection works
LaunchDarkly anomaly detection uses the Prophet time series forecasting algorithm. The algorithm models recent historical data from the alert window, separating trends and seasonality to account for recurring patterns, such as daily and weekly traffic cycles. The model produces a prediction interval with a width that matches the confidence level you configure. LaunchDarkly triggers an alert when the most recent observed value falls outside this interval.Manage alerts
You can manage individual alerts from the Alerts list.Edit an alert
To change the configuration for an alert:- Navigate to Alerts in the left sidebar. A list of all alerts appears.
- Find the alert you want to edit, then select Edit alert from its three-dot overflow menu. The “Edit” page appears.
- Update the alert configuration as necessary.
- Click Save.
Enable or disable an alert
To enable or disable a configured alert:- Navigate to Alerts in the left sidebar. A list of all alerts appears.
- Find the alert you want to enable or disable, then select Enable alert or Disable alert from its three-dot overflow menu.
Delete an alert
To delete an alert:- Navigate to Alerts in the left sidebar. A list of all alerts appears.
- Find the alert you want to delete, then select Edit alert from its three-dot overflow menu. The “Edit” page appears.
- Click Delete alert.
Audit alerts with Vega
If you have enabled Vega, you can ask it to review every alert in a project at once and report which ones still do useful work. Vega bases its answer on each alert’s firing history, rather than on the alert configuration alone. For example, you could try asking:Which of my alerts are stale?or
Which alerts notify nobody?Vega returns every alert in the project with one of the following statuses:
- Active: The alert fired recently.
- Stale: The alert is turned on, but it has not fired recently.
- Never fired: The alert is turned on, but it has not fired at all within the history Vega examined.
- Disabled: The alert is turned off and does not send notifications.
- Unknown: Vega cannot determine the alert’s firing history.
Create a Jira issue from an alert
If your account uses the Jira Cloud integration, you can create a Jira issue directly from an alert to track the work to resolve it. To learn how, read Create a Jira issue from an alert.Send alert notifications to Jira
If your account uses the Jira Cloud integration, you can add Jira as a notification destination for an alert. Each time the alert enters an alert or warning state, LaunchDarkly creates a Jira issue using the project and issue type you choose. Each Jira issue includes a link back to the alert that generated it. Your team gets a ticket to work from without opening one by hand. Each issue that LaunchDarkly creates includes the following:- A title of “[Alert]” followed by the alert name.
- A description containing the product, project, value, group, and query for the alert, along with a link back to the alert in LaunchDarkly.
- The labels
observabilityandalert.
Alert webhook payload versions
LaunchDarkly sends alert webhook notifications in one of two payload versions. Version 2 contains every field that version 1 contains, plus notification metadata and absolute product links. LaunchDarkly enables version 2 payloads for individual projects. Webhook destinations in projects that are not enabled for version 2 continue to receive the version 1 payload, which is unchanged.Identify the payload version
Version 2 requests include the following HTTP headers:X-LaunchDarkly-Payload-Version header. Read this header if your receiver needs to handle both versions.
Additional fields in version 2 payloads
Version 2 payloads add the following information about the notification:- The notification state, which indicates whether the alert is firing or resolved.
- The severity of the notification.
- The reason LaunchDarkly sent the notification, such as
threshold_breached,no_data,recovered, oralert_disabled. - The group-by keys and values for the series that triggered the alert, if the alert uses grouping.
DeduplicationKey, a stable identifier for a given alert and group. Use it to collapse repeated notifications about the same condition.EpisodeKey, an identifier for a single firing episode. The firing notification and the matching resolved notification share an episode key.- The rendered notification message, in both plain text and HTML.
- The tags associated with the alert.
- Timestamps for the notification.
AlertURL, an absolute link to the alert in LaunchDarkly.
Absolute product links
Version 1 payloads contain relative paths for product links, such as theLogsURL field. In version 2, the session, error, logs, traces, and metrics links are absolute URLs. Your receiver no longer needs to prepend a base URL to build a working link.
Event values for metrics and events alerts
Version 1 payloads report some metrics and events alerts with anEvent value of TRACES_ALERT. Version 2 payloads report these alerts with values that match the alert source: METRICS, EVENTS, and LD_CUSTOM_EVENTS.
Prepare your webhook receiver
Before your project moves to version 2, review the code that parses your alert webhook payloads:- Confirm that your receiver ignores unknown fields instead of rejecting the payload.
- Read the
X-LaunchDarkly-Payload-Versionheader if you need to handle both versions. - Treat product links as absolute URLs rather than appending them to a base URL.
- Update any logic that depends on an
Eventvalue ofTRACES_ALERTfor metrics or events alerts.