


My first experience with machine learning and AI was a few years before the current AI boom. It involved a Jupyter Notebook, the BERT sentiment analysis model, and a JSON file of tweets from individuals discussing the upcoming election.
Now, we can explore far more models and technological advancements. Let’s build a sentiment analysis app within Hugging Face Spaces and discover how to swap between different models using a LaunchDarkly AI model feature flag.
For this tutorial you’ll need:
- Hugging Face Spaces account
- LaunchDarkly account
- Some text to analyze
What is a Hugging Face Space?
Hugging Face Spaces is a platform for hosting machine learning models, datasets, and interactive web applications. This tool allows developers to deploy and share their machine-learning projects with the world effortlessly. If you’re starting out in machine learning, Hugging Face Spaces provides a great way to learn and work with models.
What is LaunchDarkly?
LaunchDarkly is a feature management platform that allows you to control the rollout of features and manage feature flags dynamically. It’s like a remote control for your application, letting you turn features on or off for specific users or groups without redeploying your code.
What is a sentiment analysis model?
A sentiment analysis model is a type of AI model that can determine the sentiment expressed in a text. It can tell whether a sentence is positive, negative, or neutral. These models are widely used in social media monitoring, customer service, and market analysis to gauge public sentiment.
Set up your environment
For this tutorial, we’ll work in Python, leveraging the Streamlit, Transformers, and PyTorch libraries.
Let’s start by setting up our development environment. Make sure you have Python installed and create a new virtual environment.
python -m venv myenv
source myenv/bin/activate
Install requirements
Create a `requirements.txt` file with the following content:
streamlit
transformers
launchdarkly-server-sdk
torch
Next, make sure all of your requirements are installed on your machine by running the following:
pip install -r requirements.txtWe’ll create a Streamlit app within the larger Hugging Face Space for this tutorial.
First, navigate to the main Hugging Face Spaces page within Hugging Face. Create an account if you haven’t already, and then click ‘create space.��’
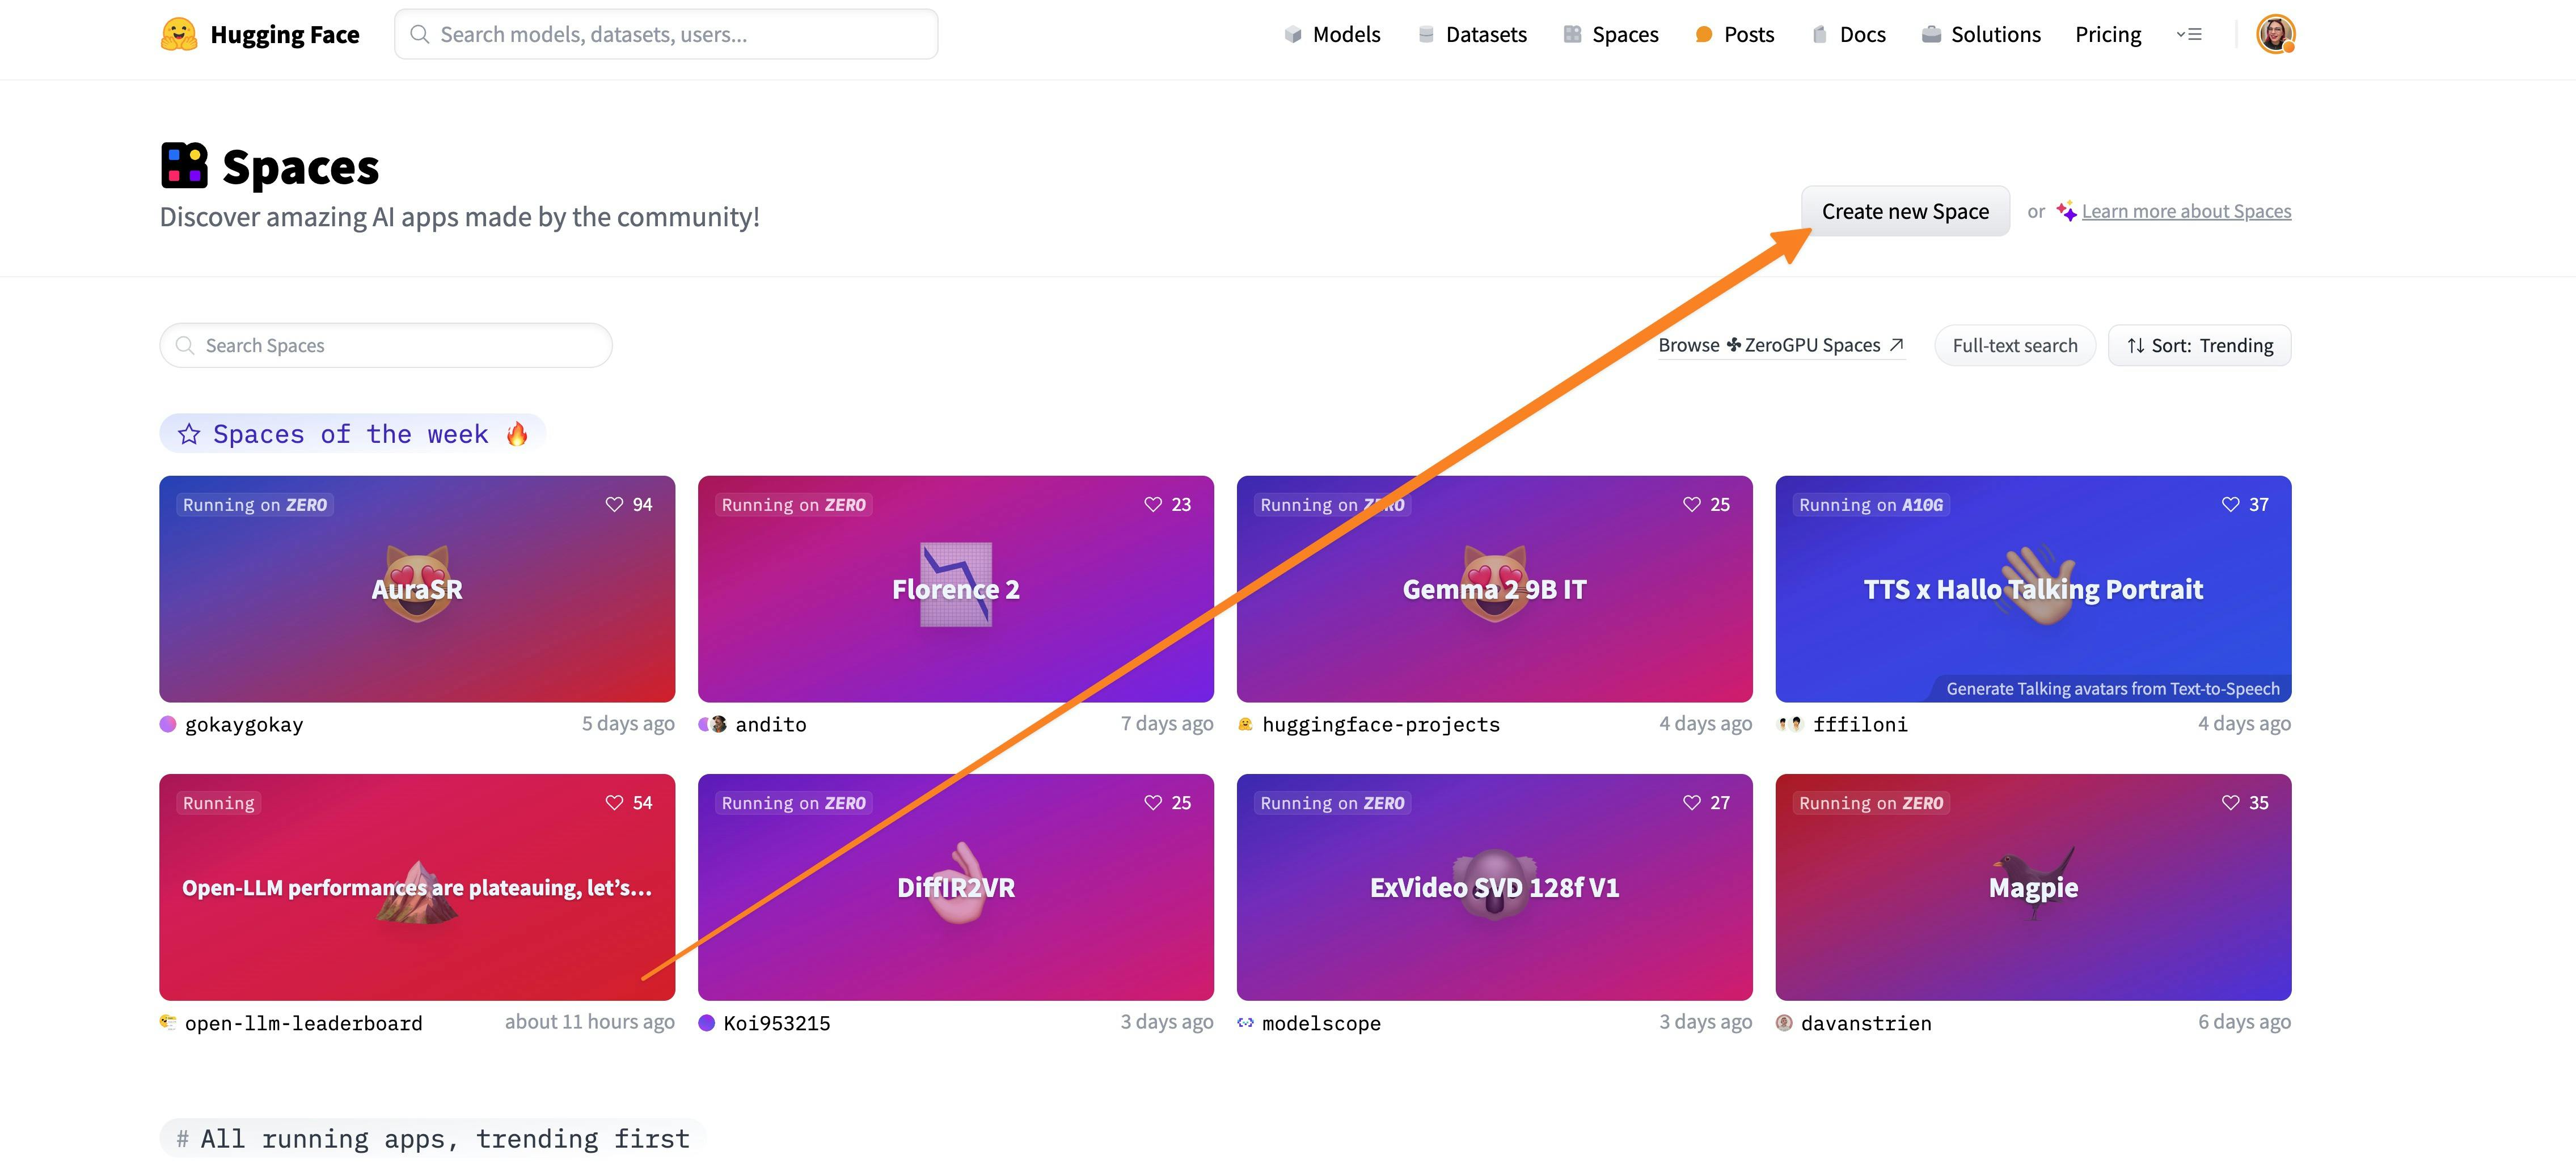
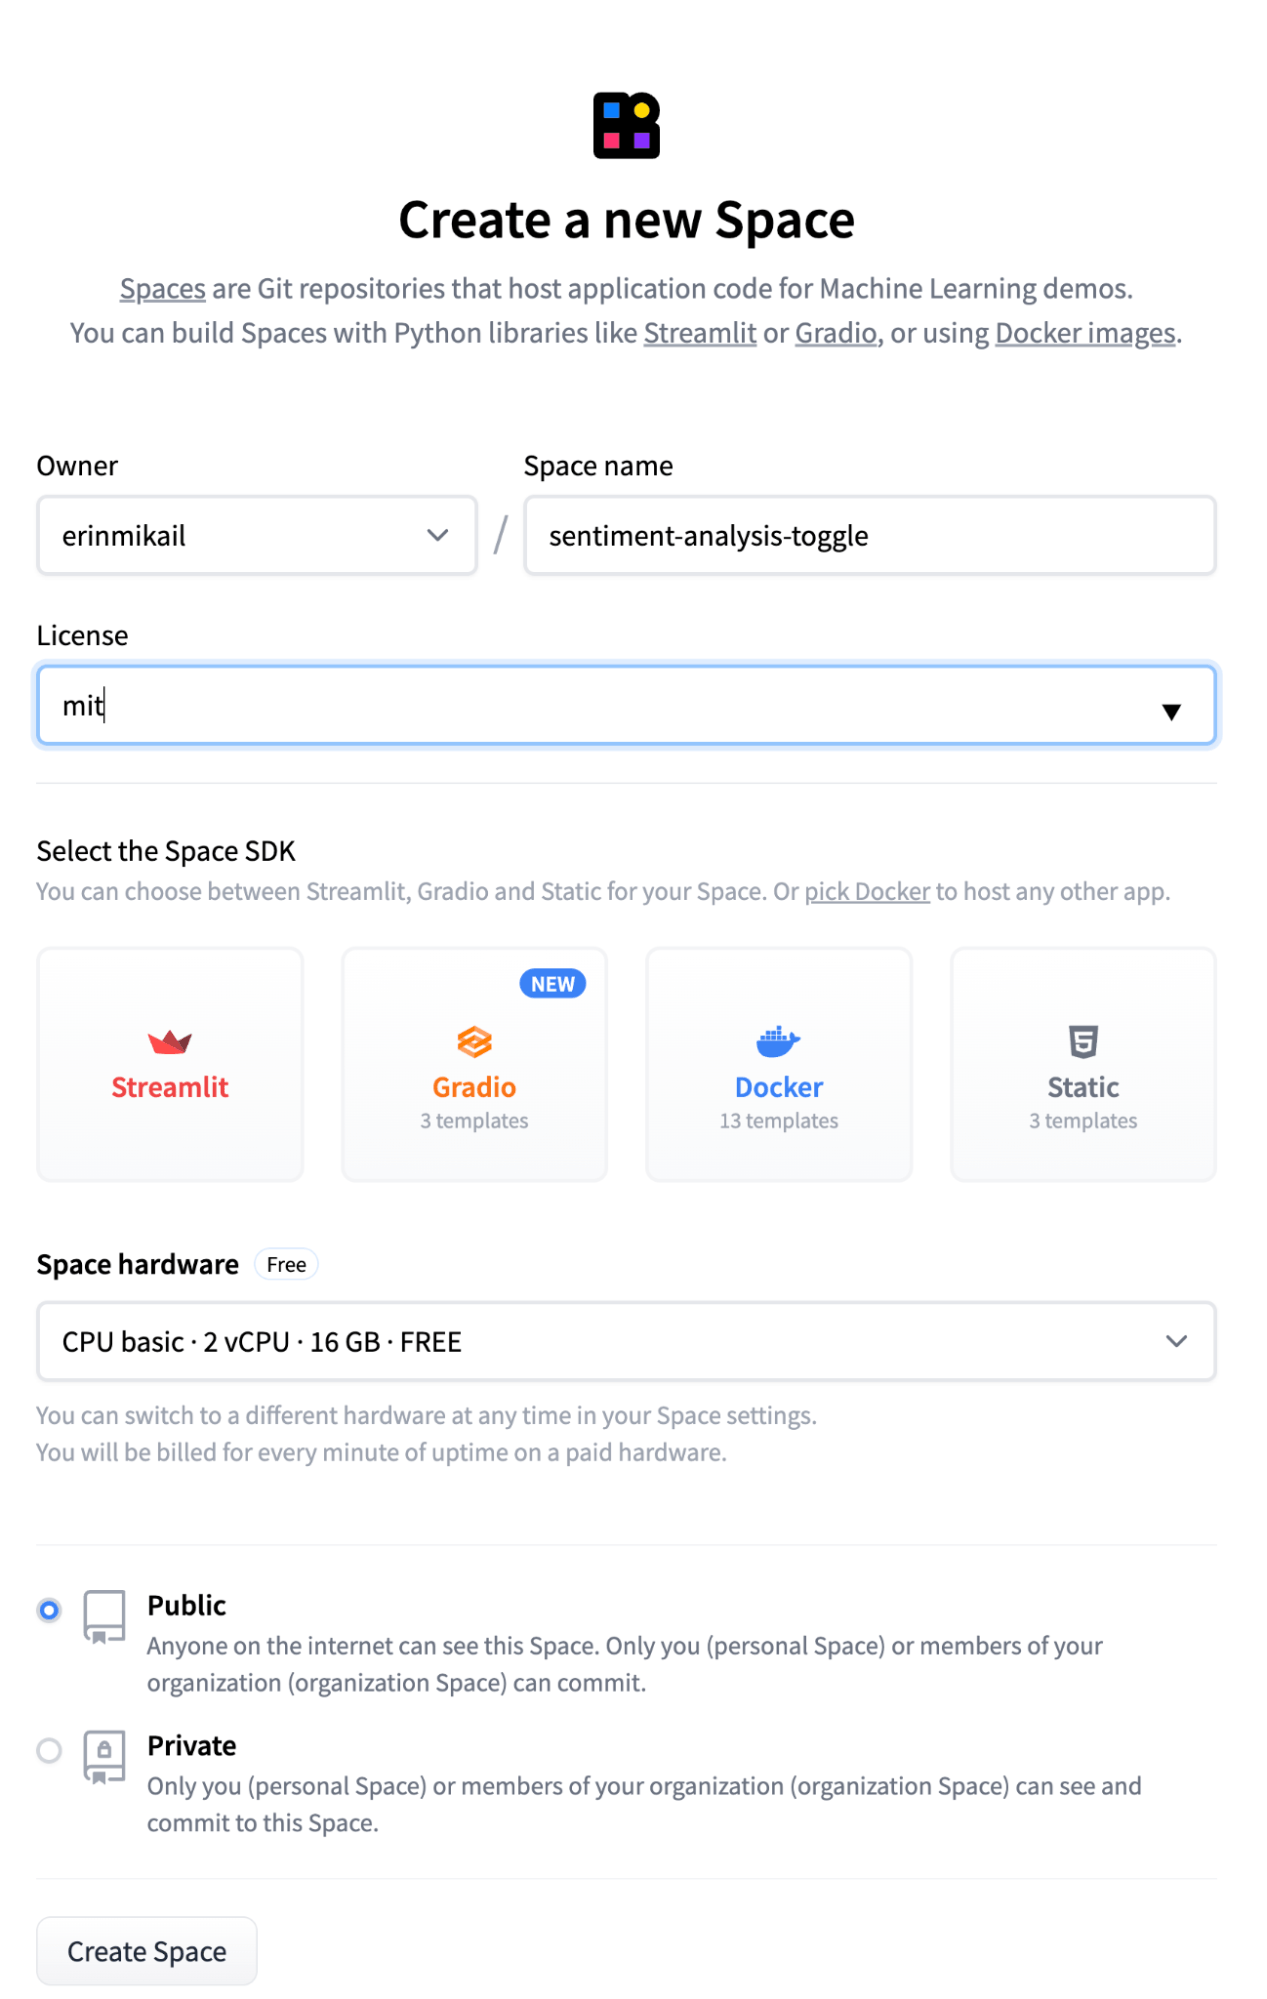
Once you’ve clicked the create space button, you’ll be prompted with the following options: type of space, memory, and storage.
For this tutorial, choose the following attributes:
- Name of your space: Sentiment Analysis Toggle
- License: MIT license
- Space Hardware: this tutorial is designed to be run on Hugging Face’s Free tier, CPU Basic
- SDK: Streamlit SDK
Creating the application
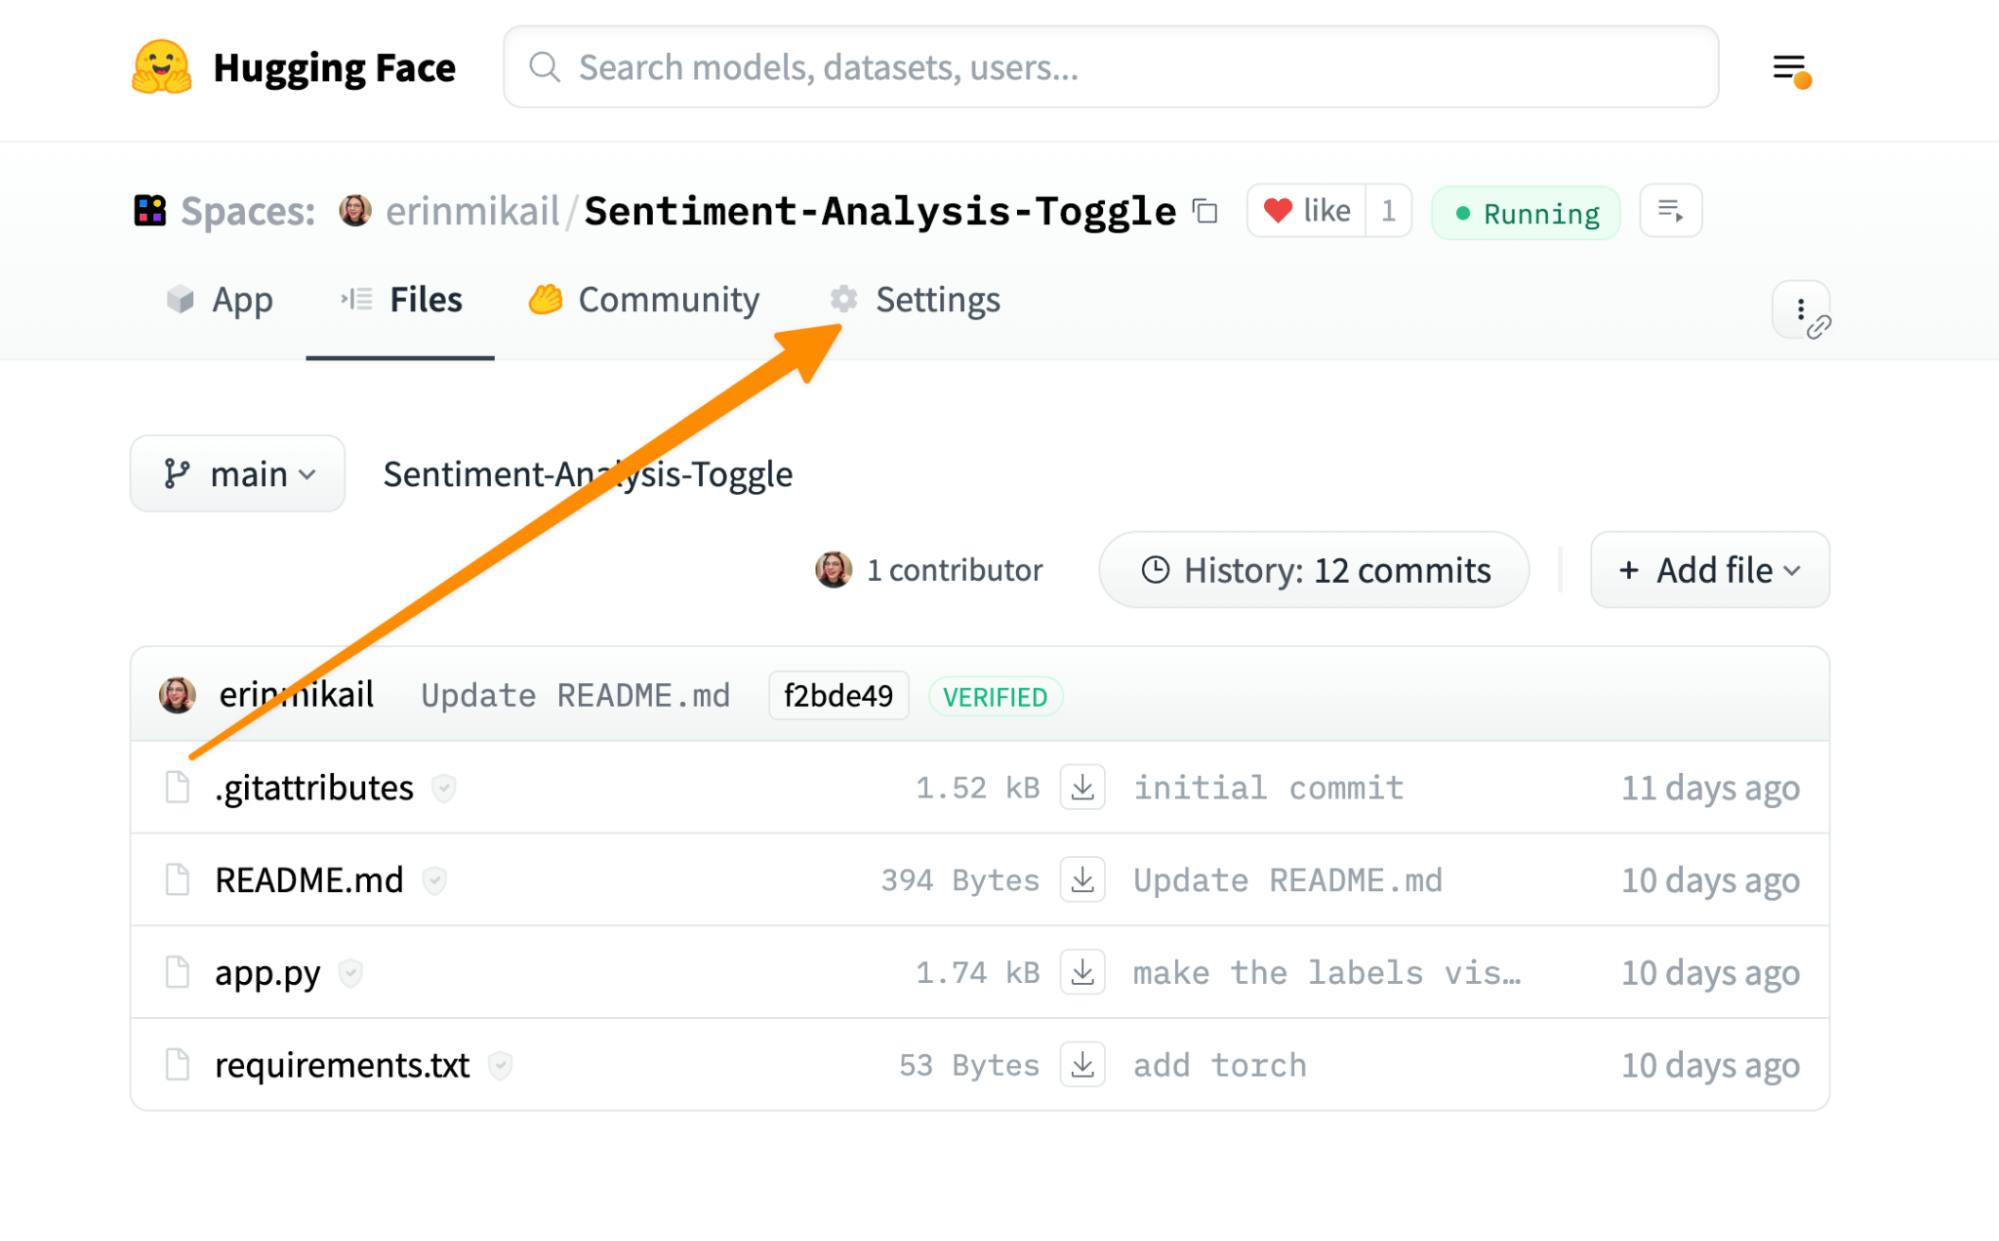
Navigate to your newly created space.
Create a file named `app.py`.
Let’s first start with our imports.
We’ll use the Streamlit, Transformers, PyTorch, and LDClient libraries.
Add the following lines to the `app.py` file:
import streamlit as st
from transformers import pipeline
from ldclient import LDClient, Config, Context
import os
import torch
Next, create a new project within LaunchDarkly. When creating your new project, grab the LaunchDarkly SDK key. For the sake of this tutorial, we’ll be working within the production environment.
Already have a project set up? Get your LaunchDarkly SDK key by navigating to the LaunchDarkly project settings, clicking on the project name, and grabbing the SDK key for the production environment.
You can add your LaunchDarkly SDK Key to your HuggingFace Space secrets by clicking on the settings window and adding the LaunchDarkly Key to the secrets panel below.
After the key is added to the Hugging Face Space Settings, call the SDK key and initialize your SDK by using the code below. This will connect your application to the LaunchDarkly application.
# Retrieve the LaunchDarkly SDK key from environment variables
ld_sdk_key = os.getenv("LAUNCHDARKLY_SDK_KEY")

# Initialize LaunchDarkly client with the correct configuration
ld_client = LDClient(Config(ld_sdk_key))
Once you’ve added the LaunchDarkly SDK key and initialized the application, we’ll create our function, which will use LaunchDarkly’s AI model flags to get the AI model configuration from the LaunchDarkly application.
We’ll use LaunchDarkly’s AI Model Flag feature for this next step. The benefit of this feature is that you can completely customize which model to use and what parameters the model should use within the LaunchDarkly application.
Before getting started, Check the feature preview modal by clicking on your account icon in the lower left-hand corner of the screen, and make sure that ‘AI Flag Templates’ are enabled.
We’ll start by jumping into our project within LaunchDarkly (or creating a new project) and creating a new flag.

Create a new AI model feature flag named `model-swap` with variations for different model IDs such as `bert-base-uncased`, `roberta-base`, `distilbert-base-uncased`, and `albert-base-v2`.
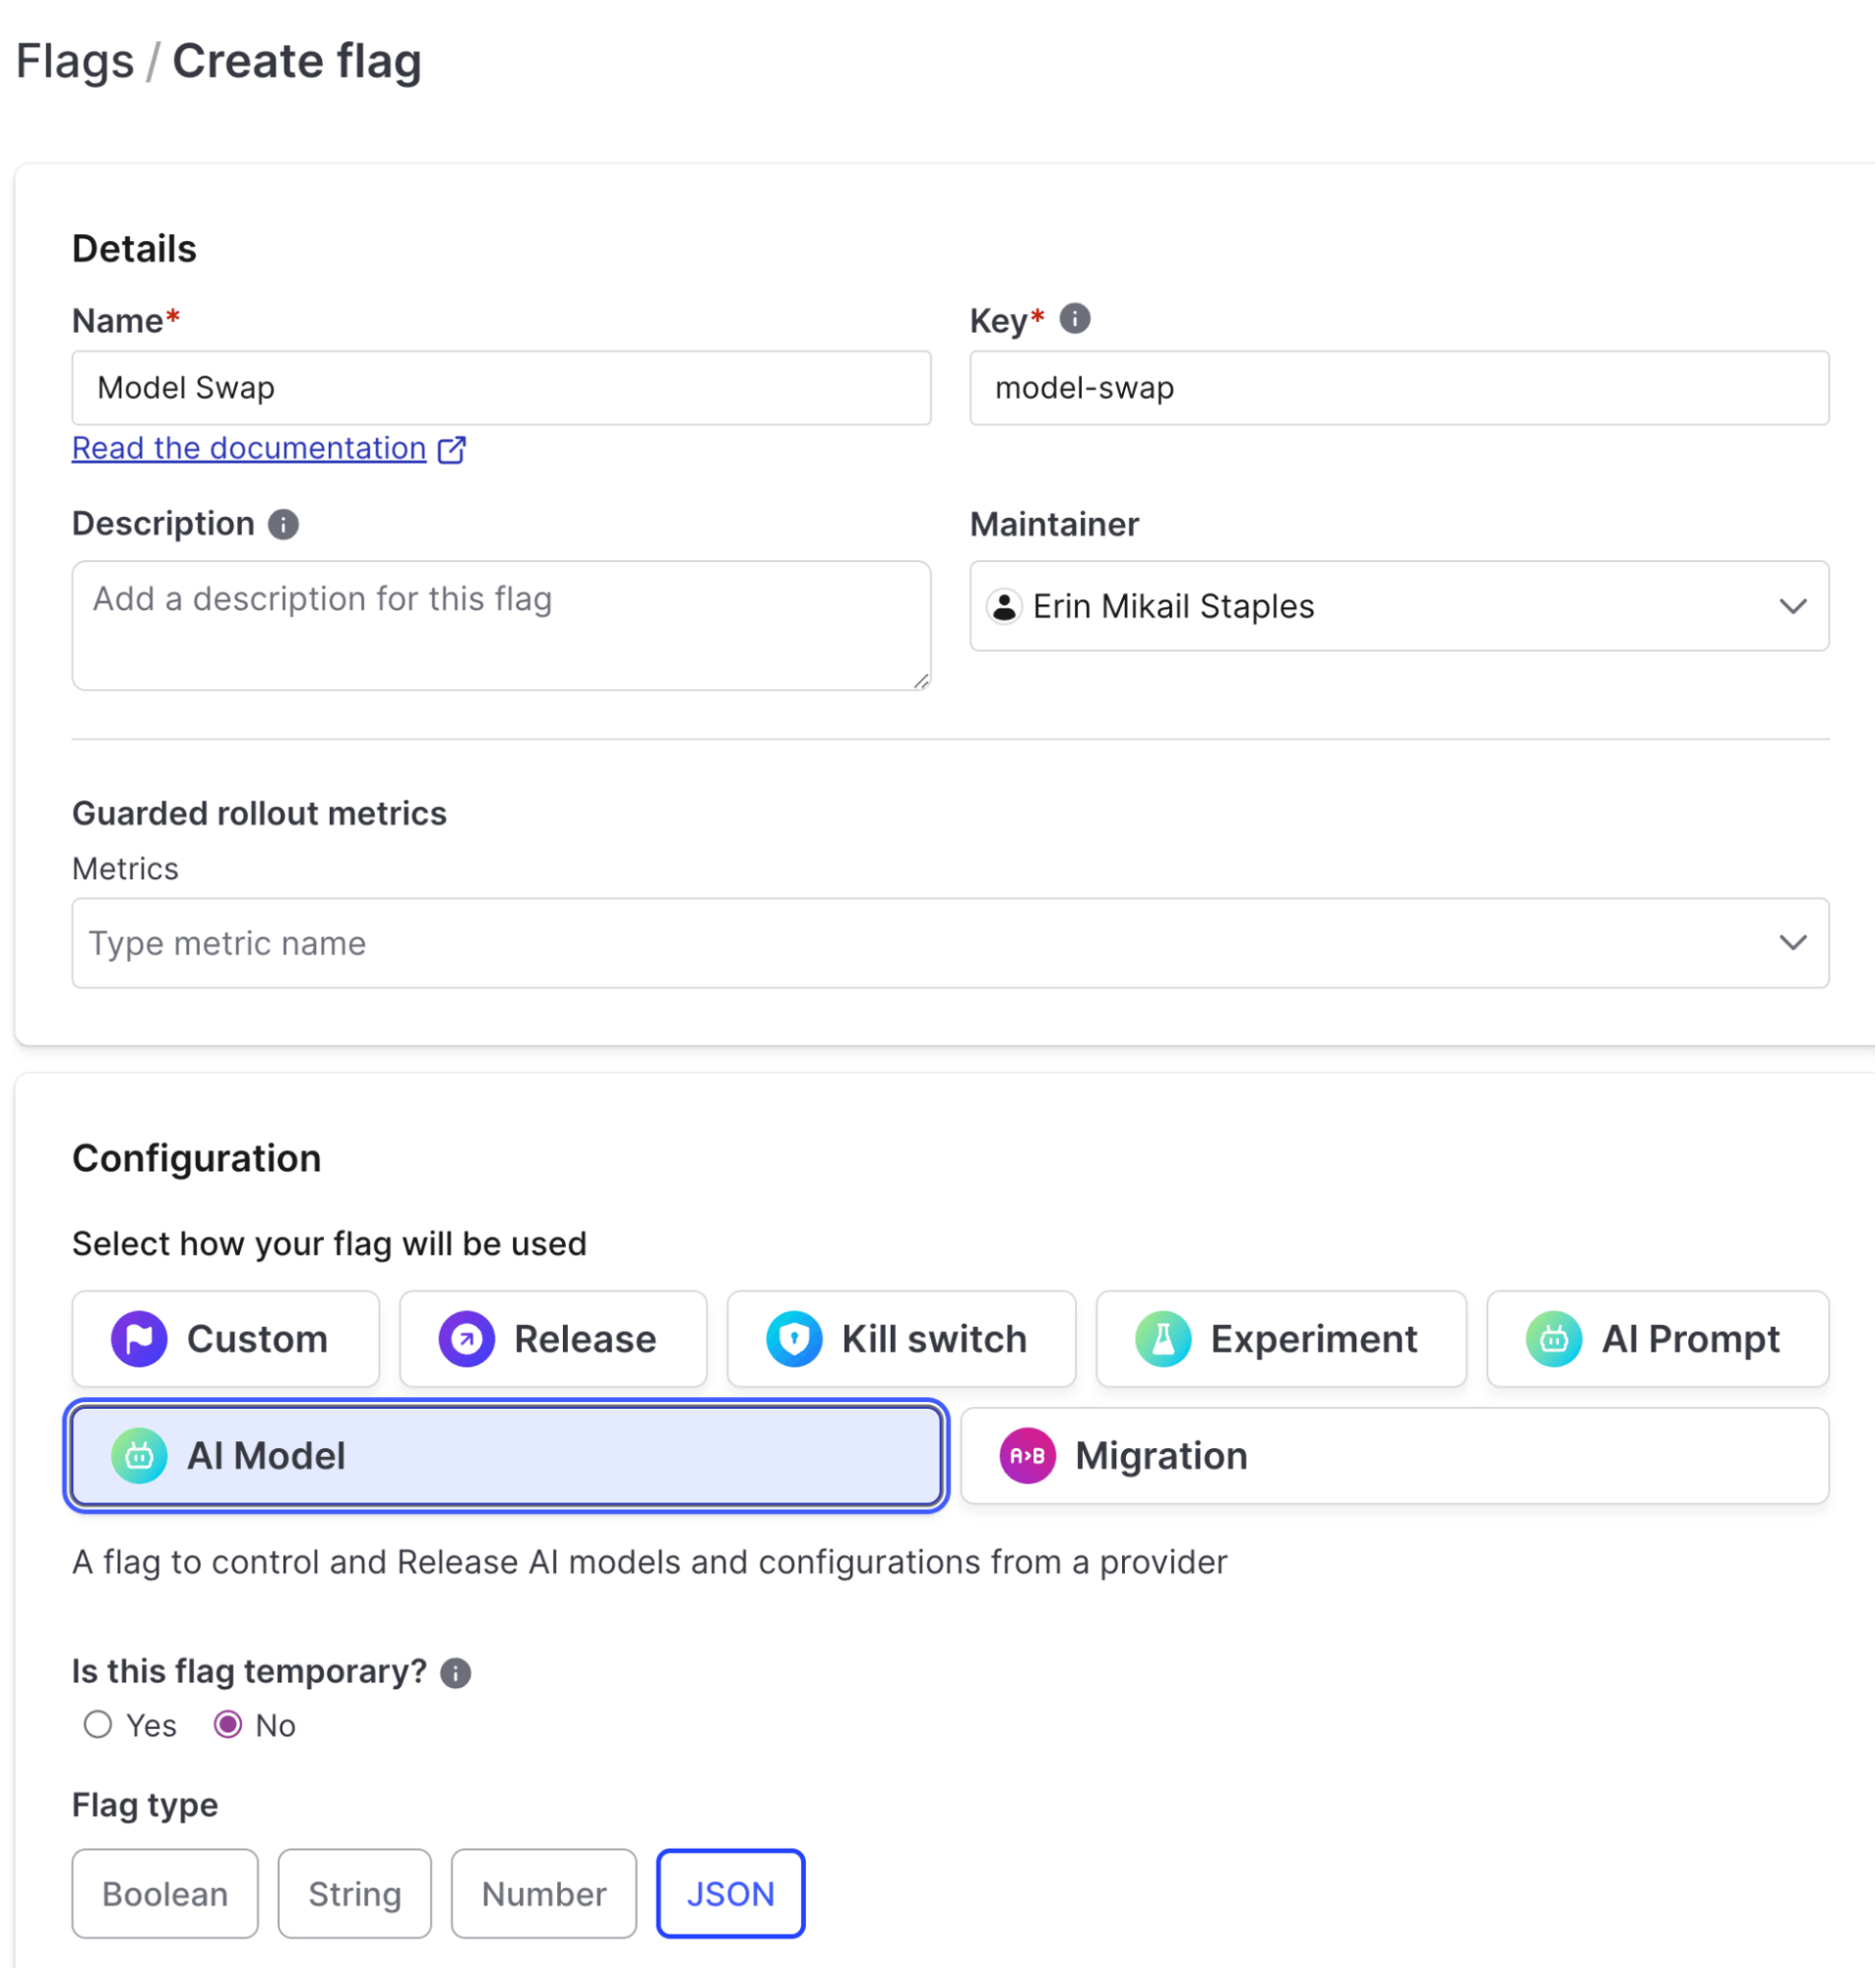
Create your variations for the following models below. For this example, you should have four distinct variations. I pulled the model, description, and recommended parameters directly from Hugging Face’s model library.
Variation 1:
- Name: bert-base-uncased
- Description: A basic model configuration for setting defaults in a model
- Value:
{
"max_length": 100,
"modelID": "bert-base-uncased",
"temperature": 0.7,
"top_k": 50,
"top_p": 0.9
}
Variation 2:
- Name: roberta-base
- Description: Configurations for OpenAI GPT-4 Omni
- Value:
{
"max_length": 50,
"modelID": "roberta-base",
"temperature": 1,
"top_k": 50,
"top_p": 0.95
}
Variation 3:
- Name: distilbert-base-uncased
- Description: A set of sample AI model parameters for using Claude 3 Haiku in AWS Bedrock
- Value:
{
"max_length": 80,
"modelID": "distilbert-base-uncased",
"temperature": 0.8,
"top_k": 40,
"top_p": 0.9
}
Variation 4:
- Name: albert-base-v2
- Description: A set of sample AI model parameters for using Meta Llama 3 Instruct Parameters in AWS Bedrock
- Value:
{
"max_length": 60,
"modelID": "albert-base-v2",
"temperature": 0.9,
"top_k": 30,
"top_p": 0.85
}
Create a function in your app.py file that loads a different configuration for an AI model based on a feature flag from LaunchDarkly.
If no model ID comes from the feature flag, the application will default to “distilbert-base-uncased.”
# Function to get the AI model configuration from LaunchDarkly
def get_model_config():
    flag_key = "model-swap"  # Replace with your flag key

    # Create a context using Context Builder—it can be anything, but for this use case, I’m just defaulting to myself.

    context = Context.builder("context-key-123abc").name("Erin").build()
    flag_variation = ld_client.variation(flag_key, context, default={})

    model_id = flag_variation.get("modelID", "distilbert-base-uncased")
    return model_id

# Function to translate sentiment labels to user-friendly terms
def translate_label(label):
    label_mapping = {
        "LABEL_0": "🤬 Negative",
        "LABEL_1": "😶 Neutral",
        "LABEL_2": "😃 Positive"
    }
    return label_mapping.get(label, "Unknown")
# Streamlit app
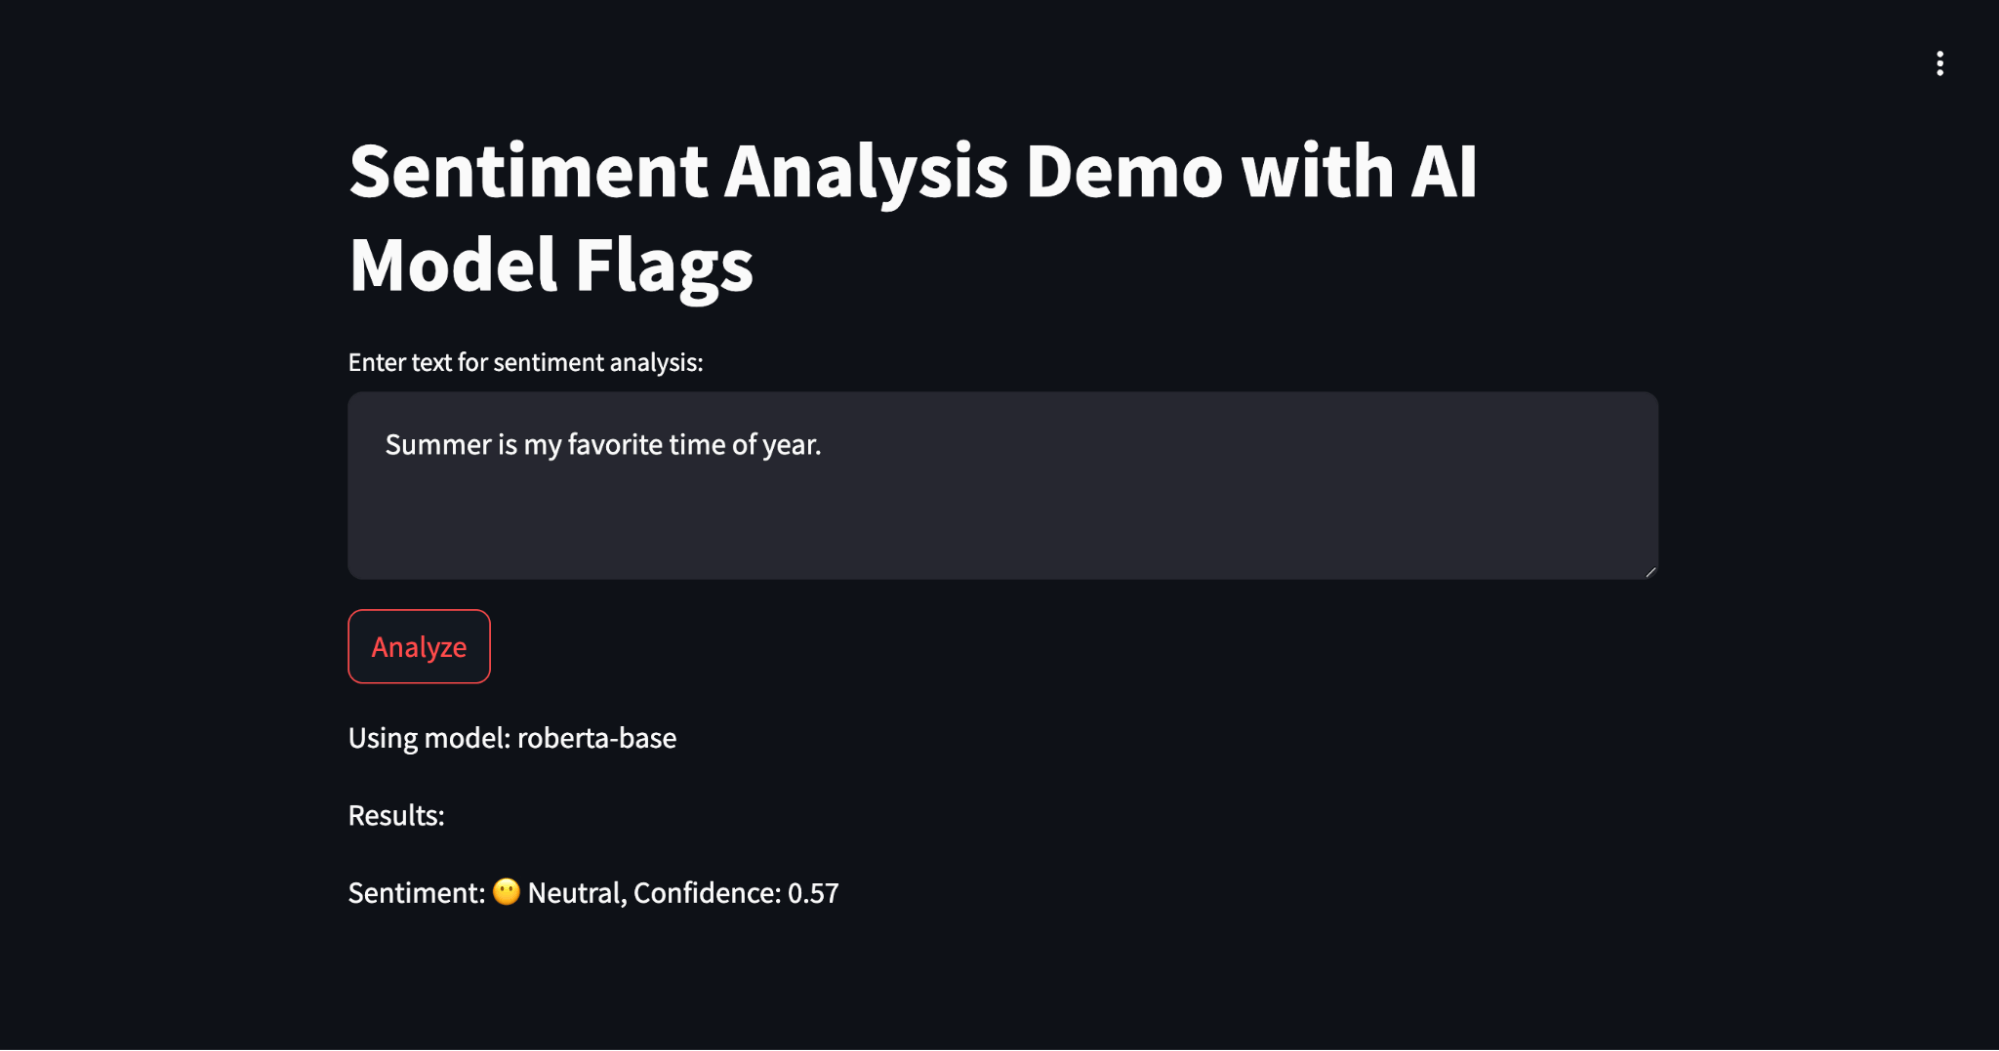
st.title("Sentiment Analysis Demo with AI Model Flags")
user_input = st.text_area("Enter text for sentiment analysis:")
if st.button("Analyze"):
model_id = get_model_config()
model = pipeline("sentiment-analysis", model=model_id)
# Display model details
st.write(f"Using model: {model_id}")
# Perform sentiment analysis
results = model(user_input)
st.write("Results:")
# Translate and display the results
for result in results:
label = translate_label(result['label'])
score = result['score']
st.write(f"Sentiment: {label}, Confidence: {score:.2f}")
# Closing the LD client
ld_client.close()Open up the Hugging Face Space. Enter some text in the input area and click the "Analyze" button. The app will fetch the model configuration from LaunchDarkly and perform sentiment analysis using the specified model. With each output, you should see the model used and the positive, neutral, or negative results, as well as a confidence score in the result.
Congratulations!
Congratulations! You've successfully built a dynamic sentiment analysis application using Hugging Face Spaces, LaunchDarkly, and AI model feature flags. This setup allows you to switch models on the fly and experiment with different configurations effortlessly. Enjoy experimenting and optimizing your AI models!
This is just the start of what’s possible using the new AI Model Flags within LaunchDarkly. I’m excited to see what you come up with next. Learn more about them in our documentation or this blog post. In the meantime, contact me at emikail@launchdarkly.com, @erinmikail, or the LaunchDarkly Discord if you have any questions.
Or check out some of our other tutorials, including:
Like what you read?
Get a demo