

Auto-release is available to customers on select plansAuto-release is only available to customers on certain plans. To learn more, read about our pricing or contact Sales.
How auto-release works
Each environment’s auto-release starts from a specific trigger. Auto-release triggers include a flag evaluation, a deploy signal from your CI/CD system, a manual start, or completion of the previous environment’s release. Flag evaluations are the default signal. Auto-releases can be progressive, meaning that if you have multiple environments, the release completing in one environment can trigger the release beginning in another environment. When a release starts, you can track its progress on the Releases page. If you need to, you can pause the release to keep the change from being released to the environments where the release hasn’t started yet. An environment already in progress continues to completion.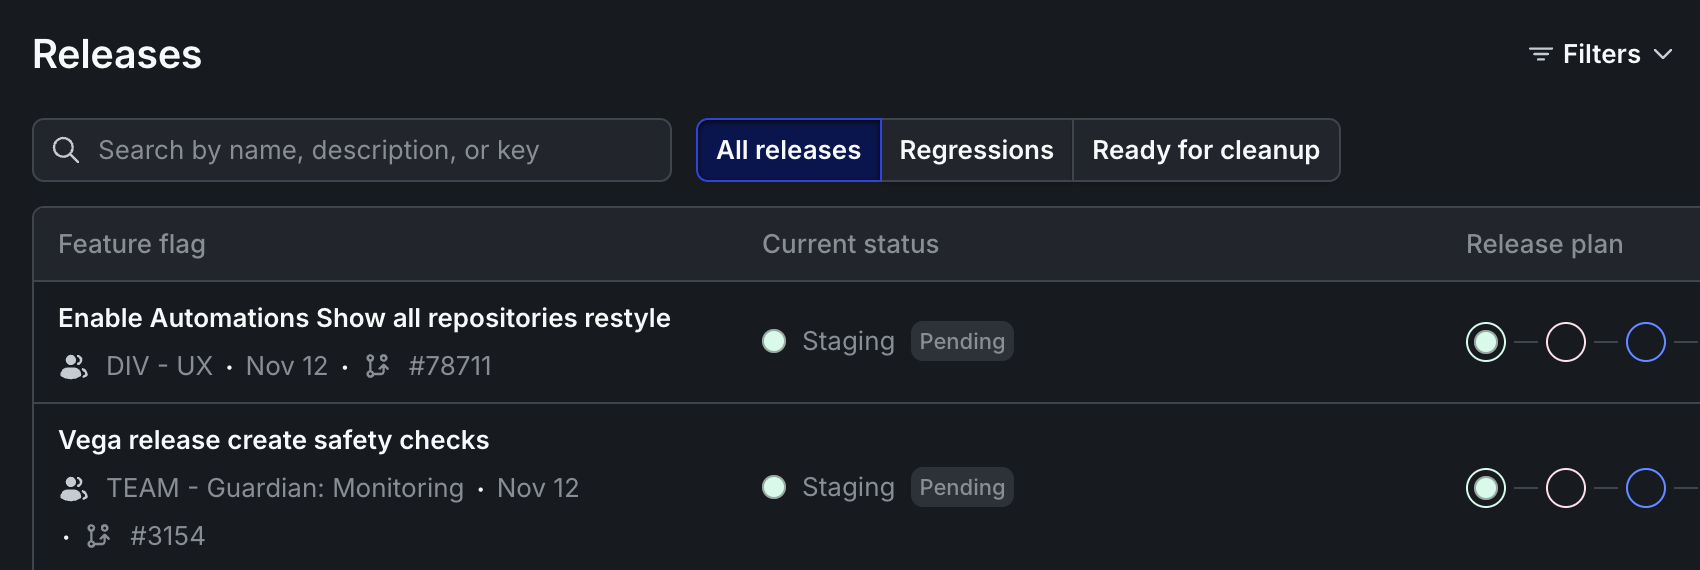
The Releases page.
- Navigate to the Releases page and find the release you wish to pause.
- Click the release to open the associated flag’s Release tab.
- Click Pause auto-release.
Types of auto-releases
When you create an auto-release, there are four different types of release process you can use:By flag evaluation
Flag evaluation releases start when LaunchDarkly detects an evaluation of the flag in a given environment. If the release is linked to a pull request, the environment waits for the pull request to merge, then starts if the flag was evaluated in that environment in the last 24 hours. Evaluations from before the merge count, so the release may start before your deploy finishes. If the release is not linked to a pull request, it starts at the first evaluation. To start a release only after your deploy completes, use the On deploy trigger. This can cause unexpected behavior if you use flags in both staging and production environments, as a flag evaluation in your staging environment can start the auto-release process and may result in the change being released to production prematurely. We recommend manually starting releases in your production environment unless the release contents are low-impact or ready to be released everywhere.On deploy releases
On deploy releases start when your CI/CD system tells LaunchDarkly that a deploy to the environment finished. In the API, this trigger type iswebhook. Your deployment pipeline sends a deploy signal after each deploy to the environment. To learn how to send a deploy signal, read Send a deploy signal.
Manual releases
Manual releases are releases that you start manually. Start a manual environment from the flag’s Release tab, or call the Start environment release API. To learn more, read Starting an auto-release manually.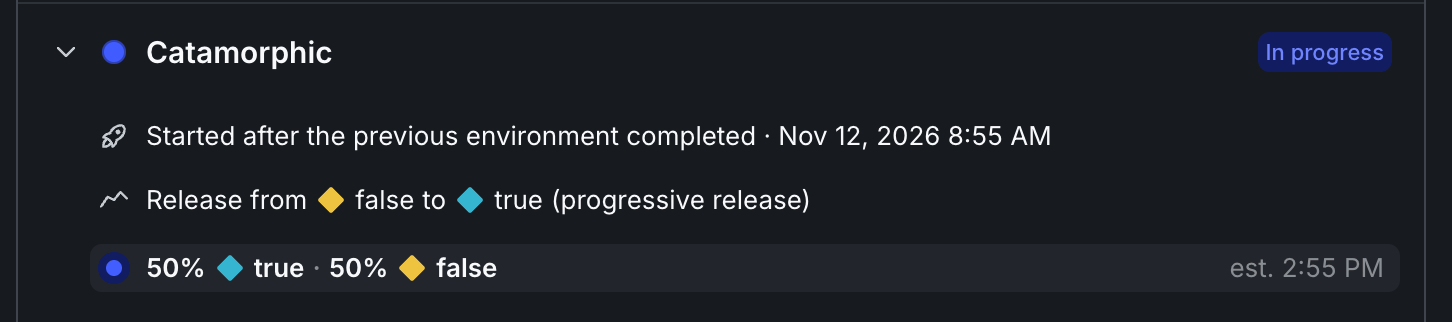
A promotion release in progress in an environment.
Promotion releases
Promotion releases are releases that start when the previous environment’s release completes. For example, your staging environment could require manual releases, and your production environment could use promotion releases, so if the release to the staging environment completes successfully, the auto-release in your production environment starts automatically.Start an auto-release
If you don’t want to use flag evaluations to start an auto-release, you can start an auto-release another way. There are three ways to begin an auto-releases:Start an auto-release manually
To release something manually:- Navigate to the flag wrapping the change you wish to release and click into its Release tab.
- Click Create release. The “Create flag release” dialog appears. This dialog displays a list of the environments where the release will occur, based on the release plan.
- Click Create release. The release is recorded and will start when the release trigger occurs.
Start an auto-release with Vega
To release something with Vega:- Navigate to the flag wrapping the change you wish to release and click into its Release tab.
- Click Create release. The “Create flag release” dialog appears. This dialog displays a list of the environments where the release will occur, based on the release plan.
- To override the release plan for this release, click Customize. A side panel opens where you can converse with Vega to create a custom release configuration.
Start an auto-release with the GitHub app
To release something from the GitHub app:- Navigate to the pull request for the change you wish to release. The GitHub app analyzes the pull request and posts a proposal. To run the analysis again, or to start it on a draft pull request, comment
@launchdarkly plan. - Reply to the proposal with
@launchdarkly approveto approve the flag and the release together. If you already approved only the flag with@launchdarkly approve flag, reply@launchdarkly approve releaseinstead.
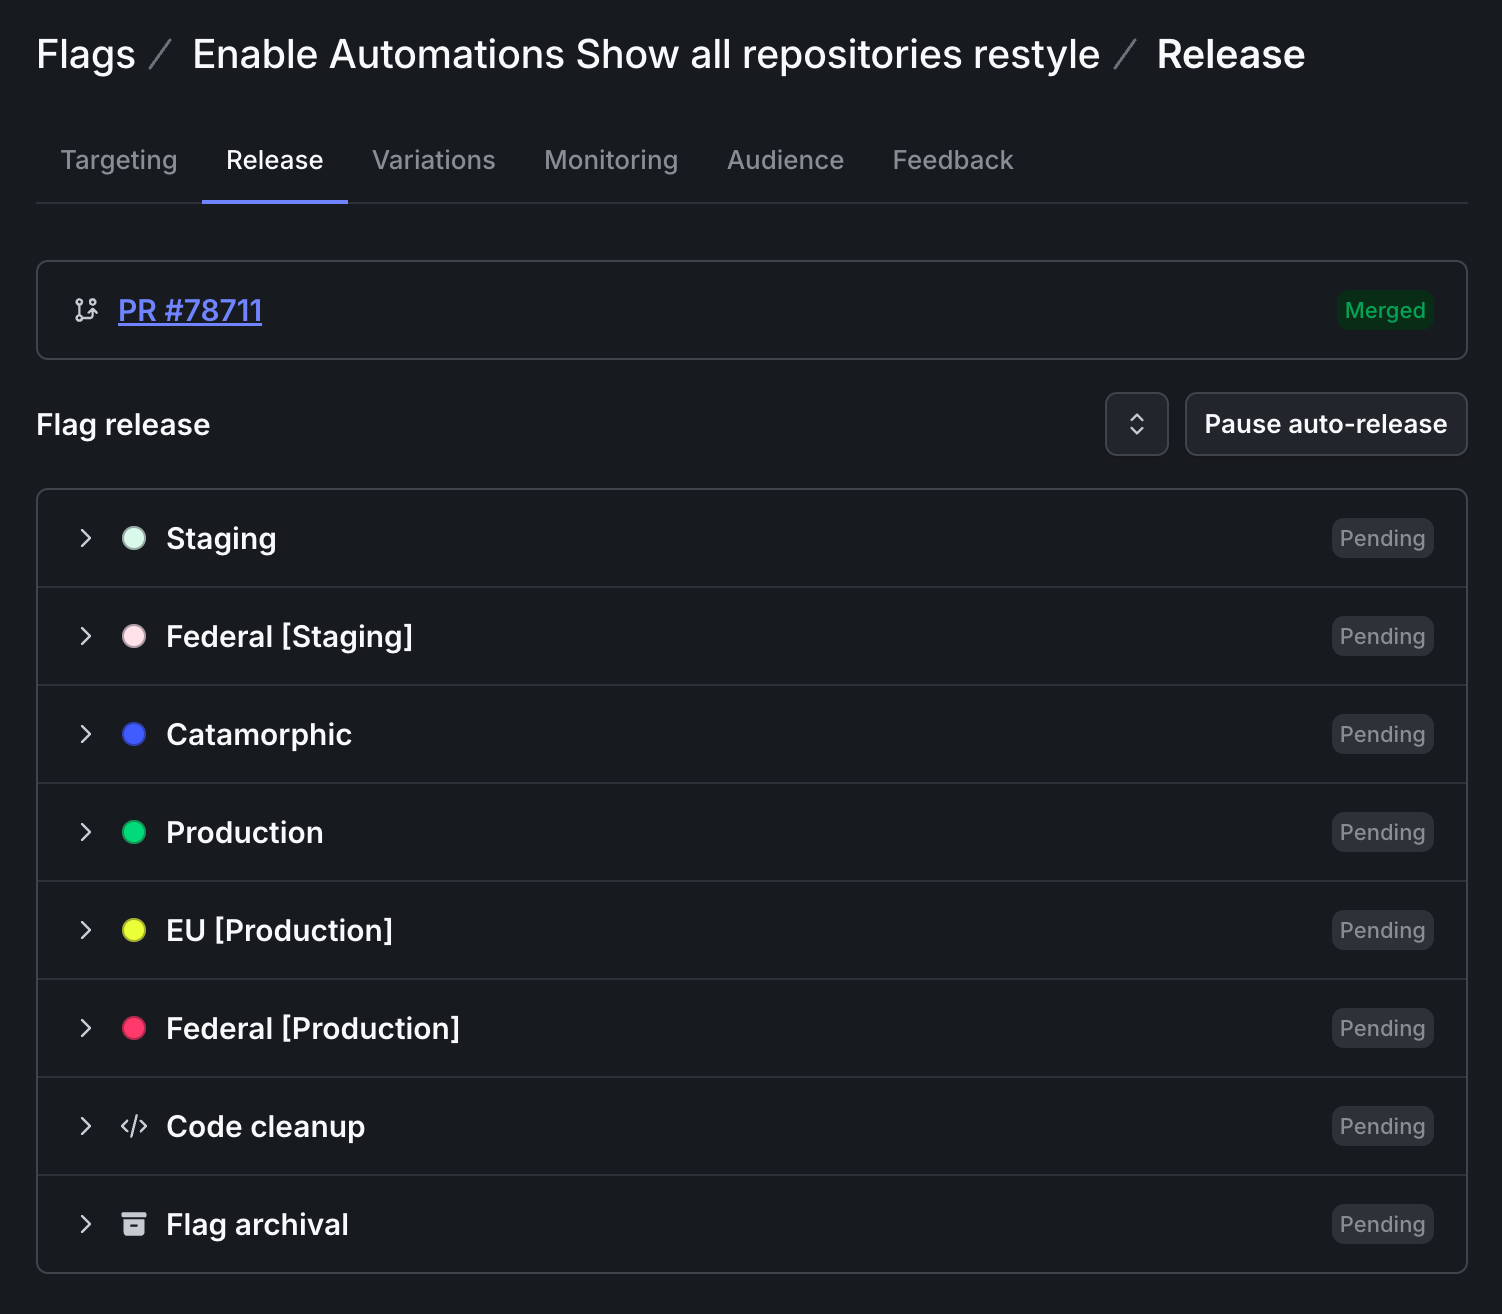
A flag's Release tab, showing the release status in each environment.
Release plans
Every auto-release uses a release plan. The release plan defines the default release process at the environment level. Auto-release also needs a project-level flag release plan. LaunchDarkly does not provide a default flag release plan. To learn how to create one, read Configure a flag release plan. After you create a release plan, it affects auto-releases only after you select it or set it as the default for an environment. An environment release plan says how a release runs inside one environment. A flag release plan says how a flag moves through all your environments, using one environment release plan per environment. Each environment release plan covers one environment and defines audiences, rollout steps, regression metrics, and cleanup. A plan that LaunchDarkly migrated from a fallback release policy has no environment. A flag release plan coordinates one or more environments. To apply the same release plan to multiple environments, duplicate the plan, give the copy a new key, and change the environment it applies to. Environment release plan keys are unique within a project. A copy with the same key fails. A flag release plan is an ordered list of environments, such as staging, then production, then federal. Each step specifies:- The environment release plan to use, or “immediate,” which just turns the flag on.
- The trigger type, which is flag evaluation, on deploy, manual, or promotion.
- After the release completes, the flag lifecycle can continue through code cleanup and archival. Those stages are not part of the flag release plan.
staging-then-production flag release plan.”
The following table compares environment release plans and flag release plans:
| Attribute | Environment release plan | Flag release plan |
|---|---|---|
| Scope | One environment | The release process across environments |
| Defines | How the rollout runs, including rollout steps, audiences, and metrics | Environment order, triggers, and which environment release plan to use |
| Relationship | The building block | Uses environment release plans |
| Tooling at GA | UI, API, and Model Context Protocol (MCP) | REST API and CLI only |
What about release policies?Environment release plans replace release policies. If you use release policies, your existing policies are migrated over automatically.
Flag release plans do not support multi-phase releasesEnvironment release plans that a flag release uses must have only one phase. Standalone environment releases can still use multi-phase environment release plans.
Create a release plan
Here’s how to create a release plan:- Navigate to Project Settings, then click Release settings. The Release settings page appears.
- Click Create. The Create environment release plan page appears.
- Enter a human-readable Name. The plan’s key generates automatically based on the name you enter.
- Optionally, enter a Description.
- Choose an Environment from the menu. Optionally, click the Default for environment checkbox to set the plan as the default for the environment.
- Choose a rollout strategy by choosing an identifier from the Roll out by menu.
- Optionally, to monitor the release for regressions, select a metric or metric group from the Monitor for regressions dropdown.
- Choose between a Manual or Automatic release phase advancement strategy.
- If you choose Manual, you must manually advance the release between phases.
- If you choose Automatic, the release will advance automatically based on the rollout strategy you choose.
- Create a release phase by designating an Audience and a Rollout strategy: a. Use the Add clause button to specify the audience that should be targeted. b. In the Rollout section, specify what percentage of that audience should be targeted by the release and for what duration. Click Add Step to make the rollout more granular.
- Optionally, create additional release phases by clicking Add phase.
- Choose between Release to everyone or Keep the release limited to this audience for the final phase.
- Click Create plan.
Troubleshoot auto-releases that did not start
A release that did not start, or started before merge, may be due toallFlags() evaluations, which count as traffic. When this happens, the release does not start and no cleanup PR is created. However, internal errors never block a merge. Use the flag’s Release tab to inspect or manually start the waiting environment. Use @launchdarkly plan to re-run pull-request analysis.