

Relay Proxy automatic configuration is available to customers on select plansRelay Proxy automatic configuration is only available to customers on select plans. To learn more, read about our pricing. To upgrade your plan, contact Sales.
Benefits of automatic configuration
In a standard Relay Proxy, without automatic configuration, whenever you add or make changes to environments and projects in LaunchDarkly, you must manually update configuration files and restart the Relay Proxy to reflect the changes. With automatic configuration enabled, you no longer need to manually update the Relay Proxy’s configuration files after you make configuration changes, nor do you need to restart the Relay Proxy for changes to take effect. Additionally, you can use a page in the LaunchDarkly user interface (UI) to configure your Relay Proxy with the automatic configuration feature. A standard Relay Proxy requires all environments to be defined individually, and you cannot configure it through the LaunchDarkly UI.
You can also use the REST API: Relay Proxy configurations
- SDK key rotation
- Mobile key rotation
- Adding, removing, and expiring an environment’s SDK keys and mobile keys
- Environment state changes, such as new environment creation, name and tag updates, and environment deletion
- Project state changes, such as new project creation, name and tag updates, and project deletion
Automatic configuration also supports concurrent SDK keysAutomatic configuration lets the Relay Proxy serve several concurrent SDK keys and mobile keys for an environment. To learn more, read How automatic configuration handles multiple SDK keys.
How automatic configuration handles multiple SDK keys
Automatic configuration handles two distinct situations for SDK keys and mobile keys: detecting a rotated key, and serving several independently active keys for the same environment at once. The sections below describe each.Key rotation
When you rotate an environment’s default SDK key or mobile key, the Relay Proxy switches its own connection to LaunchDarkly to the new default key without dropping SDK connections and without a restart.Concurrent keys
When an environment has multiple SDK keys or mobile keys active at the same time, a Relay Proxy that uses automatic configuration accepts every current key for that environment, not only the default. The Relay Proxy receives key changes in real time, the same way it receives flag and segment updates:- When you create a key, the Relay Proxy starts accepting SDK connections that authenticate with it.
- When you expire or delete a key, the Relay Proxy stops accepting it and disconnects any SDKs still using it.
Enable automatic configuration
To enable automatic configuration, you must have a role that allows thecreateRelayAutoConfiguration action. The LaunchDarkly Admin and Architect organization roles, as well as the Admin and Owner base roles, include this ability. To learn more, read Relay Proxy configuration actions.
Enabling automatic configuration is a two-step process. These steps appear in detail below.
You must:
- Create a Relay Proxy configuration on the Relay Proxy page under Organization settings and save its unique key.
- Configure your Relay Proxy instance to use the unique key from the prior step. You may do so either as a property in your Relay Proxy configuration file or as an environment variable.
- Click the gear icon in the left sidebar to view Organization settings.
- Click Relay proxy. The “Relay Proxy” page opens.
- Click Create configuration. The “Create a Relay Proxy configuration” panel appears.
- Give the Relay Proxy a human-readable Name.
- Choose a Rule from the menu. This rule determines what content the Relay Proxy receives.
- “All projects and environments” sends changes about all projects and environments to the Relay Proxy.
- “Inline policy” allows you to specify which projects and environments you can track events for. To learn more, read Write an inline policy.
- Click Save configuration. The Relay Proxy appears on the Relay Proxy page with its key visible.
- Copy and save the key somewhere secure:
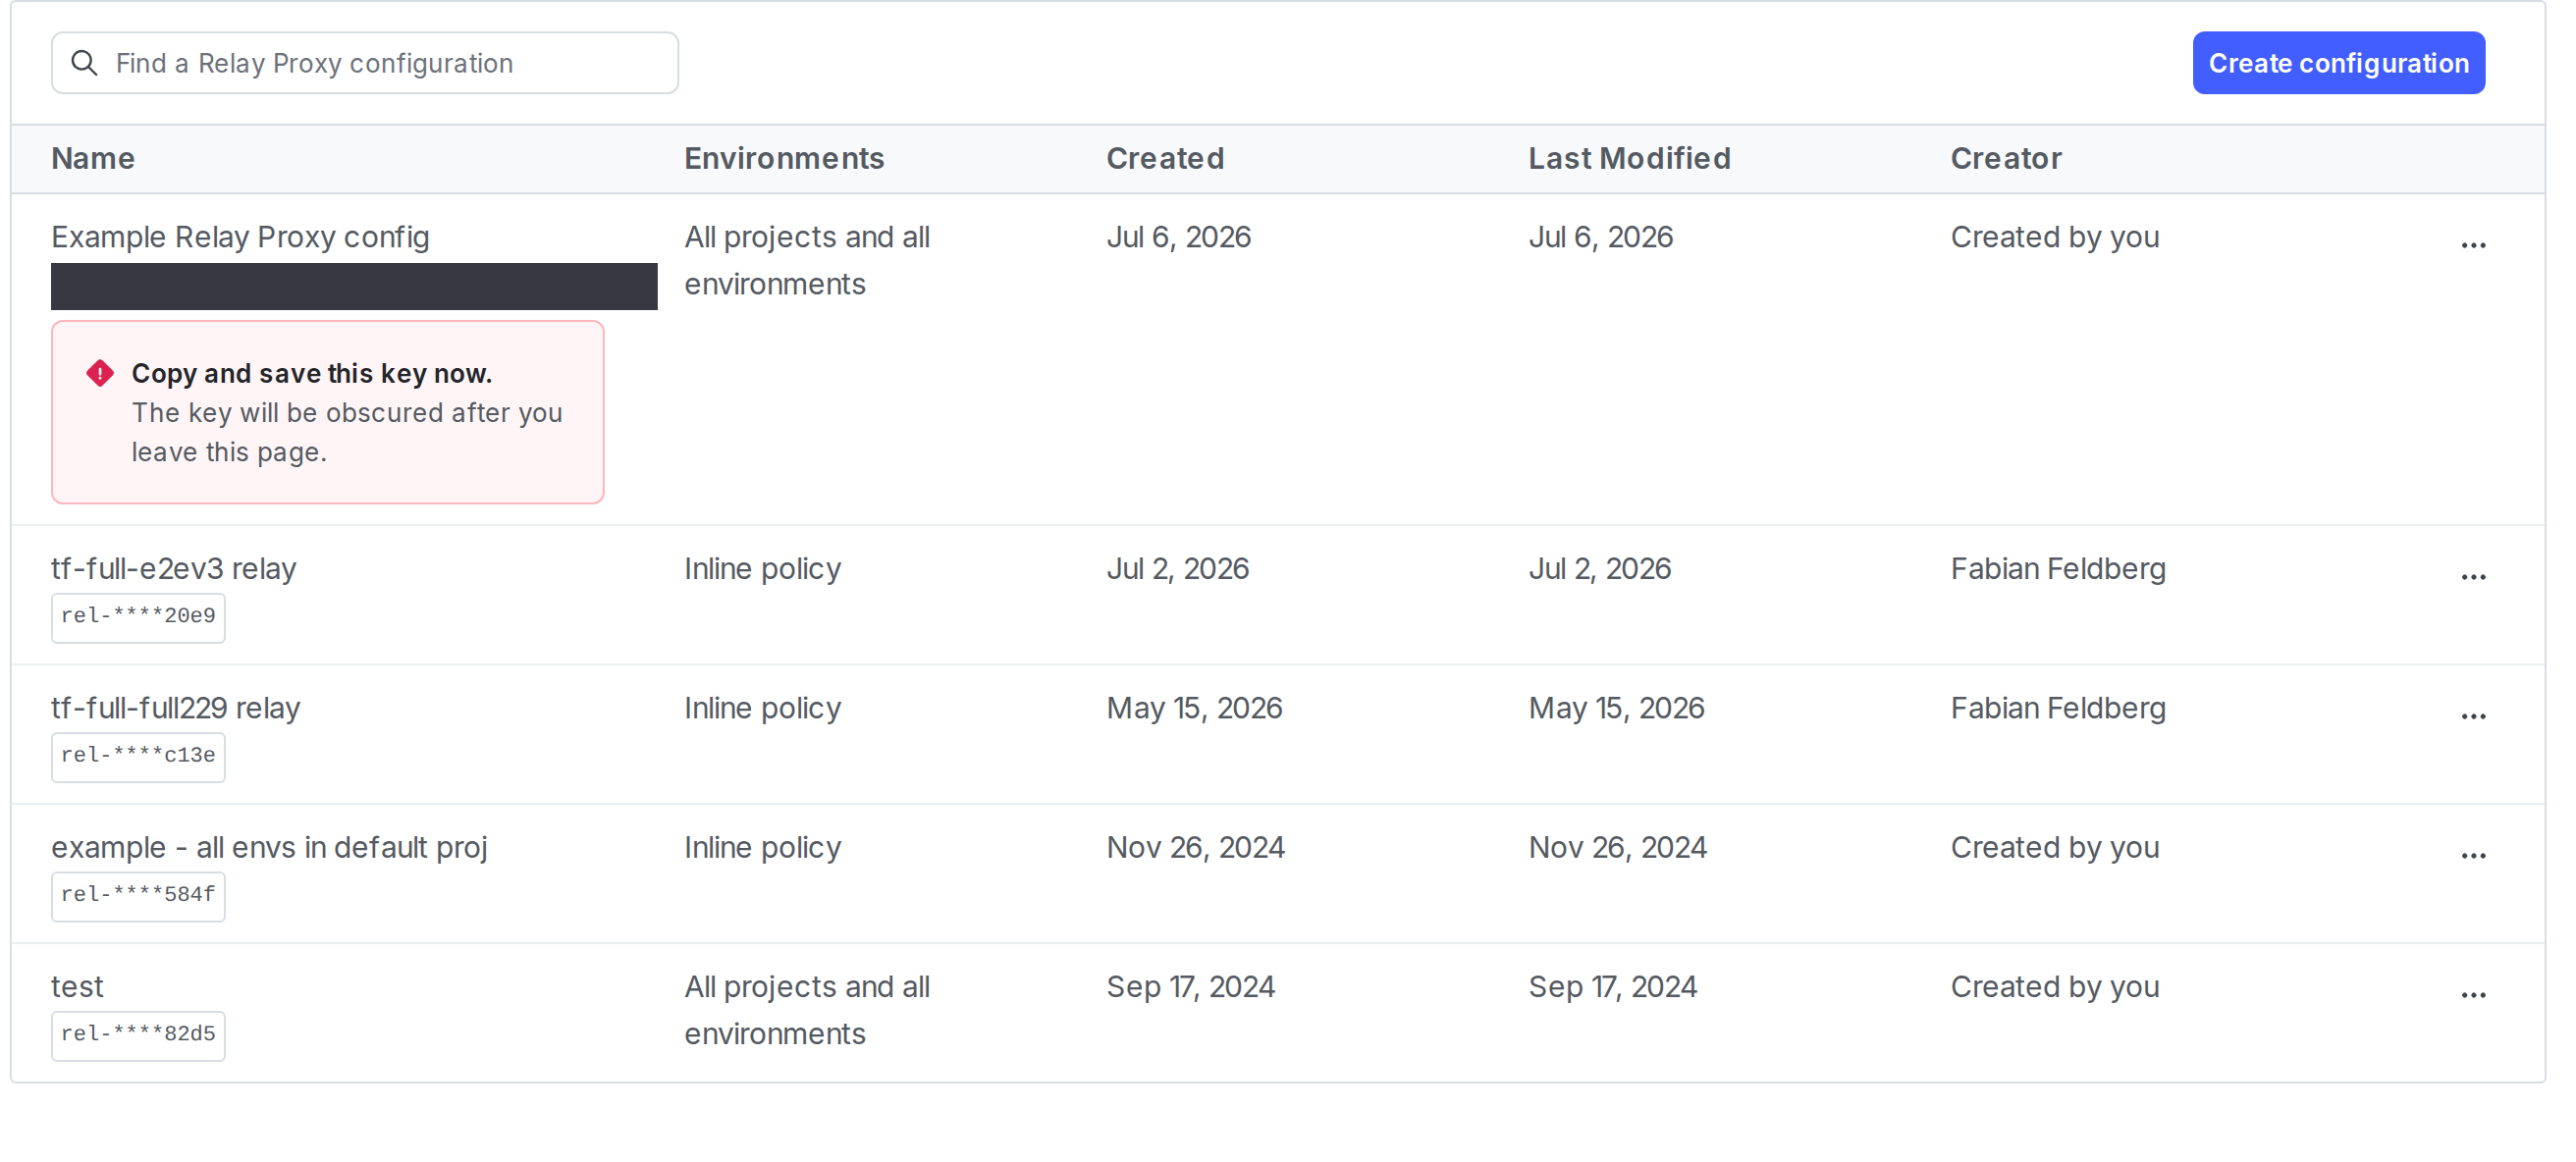
The "Relay proxy" page with a newly created Relay Proxy configuration. The key is displayed.
- Configure your Relay Proxy to use your new key.
-
For a Relay Proxy configured with a configuration file, specify the Relay Proxy key in an
AutoConfigsection as thekeyproperty. -
For a Relay Proxy configured with environment variables, specify the Relay Proxy key with the
AUTO_CONFIG_KEYenvironment variable. Here’s how:
- Start the Relay Proxy.
Write an inline policy
You can use an inline policy to specify precise instructions on what environments and projects the Relay Proxy should include or exclude. An inline policy is similar to a role, but is created as part of the Relay Proxy configuration. There are two ways to write an inline policy:- Using the policy builder
- Using the advanced editor
Expand Using the policy builder
Expand Using the policy builder
Use the policy builder
You can create most policies using the policy builder.To use the policy builder from the “Create a Relay Proxy configuration” panel:- Choose “inline policy” from the Rule menu.
- Click + Add statement.
- Use the Scope menu to specify the resources this policy affects.
- Select the resource type.
- In the Select an operation menu, select whether the scope of the statement should be all resources of this type, all resources except for a select few, or only a select few.
- Choose these select few from the Select [resources] menu when needed.
- Use the Actions menu to specify whether to allow or deny actions on these resources.
- Click Save configuration.
developerProjectKeys project: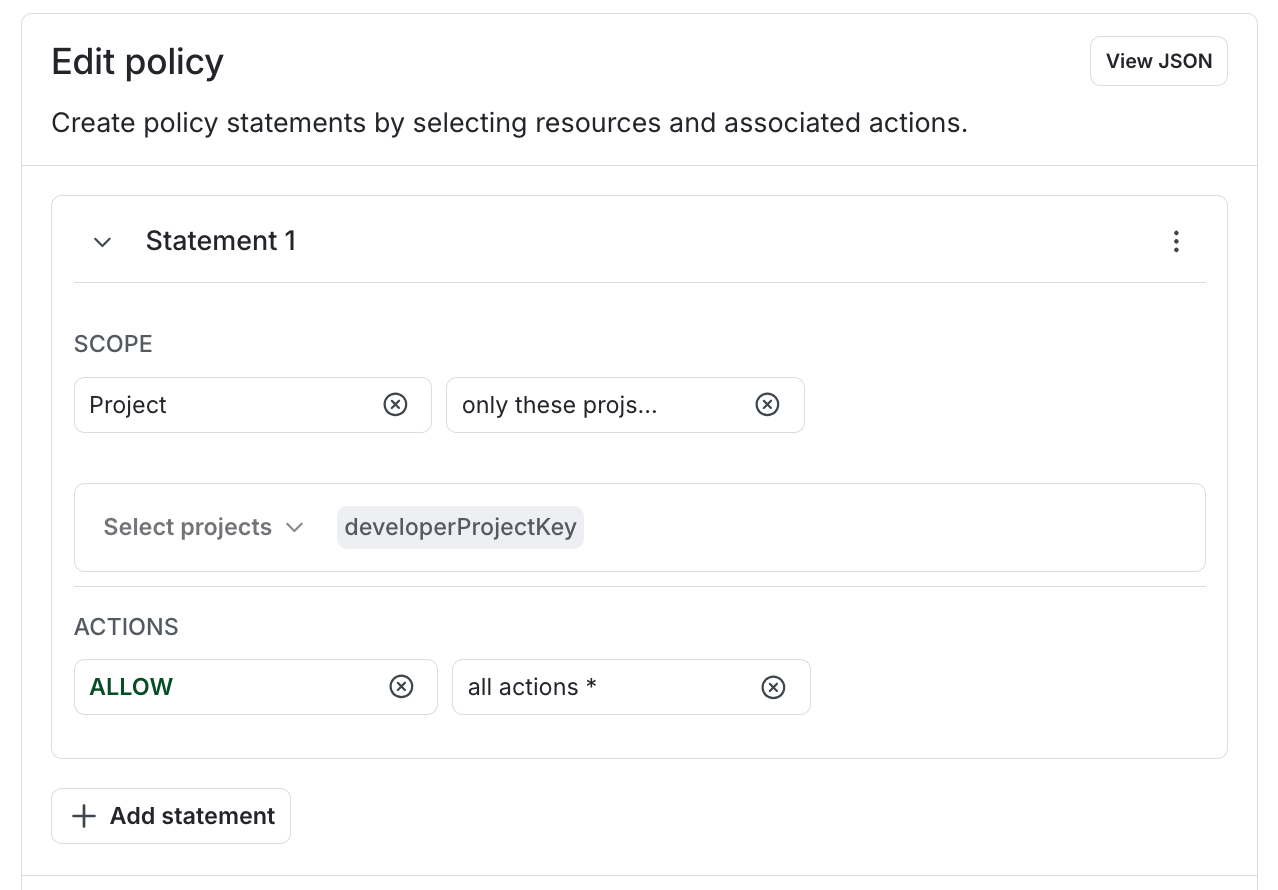
The policy builder.
Expand Using the advanced editor
Expand Using the advanced editor
Use the advanced editor
To write more complicated policies you can use the advanced editor. To learn how to write advanced policies, read About policies.To use the advanced editor from the “Create a Relay Proxy configuration” panel:- Choose “inline policy” from the Rule menu.
- Click View JSON. The advanced editor window appears.
- Enter your policy.
- Click Save configuration.
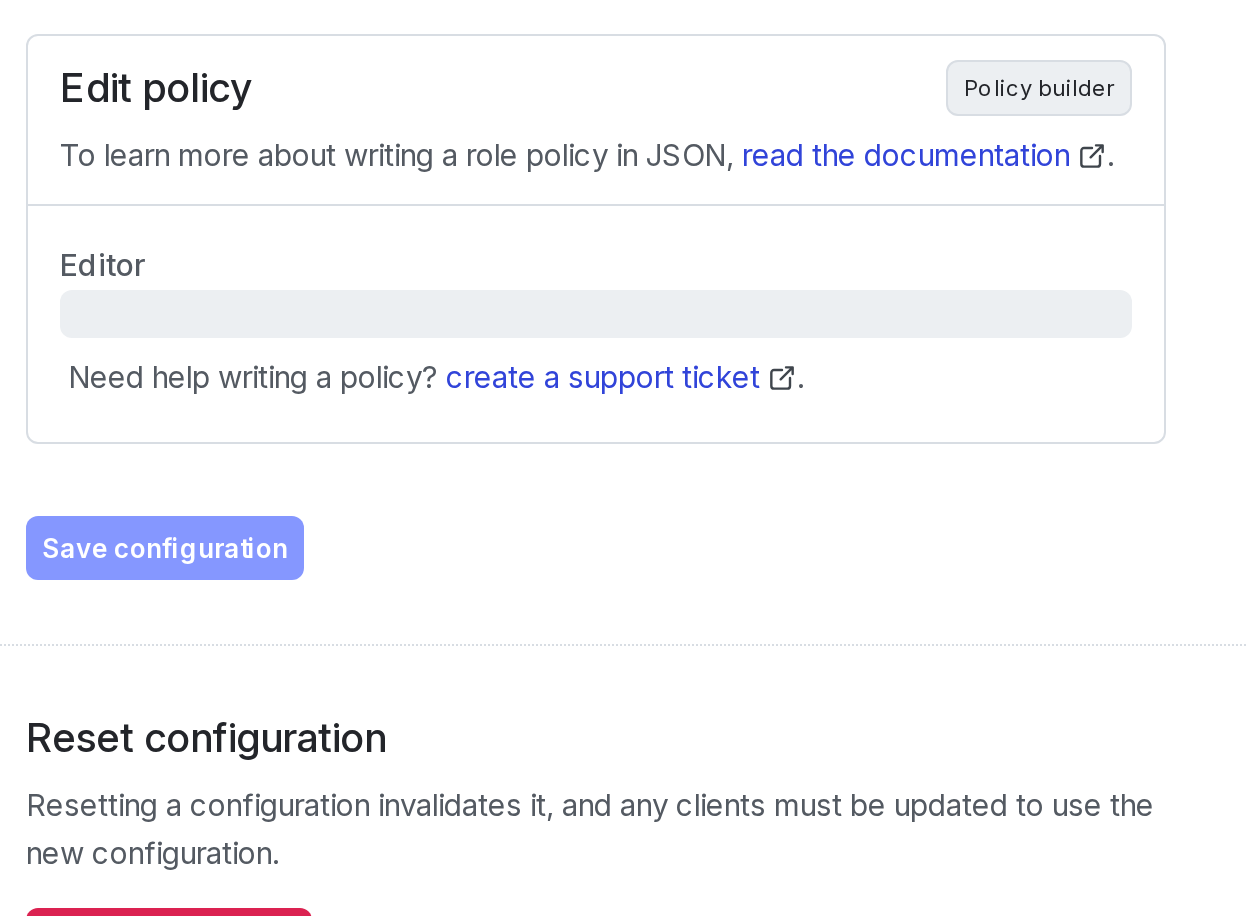
The advanced policy editor.
Example access policies
You can limit the environments to include in an automatic Relay Proxy configuration. Expand each section below to view custom role policy examples.Expand Production environment in all projects
Expand Production environment in all projects
Production environment in all projects
Use this policy to give the Relay Proxy access to the production environment in all projects:Expand Production environment in one project
Expand Production environment in one project
Production environment in one project
Use this policy to give the Relay Proxy access to the production environment in the “Mobile” project:Expand All environments in certain projects
Expand All environments in certain projects
All environments in certain projects
Use this policy to give the Relay Proxy access to all environments in projects starting with “Mobile-”:Expand Production environments in tagged projects
Expand Production environments in tagged projects
Production environments in tagged projects
Use this policy to give the Relay Proxy access production environments in projects tagged with “mobile”:Expand All non-production environments in any projects not tagged federal
Expand All non-production environments in any projects not tagged federal
All non-production environments in any projects not tagged “federal”
Use this policy to give the Relay Proxy access to non-production environments in projects not tagged with “federal”:Write a custom role with access to the Relay Proxy
You can give members access to the Relay Proxy using therelay-proxy-config resource in a custom role policy. To learn more about Relay Proxy resource actions, read Relay Proxy configuration actions.
You can copy and paste this custom role policy into the advanced editor to grant access to all Relay Proxy actions: