
Using the Honeycomb events integration
The Honeycomb events integration is only available to customers on select plans. To learn more, read about our pricing. To upgrade your plan, contact Sales.
This topic explains how to use the LaunchDarkly Honeycomb events integration.
The LaunchDarkly Honeycomb integration helps you diagnose problems by sending flag events to Honeycomb. Honeycomb displays those events alongside performance graphs so you can correlate feature rollouts with changes in operational health.
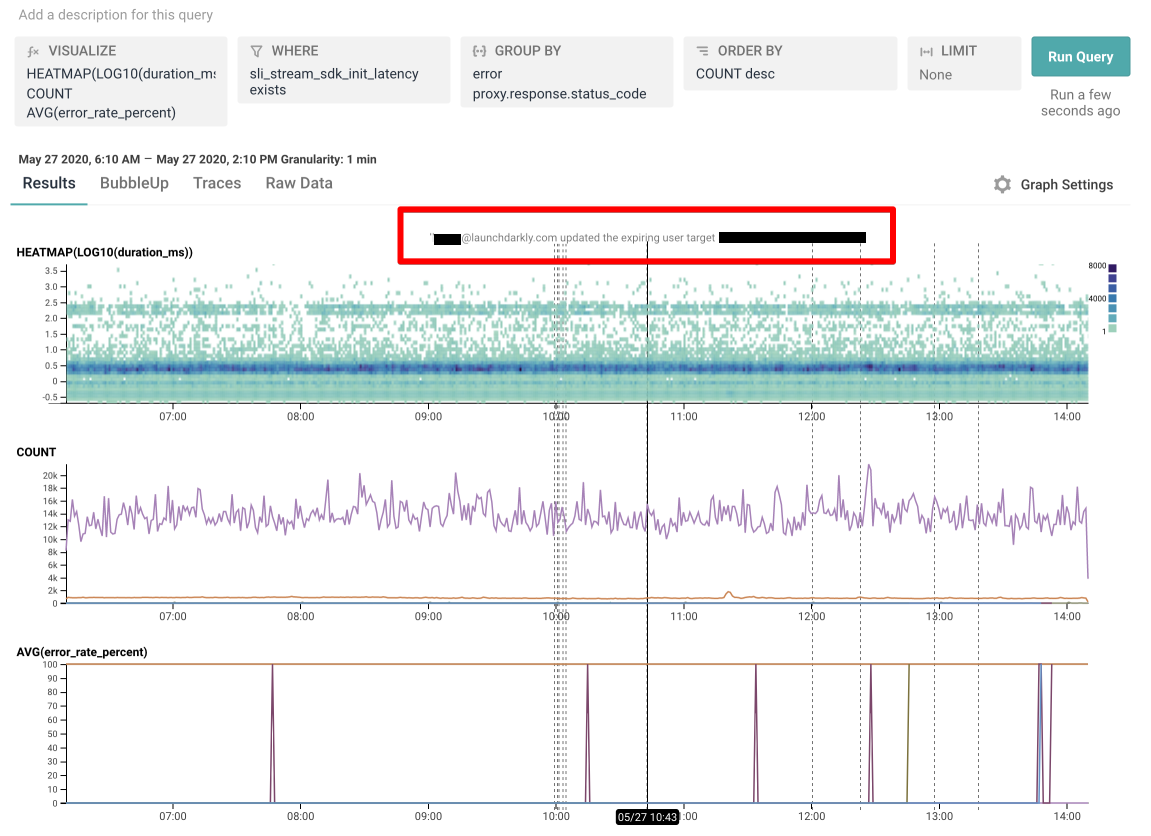
Only flag action events appear in Honeycomb after you configure the integration. Other event kinds do not appear. To learn more, read Feature flag actions.
To send flag change events to Honeycomb:
- Create a Honeycomb API key.
- Add the Honeycomb integration in LaunchDarkly.
- (Optional) Configure the integration’s policy to allow or restrict specific projects and environments.
Prerequisites
To use the LaunchDarkly Honeycomb integration successfully, you must meet the following prerequisites:
- You must have an API key from your Honeycomb account. To learn more, read Create a Honeycomb API key.
Create a Honeycomb API key
The Honeycomb API key authenticates the LaunchDarkly integration so it can submit events to your Honeycomb account. The LaunchDarkly integration uses Honeycomb’s Marker API.
To learn more about Honeycomb’s Marker API, read Honeycomb’s documentation.
When you create the API key, confirm that the key has access to create “markers.” This is the only access scope the LaunchDarkly integration needs.
Add the Honeycomb integration
Here’s how to add the Honeycomb integration:
- Click the gear icon in the left sidebar to view Organization settings.
- Click Integrations and find “Honeycomb.”
- Click Add integration. The “Create Honeycomb configuration” panel appears.
- (Optional) Type a human-readable Name.
- Enter the Honeycomb dataset name you would like flag markers to be associated with.
- Paste in your Honeycomb API key.
- (Optional) Configure a custom policy to control which flag information LaunchDarkly sends to Honeycomb. To learn more, read Configure integration policies.
- After reading the Integration Terms and Conditions, check the I have read and agree to the Integration Terms and Conditions checkbox.
- Click Save configuration.
Configure integration policies
The “Edit policy” field in the integration configuration panel lets you control which events LaunchDarkly sends to Honeycomb.
The default policy allows production environments across all projects to send events. To update the policy, use the policy builder or by click View JSON and edit the policy statements directly.
Here’s the resources specifier from the default policy:
To learn more, read Using resources.
You can use the policy editor to restrict the integration to:
- a specific set of LaunchDarkly projects/environments
- a specific set of flags
- a specific set of actions
For example, to restrict the policy to a single project called cool-app, set the policy configuration’s resources field to the following resource specifier:
The policy above makes the integration only send flag events from the cool-app project’s Production environment to Honeycomb.
If you need to restrict or allow a more complex set of resources than you can specify in a single policy, you can add multiple Honeycomb integrations and configure each one to a specific task. Each integration can have its own separate policy configuration.
To learn more about using the policy editor, read Using policies.