By day, I'm a developer experience engineer; by night, I'm a stand-up comedian. My audience (whether it's a tech conference or comedy club) differs widely. And as any skilled performer knows, the first way to bring on the tomatoes is by not serving your audience what they want.
Fortunately, I've crafted a customizable (and toggle-able) link in the bio application using Reflex.dev and LaunchDarkly, which displays different information based on the scenario.
Whether you're showcasing your projects or just want a neat way to share your online presence, this guide will walk you through creating a dynamic and visually appealing link in your bio site.
What is the tech stack we’re working with?
Reflex: A robust framework that allows you to build interactive web applications using pure Python. As of the time of writing, Reflex has 19.8K stars on GitHub and is quickly gaining traction — check out their template directory!
Requirements
- A (free) LaunchDarkly account
- Python and Pip installed on your machine
Get started with the link in bio app:
Clone the repository:
git clone https://github.com/reflex-dev/reflex-examples Navigate to the project folder:
cd reflex-examples/linkinbioCreate a virtual environment:
python -m venv venvInstall dependencies and get your app running locally:
pip install reflex launchdarkly-server-sdk python-dotenv
reflex run
Finally, navigate to http://localhost:3000/ to catch this beautiful gem:
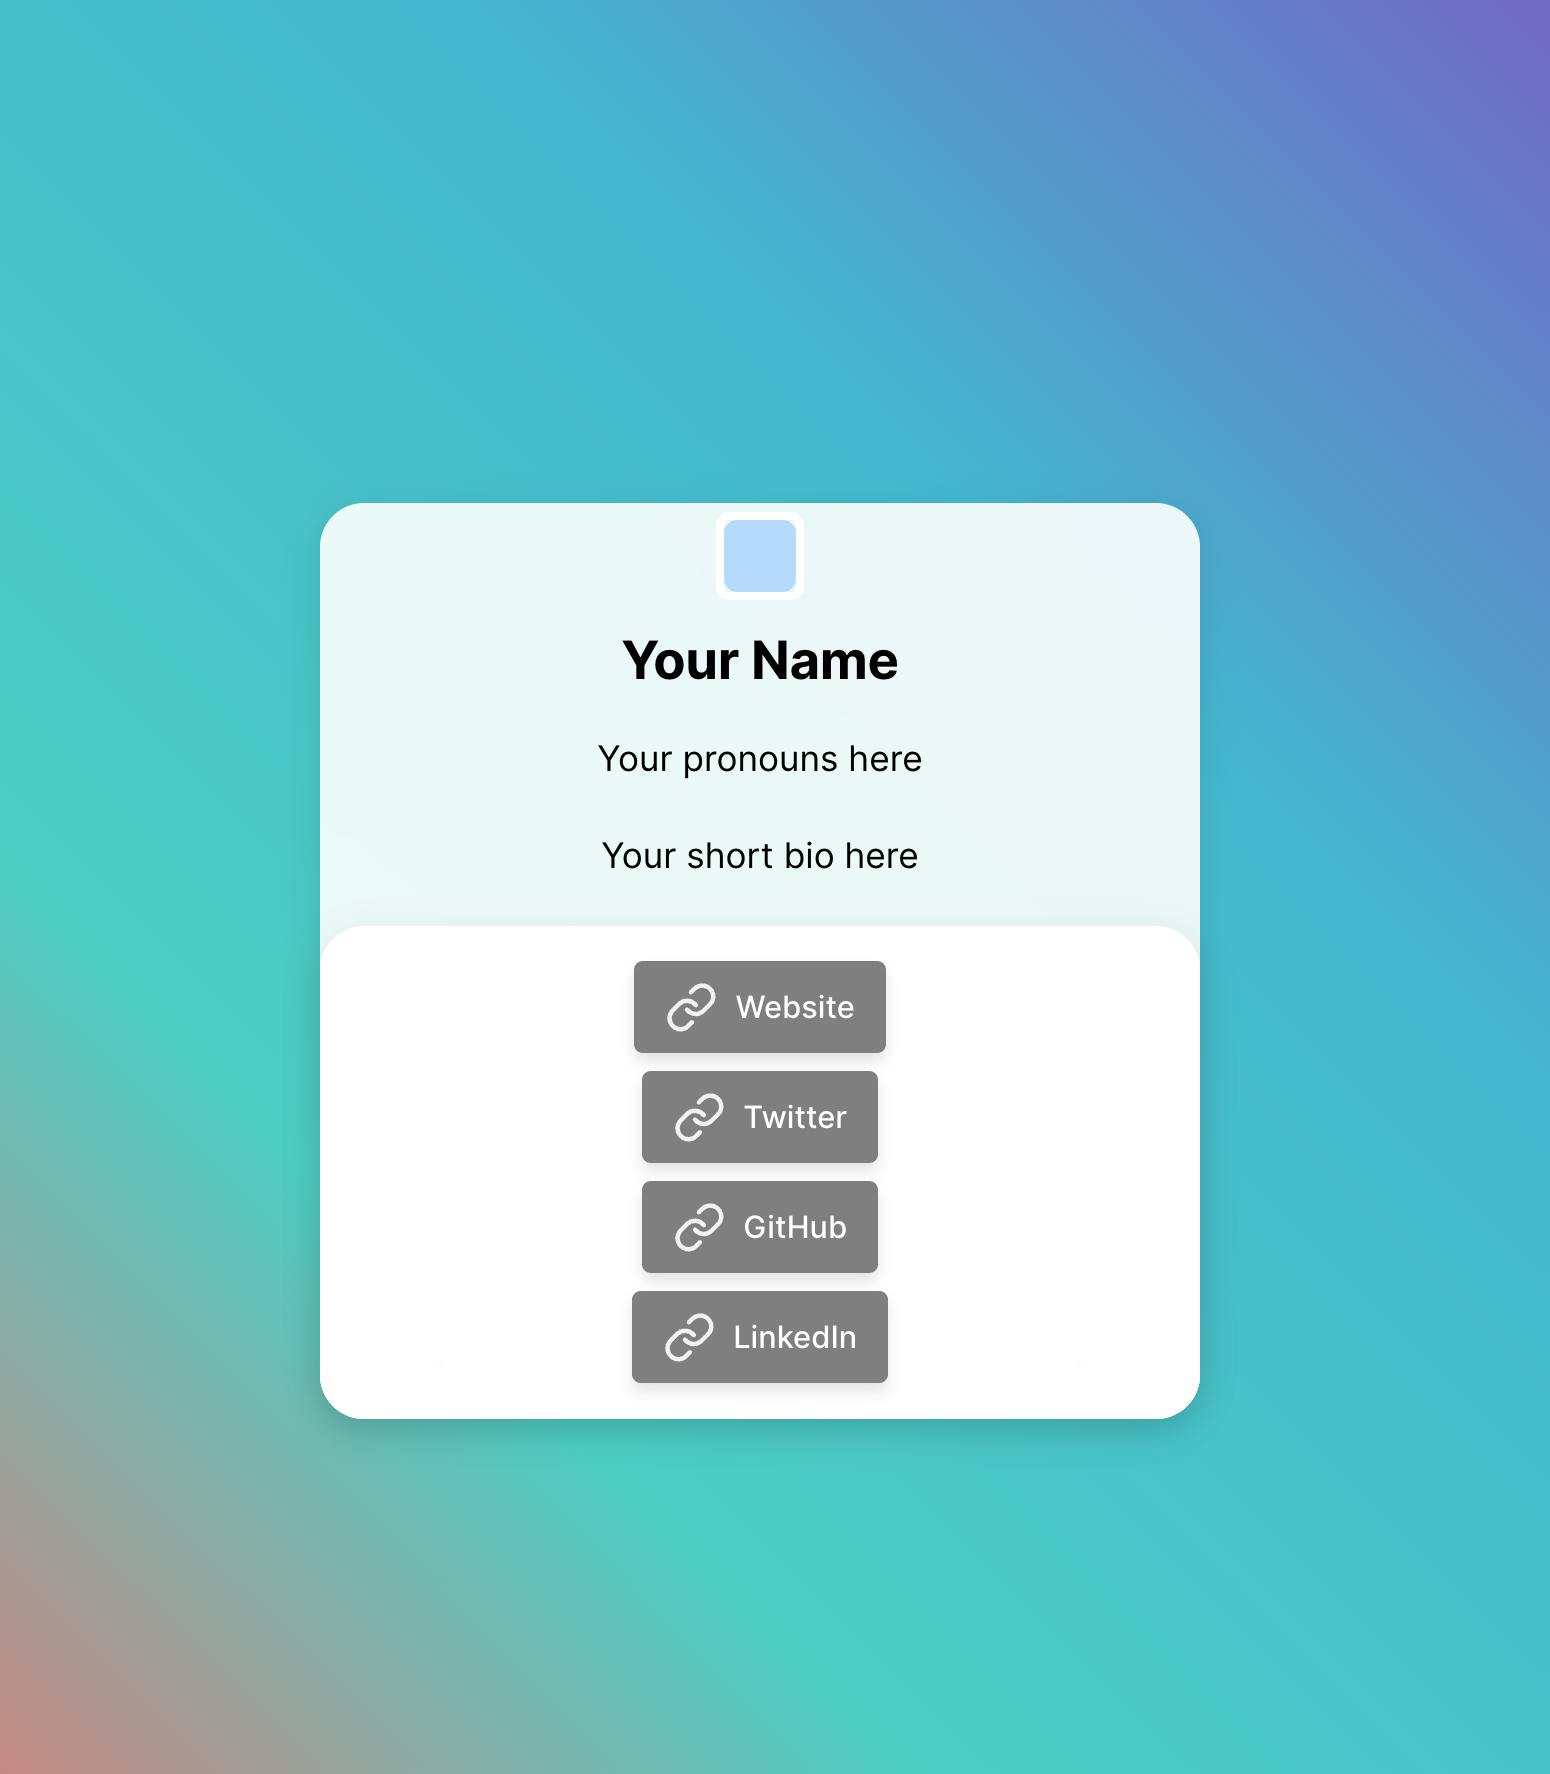
Naturally, we probably don’t want this to be a generic “your name” site, so let’s go in and add our links to this.
You'll notice two different spots to put in information in the code: a "Bio Page if True" and a "Bio Page if False" version. This shows the "Bio Page if False" version.
Let’s open the file linkinbio/linkinbio/linkinbio.py and examine the index function. This is where we’ll put our links to be uploaded.
We can add links, but what links are best to add? If I’m performing comedy, folks there really want to talk about my irritation with type errors and why I’m (somewhat begrudgingly) learning more about typescript. Don’t they? /s
No, they'd rather hear me tell funny jokes, learn how to find me at upcoming shows, and maybe see some press clips.
Hence, I'm creating two different versions of a link-in-bio page: a version for me in the day job (feature flag off) and a version for my comedy shenanigans (feature flag on)
Let’s add a feature flag that turns on this mode.
Navigate to the linkinbio.py file and find the function and array where these links are present; it should look something like this:
def index() -> rx.Component:
    return rx.fragment(
        rx.cond(
            State.get_feature_flag_bool,
            index_content(
                name="Bio Page if True",
                pronouns="dub.link/pronouns",
                bio="insert bio here",
                avatar_url="https://avatars.githubusercontent.com/<your_username_here>",
                links=[
                    {"name": "Website", "url": "https://www.google.com"},
                    {"name": "Upcoming Events", "url": "lu.ma/launchdarkly"},
                    {"name": "Instagram", "url": "https://instagram.com/qtotherescue"},
                    {
                        "name": "Another Link here",
                        "url": "https://www.youtube.com/watch?v=dQw4w9WgXcQ",
                    },
                ],
                background="linear-gradient(45deg, #FFD700, #FF8C00, #FF4500)",
            ),
         index_content(
                name="Bio Page if False",
                pronouns="dub.link/pronouns",
                bio="< insert bio here >",
                avatar_url="https://avatars.githubusercontent.com/<your_username_here>",
                links=[
                    {
                        "name": "Website",
                        "url": "https://reflex.dev",
                        "icon": "globe",
                    },
                    {
                        "name": "Twitter",
                        "url": "https://twitter.com/getreflex",
                        "icon": "twitter",
                    },
                    {
                        "name": "GitHub",
                        "url": "https://github.com/reflex-dev/reflex-examples",
                        "icon": "github",
                    },
                    {
                        "name": "LinkedIn",
                        "url": "https://www.linkedin.com/company/reflex-dev",
                        "icon": "linkedin",
                    },
                ],
                background="radial-gradient(circle, var(--chakra-colors-purple-100), var(--chakra-colors-blue-100))",
            ),
        ),
Add your details accordingly.
TIP! Get an easy avatar URL by using your GitHub and the following link: https://avatars.githubusercontent.com/<your username goes here>
For example, mine looks like this when complete:
def index() -> rx.Component:
    return rx.fragment(
        rx.cond(
            State.get_feature_flag_bool,
            index_content(


   name="Erin Mikail Staples"
   pronouns="she/her/hers"
   bio="Developer Experience Engineer @ LaunchDarkly"
 avatar_url="https://avatars.githubusercontent.com/erinmikailstaples"
   links=[
       {"name": "Website", "url": "https://erinmikailstaples.com", "icon": "globe"},
       {"name": "Twitter", "url": "https://twitter.com/erinmikail", "icon": "twitter"},
       {"name": "GitHub", "url": "https://github.com/erinmikailstaples", "icon": "github"},
       {"name": "LinkedIn", "url": "https://linkedin.com/in/erinmikail", "icon": "linkedin"},
   ]
And the finished link in bio page looks like this:
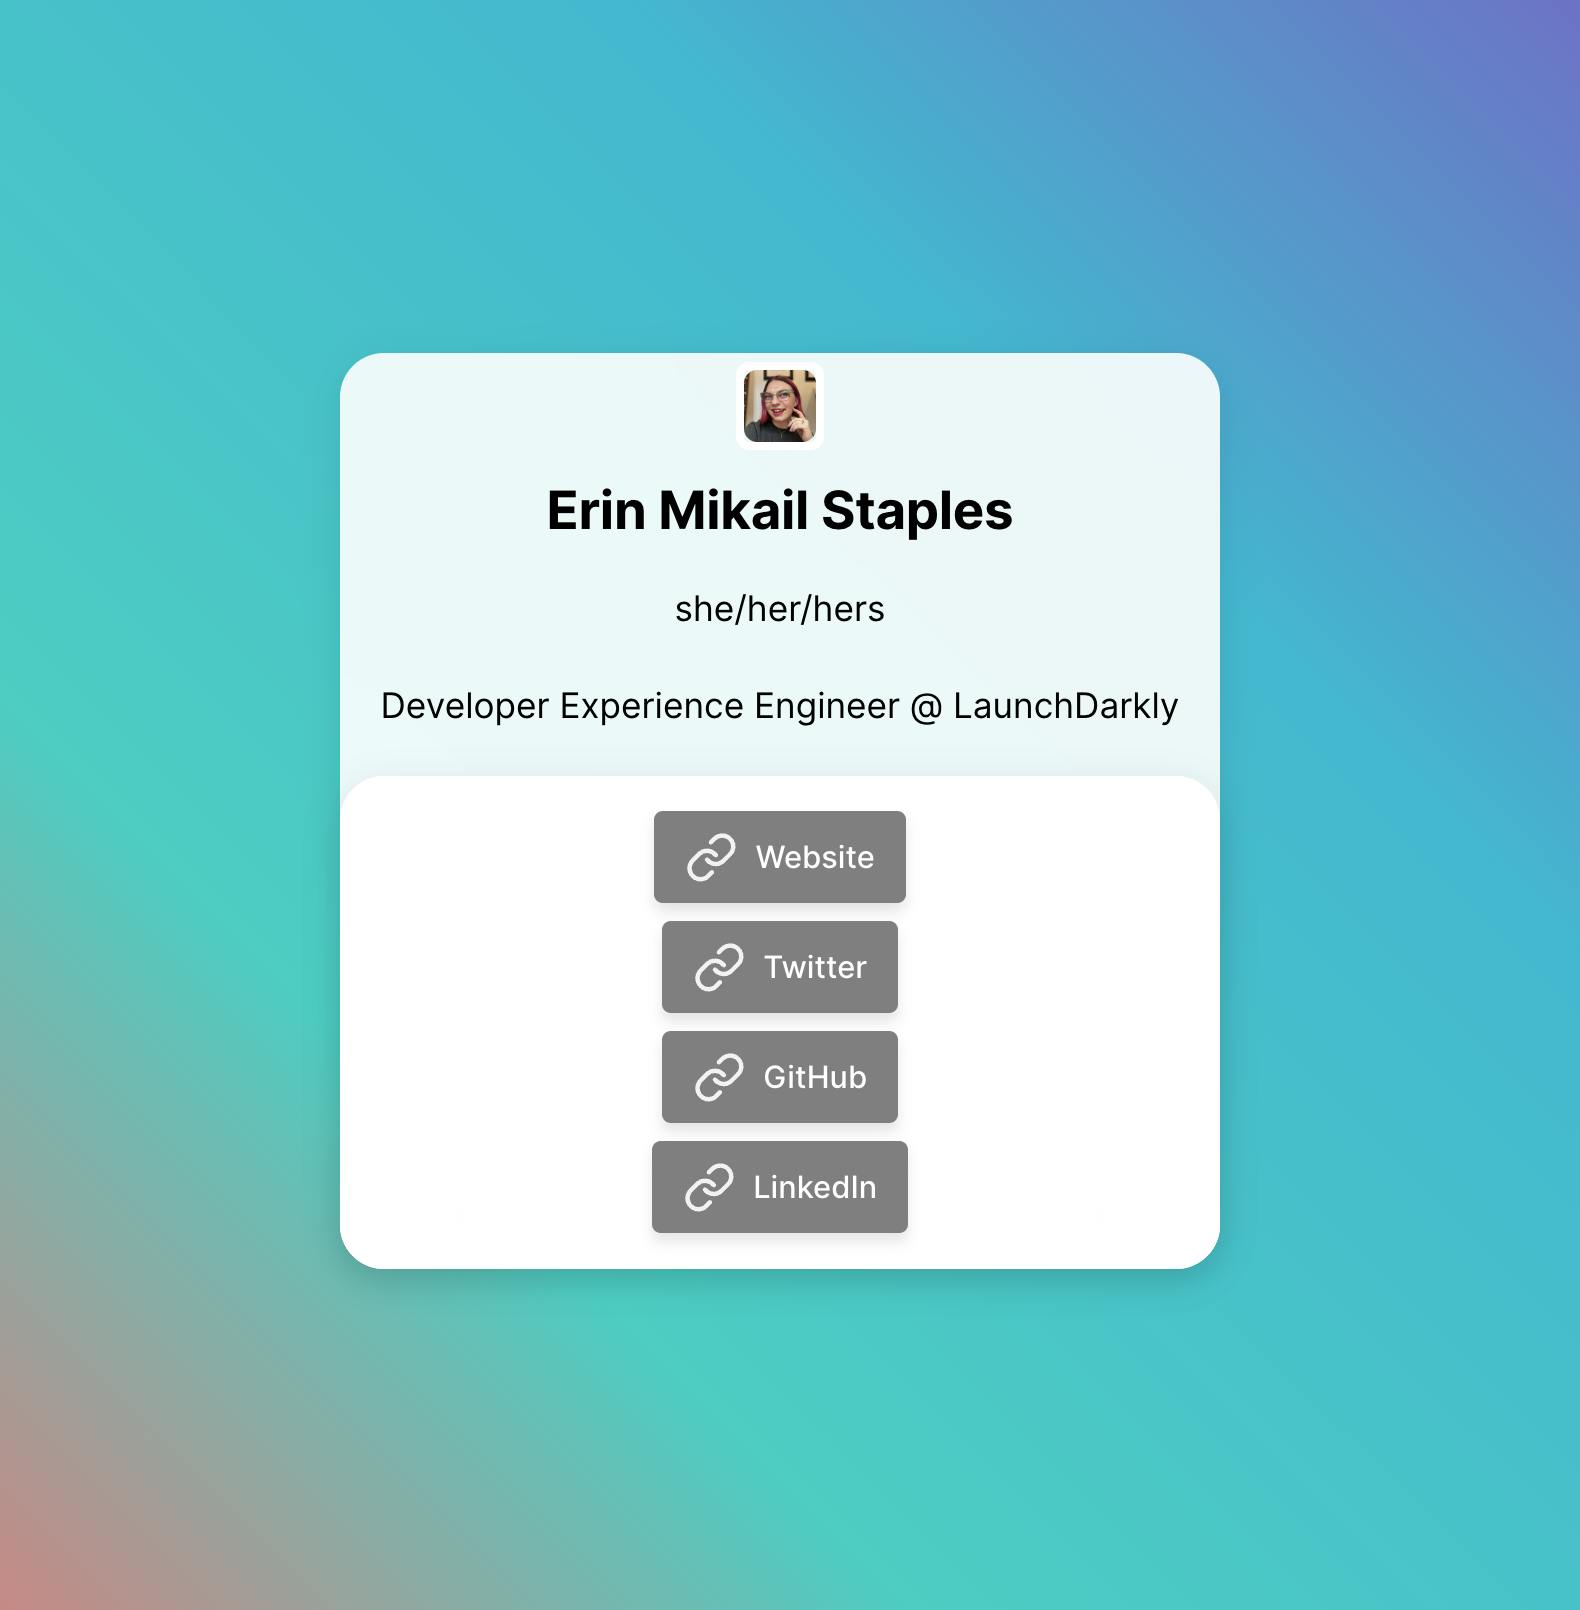
Now, let’s add a feature flag to turn on the alternate version of my link in bio page.
Business in the false variation, party in the true variation, as the saying goes, right?
Implementing LaunchDarkly
We’ve already set up the code to run in if feature flags aren’t your jam, but below, I’ll mention the magic of how we implemented the LaunchDarkly Python SDK.
First, at the top of our file, we’re adding the relevant LaunchDarkly imports:
# add LaunchDarkly imports
import ldclient
from ldclient.config import Config
from ldclient import Context, LDClient
import os
Next, we’re initializing our LD client. Note that this is done only once and needs to be the first thing that happens in our file. Because this code exists in the Reflex example library, we also want to make sure that it works without feature flags, so we’ve added an area that if the LaunchDarkly SDK isn’t present, it will ignore the initialization process, saving you an error.
# Initialize LD client (this should be done once, typically at app startup)
SDK_KEY: str | None = os.getenv("LD_SDK_KEY", None)

LD_CLIENT: LDClient | None = None
LD_CONTEXT: Context | None = None
if SDK_KEY is not None:
    ldclient.set_config(Config(SDK_KEY))
    LD_CLIENT = ldclient.get()
Now, to work correctly, switching at the speed of well, a switch, LaunchDarkly needs to be within a state class in Reflex.dev. In Reflex, the State class manages an app's dynamic data and behavior. This defines variables that can change over time (vars) and functions that modify these variables (event handlers).
class State(rx.State):

    # Create a LaunchDarkly context (formerly known as "user")
    ld_context_set: bool = False
    updating: bool = False

    def build_ld_context(
        self,
        context_key: str = "context-key-abc-123",
        context_name: str = "linkinbio-app",
    ) -> None:
        global LD_CONTEXT
        if LD_CLIENT is None:
            return

LD_CONTEXT = (
            Context.builder(
                context_key,
            )
            .name(
                context_name,
            )
            .build()
        )
        self.ld_context_set = True

    @rx.var
    def get_feature_flag_bool(
        self,
        feature_flag_key: str = "toggle-bio",
    ) -> bool:
        global COUNTER
        if not self.ld_context_set:
            return False

        flag_value: bool = LD_CLIENT.variation(
            key=feature_flag_key,
            context=LD_CONTEXT,
            default=False,
        )
        COUNTER += 1
        return flag_value

    def on_update(self, date: str,):
        print(f"{COUNTER} :: {date}")
With these items in place, we’re ready to add our LaunchDarkly SDK key and create our feature flag.
First, let's create our feature flag.
Once you log into LaunchDarkly and create a new project, create a new flag by clicking the create flag button in the app's interface.
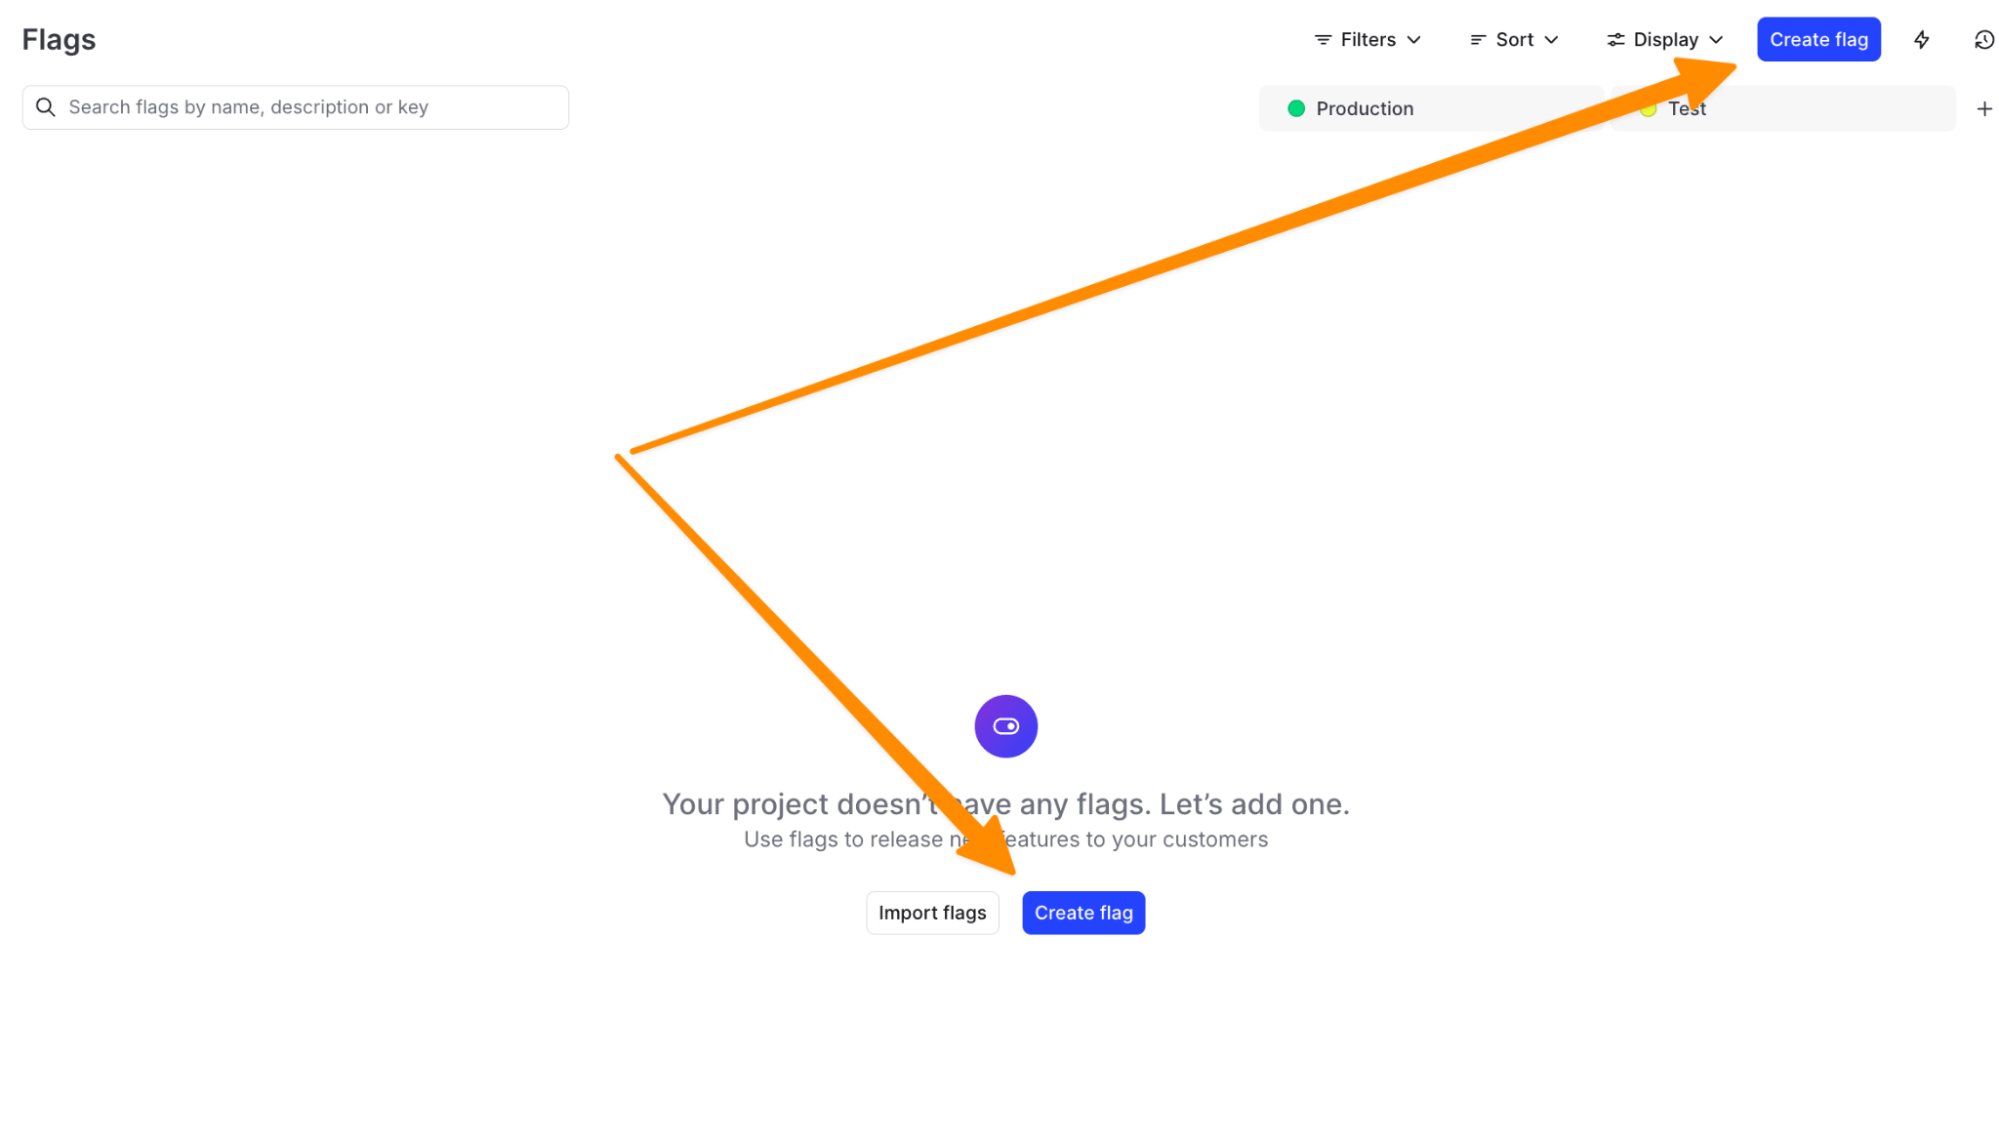
Next, create a flag with the following settings:
Name: toggle-bio
Flag Configuration: Custom
Flag is not temporary
Flag Type: Boolean
Variations:
- Party: true
- Business: false
Then click create flag.
Now, let's grab our SDK key and test this out!
Return to your terminal. Press ctrl+c to stop the current process.
Remember, each environment has its own unique SDK key. So, we’ll grab the SDK key from our production environment by clicking the three drop-down items on the flag you just created and clicking the SDK key. It will copy to the clipboard.
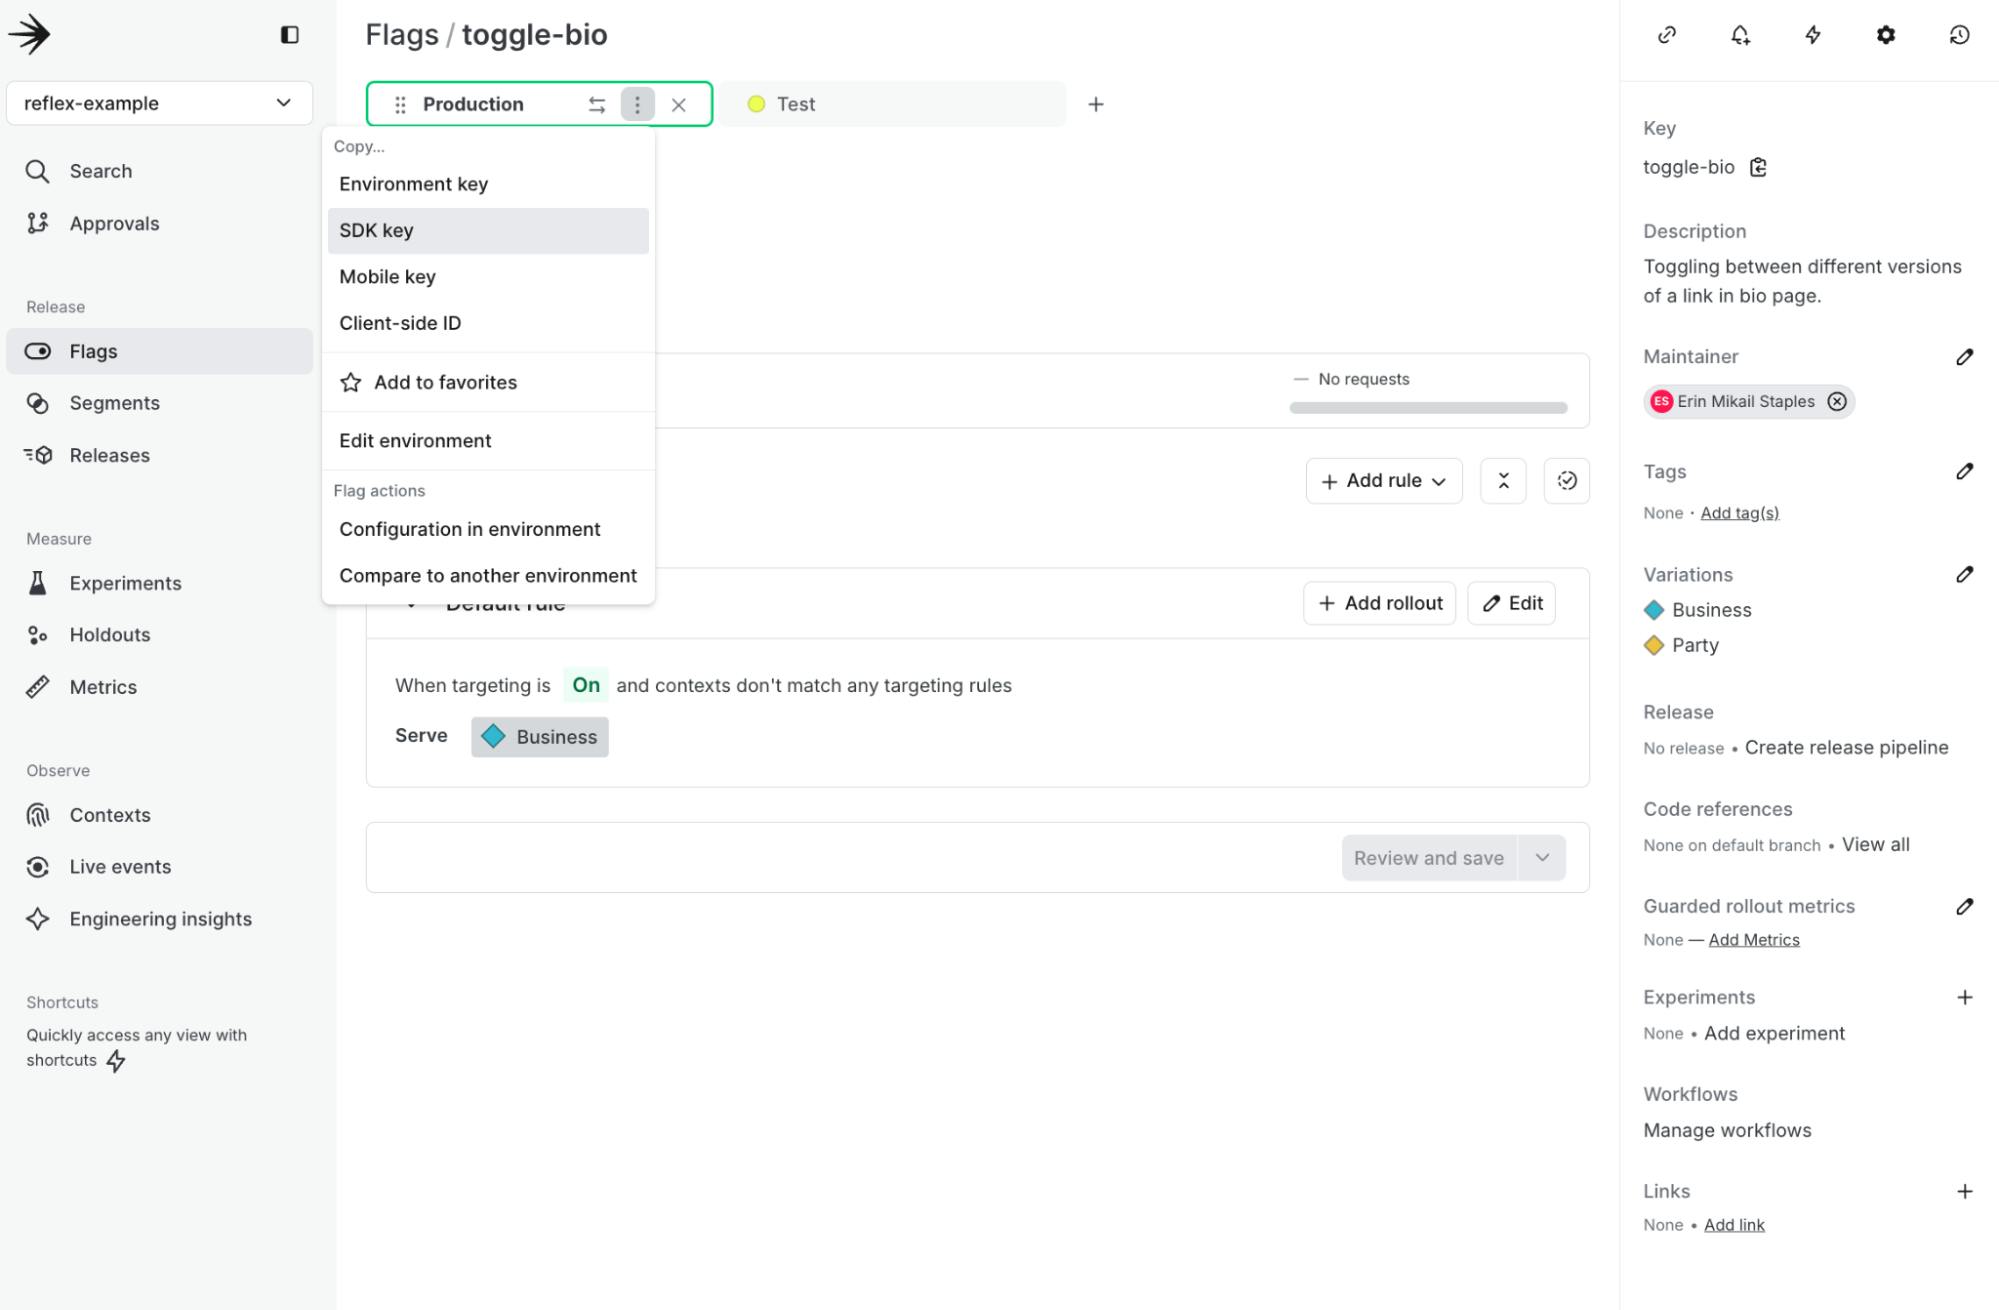
Before deploying our app, Reflex handles environment variables through the command line. We'll need to add our SDK key within the terminal.
Run the following in your terminal.
LD_SDK_KEY=<your LD SDK Key goes here> reflex runCopied!

Because we haven’t turned on the feature flag, you should still be seeing the “business” version of your page.
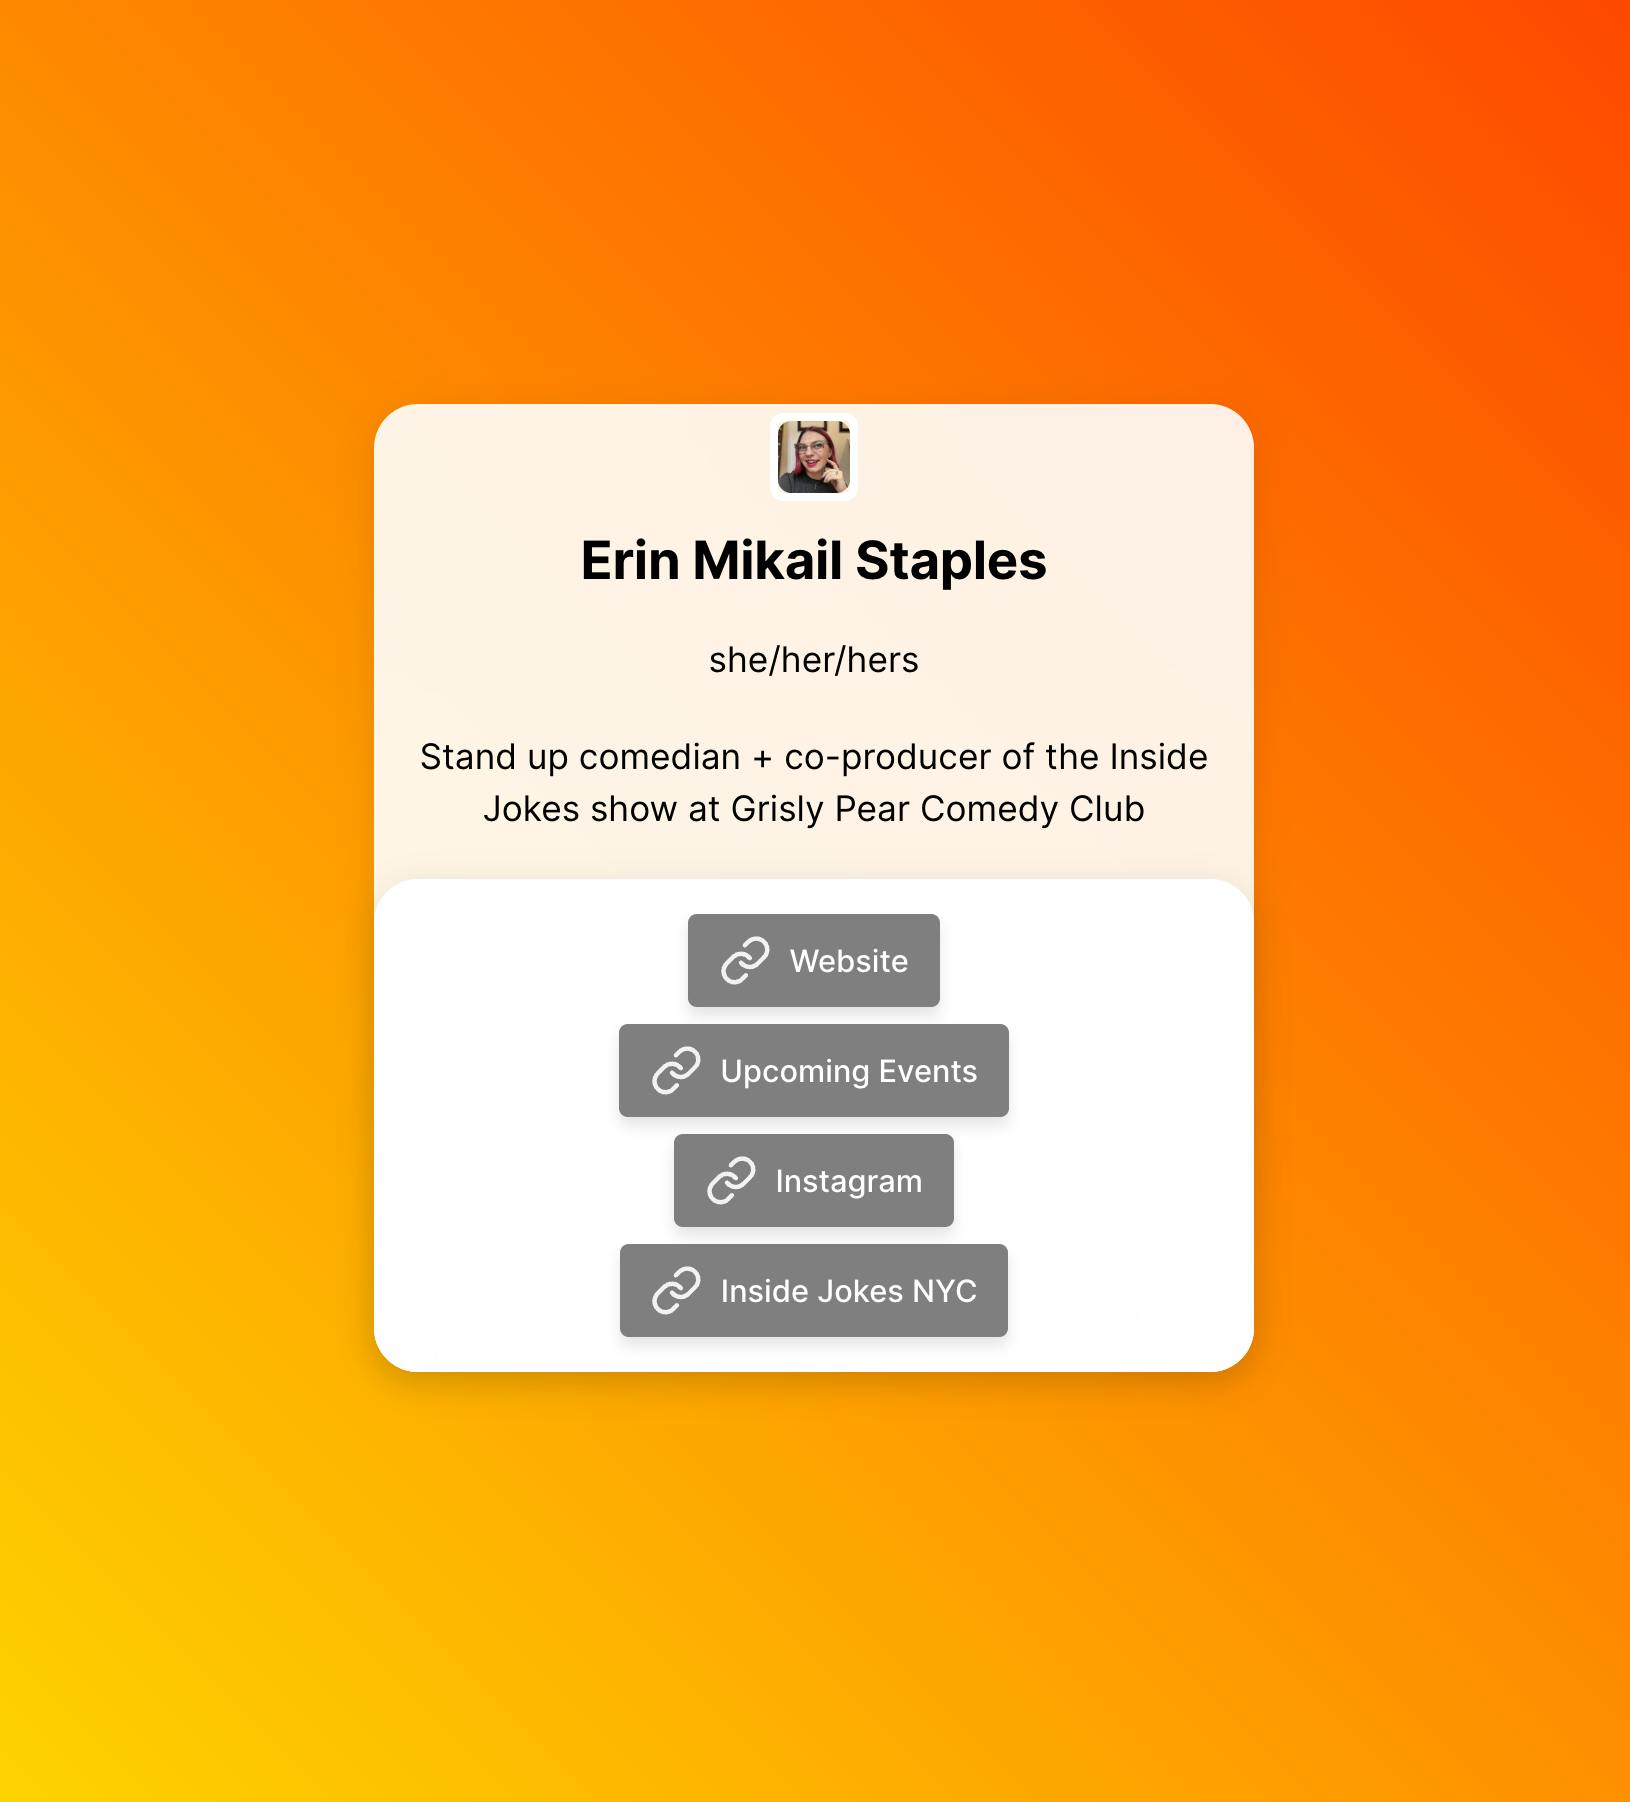
Let’s turn the feature flag on and watch that party version come to life!
Return to your LaunchDarkly interface and turn the Feature flag on.
Tada! Party mode, activated! 🥳
It’s showtime!
With everything set up in your upgraded link in bio page, it's time to take the stage. Whether you're showcasing your latest tech project or promoting your next comedy gig, your app is ready to adapt to any audience.
Congratulations! You've built a dynamic "Link in Bio" app that can easily switch between different personas. Whether you're coding, cracking jokes, running events, or taking over the world, your online presence is now as versatile as you are.
If you dug this tutorial, check out these other tutorials using LaunchDarkly (some with equally sick gradients)
- How to Build a Sentiment Analysis App using LaunchDarkly and Hugging Face.
- Boost Your Next.js Reality TV Scenario Generator: Rate Limiting and Targeting with Arcjet and LaunchDarkly
- Using LaunchDarkly to target different audience segments in a Python application.
Until next time, tell me your side hobbies, what your “party mode” would be via email, the site formerly known as Twitter, LinkedIn or the LaunchDarkly Discord. Keep shining, both on and off the digital stage!


