I know this is a bit of a "breaking the fourth wall," but working in the feature management space is pretty incredible. A lot of the concepts and topics we work through every day are new ways that people are trying to release functionality into applications. Some of them are doing this the standard way—popping in the LaunchDarkly user interface and toggling a feature on or off. As mature organizations grow, they look for different ways to leverage LaunchDarkly feature toggles in their standard tooling workflows.
In this blog post, we're going to step through a few of the most common ways we see people extend their toggling beyond just hitting the switch in the UI. This blog post is meant to give you some visibility into the different ways you can enable or disable features within your environments. Let's get into it!
The Workflow Builder
The Workflow Builder is one of my favorite new features of LaunchDarkly. I'm a huge fan of features that allow developers and operators to recapture some of their time. The Workflow Builder allows teams to scaffold out process-driven workflows for releasing feature flags in LaunchDarkly.
There's a few key capabilities of the Workflow Builder that are worth highlighting. Progressive rollouts are an out-of-the-box capability: with the click of a button, you can automatically plot out a progressive rollout that gradually increases by a configurable percentage over a defined period of time. This allows you the ability, for example, to roll out a change to 10% of your users each day over the course of 10 days. If there's a problem along the way, the process can be canceled and the feature can be disabled immediately.
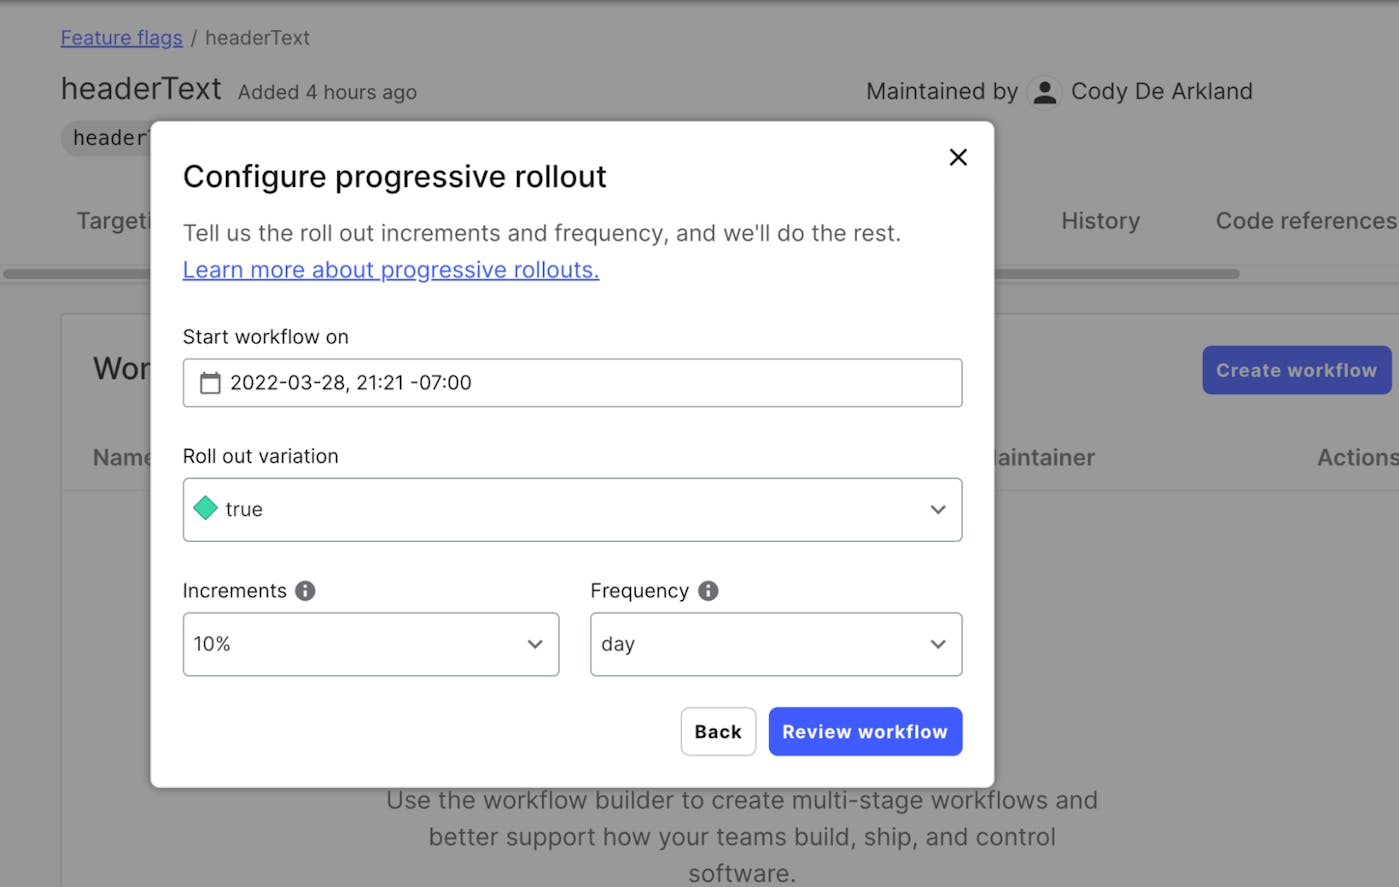
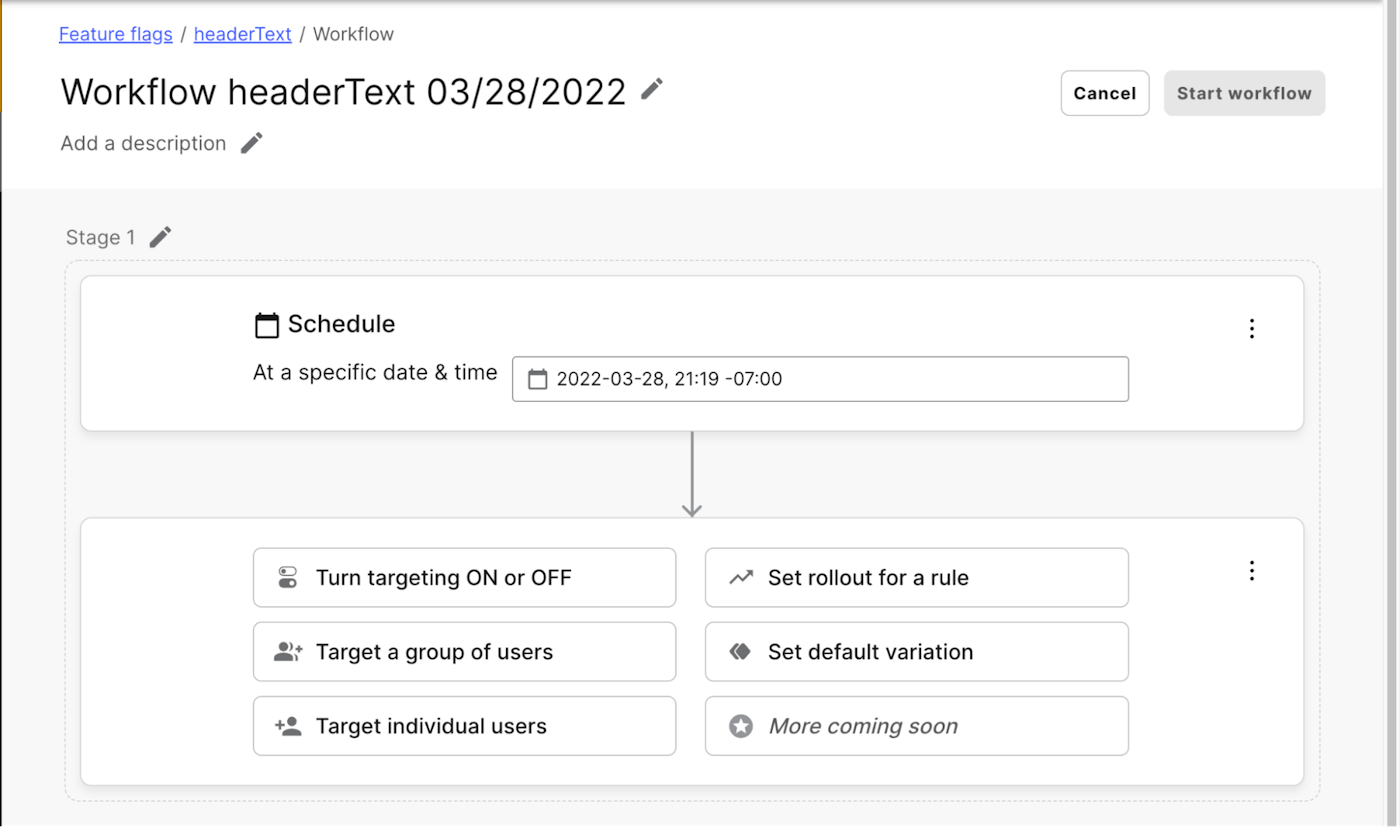
When you want a more customized approach, the Workflow Builder also allows you to plot out a custom workflow with the specific steps you'd like to execute on. For instance, you can create a workflow that requires approvals from specific people within your organization or a specific date to begin executing.
From there, you can have the Workflow Builder create multiple different steps around enabling or disabling a feature, adding targets to a feature flag, change the default variations for a rule, or even build out specific rollout percentages.
Targeting rule based rollouts and scheduled changes
One of the biggest superpowers of LaunchDarkly is the ability to target users with flag values that are based on rule configurations. These rules allow us to use attributes that can be configured as part of the user connection to influence the flag values that are received by the application. Do you want to ensure that "dev users" are receiving the latest and greatest features, or testing out a new component that you've built, while "prod users" are receiving their existing stable configuration? This concept is one of the hallmarks of LaunchDarkly and the core of the idea of "dark launching" features.
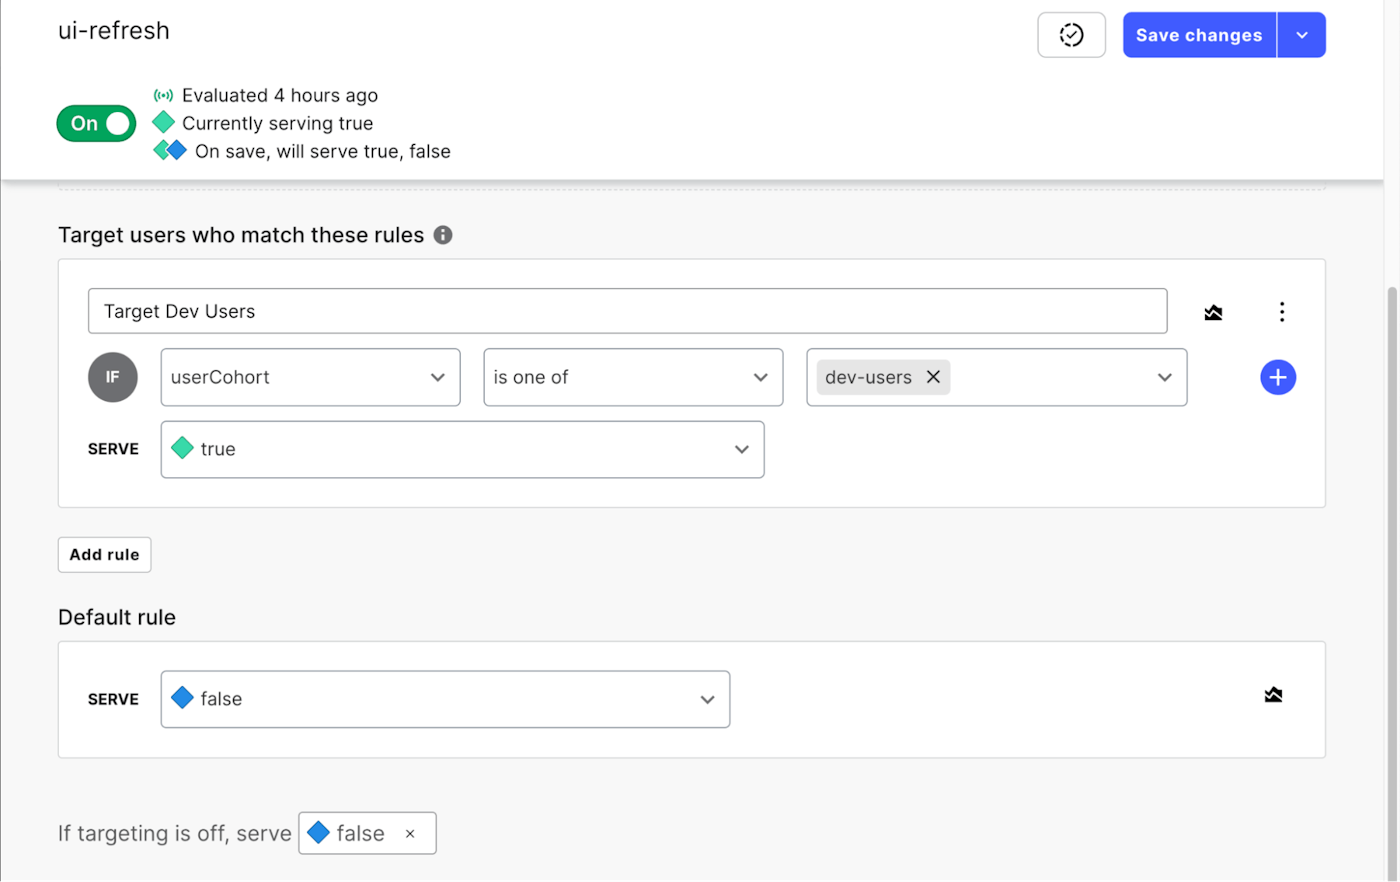
When coupled with scheduling out flag changes, these rules give you the ability to plan out feature releases that impact specific teams.
Other example use cases for flag targeting:
- Targeting a mobile-optimized UI for testing by mobile devices that are IOS
- Ensuring that Internet Explorer browsers receive a more compatible-friendly user interface
- Allowing developers who have a specific header configuration on their API requests to receive a new version of API for early testing, or bypass a maintenance mode on a development API
Flag Triggers
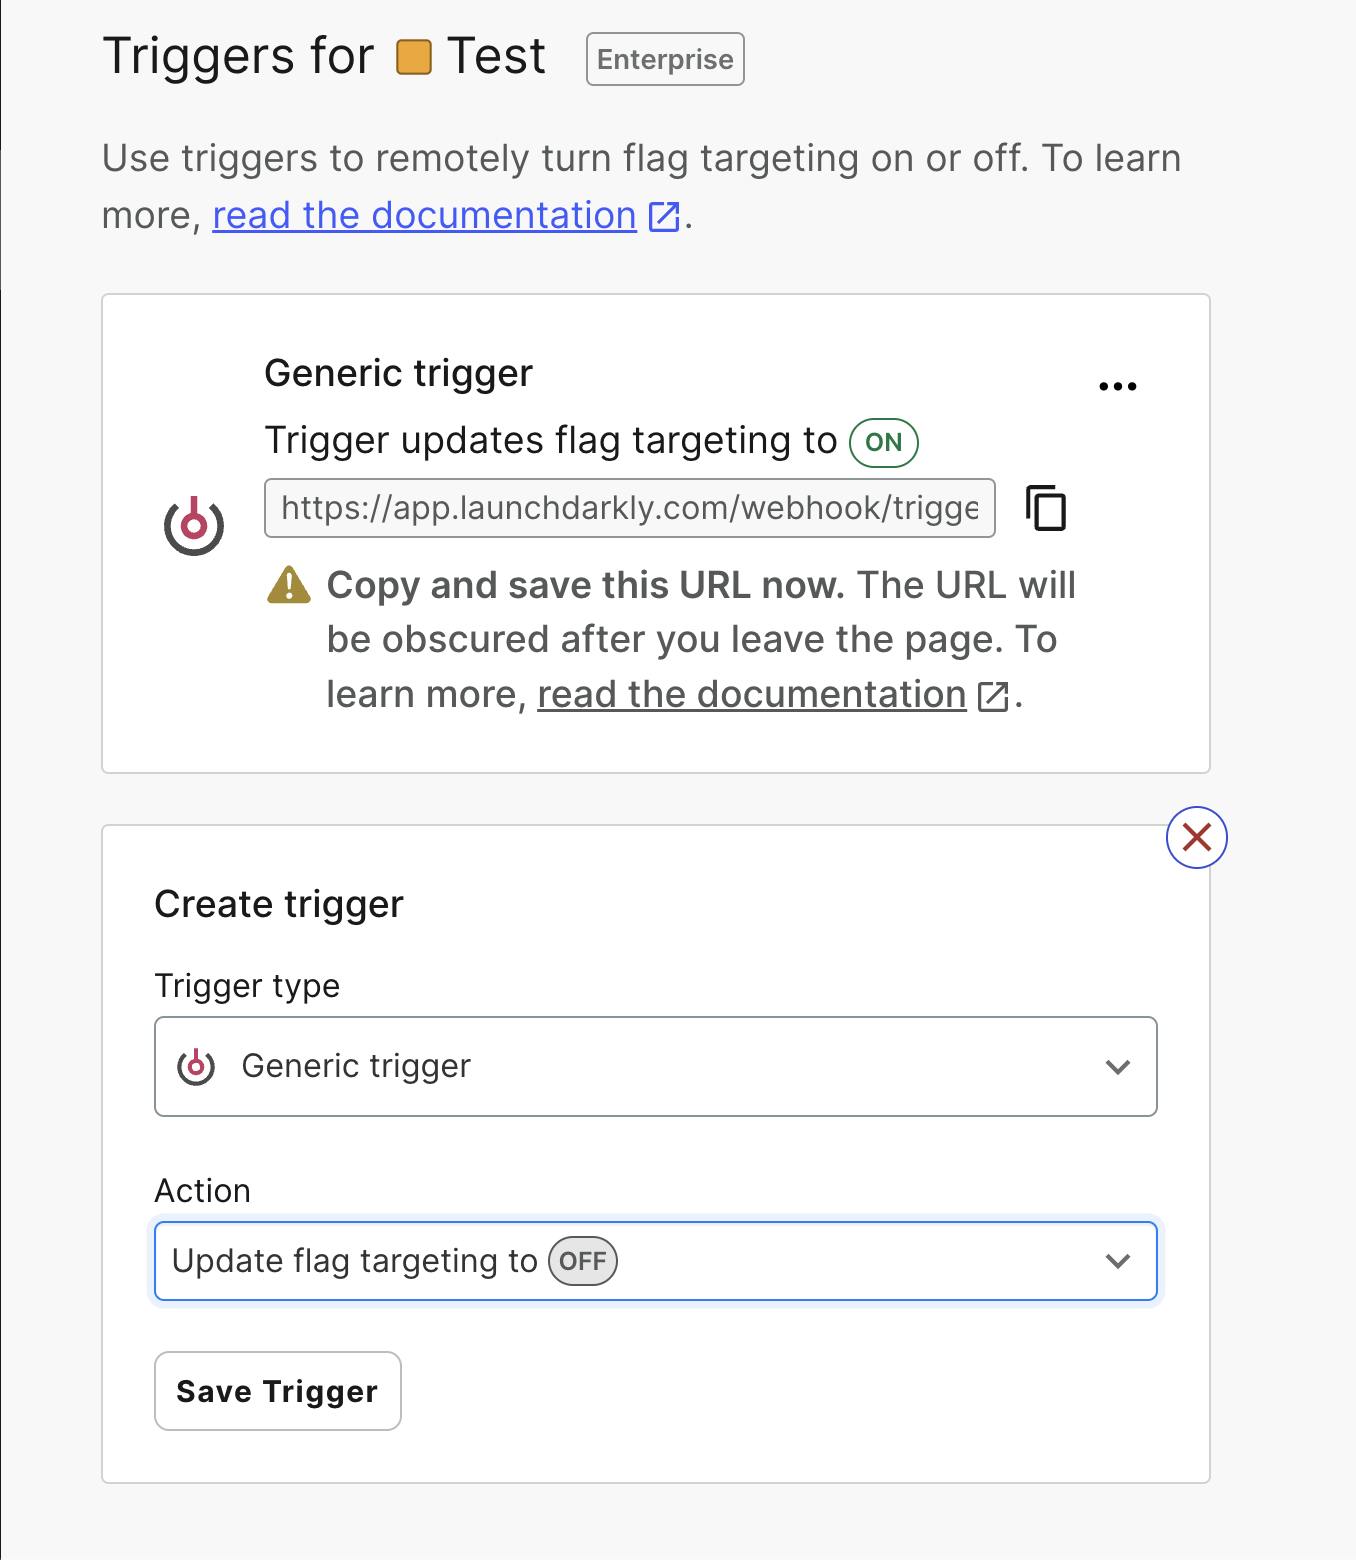
Flag triggers give us the ability to integrate feature flag changes with different platforms. Out-of the-box integrations include flag triggers for many observability platforms such as DataDog, New Relic, Dynatrace, and Honeycomb. Integrating flag triggers in these platforms allows us to trigger flag changes both from within dashboarding tools, as well as programmatically based on metric values and events within those platforms.
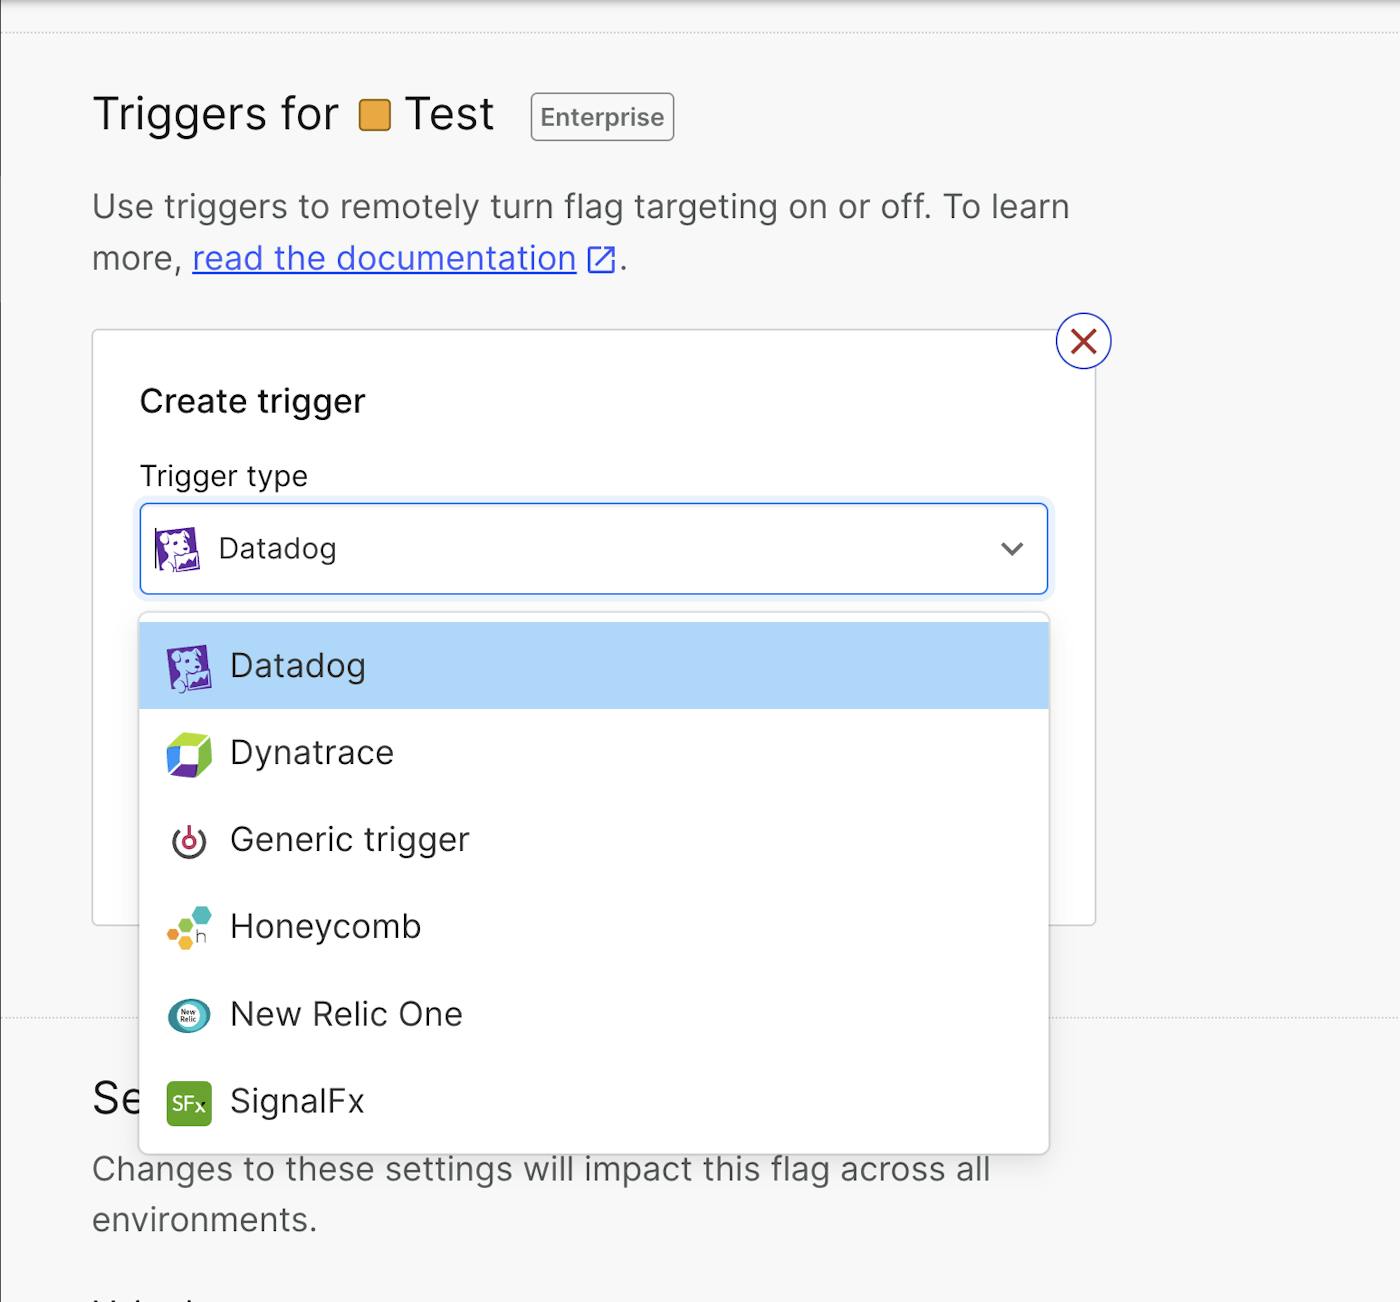
We also have the ability to create generic flag triggers that provide us with a URL to enable or disable specific feature flags. This URL can be tied into API requests as part of your development pipeline, or even provided to developers on teams to self manage features without being forced to log into the user interface.
These URLs can be called on-demand to enable or disable the targeting rules that manage features. Problem with a deployment late on a Friday evening after a last minute feature release? Call the disable URL and the feature is off.
This is an often overlooked but extremely powerful capability for integrating LaunchDarkly into other platforms.
Flag prerequisites
Flag prerequisites allow us to configure dependencies on other feature flag values in order to enable another feature. For example, we might develop a "new login" component as part of our "new UI" refresh, both of which being controlled by individual feature flags. It wouldn't make sense for us to roll out the "new login" feature flag before the "new UI," so we set the "new login" flag to require a "true" result from the "new UI" feature flag. This helps us protect our user experience and ensure that features are being released in our intended order.
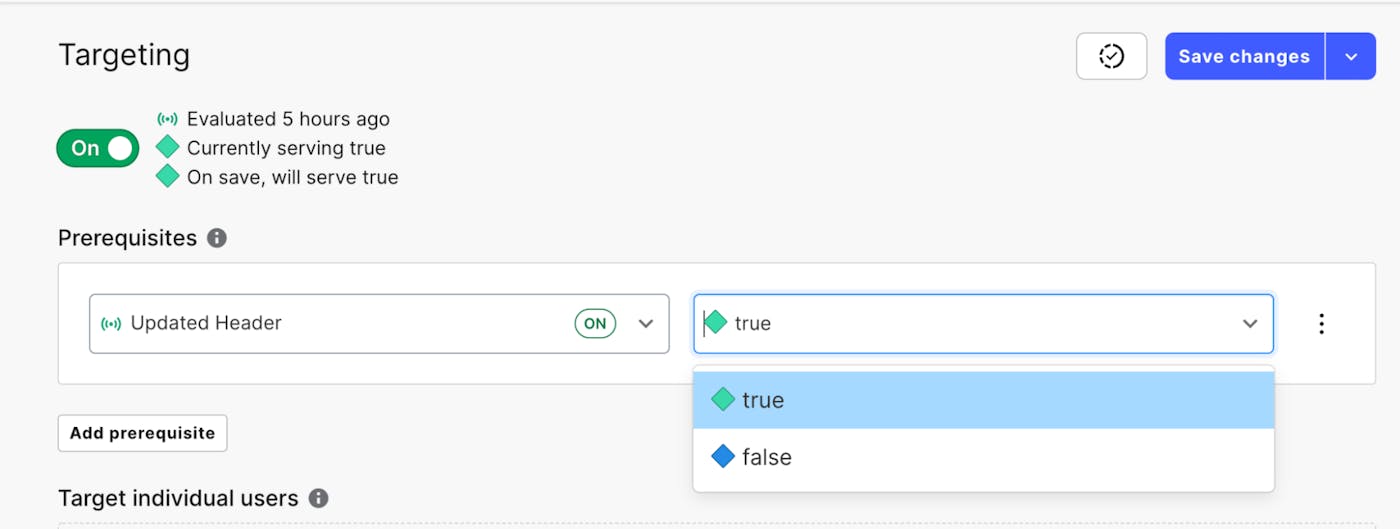
Using flag prerequisites to plot out the path of features you want to enable as a multi-part release allows you to truly orchestrate the rollout of a new set of capabilities across your application, while protecting yourself from the bad experience of rolling out a feature before the rest of your platform is ready for it. Furthermore, these flag prerequisites can also leverage targeting rules to ensure that the right users are receiving the right features.
And so much more...
In this blog, we touched on just a few of the ways teams can enable or disable features within LaunchDarkly, but there are so many more. Direct API integrations, HashiCorp Terraform, leveraging segments with targeting are all additional ways that features can be targeted to users and enabled.
Want to learn more? We'd love to hear from you! Reach out to us today, and tell us all about how you want to toggle!


