


The LaunchDarkly CLI now allows you to run a local development server to create a local copy of your flags in your local development environment. These local feature flags will enable you to continue development without an internet connection.
This guide will explain how (and why) to use the local development server to test both client-side and server-side flags in an Astro application.
Requirements
- A LaunchDarkly account (create a free one if you don’t already have one!)
Installing the CLI
The LaunchDarkly CLI is a tool for setting up and managing feature flags, account members, projects, environments, and teams, as well as running a local development server directly from the command line.
First, install the LaunchDarkly CLI if you do not already have it installed on your machine.
This can be installed via Homebrew, NPM, Docker, building from source, or by downloading it from GitHub.
For the next few steps, we'll use Homebrew and assume that you already have Homebrew installed on your machine; however, you can find other installation methods in the LaunchDarkly documentation.
Within your terminal, run the following.
brew tap launchdarkly/homebrew-tap
brew install ldcli
Check that the CLI version you have installed contains the development server using the following command:
ldcli dev-server –helpIf you already have the CLI installed, make sure you have the latest version by running the following command:
brew upgrade ldcliAuthenticating via the CLI
If running the LaunchDarkly CLI for the first time, you must authenticate to connect the command line tool to your LaunchDarkly account.
We’ll then authenticate ourselves through the login command. This command provides a login link to the LaunchDarkly application, requests your approval for the LaunchDarkly CLI to access your account information, and then stores an appropriate access token in the LaunchDarkly CLI's configuration file.
ldcli loginYou can also authenticate via access token for more controlled authorization or specific configuration scope.
Let’s now practice using the LaunchDarkly CLI by setting up a project exploring how to use its local development server feature with client-side and server-side flags.
Setting up the LD CLI Demo Project
For this tutorial, we'll use an existing Astro project that demonstrates the use of both client-side and server-side SDKs: the LaunchDarkly Node Server-side SDK and the LaunchDarkly JavaScript Client-Side SDK.
You can find the tutorial repository with both client-side and server-side flags here:
https://github.com/erinmikailstaples/LaunchDarkly-CLI-Demo/
Clone the LD CLI Demo repository locally to your machine and open it in your code editor of choice.
git clone https://github.com/erinmikailstaples/LaunchDarkly-CLI-Demo.git
cd LaunchDarkly-CLI-Demo
ℹ️ Why Astro? Astro is an open source web framework that allows for both server and client rendering in an HTML-like structure, providing for ease of use with fast performance. At the time of publication, the project has 45.5K stars on GitHub.
Once within that folder, open the .env.example file and have it ready to input your LaunchDarkly SDK and Client-Side IDs. We’ll be using this later in the process, so stay tuned!
Setting up your LaunchDarkly Credentials
First, log in to your existing LaunchDarkly account or create a new one.
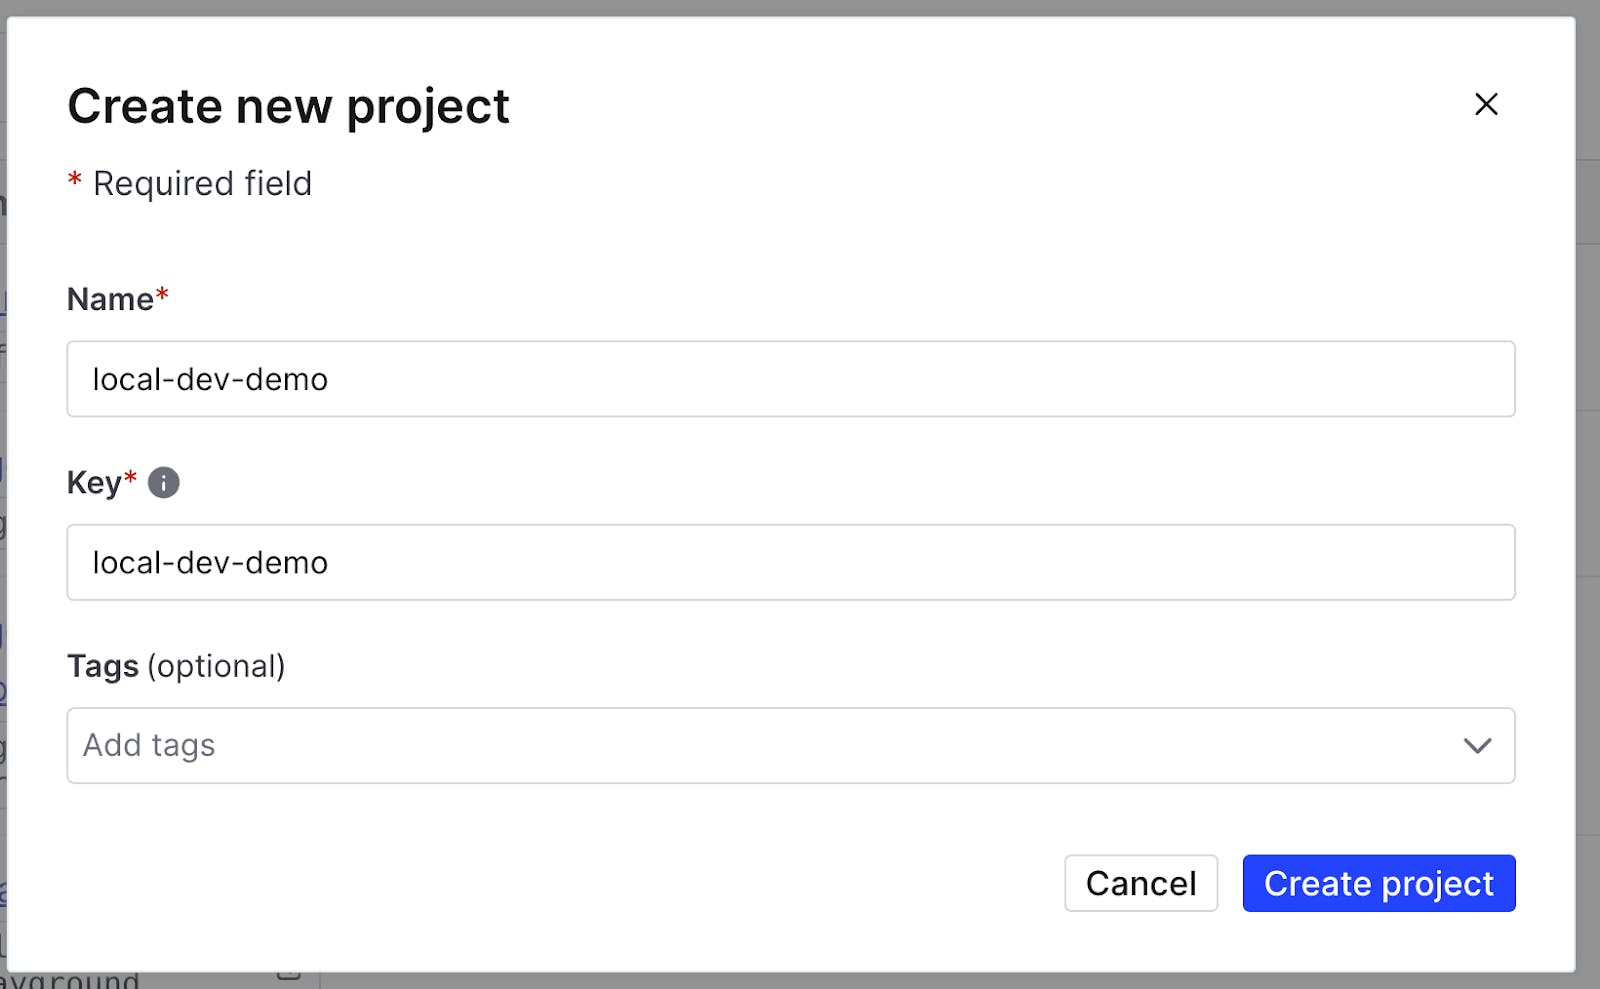
You can create a new LaunchDarkly project by clicking on the cog on the lower left-hand side of your window, navigating to projects, and selecting "Create new project."
For the sake of this tutorial, I’ll name this project local-dev-demo. As a heads up, your project key (in this case, local-dev-demo) will be used later in this tutorial, so hold onto this in the meantime.
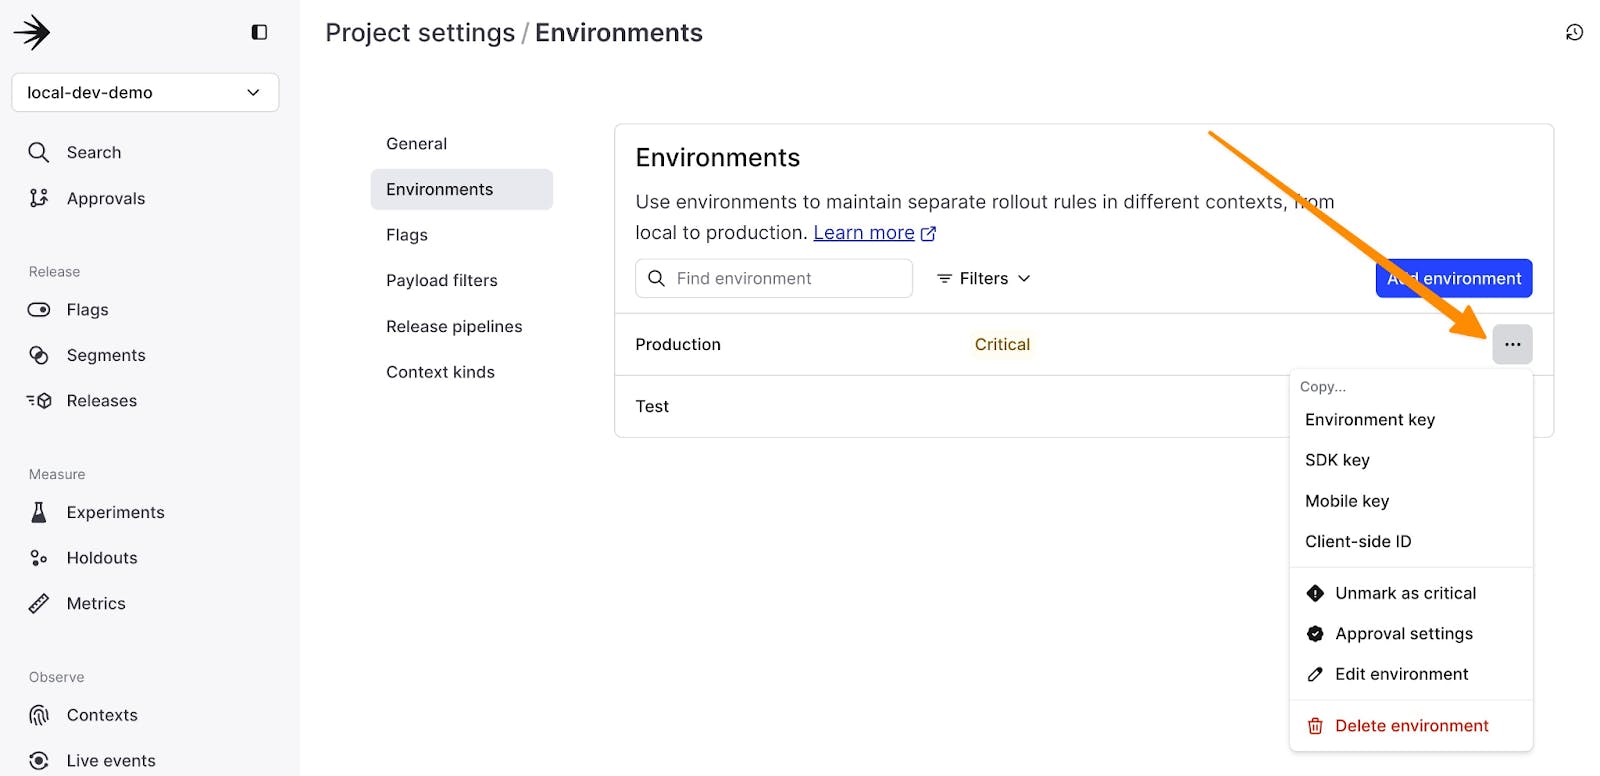
Then, we’ll need to get our client-side ID and SDK key.
We’ll need to get the keys from our production environment within the local-dev-demo project.
We’ll be working within our production environment. Copy the SDK key and Client-side ID here.
Paste each key within their respective place in the .env.example file;

Once complete, rename the .env.example file to .env and save the file.
We’ll now set up two feature flags, which will change dynamically depending on where LaunchDarkly SDK is being evaluated. The flags will show their status.
Creating the Feature Flags
We’ll create two flags to showcase how to use client-side and server-side feature flags within the local environment.
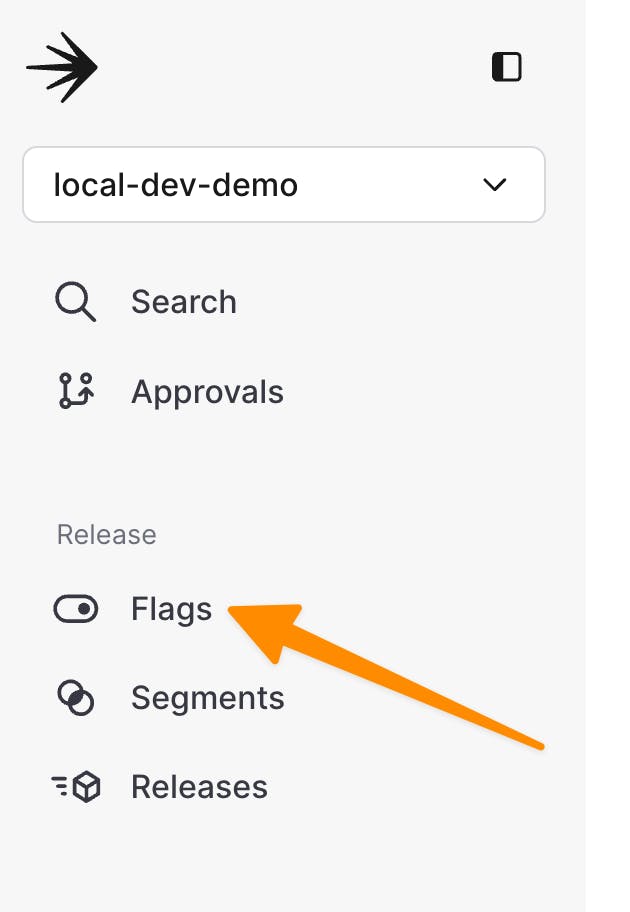
On the left-hand side of your screen, navigate to the flags panel within LaunchDarkly. Then click on Create new flag.
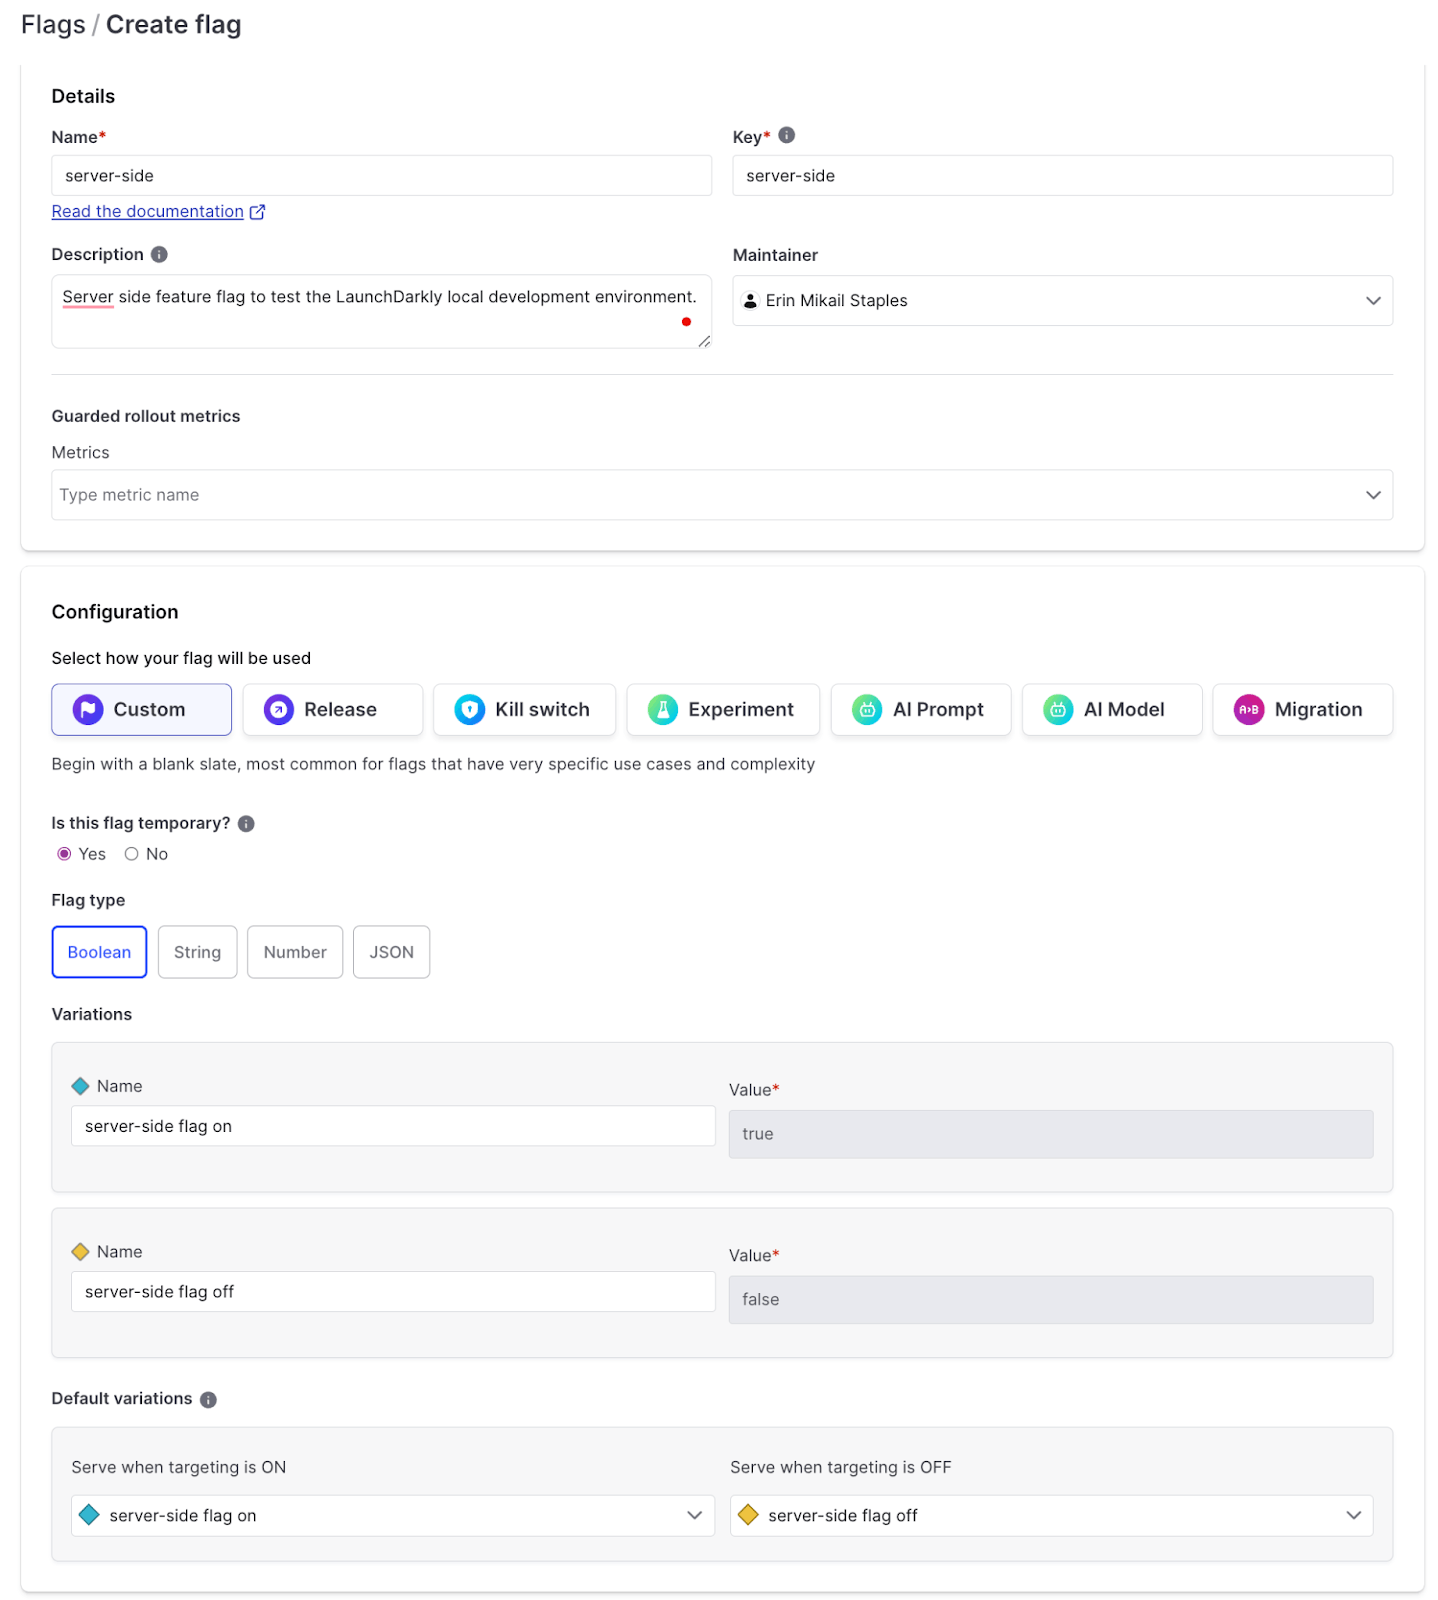
First, let’s start with creating our server-side feature flag.
Create a new feature flag with the following details:
Name: server-side
Key: server-side
Configuration: Custom
Flag type: Boolean
Variations:
- server-side flag on: true
- server-side flag off: false
Default Variations:
- When targeting is ON serve: server-side flag on
- When targeting is OFF serve: server-side flag off
Click Save flag when complete.
Let’s repeat the process with the client-side flag with a few minor changes.
For this situation, we’ll create an aptly named flag, client-side, with the following details
Name: client-side
Key: client-side
Configuration: Custom
Flag type: Boolean
Variations:
- client-side flag on: true
- client-side flag off: false
Default Variations:
- When targeting is ON serve: client-side flag on
- When targeting is OFF serve: client-side flag off
Client-side SDK availability
- Check: SDKs using Client-side ID
Click `Save flag` when complete.
Most importantly, when creating this flag, be sure to check the box that says “SDKs using Client-side ID” when complete.

Now, let’s check our work by starting up our application.
Starting the LD CLI Demo Application
Navigate back to your code editor of choice, where you have cloned the LaunchDarkly CLI Demo.
From within the project folder, LaunchDarkly-CLI-Demo, run the following within your terminal to install the required dependencies.
npm installThen start the Astro application by running the following:
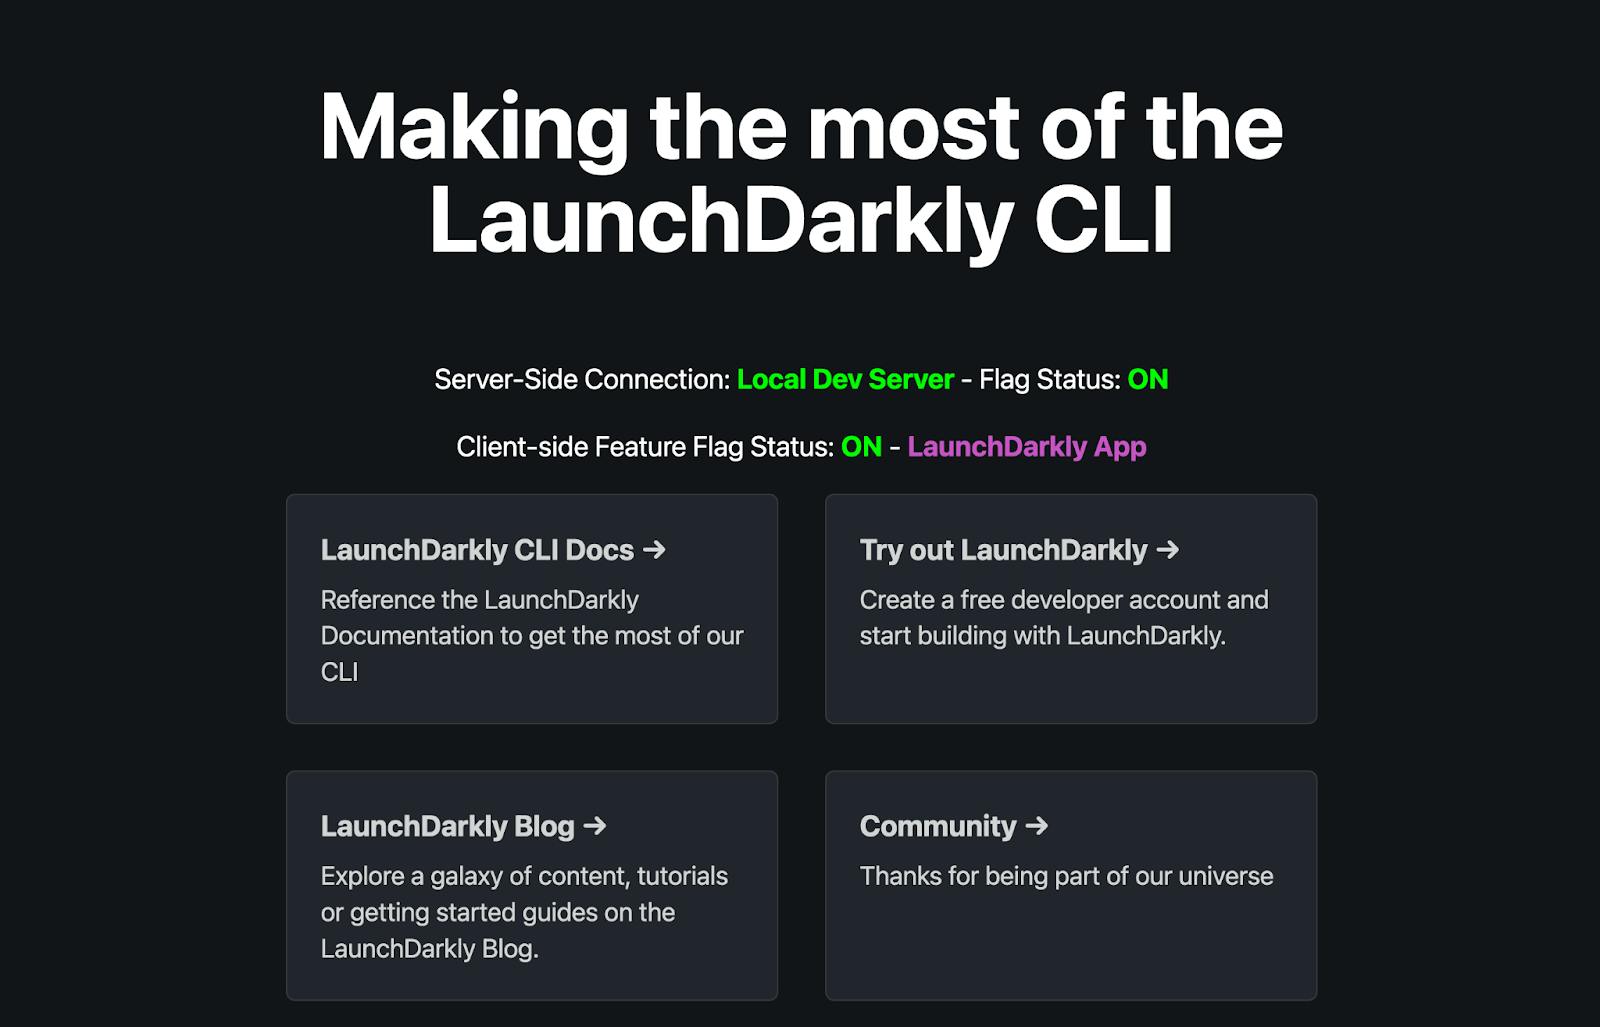
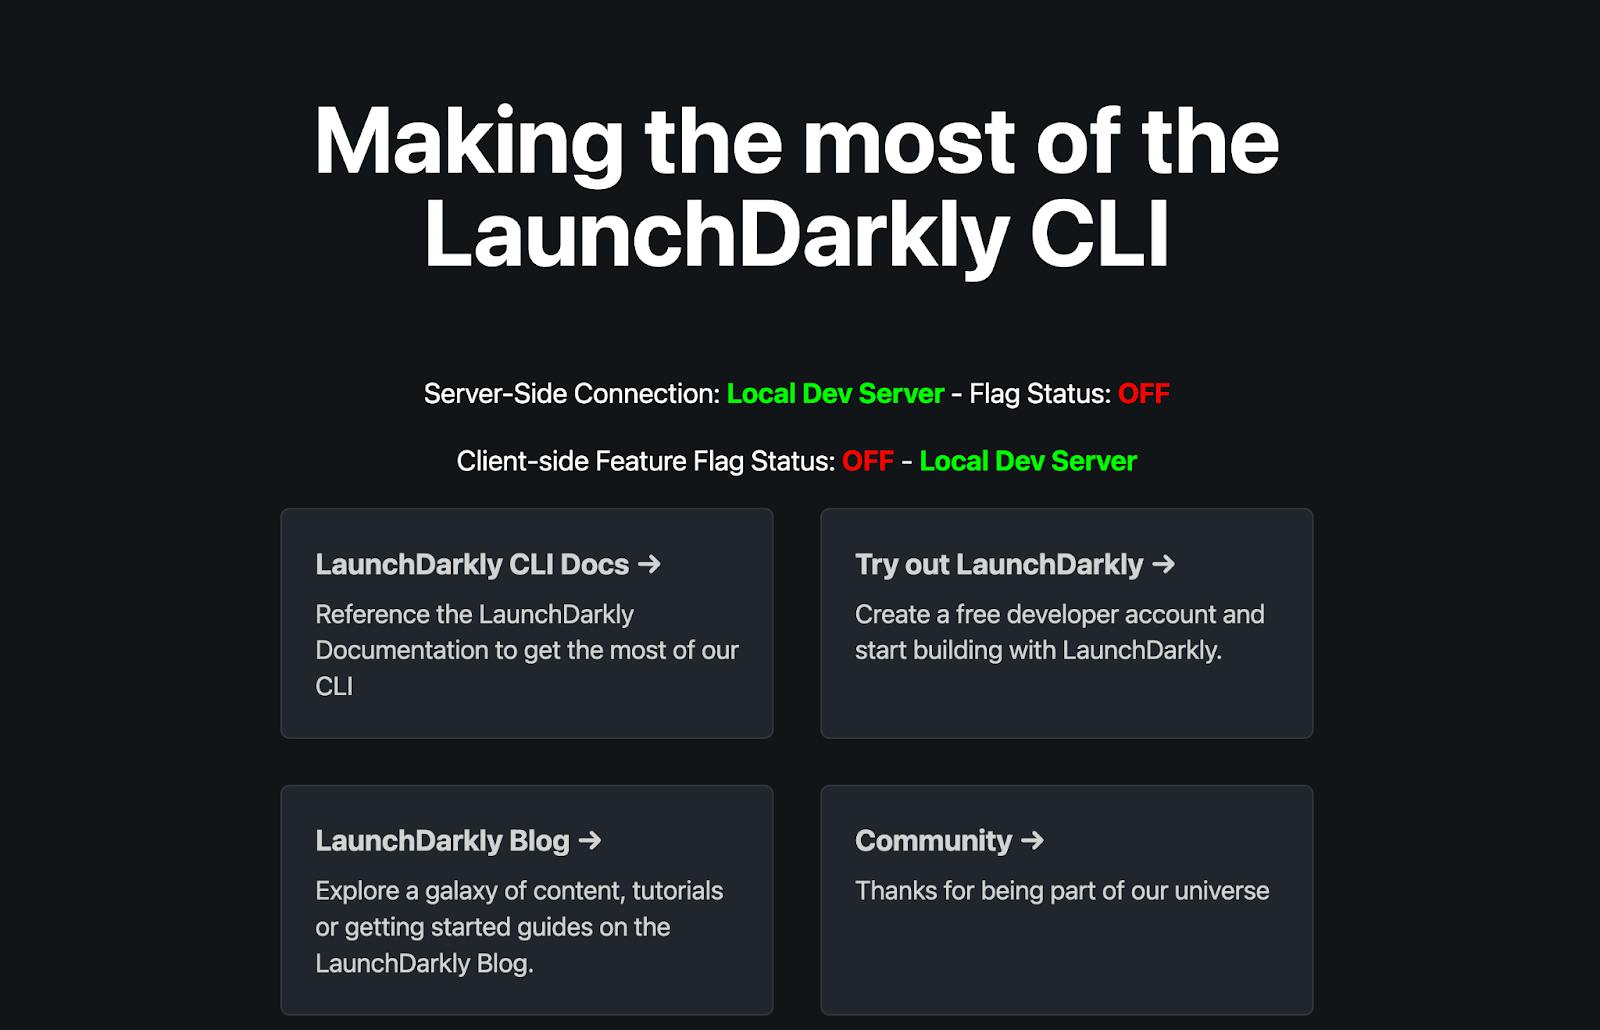
npm run devOpen up your browser to http://localhost:4321/, and you should see the following.
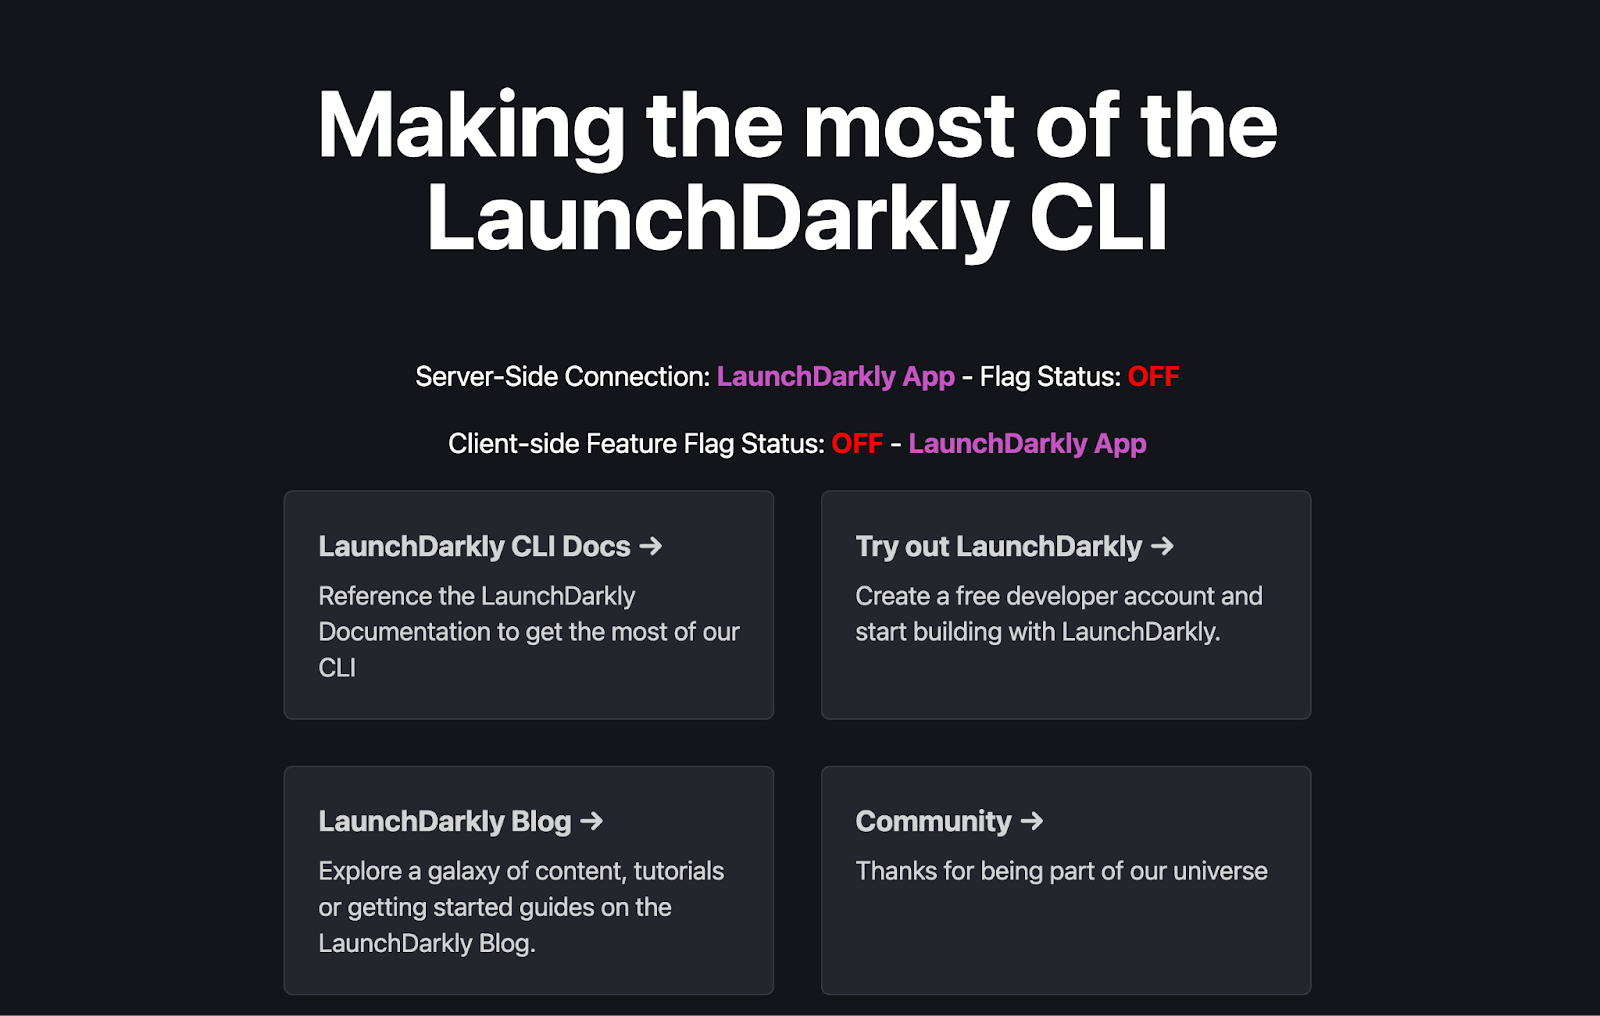
The application will inform us that our flags are connected to the LaunchDarkly application and turned off.
Let’s turn those flags on and confirm they work before running this on the local development server.
Navigate to your LaunchDarkly application and turn on each feature flag you created. Remember to hit save when you do so.

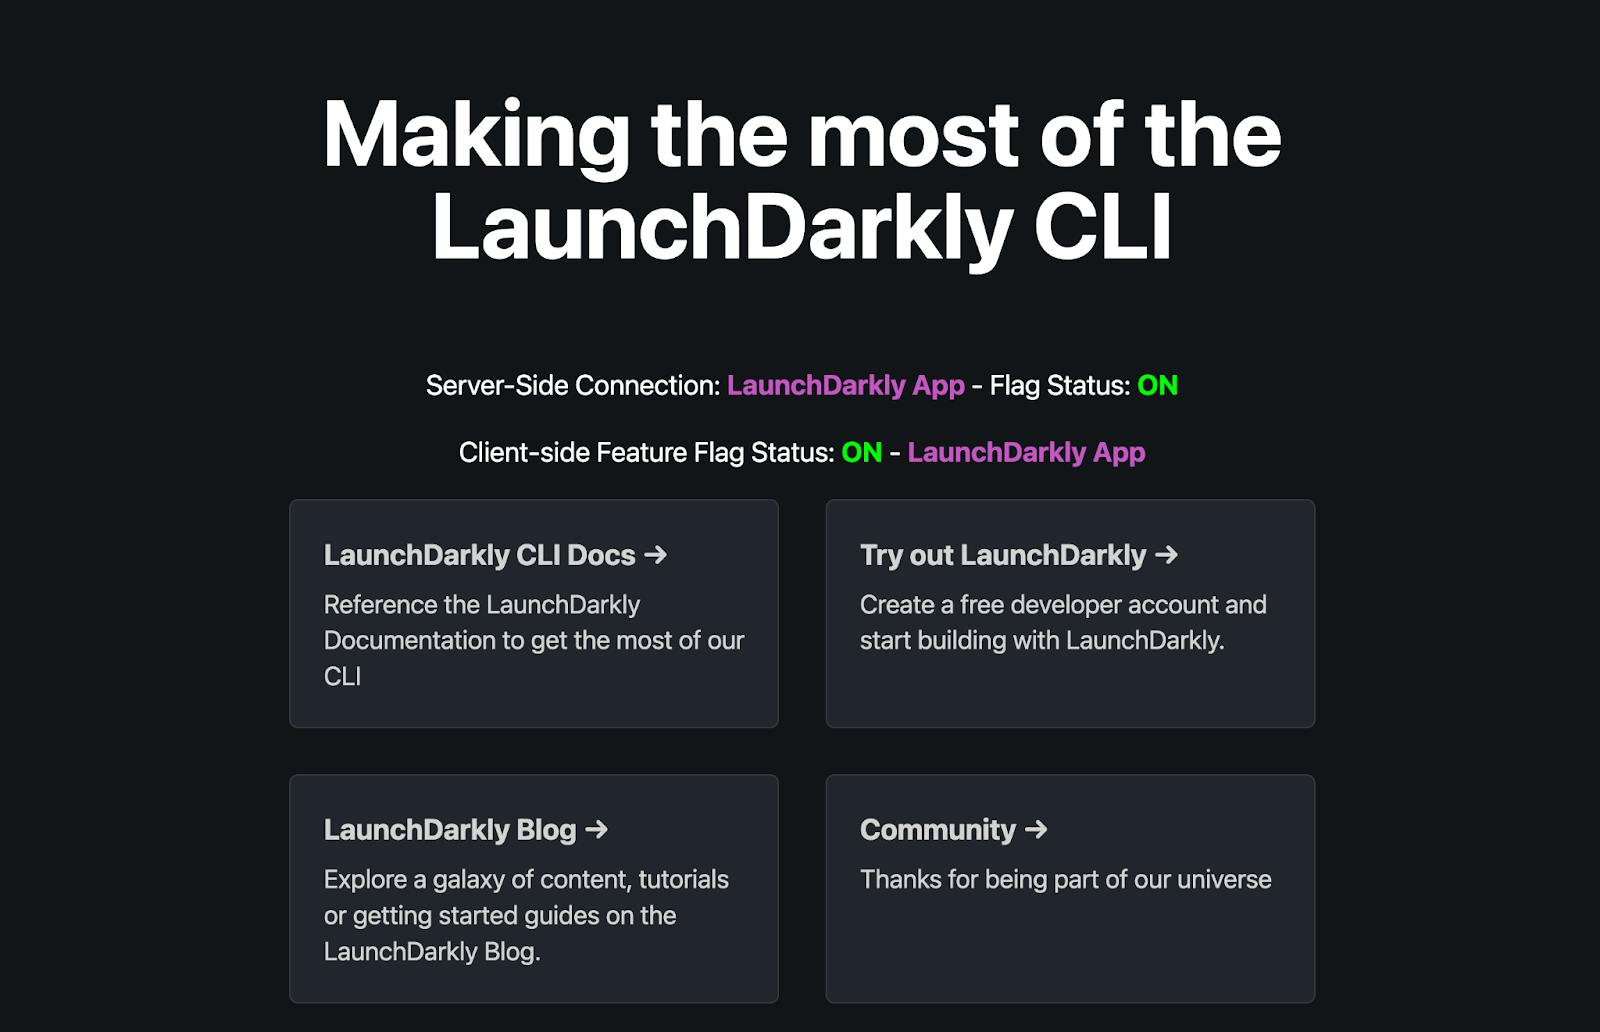
Return to your application at http://localhost:4321/ and refresh your browser.
You’ll now notice that the application's status has been updated to show that both flags are on and being served through the LaunchDarkly Application.
Now, let's walk through how to run this project using the ldcli local development server.
Starting the local development server
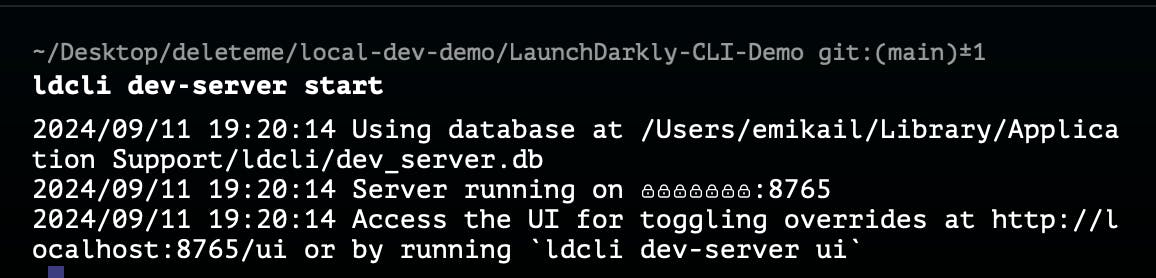
In a new terminal window, start the local development server using the ldcli dev-server start command.
You should see a confirmation message indicating that the server has started successfully.
While the local development server is running, in a new terminal window, run the following:
ldcli dev-server add-project --project <project KEY> --source <ENVIRONMENT KEY>Our project key in this scenario is local-dev-demo, and the environment key, in this case, would be production. The end command would look like this:
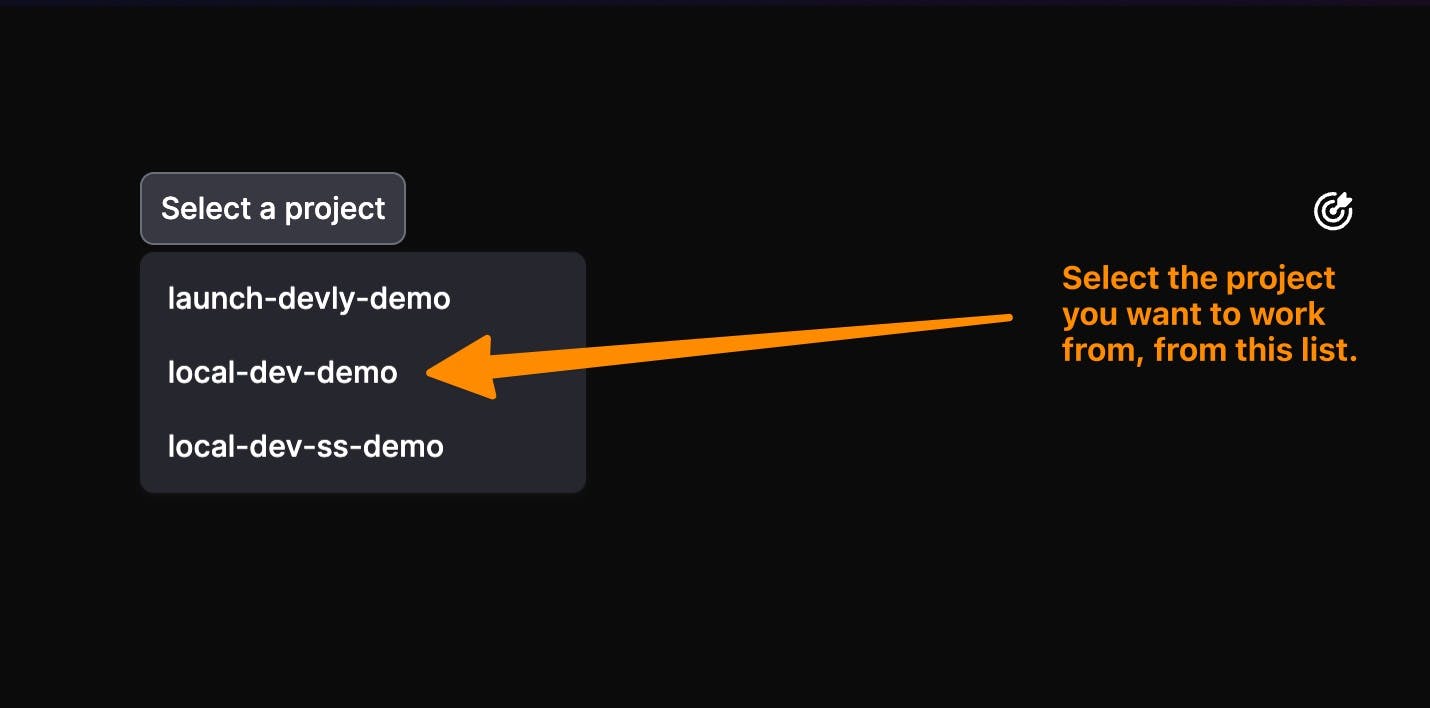
ldcli dev-server add-project --project local-dev-demo --source productionIf multiple projects have been added to the CLI, pick the project from the list of previously added projects in the dropdown window.
Have you lost your keys? Honestly, I couldn’t tell you where my house keys are either 😅. Fortunately, you can find any of your LaunchDarkly keys by navigating back to the environment settings window, clicking the cog on the lower left-hand side of your screen, clicking on projects, and then finding the relevant project.
Once complete, you can see the local development server in action with the two feature flags you’ve created. https://localhost:8765/ui

But wait! Why haven’t my feature flags updated?!
If you navigate back to the Astro application running, you’ll notice that your feature flags are still running within the LaunchDarkly application. We’ll now need to move these to the local development server.
Navigating back to your code editor du jour, within the project folder, navigate to the index.astro file within the following file path, LaunchDarkly-CLI-Demo/src/pages/index.astro.
Let’s open this file and walk through what’s happening within it.
Breaking down index.astro
The index.astro file has 3 main parts:
1. Server-side setup: Loads the LaunchDarkly Node.js Server-side SDK, initializes it, and evaluates a feature flag named ‘server-side’.
2. Client-side setup: Loads the LaunchDarkly JavaScript client-side SDK, initializes it, and evaluates a feature flag named ‘client-side’.
3. UI components: Includes indicators for both server-side and client-side feature flag statuses and simple interface components. There are also commented out code blocks for changing where the flags are being evaluated.
Let’s take a look at these blocks.
First up, the server-side setup. Look around lines 22-25 and lines 30-38 to see how the server-side flag can be evaluated .
Let's zoom into lines 22-25 where we're initalizing the server-side SDK and evaluating the flag through the LaunchDarkly Application.
const serverClient = serverInit(import.meta.env.LD_SDK_KEY);
console.log('Waiting for server client initialization...');
await serverClient.waitForInitialization({timeout: 5});
console.log('Server client initialized successfully');
Let’s comment out the above section and uncomment the initialization in lines 31-38
The below code block should look something like this:
console.log('Initializing LaunchDarkly server-side SDK with local dev server');
const serverClient = serverInit('local-dev-demo', {
baseUri: 'http://localhost:8765',
streamUri: 'http://localhost:8765',
eventsUri: 'http://localhost:8765'
});
await serverClient.waitForInitialization({timeout: 5});
console.log('Server client initialized successfully');
We will now be able to see in the logs where the flag is running, as well as within our Astro application.

When initializing the SDK using the local dev server — there are a couple of key differences:
First, notice we’ve replaced our SDK key (LD_SDK_KEY) with the name of our LaunchDarkly project (local-dev-demo). Next, we’ve told it to initialize the SDK where the development server is running.
Finally, we’ve added some logs to make it easier to troubleshoot the initialization process.
console.log('Initializing LaunchDarkly server-side SDK with local dev server');
const serverClient = serverInit('local-dev-demo', {
 baseUri: 'http://localhost:8765',
 streamUri: 'http://localhost:8765',
 eventsUri: 'http://localhost:8765'
});

console.log('Waiting for server client initialization...');
await serverClient.waitForInitialization({timeout: 5});
console.log('Server client initialized successfully');
Let’s return back to the local dev server UI and turn our server-side flag off to confirm that all is working as expected.
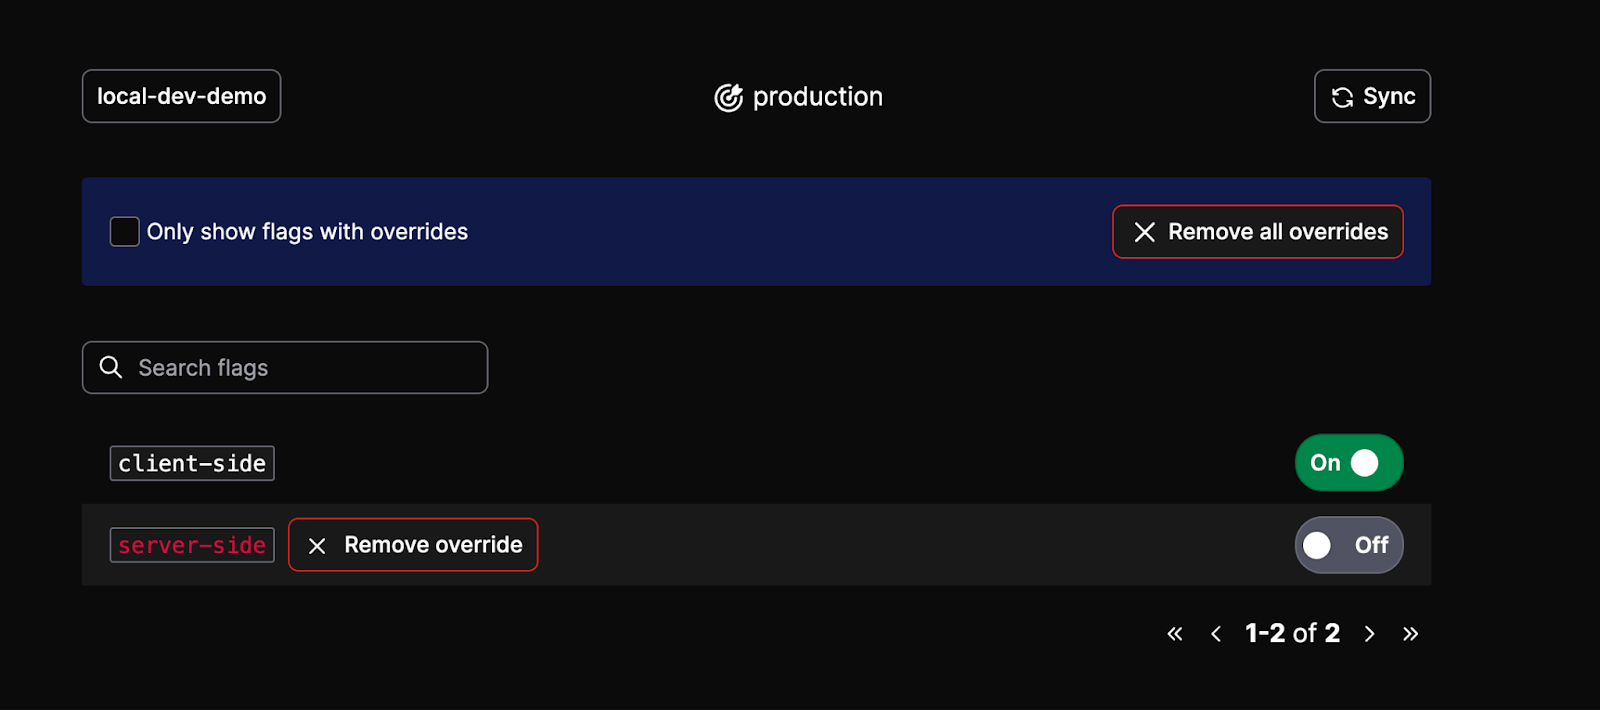
After toggling your flag off in the local dev server UI, refresh your Astro application and see the flag status changed!
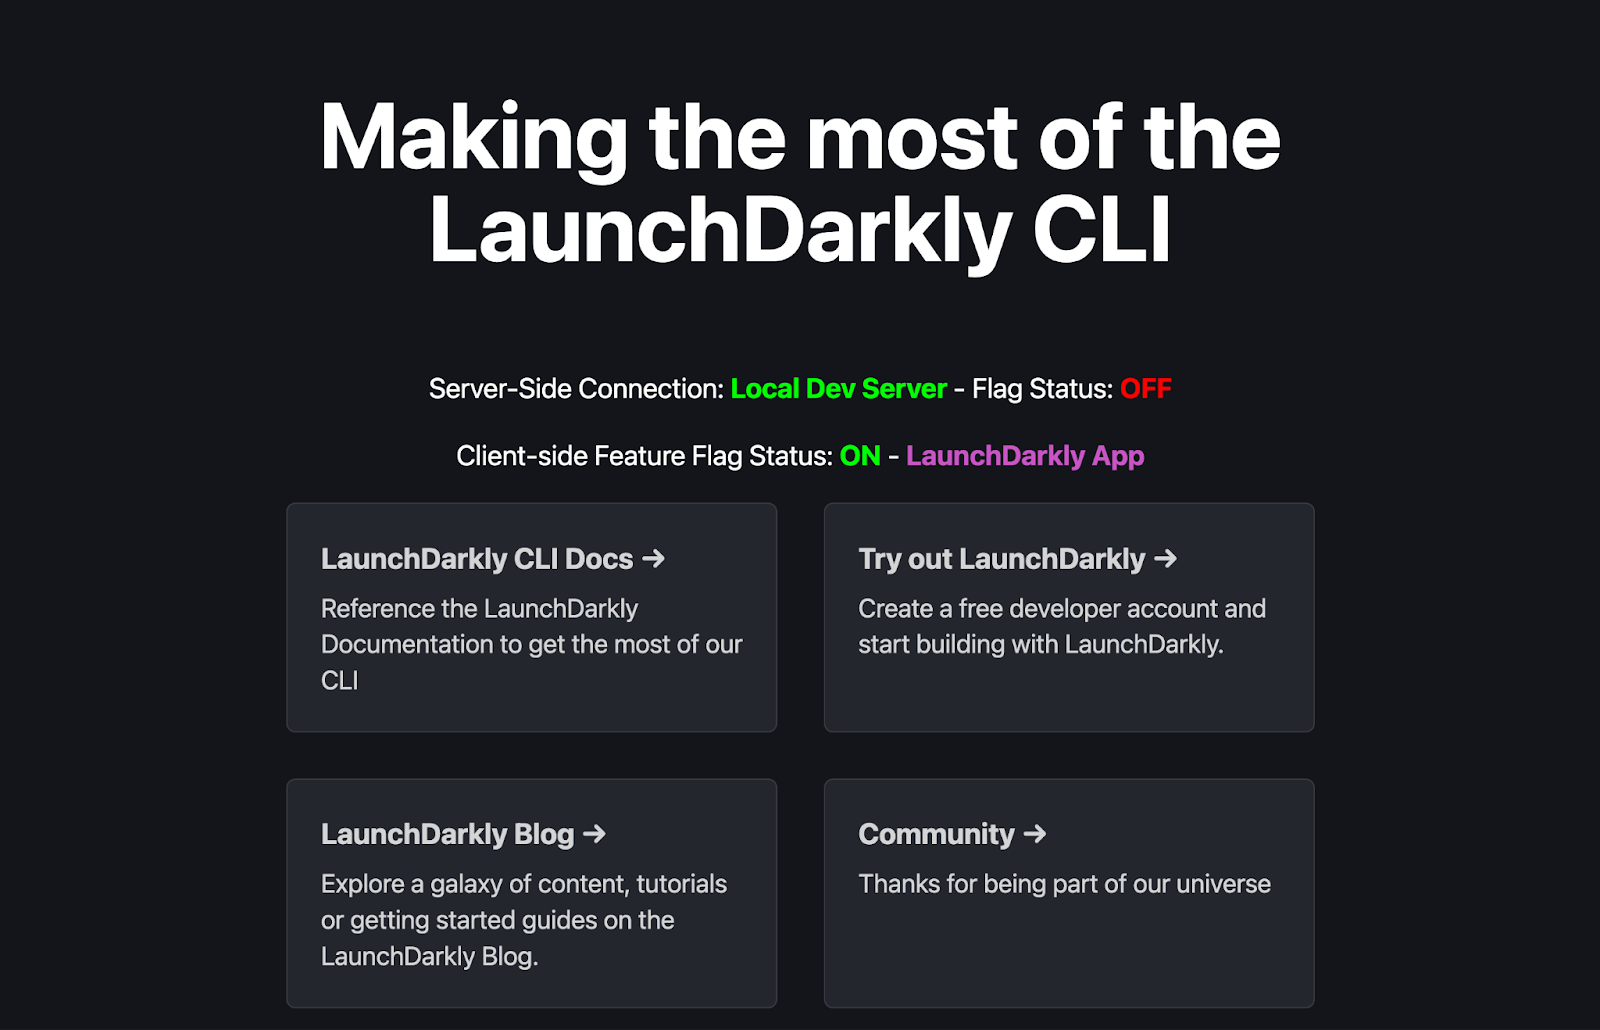
Our client-side flag is still running through the LaunchDarkly application; however, our server-side flag is running through the local development server—neat!
Let’s explore getting our client-side flag running through the local development server.
Around line 104 — you’ll see where we’re currently initializing the client-side flag.
<script define:vars={{ clientSideId: import.meta.env.PUBLIC_LD_CLIENT_SIDE_ID }}>
  document.addEventListener('DOMContentLoaded', () => {
    console.log('Initializing LaunchDarkly client-side SDK');
    const isLocalDevServer = clientSideId === 'local-dev-demo';
    const ldClient = LDClient.initialize(clientSideId, {
      key: 'user-key-123',
      name: 'DJ Toggle',
      email: 'DJToggle@launchdarkly.com'
    }, isLocalDevServer ? {
      baseUrl: 'http://localhost:8765',
      streamUrl: 'http://localhost:8765',
      eventsUrl: 'http://localhost:8765'
    } : {});

    ldClient.on('ready', () => {
      const clientFlagValue = ldClient.variation('client-side', false);
      const clientFlagStatus = document.getElementById('clientFlagStatus');
      const clientConnectionType = document.getElementById('clientConnectionType');

      clientFlagStatus.textContent = clientFlagValue ? 'ON' : 'OFF';
      clientFlagStatus.className = clientFlagValue ? 'green' : 'red';

      clientConnectionType.textContent = isLocalDevServer ? 'Local Dev Server' : 'LaunchDarkly App';
      clientConnectionType.className = isLocalDevServer ? 'local' : 'remote';
    });
  });
</script>
Let's comment this chunk out, and uncomment the local-server initialization, which starts around line 135.
<script define:vars={{ clientSideId: 'local-dev-demo' }}>
  document.addEventListener('DOMContentLoaded', () => {
    console.log('Initializing LaunchDarkly client-side SDK');
    const ldClient = LDClient.initialize(clientSideId, {
      key: 'user-key-123',
      name: 'DJ Toggle',
      email: 'DJToggle@launchdarkly.com'
    }, {
      baseUrl: 'http://localhost:8765',
      streamUrl: 'http://localhost:8765',
      eventsUrl: 'http://localhost:8765'
    });

    ldClient.on('ready', () => {
      const clientFlagValue = ldClient.variation('client-side', false);
      const clientFlagStatus = document.getElementById('clientFlagStatus');
      const clientConnectionType = document.getElementById('clientConnectionType');

      clientFlagStatus.textContent = clientFlagValue ? 'ON' : 'OFF';
      clientFlagStatus.className = clientFlagValue ? 'green' : 'red';

      clientConnectionType.textContent = 'Local Dev Server';
      clientConnectionType.className = 'local';
    });
  });
</script>
Configure your LaunchDarkly kill switch flag
We're going to step away from the FastAPI app for a second, and set up our LaunchDarkly configuration.
In the LaunchDarkly app, click on “Flags” in the left navigation menu and then click one of the “Create flag” buttons.

Breaking this down:
First we’re setting the clientSideId variable to 'local-dev-demo' for use within the script.
Then, we’re initializing the LaunchDarkly client using LDClient.initialize().
This takes three parts:
- The clientSideId ('local-dev-demo')
- A user object with key, name, and email
- Configuration object with URLs pointing to the local development server (http://localhost:8765)
And finally a ‘ready’ event listener to the client-side initialization process that will run when the SDK is fully initialized.
- We get the value of the 'client-side' feature flag using ldClient.variation()
- We update the text and class of the clientFlagStatus element based on the flag value
- We set the clientConnectionType element to show 'Local Dev Server' and give it the 'local' class
Return to the Astro Application, and you will see the change here as well.
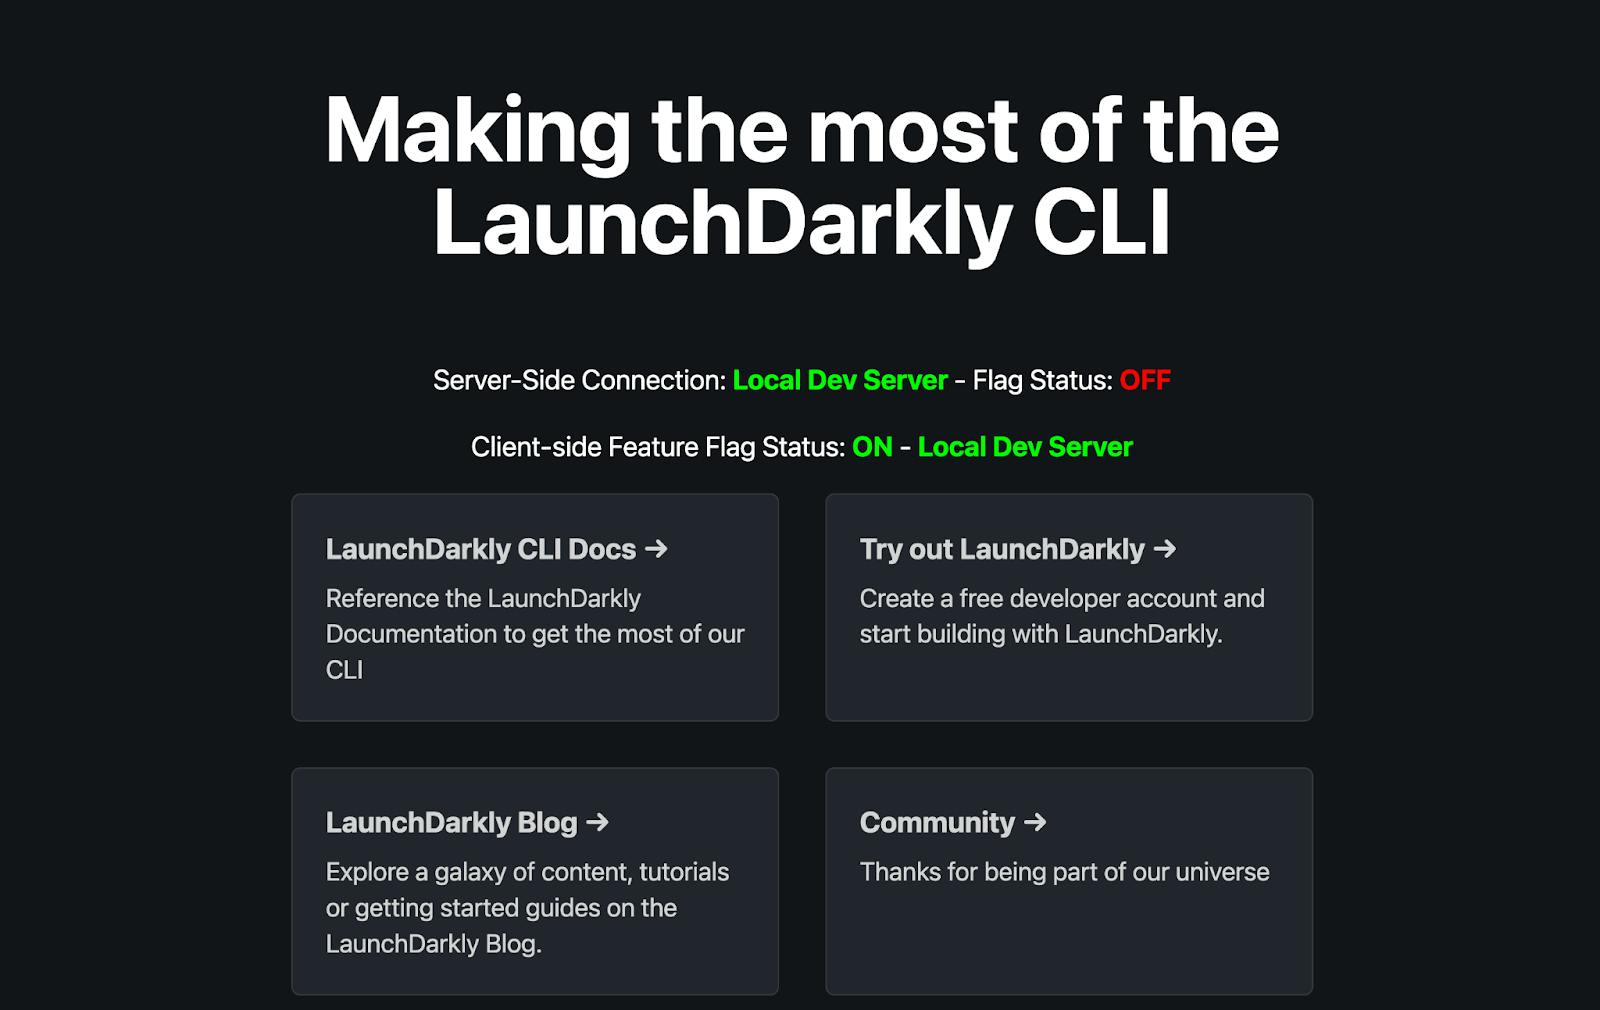
Let’s now do a final check and turn our client-side feature flag off within the local dev server ui.
Ta-da! You’ve got everything you need up and running!
What's next?
The LaunchDarkly CLI allows you to easily test flags for development and ensure that everything is set up correctly.
However, as with all great things, there are some scenarios where you hit limitations.
Debugging Targeting:
The local dev server will always serve the same variation for a flag, no matter the context used. This was designed to test your code locally but not to test targeting rules. Once you’re happy that your code handles all variations, open a PR and test those targeting rules (multi-contexts and segmentation) within your shared QA/Staging environment — or even production!
Experimentation:
Similarly, because the same variation is served, you can’t test out experiments via the dev server. Additionally, the local dev server doesn’t support any of the event tracking LaunchDarkly provides because it’s running on your local machine, designed for the development process. That data can’t be analyzed, even if you could generate it.
Events:
Running on the local development server drops all the events that SDKs send, so you won’t be able to use events to debug your LaunchDarkly implementation like you would in the real product. This means features like live events or event tracking won't be able to be used to check in on the implementation.
Conclusion
Go forth and test locally! Now, you’re enabled with the power to iterate, build, and test things faster than ever before! I'm looking forward to seeing what you come up with!
If you ever need a hand or want to geek out on the latest updates to LaunchDarkly, don't hesitate to reach out— I’m always here to help. If you’re in a place with an internet connection, you can email me at emikail@launchdarkly.com, find me on the site formerly known as Twitter or on LinkedIn, or join the fun in the LaunchDarkly Discord.
Like what you read?
Get a demo
