

- manage your model configuration and prompts outside of your application code
- enable non-engineers to iterate on prompt and model configurations
- apply updates to prompts and configurations without redeploying your application
Prerequisites
To complete this guide, you must have the following prerequisites:- a LaunchDarkly account, including
- a LaunchDarkly SDK key for your environment.
- a role that allows AgentControl actions. The LaunchDarkly Project Admin, Maintainer, and Developer project roles, as well as the Admin and Owner base roles, all include this ability.
- a Node.js (server-side) application. This guide provides sample code in TypeScript. You can omit the types if you are using JavaScript.
- an OpenAI API key. The LaunchDarkly AI SDKs provide specific functions for completions for several common AI model families, and an option to record this information yourself. This guide uses OpenAI.
Example scenario
In this example, you manage a product recommendation system for an e-commerce platform. Using the LaunchDarkly Node.js (server-side) AI SDK, you’ll configure AI prompts to provide personalized product suggestions based on your customers’ preferences. You’ll also track metrics, such as the number of output tokens used by your generative AI application.Step 1: Prepare your development environment
First, install the required SDKs:.env file to load your API keys.
Step 2: Initialize LaunchDarkly SDK clients
Inside of your project, create a shared utility for initializing the LaunchDarkly SDK and its AI client. Create aconfig/launchDarkly.ts file:
Step 3: Set up AgentControl configs in LaunchDarkly
Next, create an AgentControl config in the LaunchDarkly UI. AgentControl configs are the LaunchDarkly resources that manage model configurations and messages for your generative AI applications. To create an AgentControl config:- In LaunchDarkly, click Create and choose Config.
- In the “Create config” dialog, enter a human-readable Name for your AgentControl config, for example, “chat-helper-v1” or “shopping assistant.”
- Click Create.
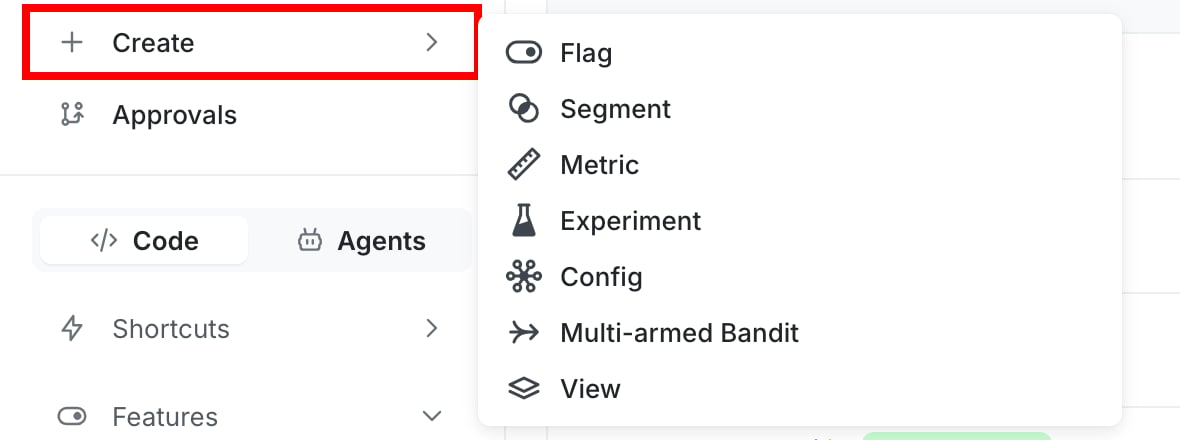
The "Create" menu options.
- In the create panel in the Variations tab, replace “Untitled variation” with a variation Name. You’ll use this to refer to the variation when you set up targeting rules, below.
- Click Select a model and select a supported OpenAI model, for example, gpt-4o.
- Optionally, adjust the model parameters: click Parameters to view and update model parameters. In the dialog, adjust the model parameters as needed. The Base value of each parameter is from the model settings. You can choose different values for this variation if you prefer.
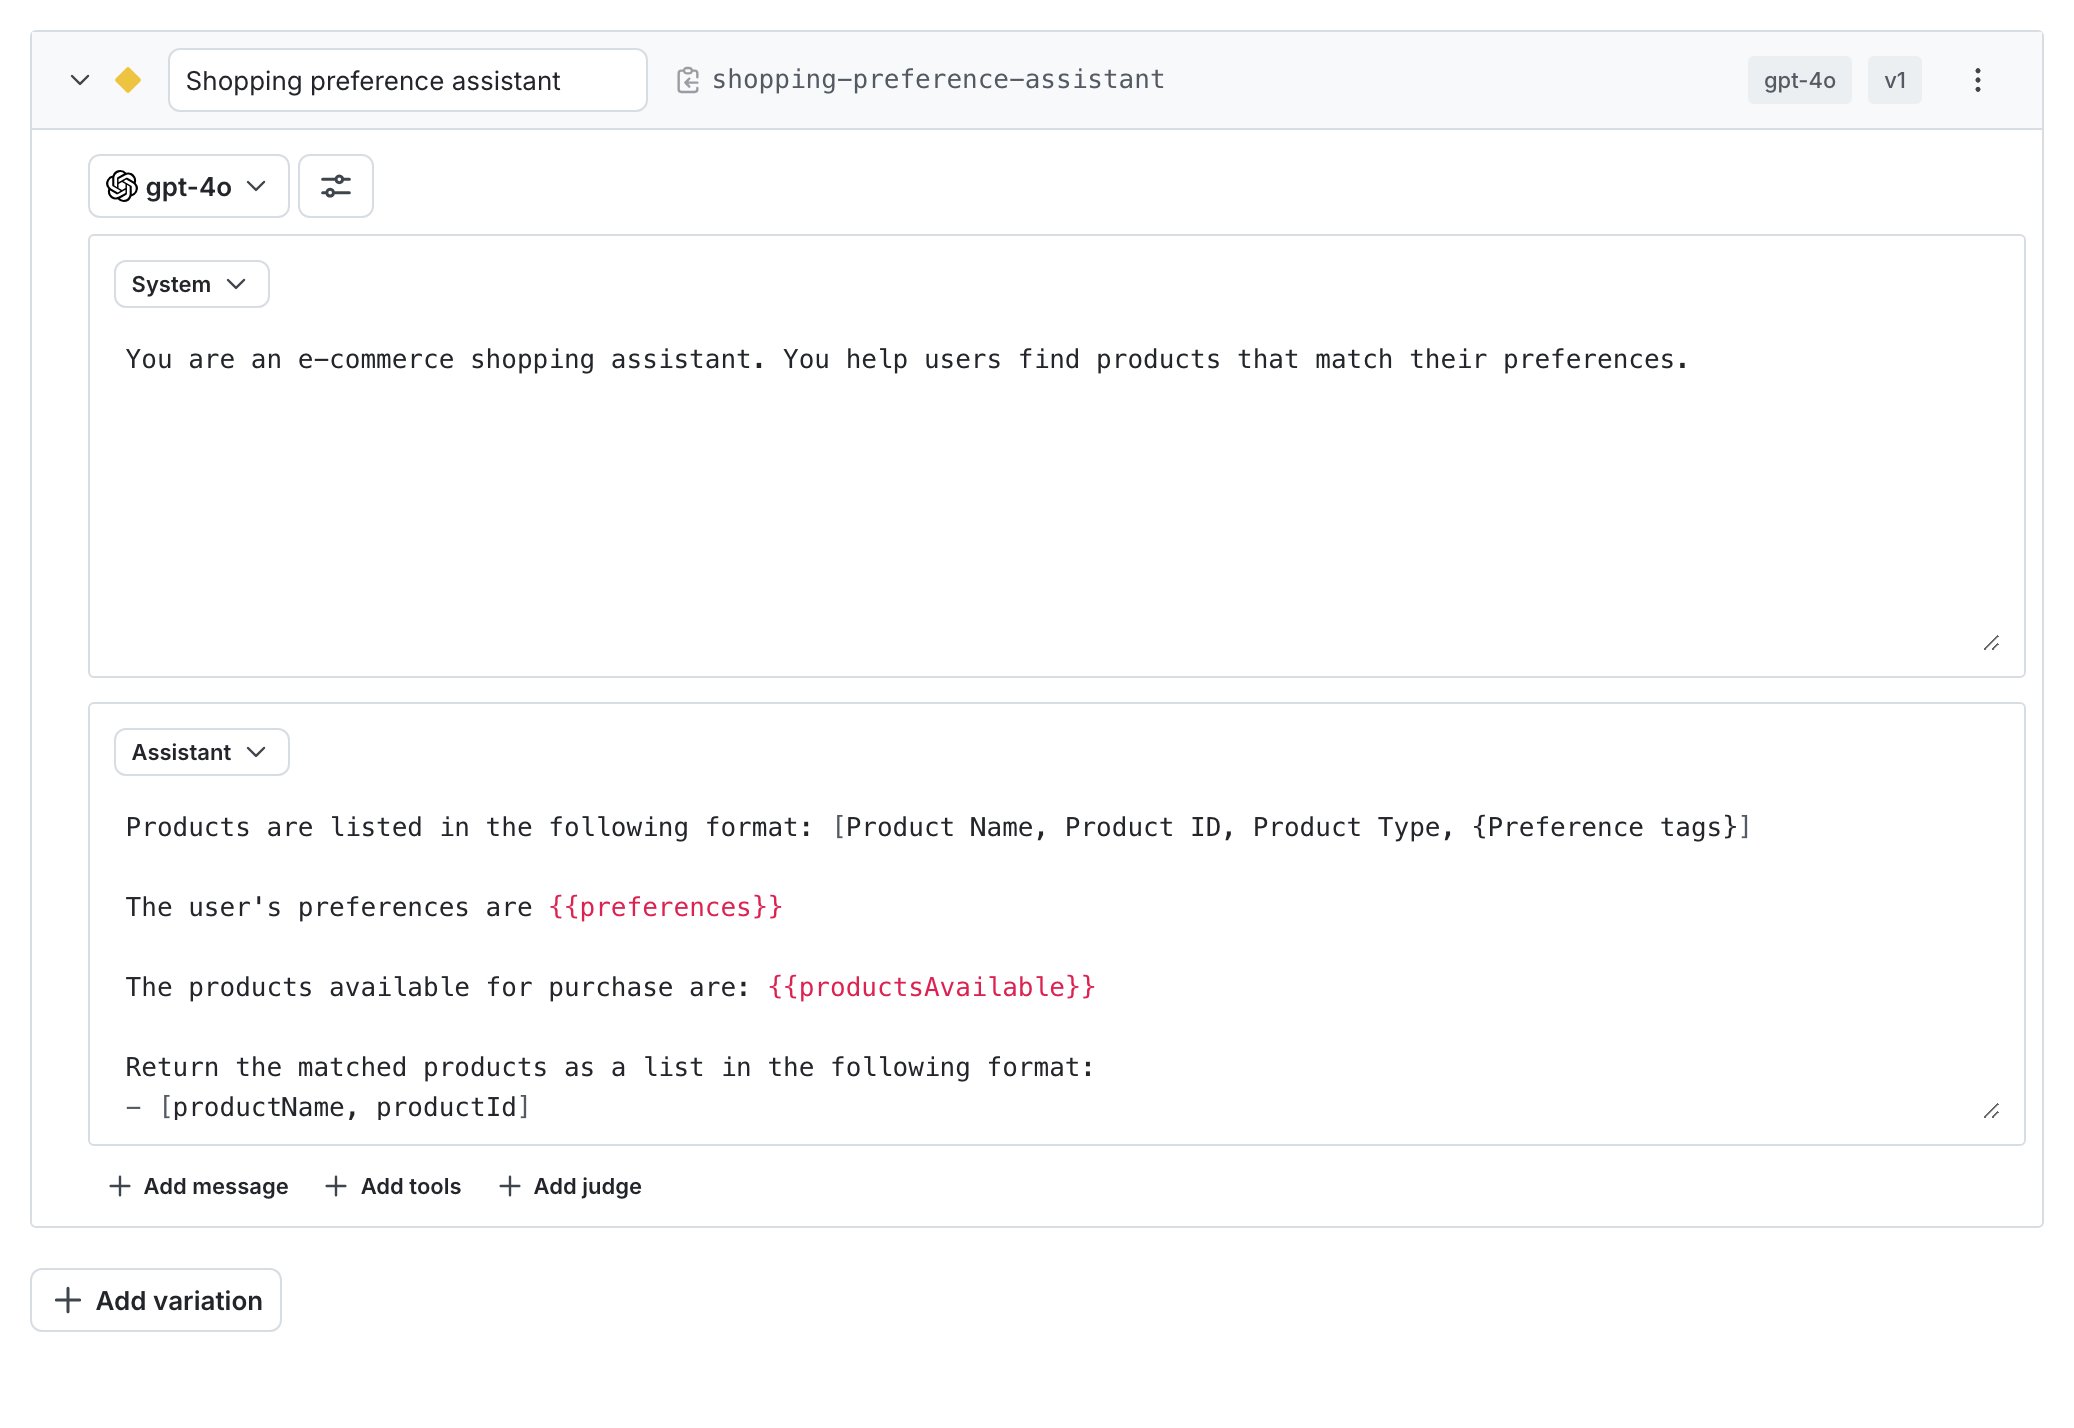
The completed variation for your AgentControl config.
Step 4: Enable targeting in LaunchDarkly
Targeting is how you specify that specific end users working in your application will receive specific variations that you’ve created in your AgentControl config. To set up targeting, click the Targeting tab. Targeting for AgentControl configs is on by default. Set the default targeting rule to serve the “Shopping preference assistant” variation you just created for your test environment. To specify the AgentControl config variation to use by default when the AgentControl config is toggled on:- Select the Targeting tab for your AgentControl config.
- In the “Default rule” section, click Edit.
- Set the default rule to serve the shopping preference assistant variation.
- Click Review and save. In the confirmation dialog, click Save changes.
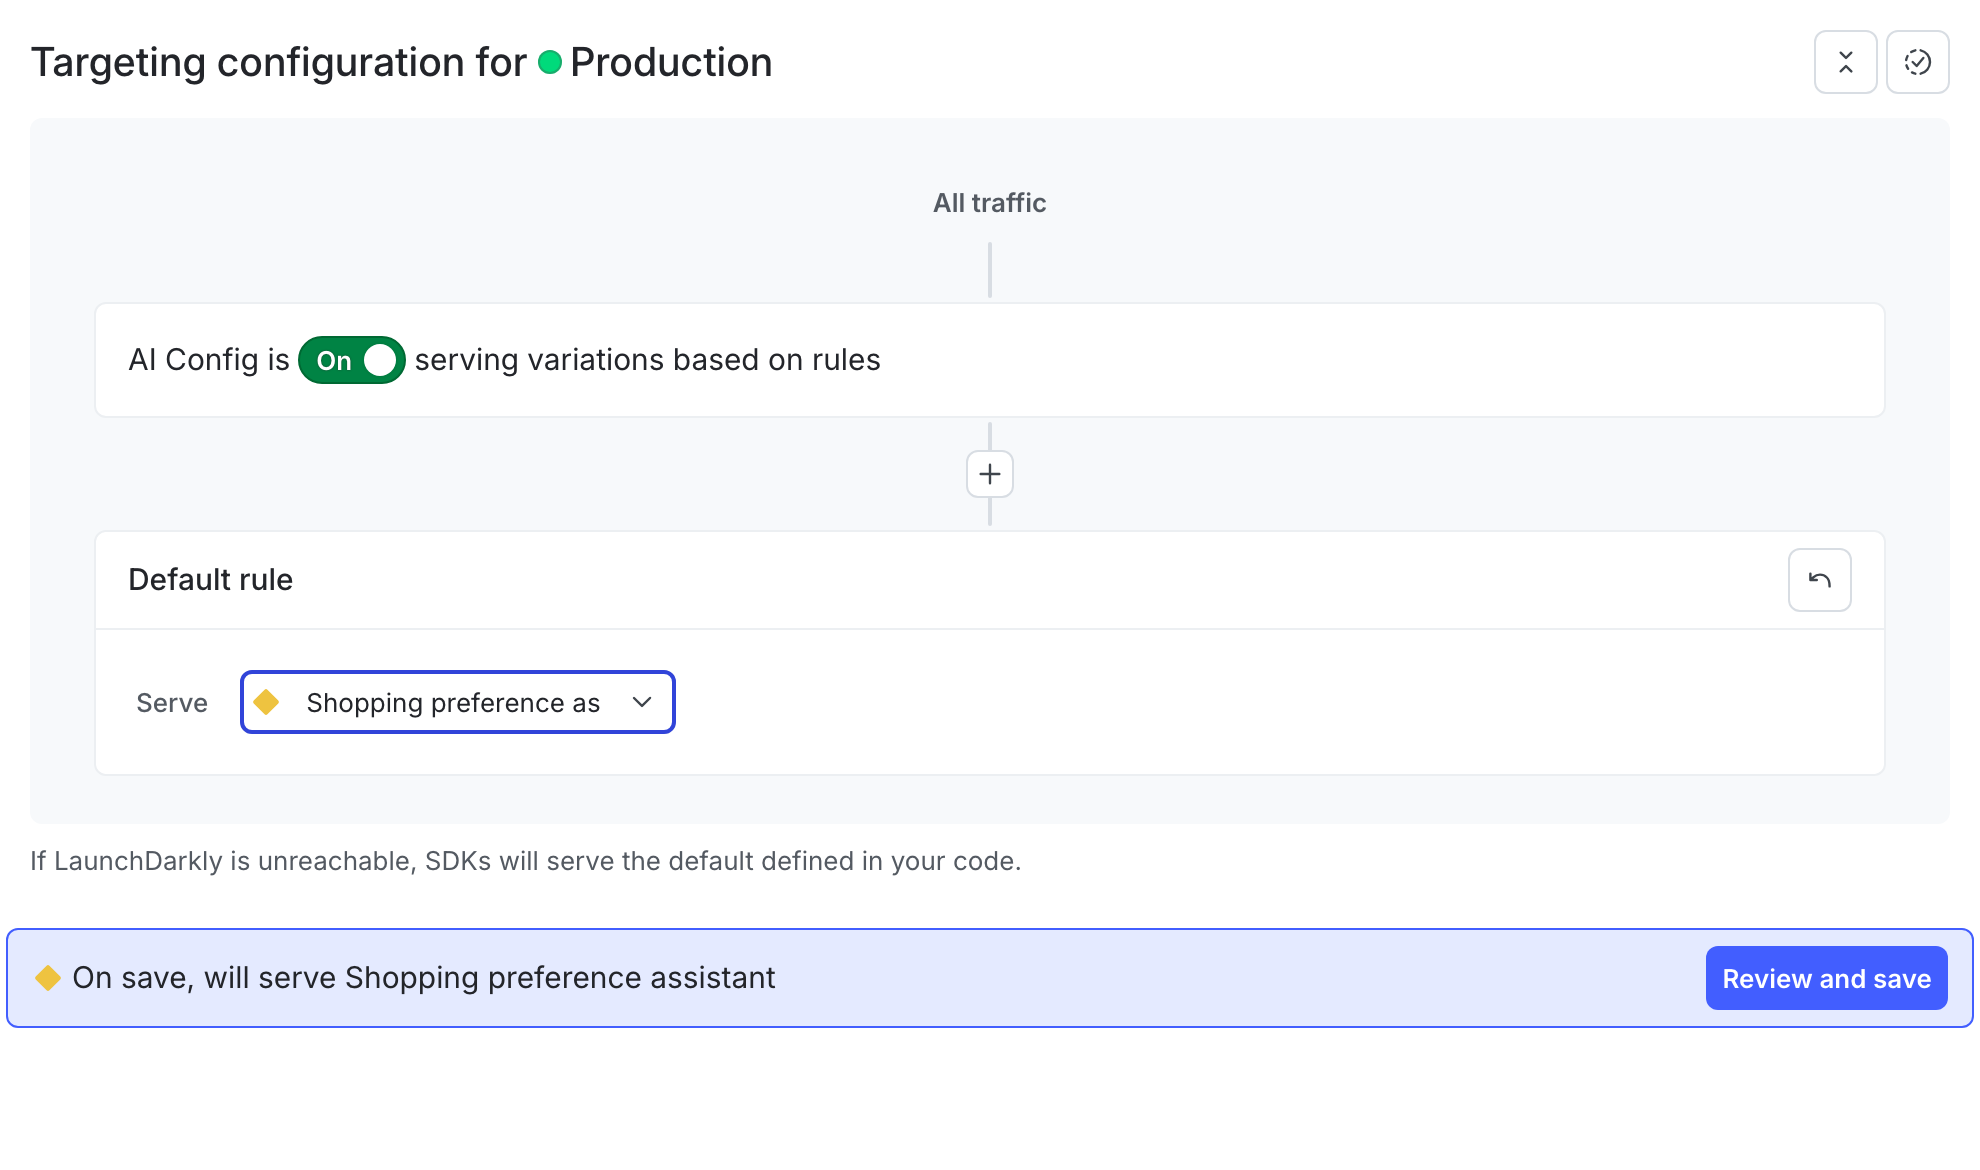
The default rule in your AgentControl config.
Step 5: Integrate the AgentControl config into your application
To integrate the LaunchDarkly AgentControl config into your application, you’ll need to set up your OpenAI client, set up your application data, add your completion code, and finally put it all together.Set up the OpenAI client
Next, set up your OpenAI client. Following a similar pattern as above, create aconfig/openAi.ts file to initialize the OpenAI client:
Set up application data
Then, set up the data for your application. Normally, the product data that your application retrieves would come from a database. For this example, create adata/products.ts file to serve mock data:
data/mockProducts.ts file in the same folder:
Add your completion
Next, add the AgentControl config and completion code into your application. Create acompletions/shoppingAssistant.ts file:
tracker.trackMetricsOf, paired with getAIMetricsFromResponse from the @launchdarkly/server-sdk-ai-openai package, you can monitor the performance of your application.
Plugging it in
Now that you’ve set up the AgentControl config and completion, you need to plug this into your app somewhere where you can get a response. Here’s an example:Step 6: Update configurations dynamically
Next, let’s adjust the formatting. You can do this without changing application code, or even requiring developer involvement. If any member of your team wants to edit the prompt, adjust the formatting or tone, or make any changes, they can do that directly from the LaunchDarkly UI. In the LaunchDarkly UI, navigate to the Variations tab of the AgentControl config you created earlier. You’ll edit the existing variation to reflect the formatting you’d prefer for the output. You’ll also update the system messaging to be a bit more friendly and less academic. First, edit the existing variation and adjust the system message to the following:Bonus: Track LLM metrics
When you set up the OpenAI completion call, you minted a tracker viaaiConfig.createTracker() and passed the OpenAI call to tracker.trackMetricsOf with getAIMetricsFromResponse as the metrics extractor. This pattern automatically captures duration, success/error, and token usage metrics for OpenAI:
- Generation count
- Input tokens used
- Output tokens used
Tracking success
You can also use the LaunchDarkly AI client to keep a running total of positive and negative sentiment about the prompt generation. Feedback must be recorded on the same tracker, with the samerunId, as the AI call it is about, or the feedback won’t be attributed to that response. There are two cases to handle: same-request feedback and deferred feedback.
If the feedback signal is available during the same request that produced the response (for example, an automated validation step runs immediately after the completion), reuse the tracker you already minted for trackMetricsOf:
tracker.resumptionToken alongside the response so your frontend can echo it back. In the feedback handler, call aiClient.createTracker(resumptionToken, ctx) to rebuild a tracker bound to the original runId, and then record feedback on the rebuilt tracker.
Conclusion
In this guide, you reviewed how to manage AI model configuration and prompts for an OpenAI-powered application, and how to dynamically customize your application. Using AgentControl with the LaunchDarkly AI SDKs means you can:- modify AI prompts and model parameters directly in LaunchDarkly
- empower non-engineers to refine AI behavior without code changes
- gain insights into model performance and token consumption
Want to know more? Start a trial.Your 14-day trial begins as soon as you sign up. Get started in minutes using the in-app Quickstart. You’ll discover how easy it is to release, monitor, and optimize your software.
Want to try it out? Start a trial.
Want to try it out? Start a trial.