


LaunchDarkly’s kill switch feature flags are a helpful tool to disable features with a single click rather than going through an entire code deployment.
In this tutorial, we’ll use LaunchDarkly's kill switch flags in a JavaScript application. We’ll add a new feature to an example application called "DJ Toggle’s fan page" and wrap it in a feature flag to mitigate risk in the rollout process. Additionally, we’ll explore how to roll back features if we encounter pesky bugs.
Prerequisites
- Basic knowledge of HTML, CSS, and JavaScript
- Node.js and npm installed on your machine
- A LaunchDarkly account (free developer plan available)
Sample Project Repository
The assets needed for this project and a completed sample of this project are found on GitHub: https://github.com/launchdarkly-labs/Risk-Management-JavaScript.
Within this repository, the materials for this tutorial can be found in the folder Kill-Switch > JavaScript.
mkdir kill-switch
cd kill-switch
Create a LaunchDarkly Account
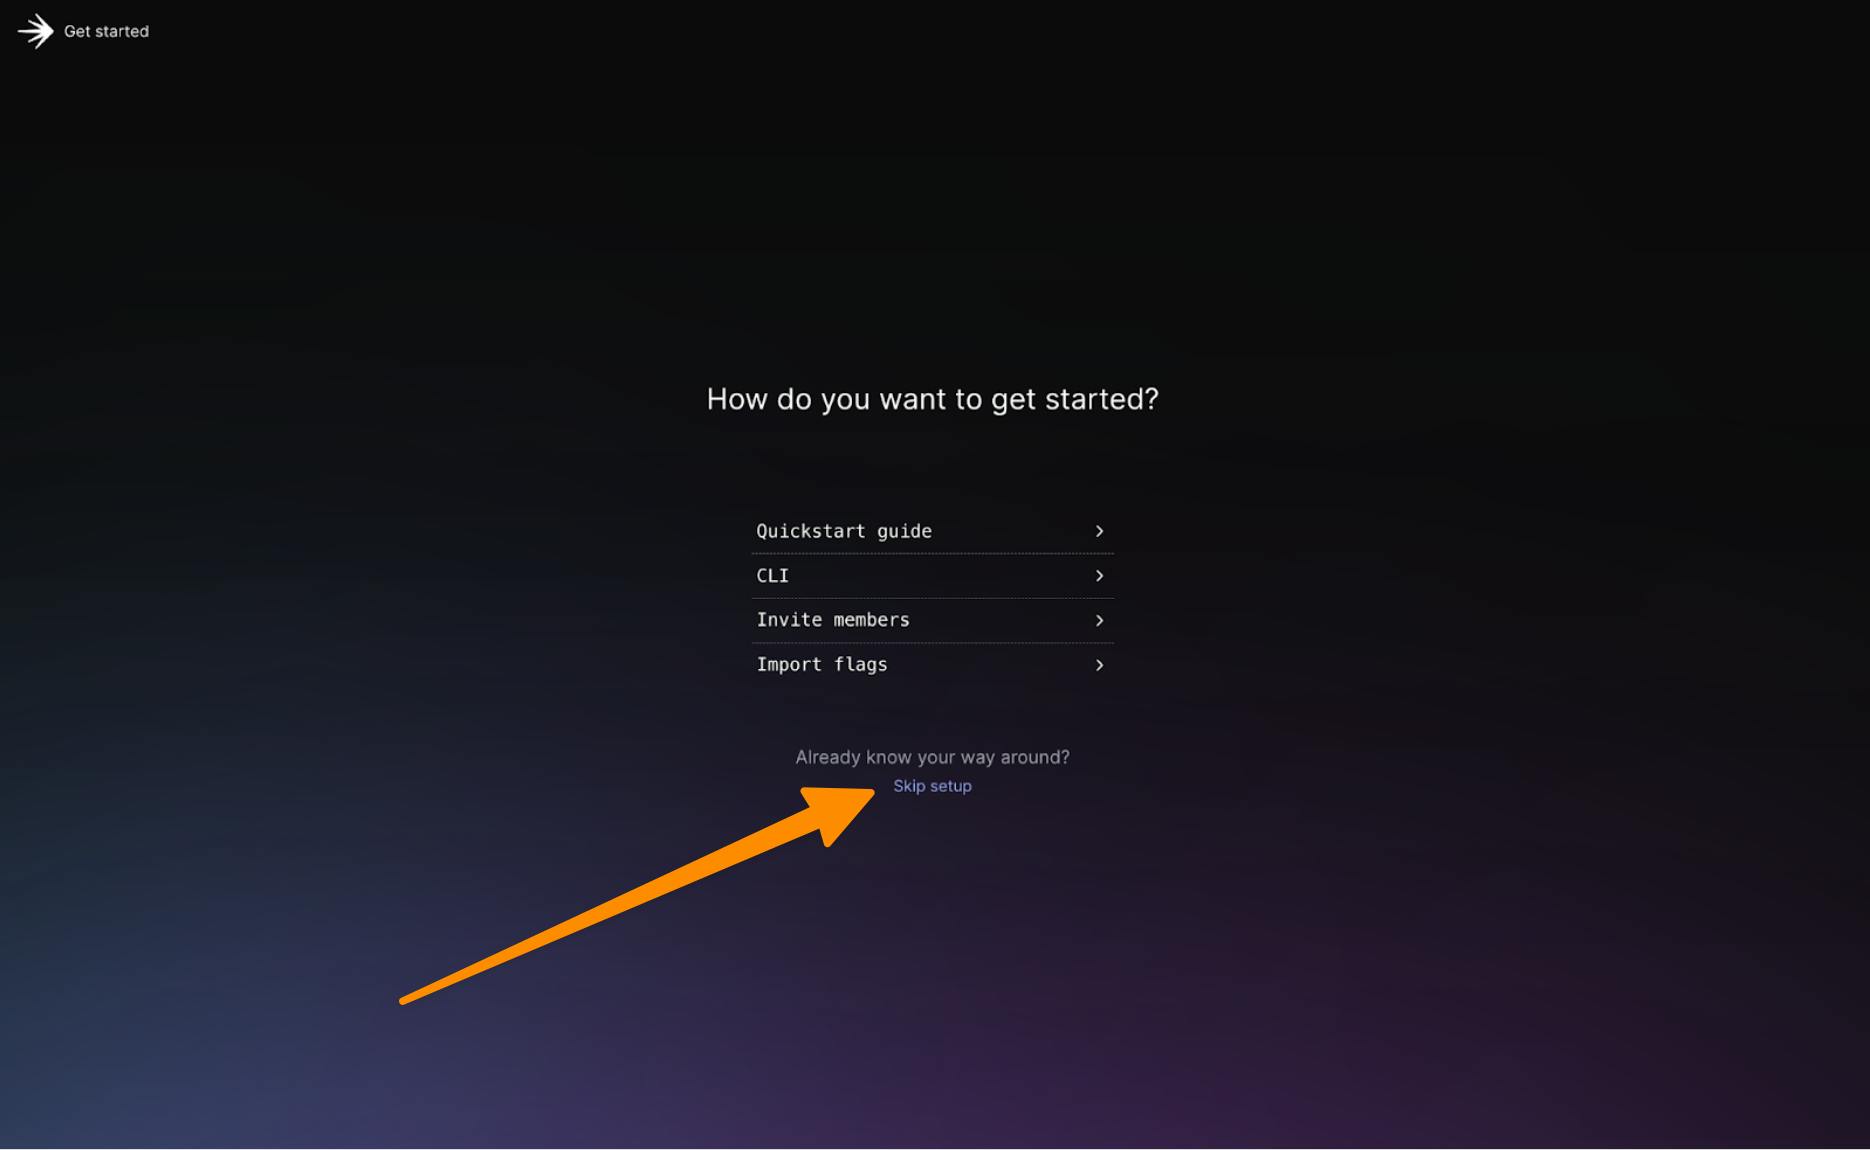
Head to LaunchDarkly in your web browser, log in to an existing LaunchDarkly account, or create an account with our free developer plan. If you're new, click ‘Skip setup’ after verifying your email.
You will then be added to a default project.
To get the relevant keys for your project:
- Click on the cog icon on the lower left side of the screen.
- Navigate to "Projects" and click on your project's name.
Once you click on the project name, you’ll be brought to the project settings page.
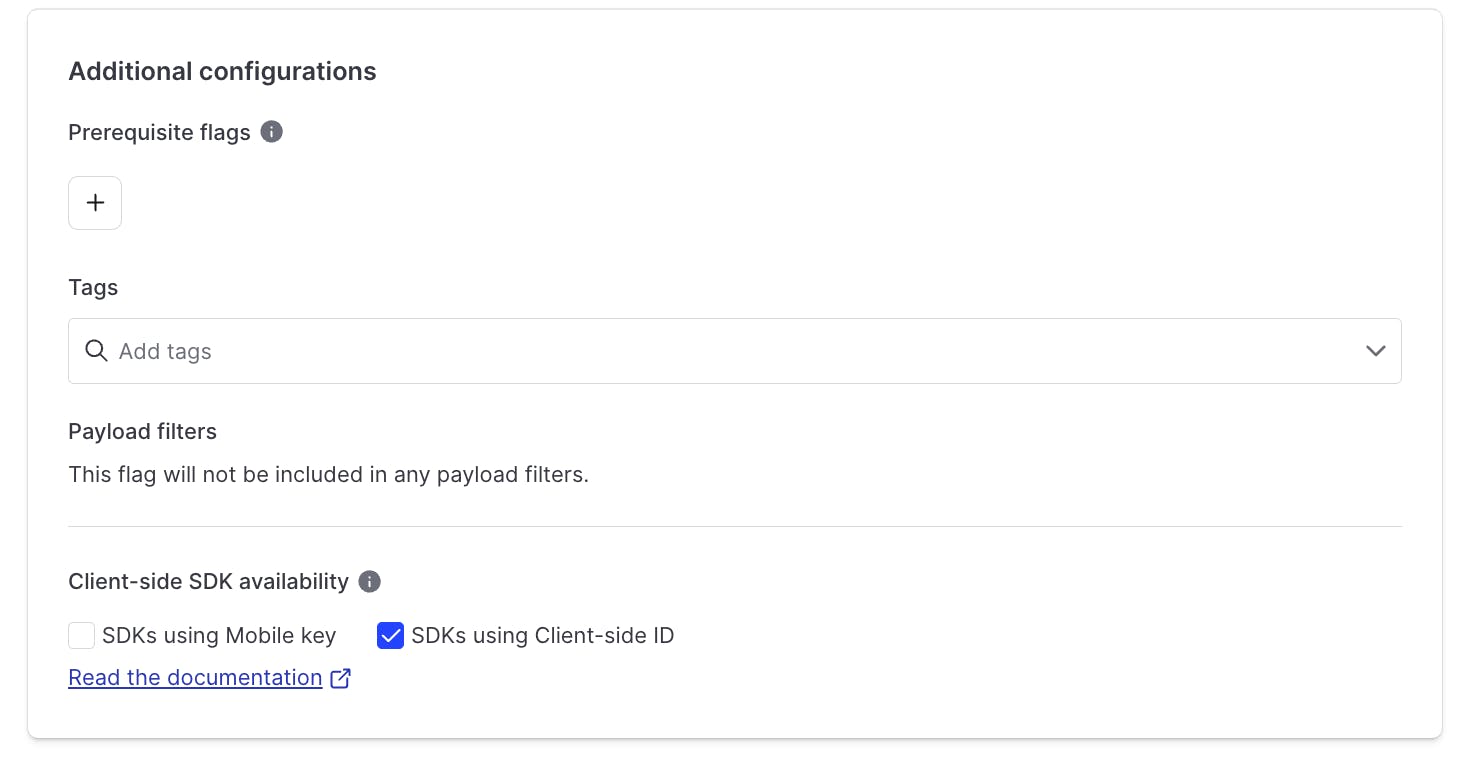
We'll be working within our production environment. Click on the three dots next to your environment and select ‘Client-side ID’.
Create a .env file within the project folder (kill-switch) by writing the following within your terminal.
echo "LAUNCHDARKLY_CLIENT_SIDE_ID==your_actual_CLIENT_SIDE_ID_here" >> .envKeep your secrets safe by creating a .gitignore file and adding your .env file. This will prevent any environment variables or secrets from being accidentally uploaded to GitHub.
echo ".env" >> .gitignoreSet up your JavaScript project
Now, let’s set up our JavaScript project to build our fan page and add in a button for added functionality.
Initialize a new NPM project in the kill-switch directory:
npm init -yThis command creates a package.json file with default settings, which you'll need to manage your project dependencies.
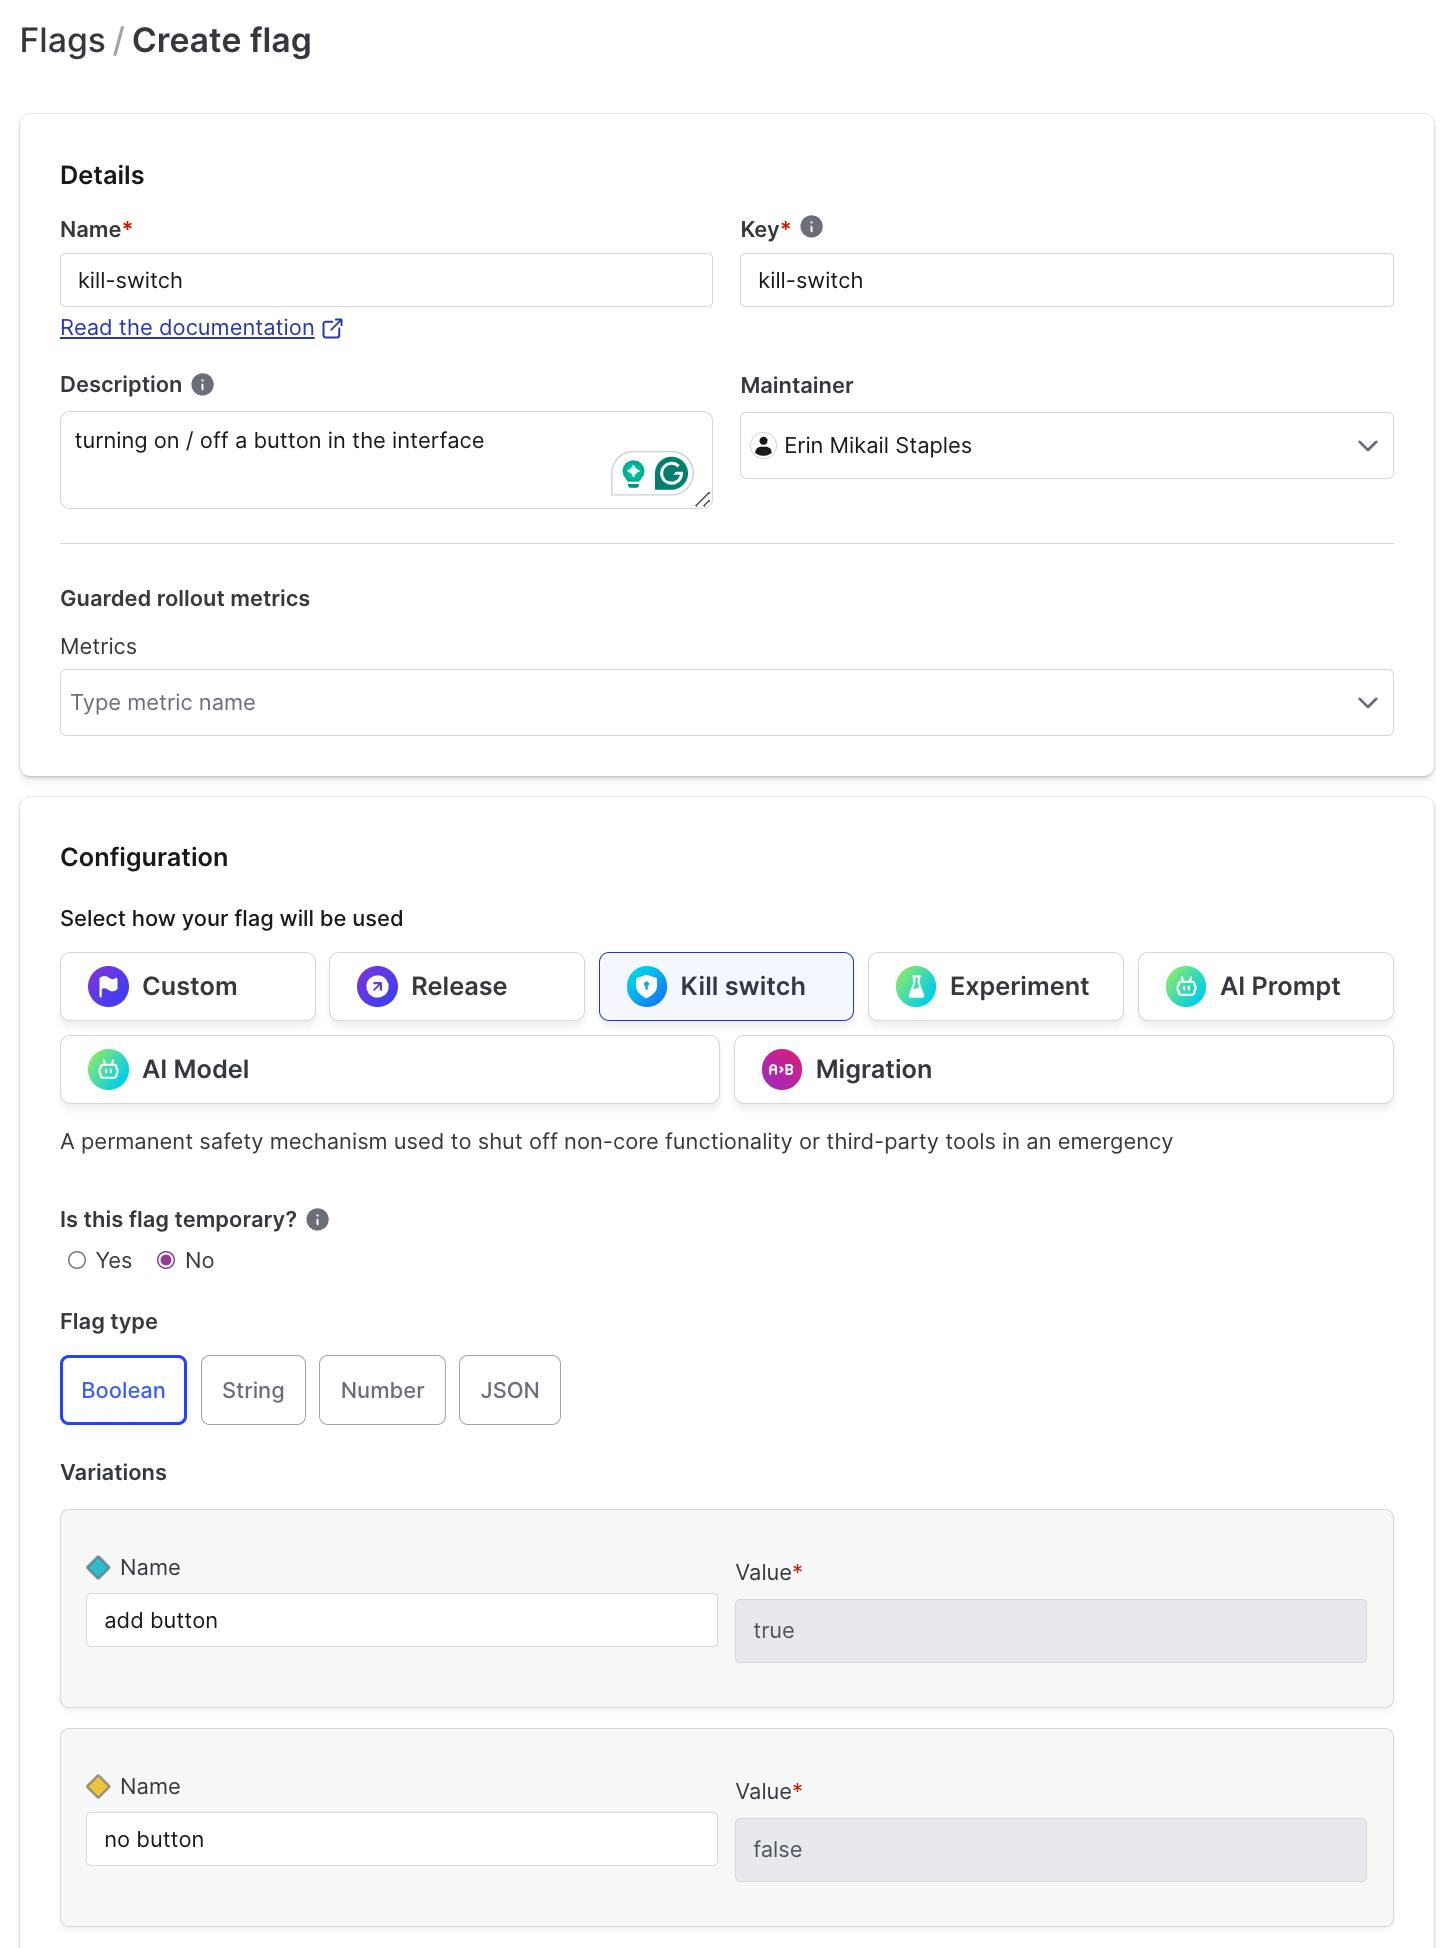
Create a Kill Switch Feature Flag
In your new project, create a feature flag named kill-switch. This flag will control a button feature within your application. Set the flag type to Kill Switch and Boolean, and check the client-side SDK checkmark. When complete, your feature flag should look like the below. When complete, click save.
Next, install the necessary dependencies:
npm install launchdarkly-js-client-sdk dotenv-webpack webpack webpack-cli http-server- launchdarkly-js-client-sdk: This JavaScript SDK allows your app to communicate with LaunchDarkly.
- dotenv-webpack: This package helps you manage environment variables easily.
- webpack: This is a module bundler for JavaScript. It takes your JavaScript files and their dependencies and bundles them together, optimizing them for production use.
- webpack-cli: This provides the command line interface for Webpack, allowing you to run Webpack commands from your terminal or npm scripts.
- http-server: This is a simple, zero-configuration command-line HTTP server. It's helpful for serving static files locally during development and testing.
Create a webpack.config.js file within your project directory.
touch webpack.config.jsOpen the webpack.config.js file, and navigate within it to add the following:
const path = require('path');
const Dotenv = require('dotenv-webpack');


module.exports = {
 entry: './app.js',
 output: {
   filename: 'bundle.js',
   path: path.resolve(__dirname, 'dist'),
 },
 plugins: [
   new Dotenv()
 ],
};
This configuration tells Webpack how to bundle your JavaScript and load environment variables.
Create an index.html file in your project directory:
touch index.htmlOpen index.html in your preferred text editor and add the following HTML:
<!DOCTYPE html>
<html lang="en">
<head>
 <meta charset="UTF-8">
 <meta name="viewport" content="width=device-width, initial-scale=1.0">
 <title>DJ Toggle Fan Page</title>
 <script src="https://unpkg.com/launchdarkly-js-client-sdk@2.18.1/dist/ldclient.min.js"></script>
 <style id="era-styles"></style>
</head>
<body>
 <div id="content"></div>
 <script src="dist/bundle.js"></script>
</body>
</html>
This HTML file sets up your website's basic structure, including a div to hold the content and a style tag for custom styles.
Create the JavaScript file that will control the behavior of our app based on the kill switch flag.
Create a file named app.js in the same directory:
touch app.jsAdd the following JavaScript code
Open app.js in your text editor and add the following code:
const content = document.getElementById('content');
const eraStyles = document.getElementById('era-styles');
const style1995 = `
body {
background-color: #008080;
font-family: "Comic Sans MS", cursive;
color: #FFFF00;
text-align: center;
}
h1 {
font-size: 48px;
text-shadow: 2px 2px #FF00FF;
}
p {
font-size: 18px;
}
#content {
border: 5px dashed #FF00FF;
padding: 20px;
margin: 20px;
background-color: #000080;
}
`;
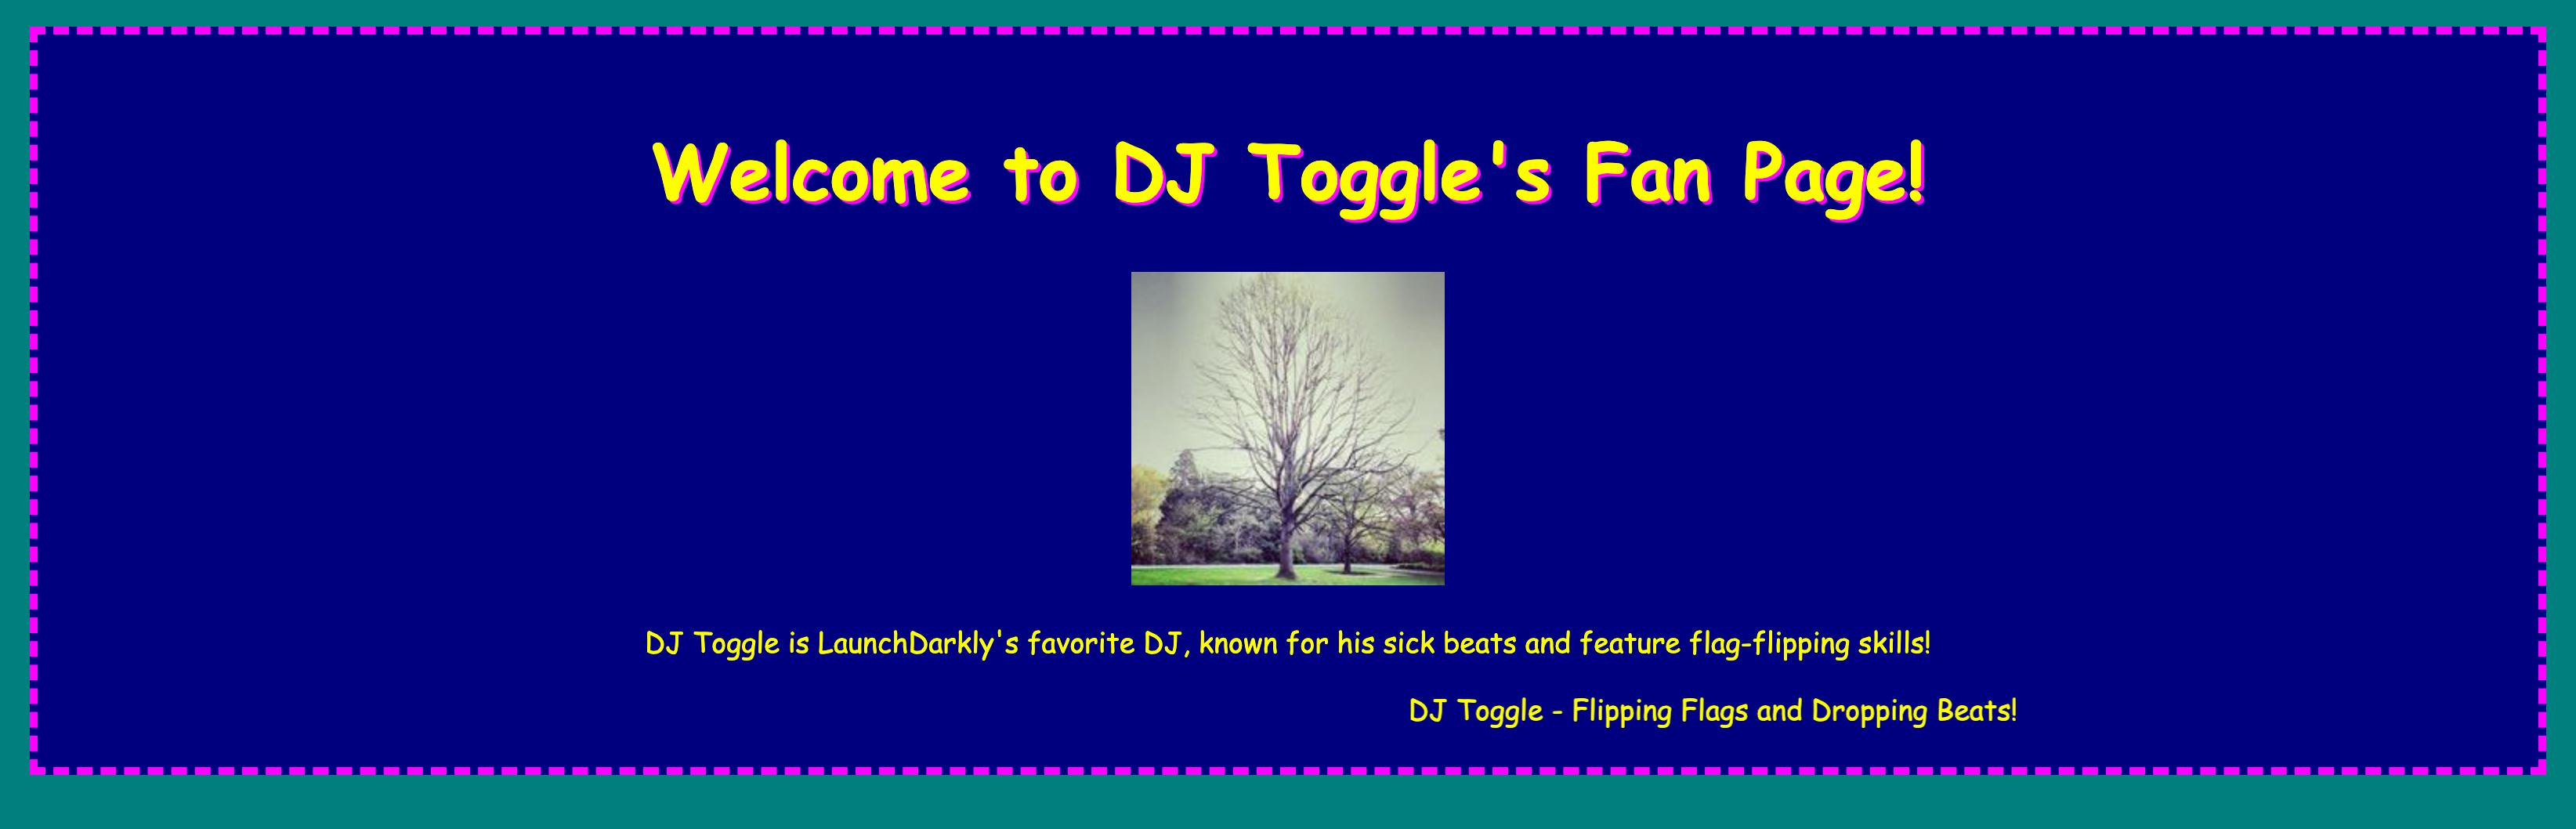
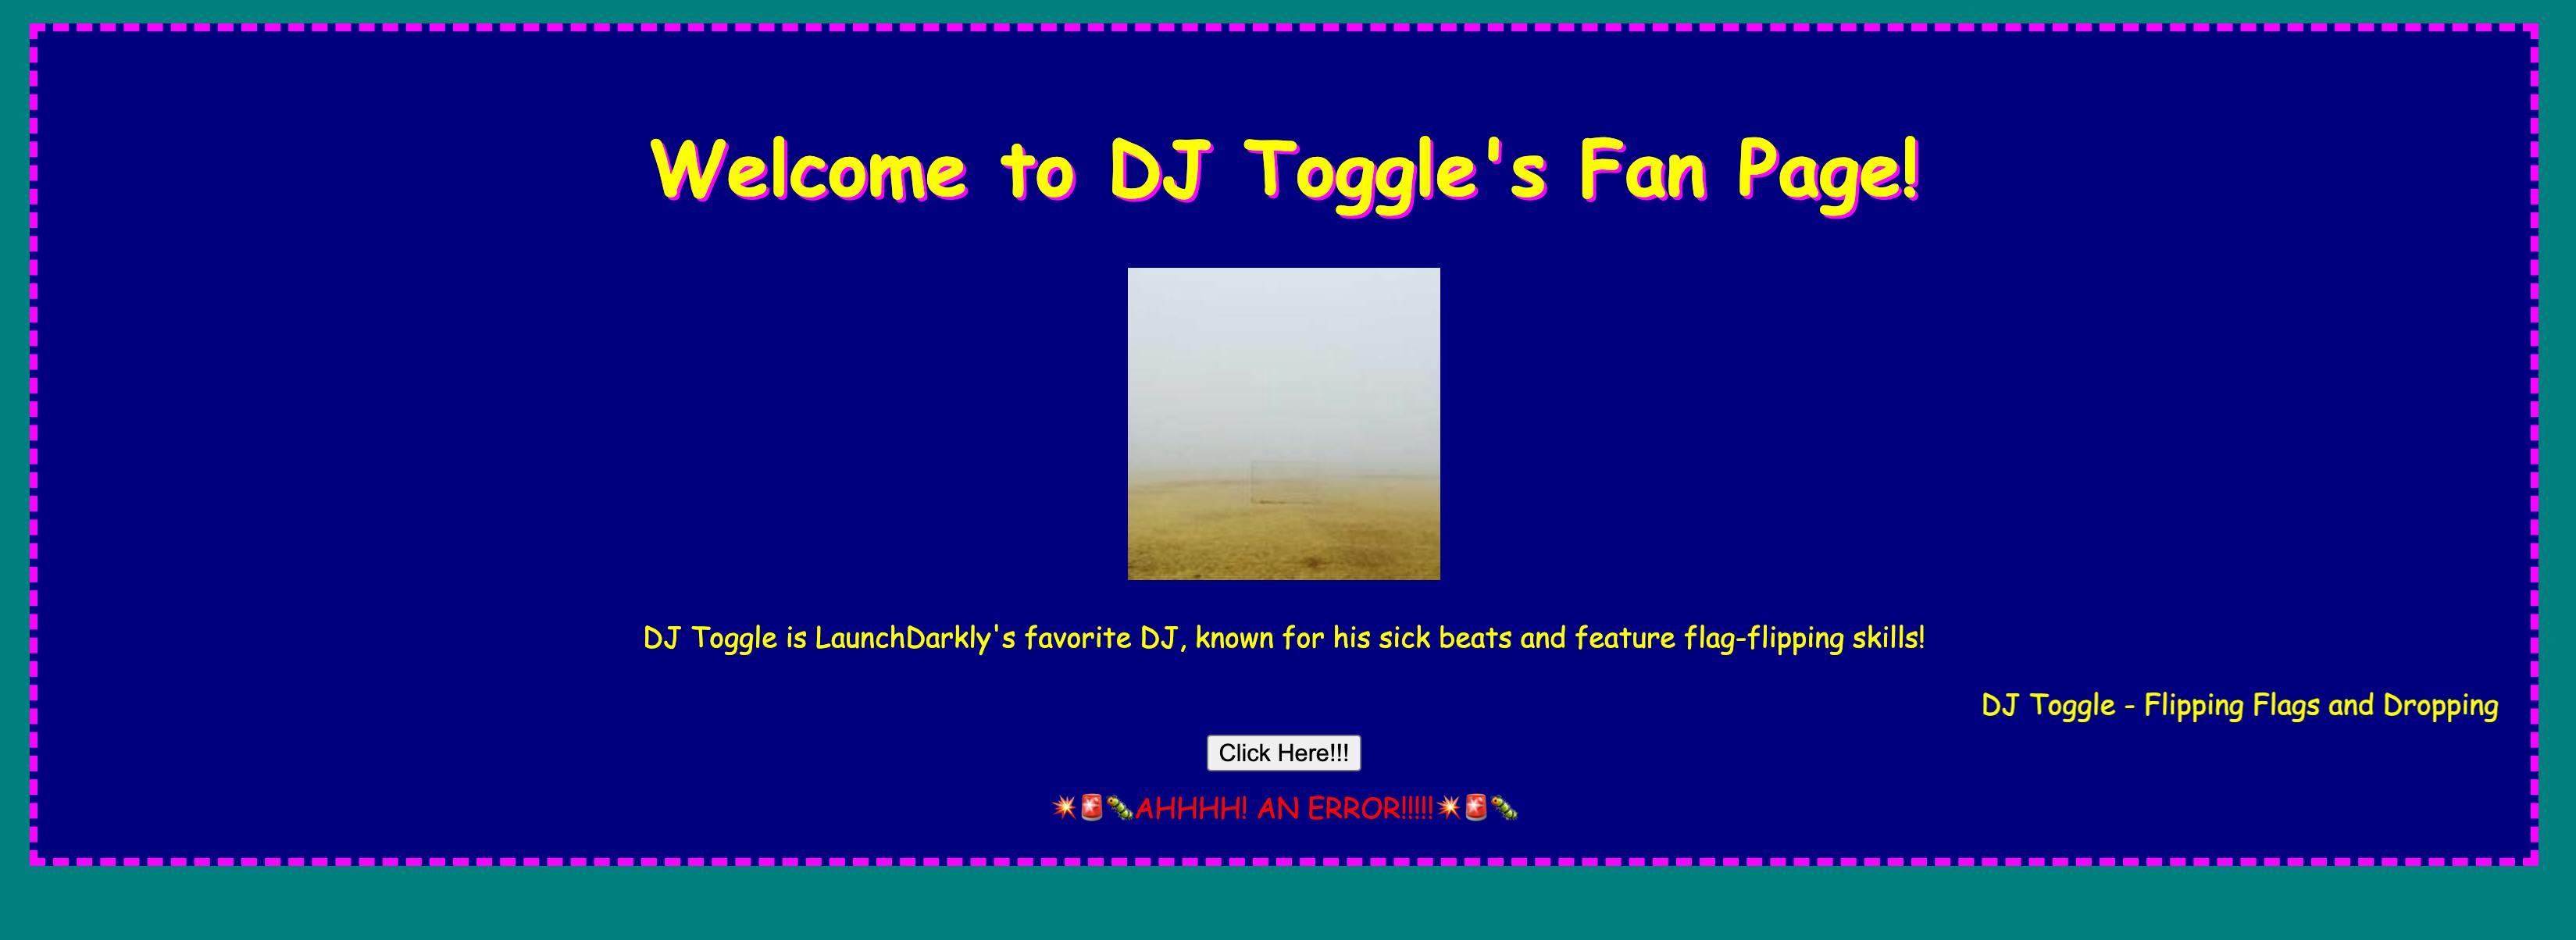
const fanPageContent = `
<h1>Welcome to DJ Toggle's Fan Page!</h1>
<img src="https://picsum.photos/200" alt="DJ Toggle">
<p>DJ Toggle is LaunchDarkly's favorite DJ, known for his sick beats and feature flag-flipping skills!</p>
<marquee>DJ Toggle - Flipping Flags and Dropping Beats!</marquee>
`;
const maintenanceContent = `
<h1>We'll be right back!</h1>
<p>DJ Toggle is currently fine-tuning his LaunchDarkly-powered turntables. Please check back later!</p>
`;
const errorButtonContent = `
<button id="error-button">Click Here!!!</button>
<div id="error-message" style="display: none; color: red; margin-top: 10px;"></div>
`;
const ldClient = LDClient.initialize(process.env.LAUNCHDARKLY_CLIENT_SIDE_ID, {
key: 'anonymous'
});
ldClient.on('ready', function() {
const show2000sVersion = ldClient.variation('style-update', false);
const showErrorButton = ldClient.variation('kill-switch', false);
if (show2000sVersion) {
content.innerHTML = fanPageContent;
eraStyles.innerHTML = style2000s;
} else {
content.innerHTML = fanPageContent;
eraStyles.innerHTML = style1995;
}
if (showErrorButton) {
content.innerHTML += errorButtonContent;
const errorButton = document.getElementById('error-button');
const errorMessage = document.getElementById('error-message');
errorButton.addEventListener('click', () => {
errorMessage.textContent = "💥🚨🐛AHHHH! AN ERROR!!!!!💥🚨🐛.";
errorMessage.style.display = 'block';
setTimeout(() => {
errorMessage.style.display = 'none';
}, 3000);
});
}
});What does this JavaScript file do?
- Styles: We define our styles — with a 1995 vibe, complete with a Comic Sans font and a teal background.
- LaunchDarkly Integration: We initialize the LaunchDarkly client and check the value of the kill-switch flag. Depending on its state, we either display a version of the page with a button or a version without a button.
Run your website
To view your work in action, you’ll need to bundle your file and run it on a local server.
Run the following command to build your project using webpack:
npm run buildThis command will create a dist folder with a bundle.js file containing all your JavaScript code and dependencies.
Next run the package.
npm run startBy default, your files will be served at http://localhost:8080.
Opening your browser to that path, you should now see DJ Toggle's fan page in its 1995 gloriousness, yellow Comic Sans, and all.

Test the Kill Switch
Now, it’s time to test your kill switch flag.
Go to your LaunchDarkly dashboard and toggle the 'kill-switch' flag on. Return to the website and see how you’ve added a “Click Here!!!” button in the middle of your screen.
However, when clicked, this button doesn’t quite function as you may want it to. You will notice a bug appear when pressed.
Fortunately, your DJ Toggle Fan Page can instantly roll back to its prior state without the devastating “Click Here!!!” button that shows a bug.
Turn the feature flag “off” and watch your site roll back to its buttonless (and bug-less) version.
This example of using feature flags to add new features to your application safely is just the beginning. Kill Switch flags can be placed on different parts of your application, front or backend, allowing you to safely create your wildest dreams within your application.
When implementing new features, kill switch flags can instantly roll back your application if something goes wrong, saving you time, money, and—let’s be honest—style points. It's like having a big, red “undo” button that you can press when things get a little too wild in production.
Conclusion
In this tutorial, you've learned to use LaunchDarkly's kill switch feature flags to roll back your JavaScript application if errors appear. In doing so, your users (and developers) will thank you for saving them a poor user experience and precious time, credibility, and money as problems are mitigated.
For more details on kill switch flags or on how else you can mitigate risk while building to your heart's content, check out LaunchDarkly's official documentation. Check out other articles about how to de-risk your releases, further documentation on kill switch flags, release management, or how to roll back features automatically with release guardian.
Need a hand or want to geek out on how else you can mitigate risk using LaunchDarkly?? Don't hesitate to reach out— I’m always here to help. Email me at emikail@launchdarkly.com, on Twitter, LinkedIn, or join the LaunchDarkly Discord.
Like what you read?
Get a demo