
In this tutorial you will learn to add a kill switch to disable 3rd-party API calls in a Sinatra application using the LaunchDarkly Ruby SDK. For a Python version of this, please see Quickly disable external API calls in your FastAPI application using FastAPI and LaunchDarkly kill switch flags.
Kill switches are a type of feature flag that let you instantly turn off specific functionality—like API calls—during emergencies or unexpected issues. They help you quickly stop external service calls without needing to redeploy your application.
Prerequisites
- A LaunchDarkly account – Sign up for a free trial here
- A local developer environment with Ruby and Bundler installed
- A text editor to modify your code
Note: This tutorial uses Sinatra 4.0+, which comes with Puma as the default web server.
What You'll Build
We will start by creating a simple Sinatra application using Ruby. Sinatra is a lightweight Ruby web framework that makes it easy to build small web applications quickly and lets you focus on your core application logic.
In our case, the app will initially return a JSON message to confirm it’s running. Next, we'll add functionality to serve jokes as HTML by calling the Dad Jokes API.
Finally, we'll integrate LaunchDarkly’s kill switch feature so that you can toggle between fetching jokes from the external API and using a local fallback, and test this functionality in real time.
Step 1: Set Up a New Ruby Project
Begin by creating a new project directory and navigating into it. Open your terminal and run:
Next, create a file called Gemfile (named exactly "Gemfile" without any extension) in the root of your project. This file lists the gems (dependencies) your project will use. For this project, we need Sinatra to build our web application, Puma as the web server, Rackup for running Rack applications, the LaunchDarkly Ruby SDK to evaluate our flag, and dotenv to load environment variables. Add the following content to your Gemfile:
Once your Gemfile is ready, run the following command to install the dependencies:
This command reads the Gemfile and installs the specified gems, setting up your Ruby project environment.
Step 2: Get Started with Sinatra
Now that we have our project set up, let's create a simple Sinatra application. Create a file called app.rb in your project root and add the following code:
This basic application defines a single route at the root URL ("/") that returns a JSON message saying {"message":"Hello World"}. You can run this application by executing:
Note: We're using bundle exec here instead of just ruby app.rb to ensure that the application runs with the exact gem versions specified in your Gemfile. This prevents version conflicts with globally installed gems and ensures consistency across different development environments.
Then, open your browser and visit http://127.0.0.1:4567/. It should display:
This confirms we have our Sinatra app running. Next, we'll add functionality to serve jokes as HTML.
Step 3: Add an HTML Page to Serve Jokes
We'll now add a new route that displays a Dad joke in an HTML page by calling the Dad Jokes API. Update your app.rb to include this functionality. Replace its contents with the following code:
This updated application now has an additional route, /joke/, which calls the Dad Jokes API and renders the returned joke inside an HTML template. Run your application again with:
Visit http://127.0.0.1:4567/joke/ to see a fresh Dad joke.
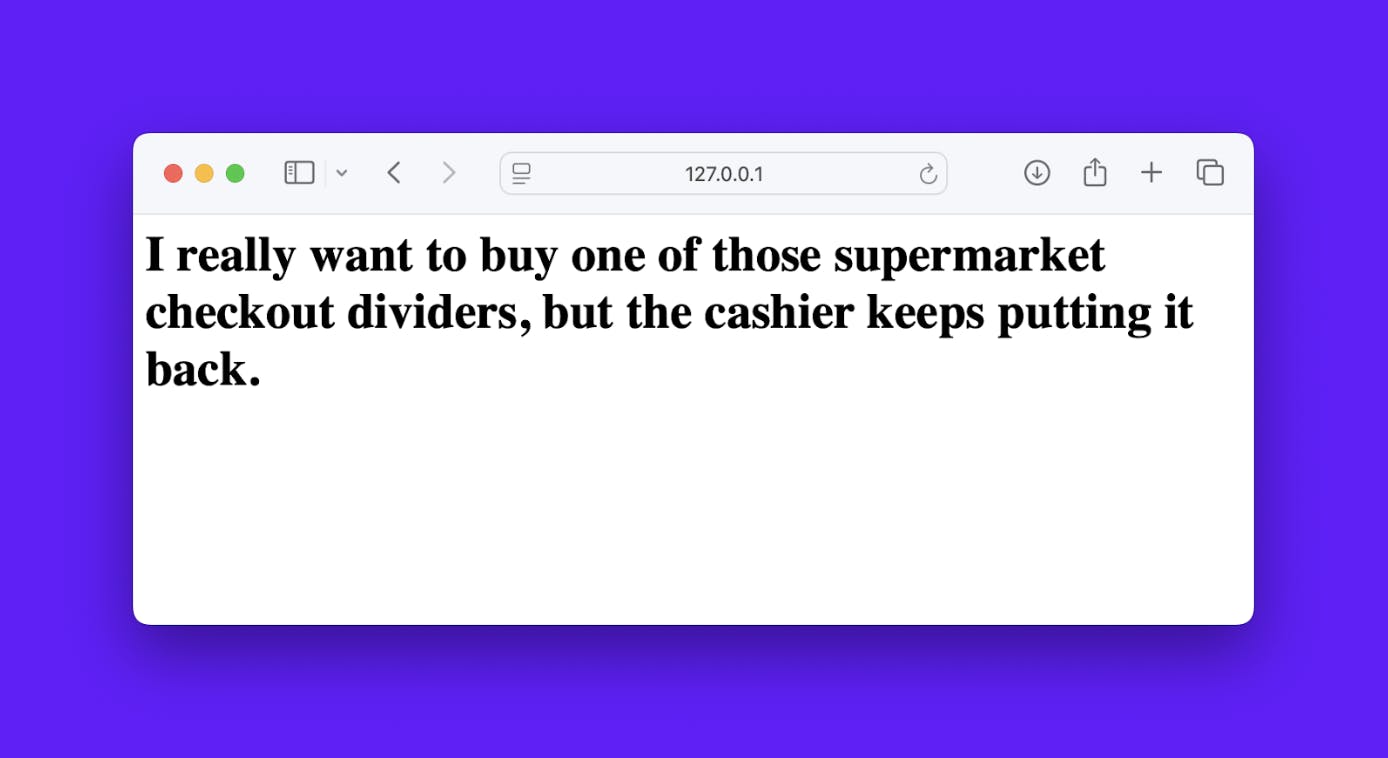
Note: If you visit http://127.0.0.1:4567/joke without the trailing slash, Sinatra won’t match it with our /joke/ route. If you prefer the route to work without the trailing slash, you can define it accordingly.
Step 4: Configure your LaunchDarkly kill switch flag
We're going to step away from the Sinatra app for a second, and set up our LaunchDarkly configuration.
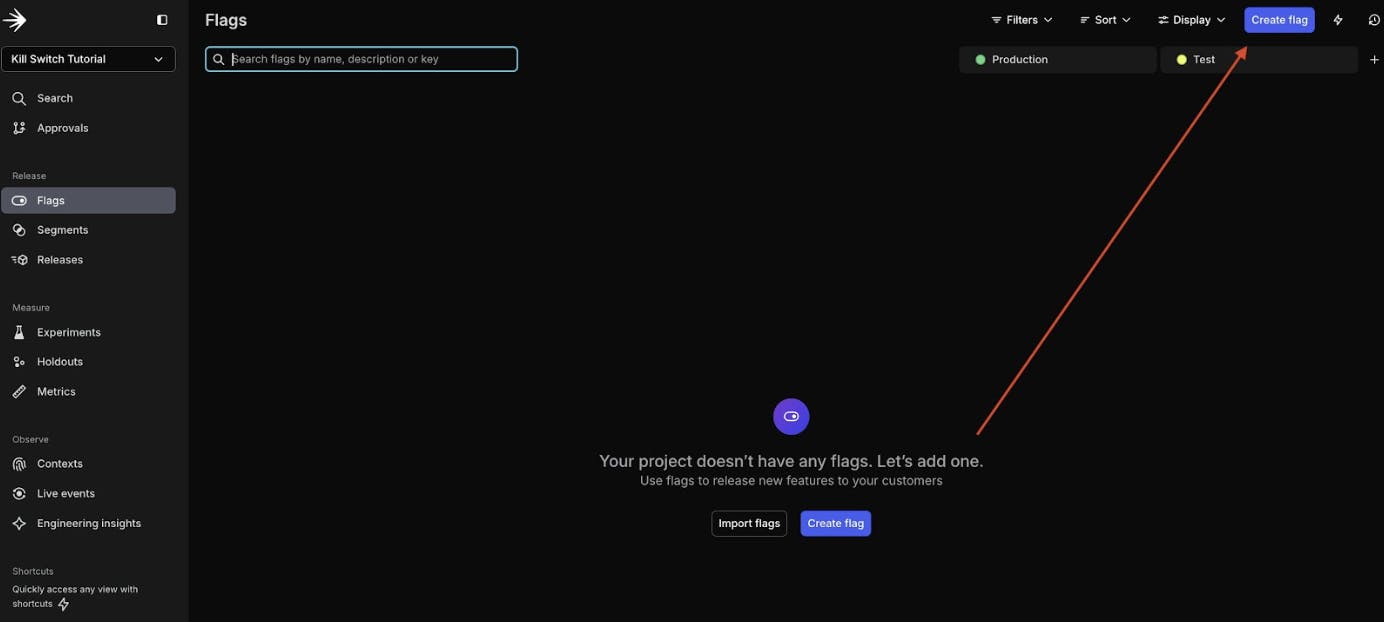
In the LaunchDarkly app, click on “Flags” in the left navigation menu and then click one of the “Create flag” buttons.
Configure your flag as follows:
- Name your flag “use-dadjokes-api”. When you type in the Name, the Key field will automatically populate.
- Enter a description to explain the purpose of this flag. For example:
“When enabled, pull jokes from the dadjokes API. When disabled, pull from a local file.”
Select “Kill Switch” as the flag type.
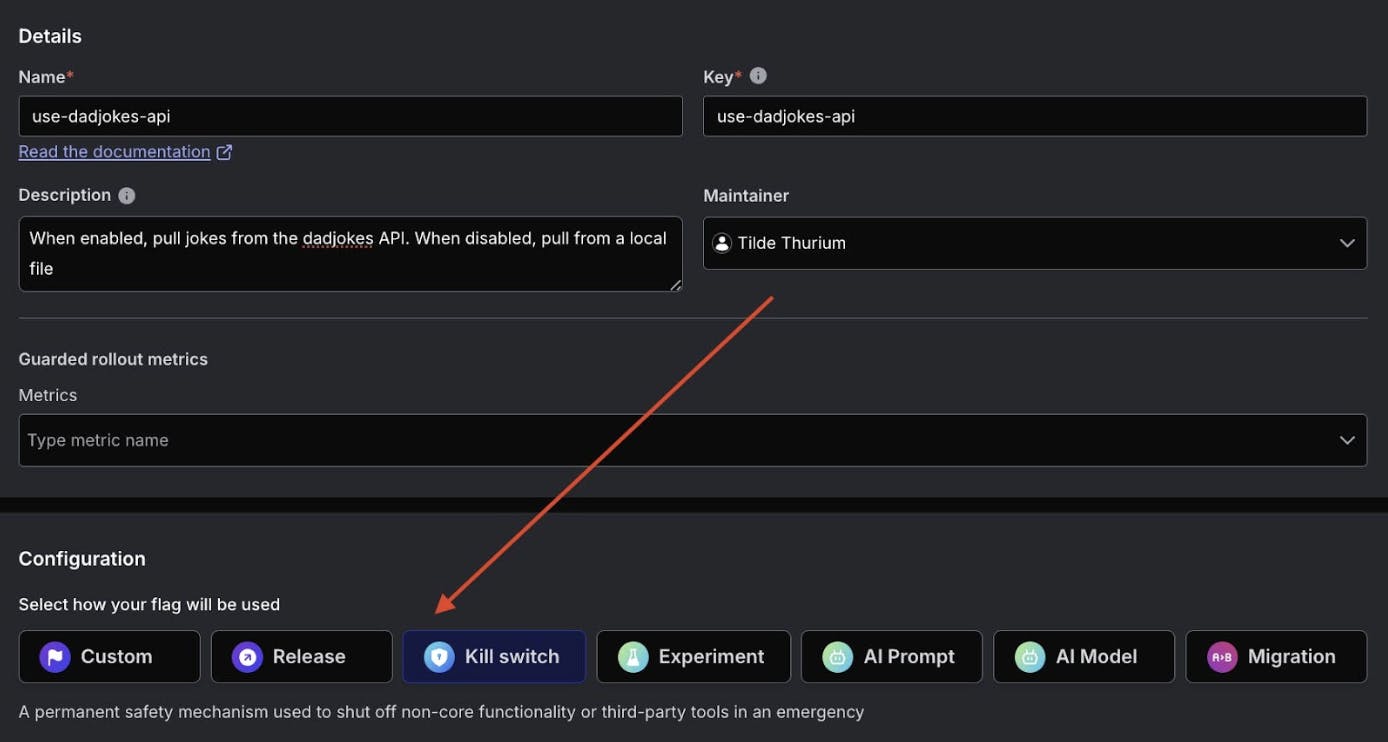
Click the “Create Flag” at the bottom of this dialog.
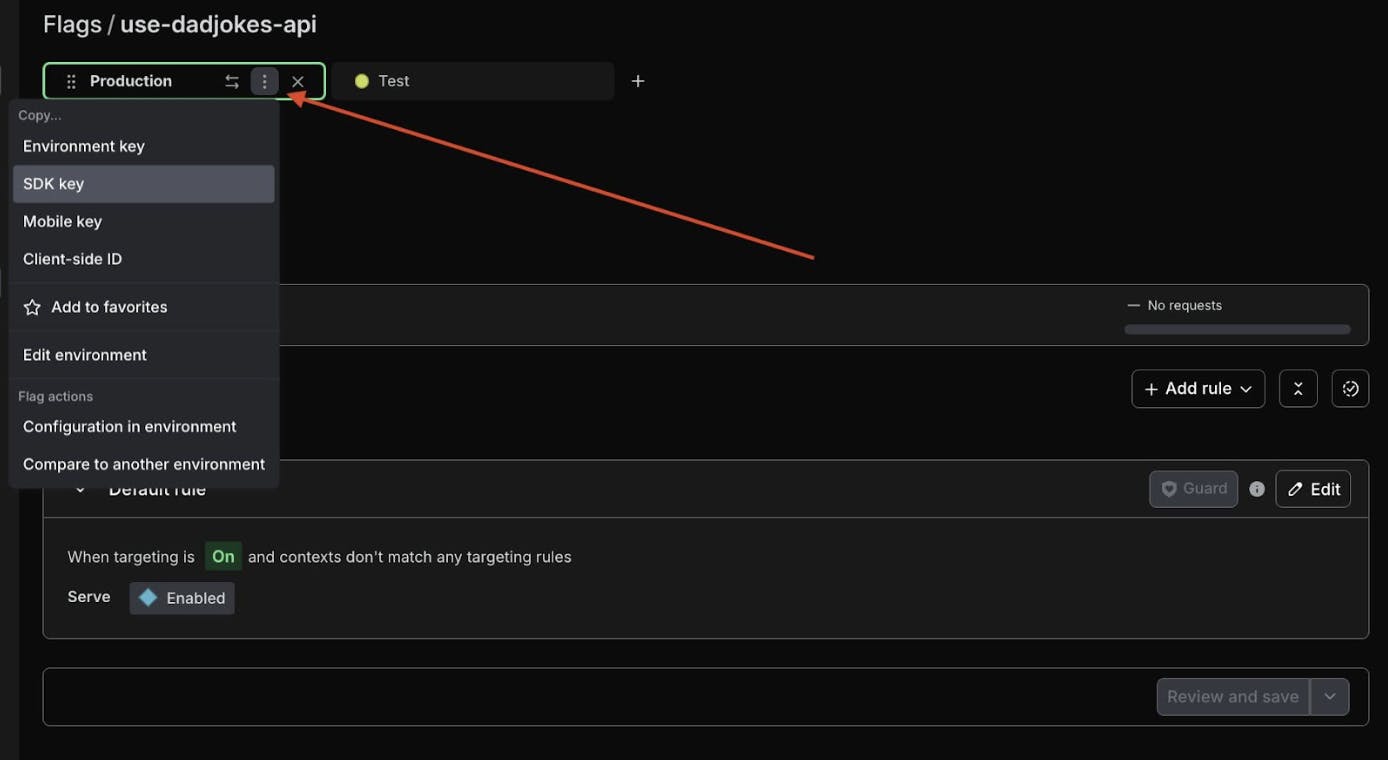
On the following screen, click the dropdown menu next to the “Production” environment. Copy the SDK key by selecting it from the dropdown menu—we’ll need it in a second.
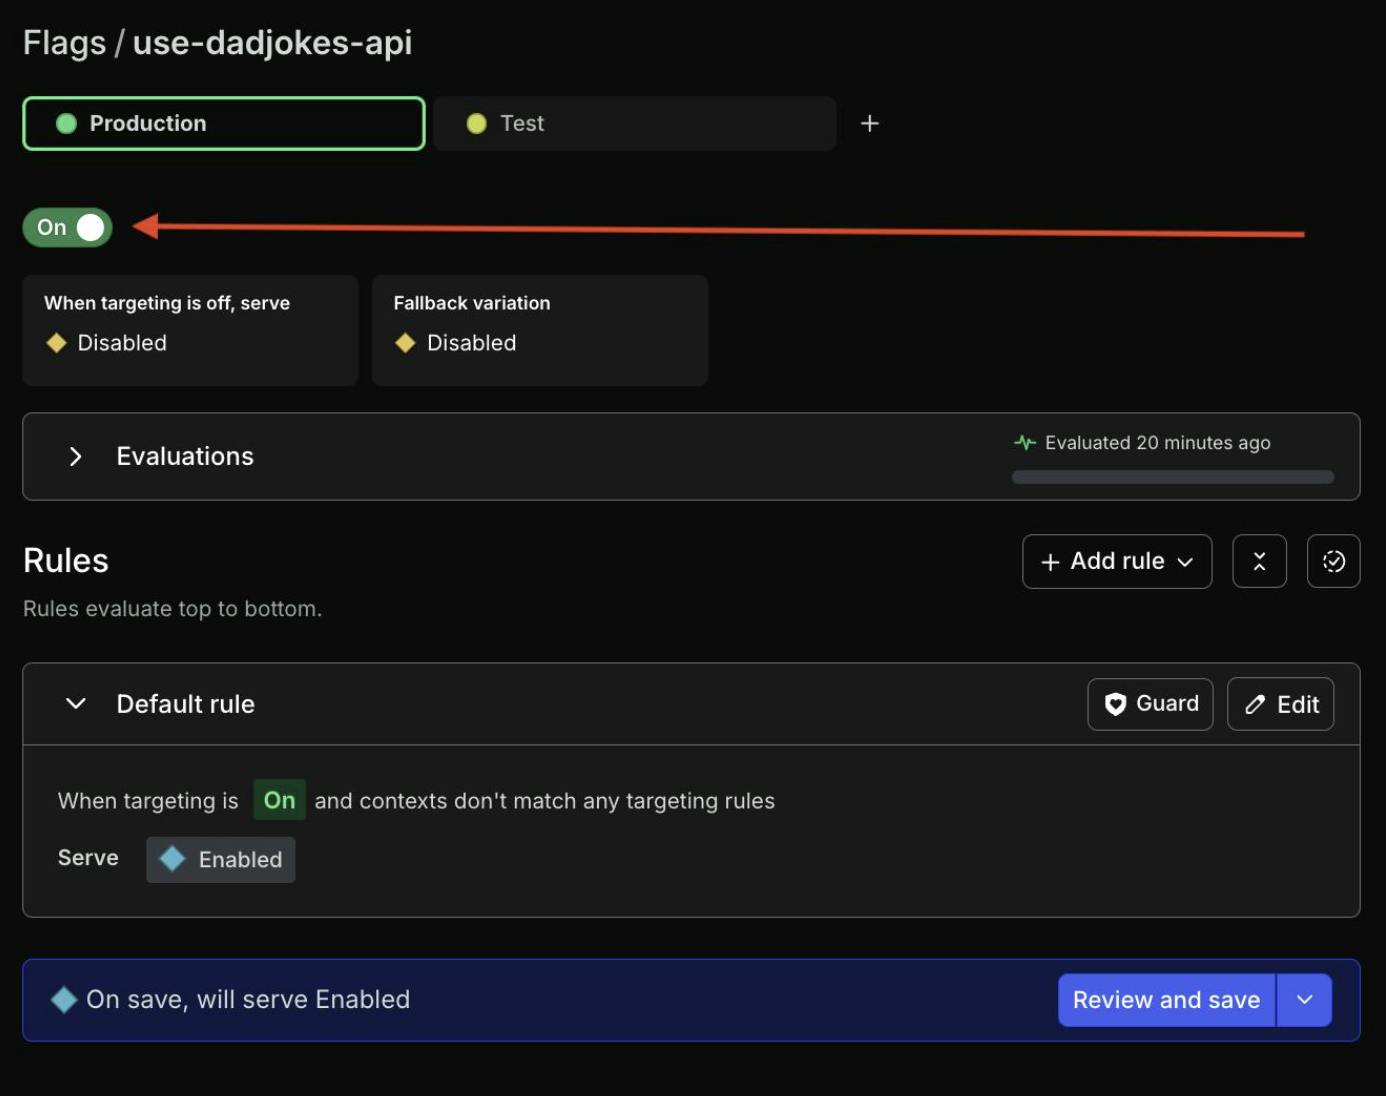
Very important - turn the flag on using the toggle switch! Then click the “Review and save” button at the bottom.
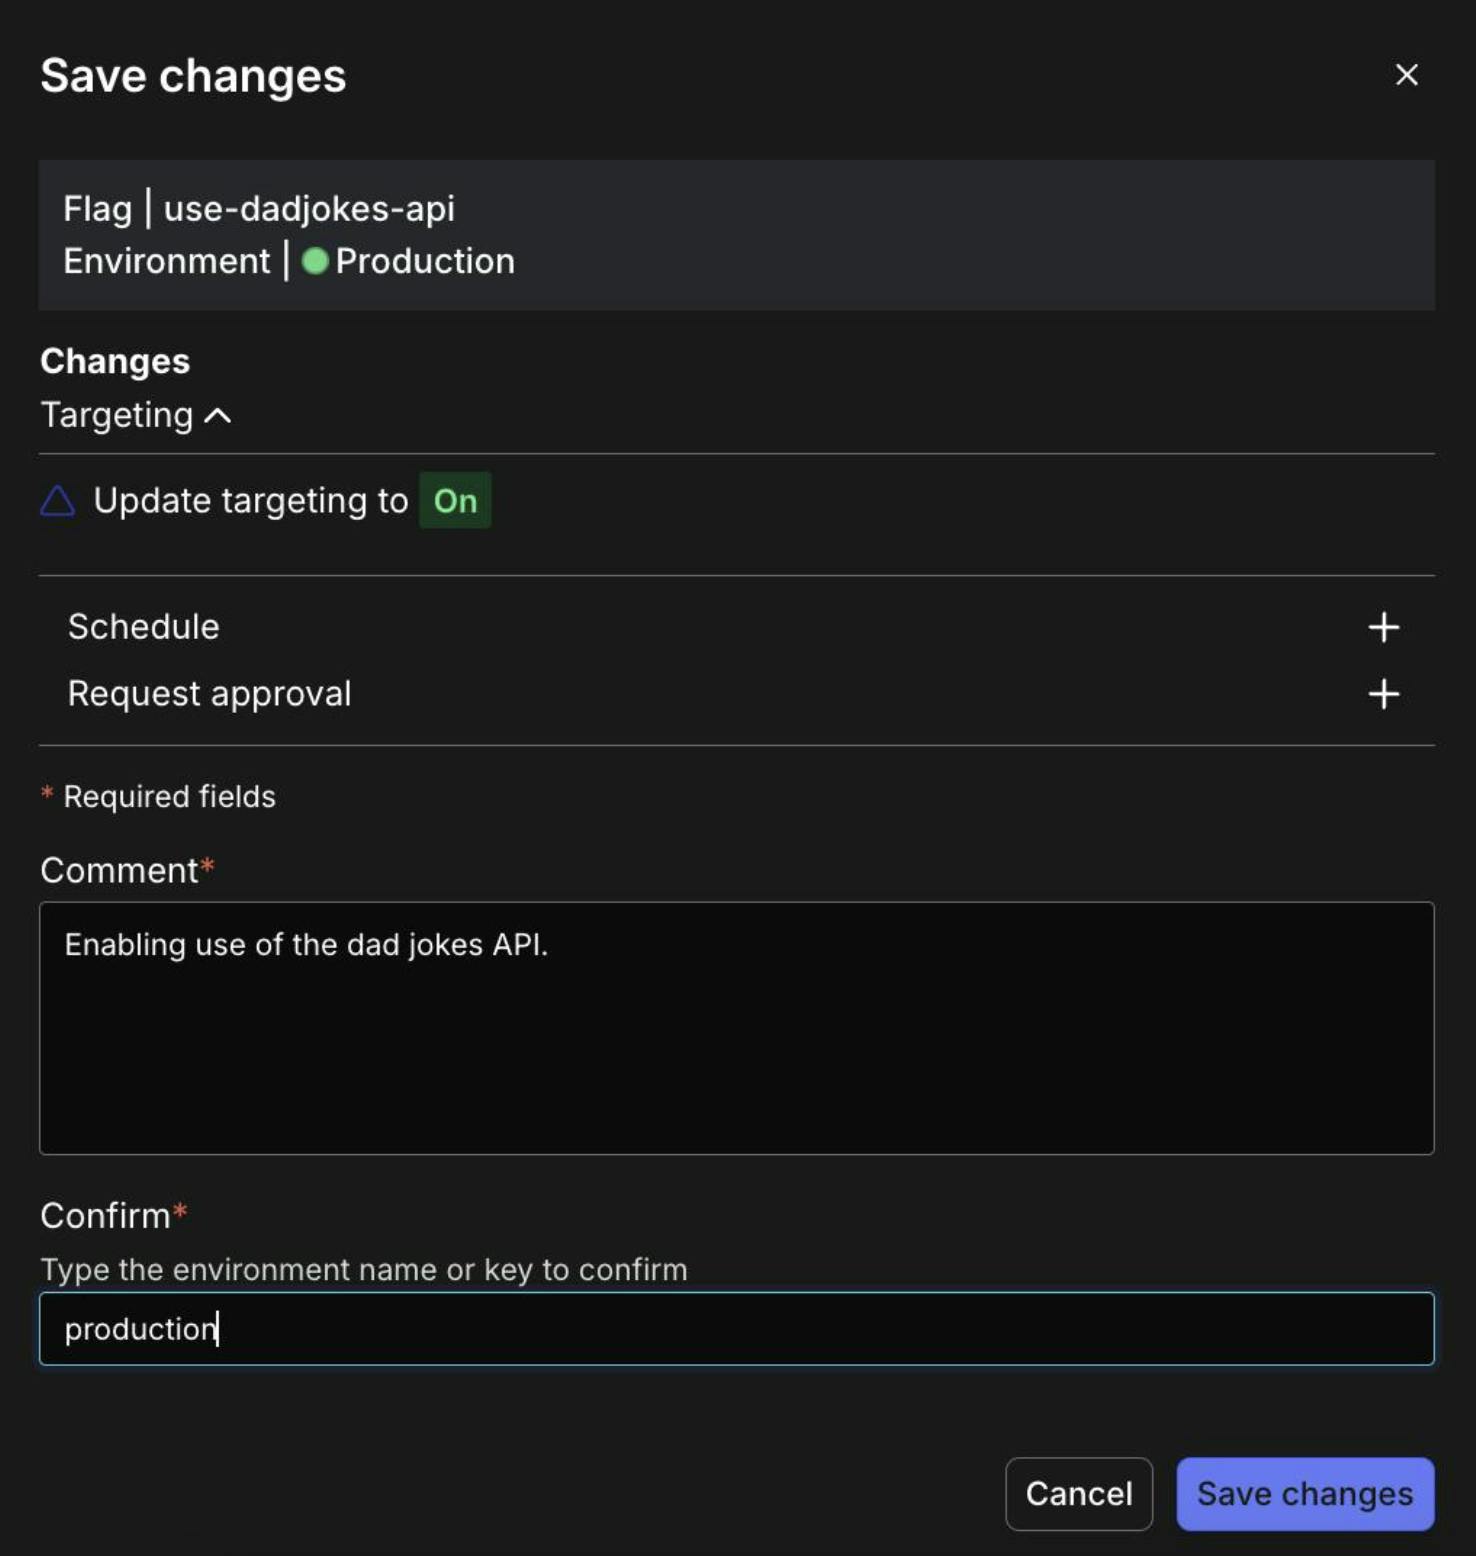
Add a comment and verify the name of the environment if your LaunchDarkly setup prompts you to, then click the “Save changes” button.
Step 5: Add the LaunchDarkly Ruby SDK to Your Sinatra Application
Now, we'll integrate LaunchDarkly into our application. First, update your Gemfile (if you haven't already) to include the LaunchDarkly Ruby SDK and Dotenv:
After updating, run:
Create an .env file in your project root with the following content (replace the placeholder with your actual SDK key):
Next, update your app.rb to integrate the LaunchDarkly SDK. Replace its contents with the following code:
In this version, we load the SDK key from the .env file using dotenv, then initialize the LaunchDarkly client with it.
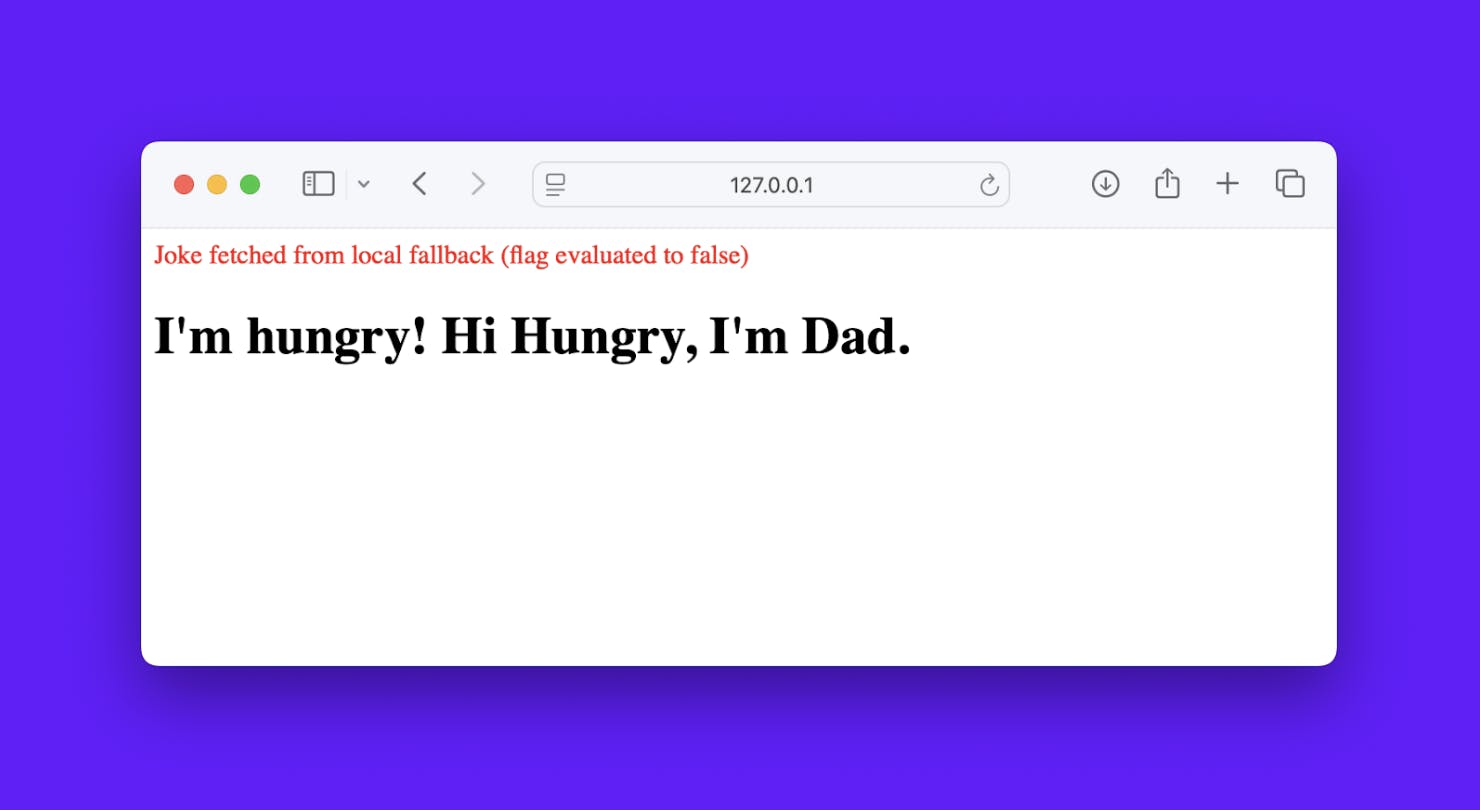
The /joke/ route creates a generic context, evaluates the use-dadjokes-api flag, and prints both the flag evaluation to the console and in the HTML page along with the joke (from the API if true, or from a local fallback if false).
Step 6: Run and Test Your Application
Start your Sinatra application with the following command:
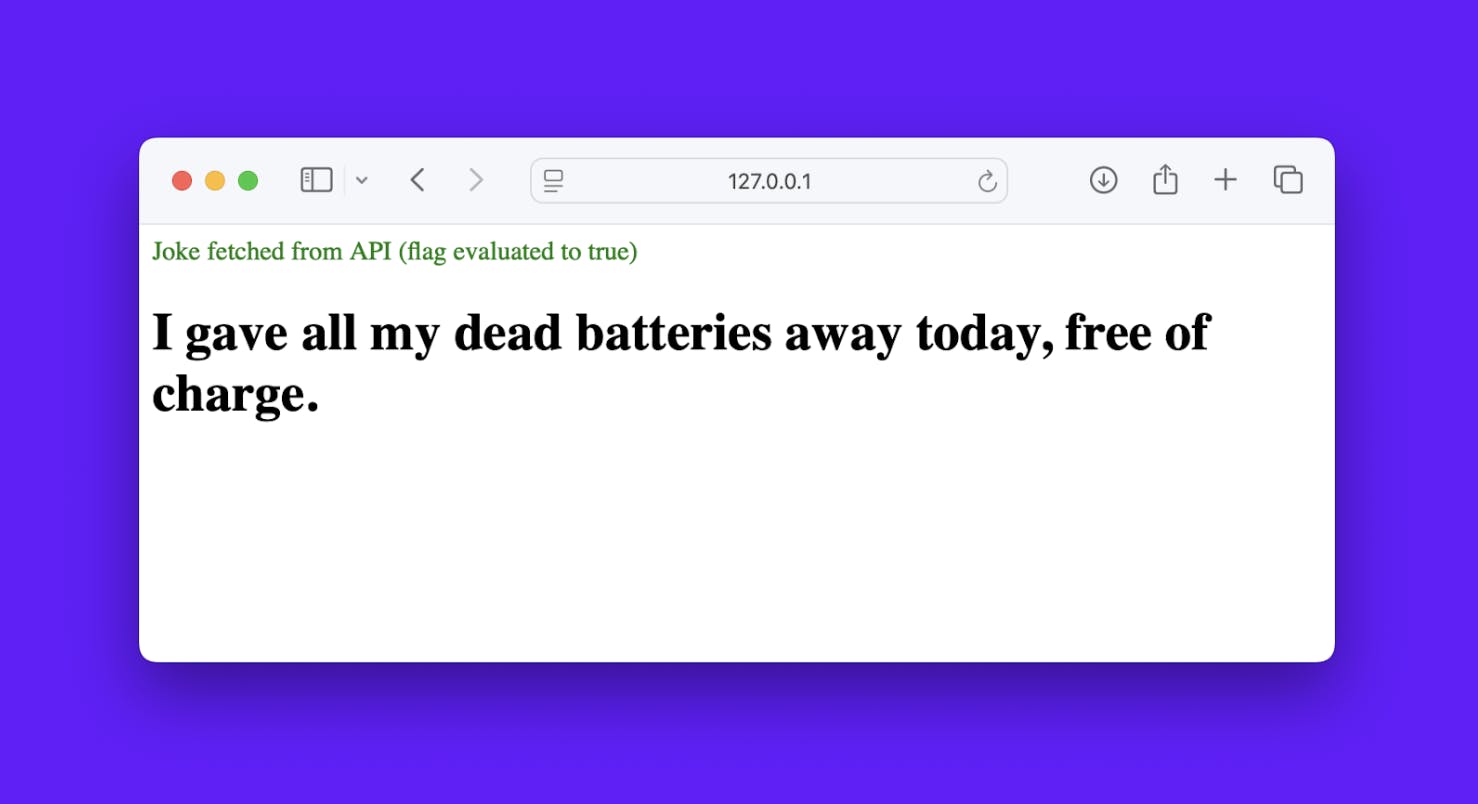
By default, your application will be accessible at http://127.0.0.1:4567/. Visit http://127.0.0.1:4567/joke/ in your browser. You should see a message indicating whether the joke was fetched from the API or local fallback, along with the evaluated flag value. The evaluation is also printed on the console.
When using LaunchDarkly with Sinatra, you might notice that toggling the "use-dadjokes-api" flag in the LaunchDarkly dashboard doesn't immediately change your application's behavior. For example, even after turning the flag OFF in the dashboard, the app might still fetch jokes from the API instead of using the local fallback jokes. You would need to restart your server for changes to take effect - which defeats the purpose of having an instant kill switch!
This happens because when your Sinatra app starts up, Puma (the web server) creates several copies of your application to handle traffic efficiently. Each copy needs its own direct line to LaunchDarkly to get flag updates. Without proper configuration, those connections break, and your app stops receiving updates when flags change.
To fix this issue, we need to create a Puma configuration file:
1. First, create a config directory in your project:
2. Now create a file called config/puma.rb with the following content:
Here's what this configuration does: it ensures that each copy of your application properly connects to LaunchDarkly and stays connected. The key part is the on_worker_boot section, which creates a fresh LaunchDarkly connection every time Puma starts a new copy of your app.
Note: Since Sinatra 4.0+ uses Puma as its default server, this file will be automatically detected and loaded when you start your application.
3. Restart your application:
Now when you toggle the flag in the LaunchDarkly dashboard, your application should immediately reflect these changes without requiring a restart.
Tip: Try toggling the use-dadjokes-api flag in the LaunchDarkly dashboard to see the change in behavior in real time. Switch the flag on and off, and refresh the /joke/ route in your browser to verify that the joke source updates accordingly.
Wrapping It Up
In this tutorial, we built a Sinatra application that uses LaunchDarkly kill switch flags to manage external API calls.
We started by setting up a new Ruby project and creating a simple Sinatra application that returns a JSON message. Then, we added functionality to display Dad jokes on an HTML page by calling the Dad Jokes API. Next, we integrated the LaunchDarkly Ruby SDK by loading the SDK key from an .env file, and used the kill switch flag to dynamically choose between live API data and a local fallback without needing to redeploy.
We also learned how to configure Puma to ensure that LaunchDarkly flag changes take effect immediately, which is crucial for a kill switch to work properly in emergency situations.
This approach gives you the flexibility to quickly disable external dependencies during emergencies or unexpected issues. Enjoy building and testing your new Sinatra app, and have fun with those jokes!
Happy coding!