


Overview
Everyone who uses your product has a unique set of hopes, dreams, goals, and aspirations, and driving them all through the same product experience can be, well, disappointing. Fortunately, thanks to LaunchDarkly, providing a unique product experience for different segments of your audience is quite easy.
In this tutorial, you will learn how to create different user experiences by targeting specific segments within LaunchDarkly.
Prerequisites
- A development environment with git, Python, and pip installed.
- A LaunchDarkly account - sign up for a free one here!
First, clone this repository on your local machine:
git clone https://github.com/launchdarkly-labs/Risk-Management-Python.gitThen, navigate into the correct folder:
cd Risk-Management-Python/Targeting/Python/Next, let’s install our dependencies + create a virtual environment to work within.
python -m venv venvActivate the virtual environment.
On Windows:
venv\Scripts\activateOn macOS and Linux:
source venv/bin/activateThen, install the dependencies.
pip install -r requirements.txtRun the servNext, let's get our SDK key, and set up our environment file (.env).
Copy your SDK key from the LaunchDarkly application under Project settings / Environments:
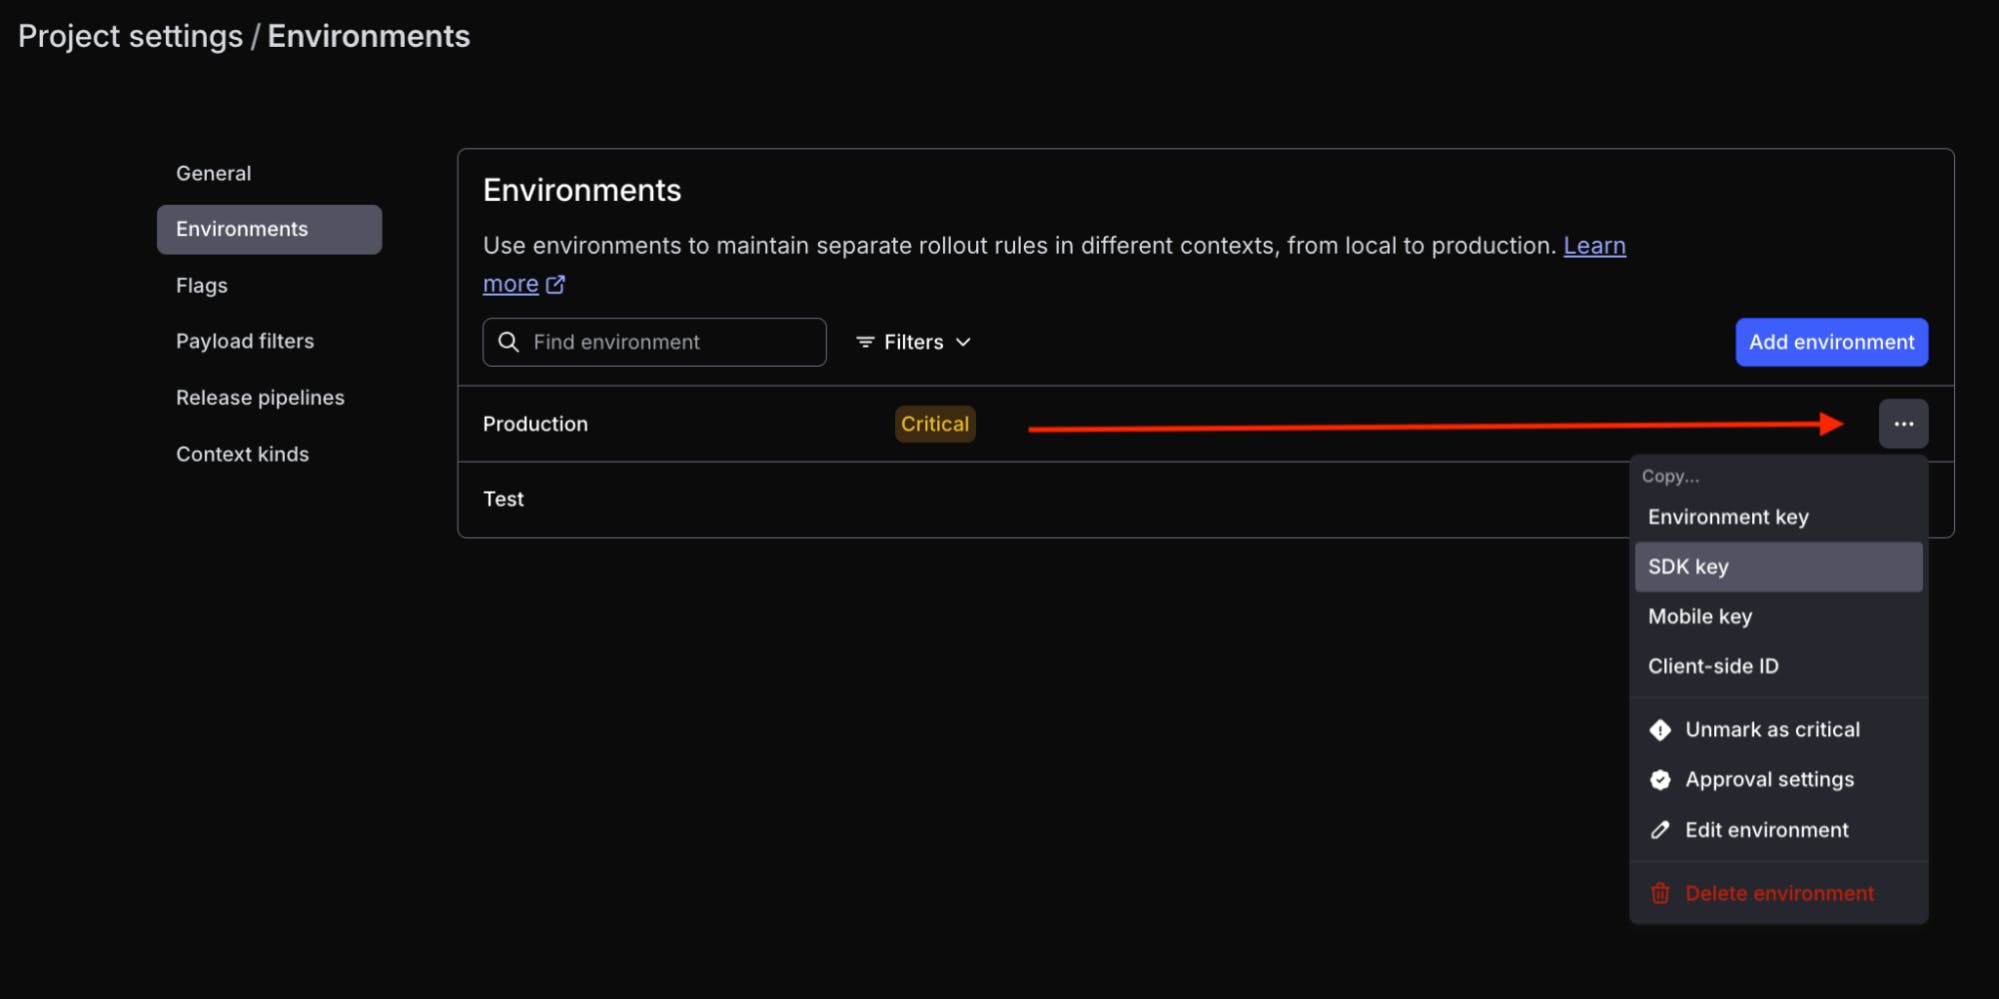
Important—SDK keys are environment-specific, so make sure you use the key from your “Production” environment.
Rename the file .example.env to .env and save the file.
Now run the following command to connect your .env file to your environment variables.
source .env With this setup, the LaunchDarkly SDK can access the credentials locally but you won’t accidentally commit them to source control and compromise your security.
Finally, run the application within your terminal:
python main.pyBy default, you should see an output within your terminal that shares the LaunchDarkly client has initialized successfully and the entire playlist from DJ Toggle’s Team, including the top 40 tracks.

Now, while our internal team may care about all 40 tracks, if we’re to send this to, say… a new hit radio streaming service, we may not want to send all 40 tracks, but rather just our top hits, as well as some added details on the release date.
Let’s use LaunchDarkly to target unique segments to create this end result.
Segments are groups that allow you to consistently target the same audiences, serving as a single source of truth for your targeting logic. While nothing stops you from duplicating targeting rules across different flags, keeping them all updated when requirements change can be a time sink. That’s where segments come in.
Segments can be shared across LaunchDarkly environments, making it more accessible to keep things in sync between dev/test and production. Let’s create a segment, add targeting rules to it, and then use it in a flag.
Creating a segment
Head back to the LaunchDarkly web application.
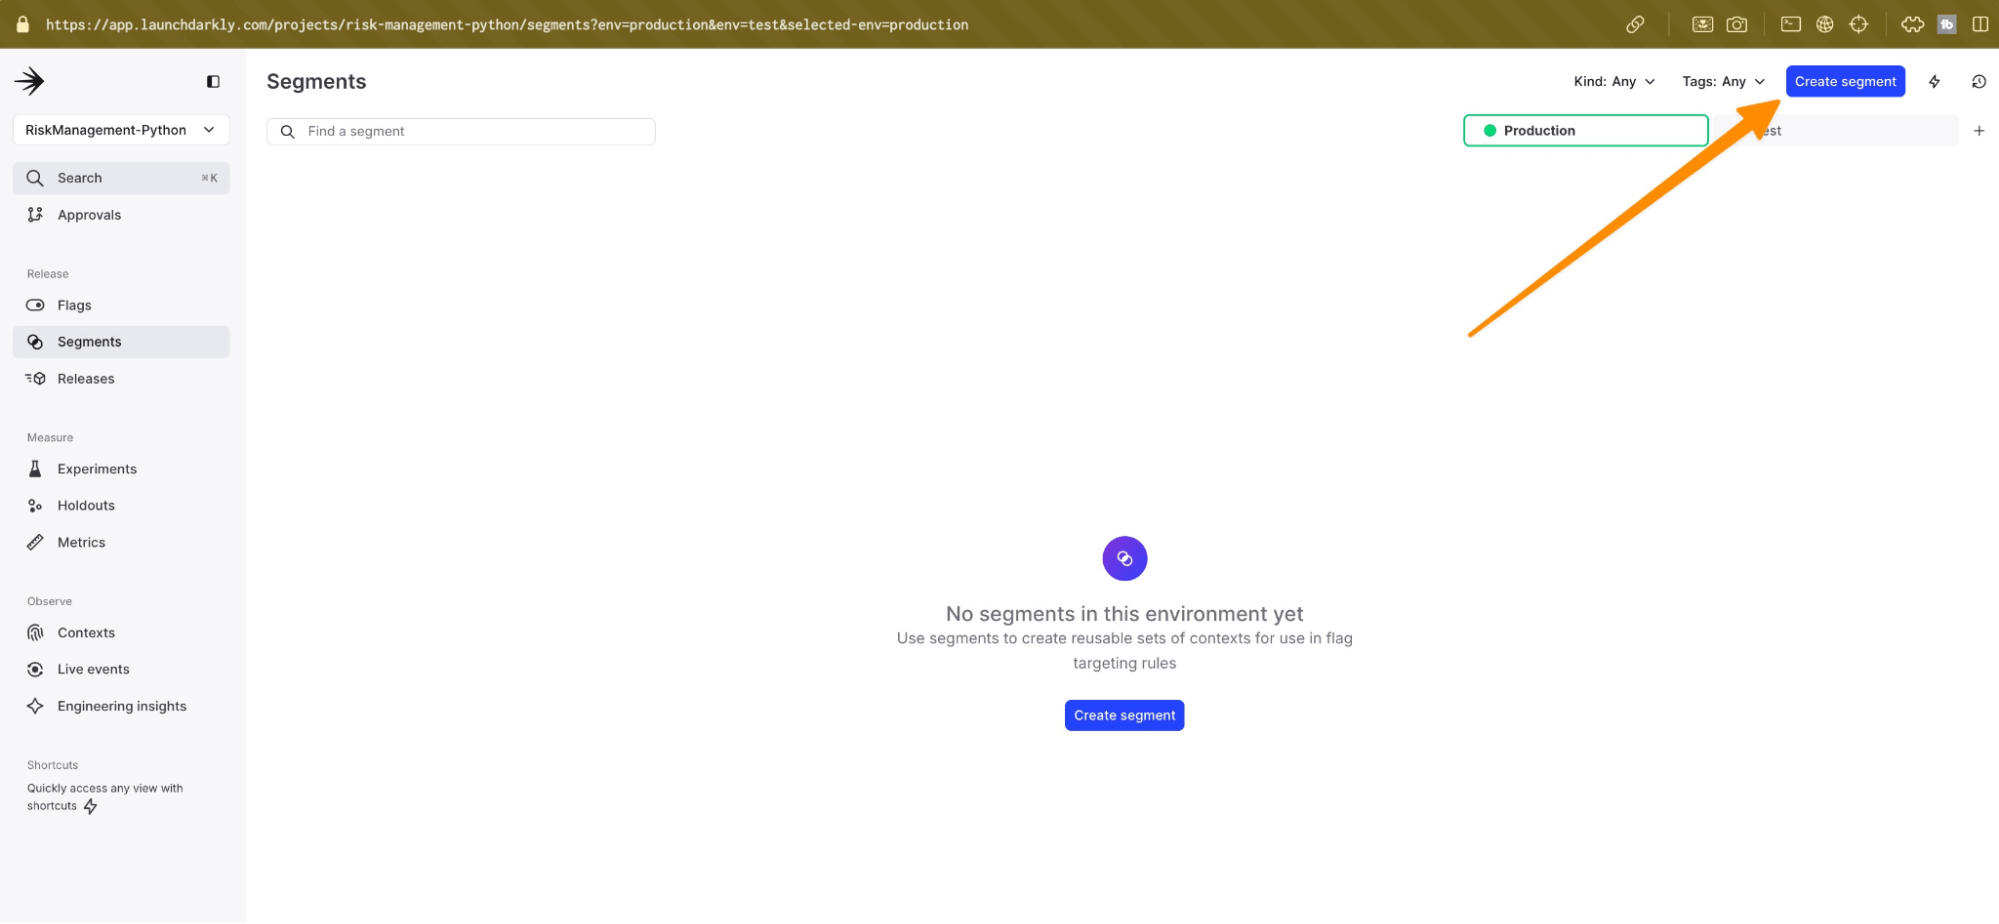
Click “Segments” on the left-hand menu, then click one of the “Create segment” buttons.
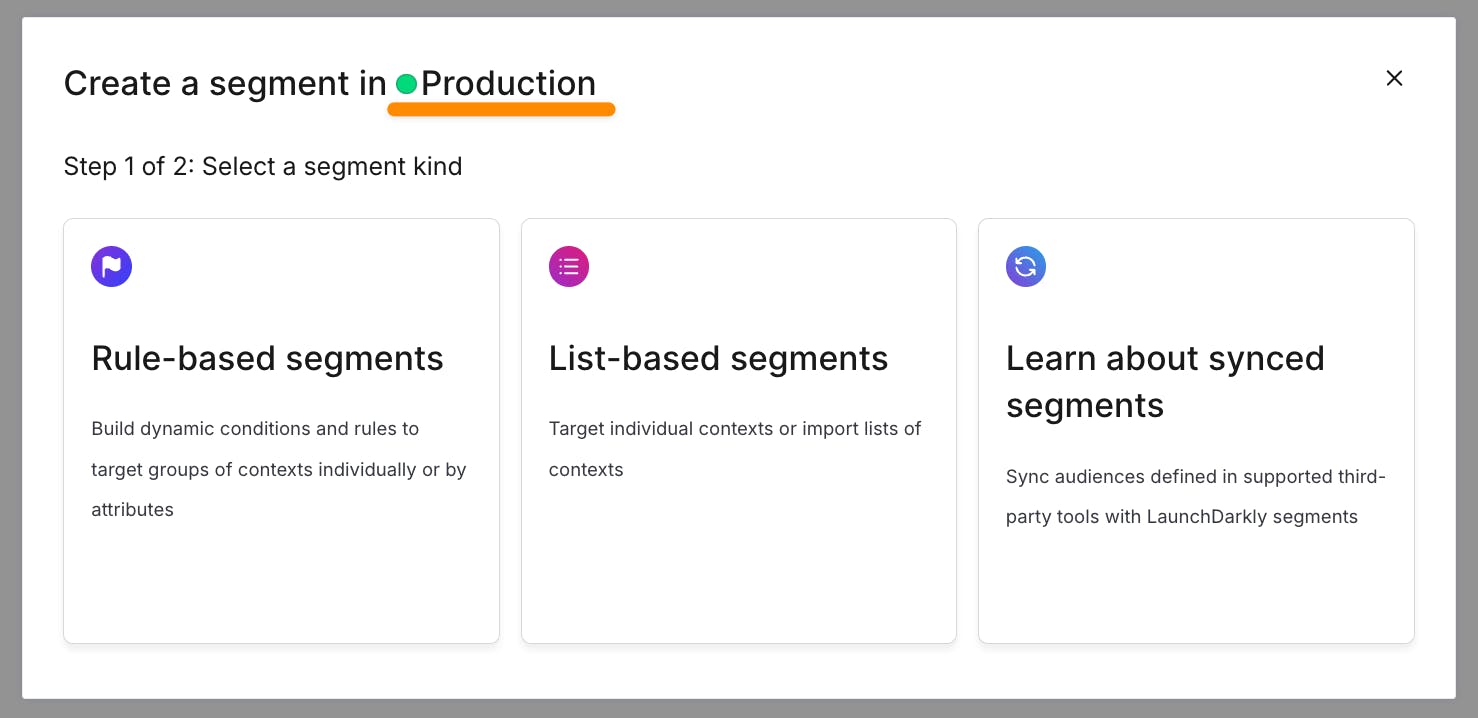
Confirm that you’re in the correct “Production” environment by double-checking the popup modal.
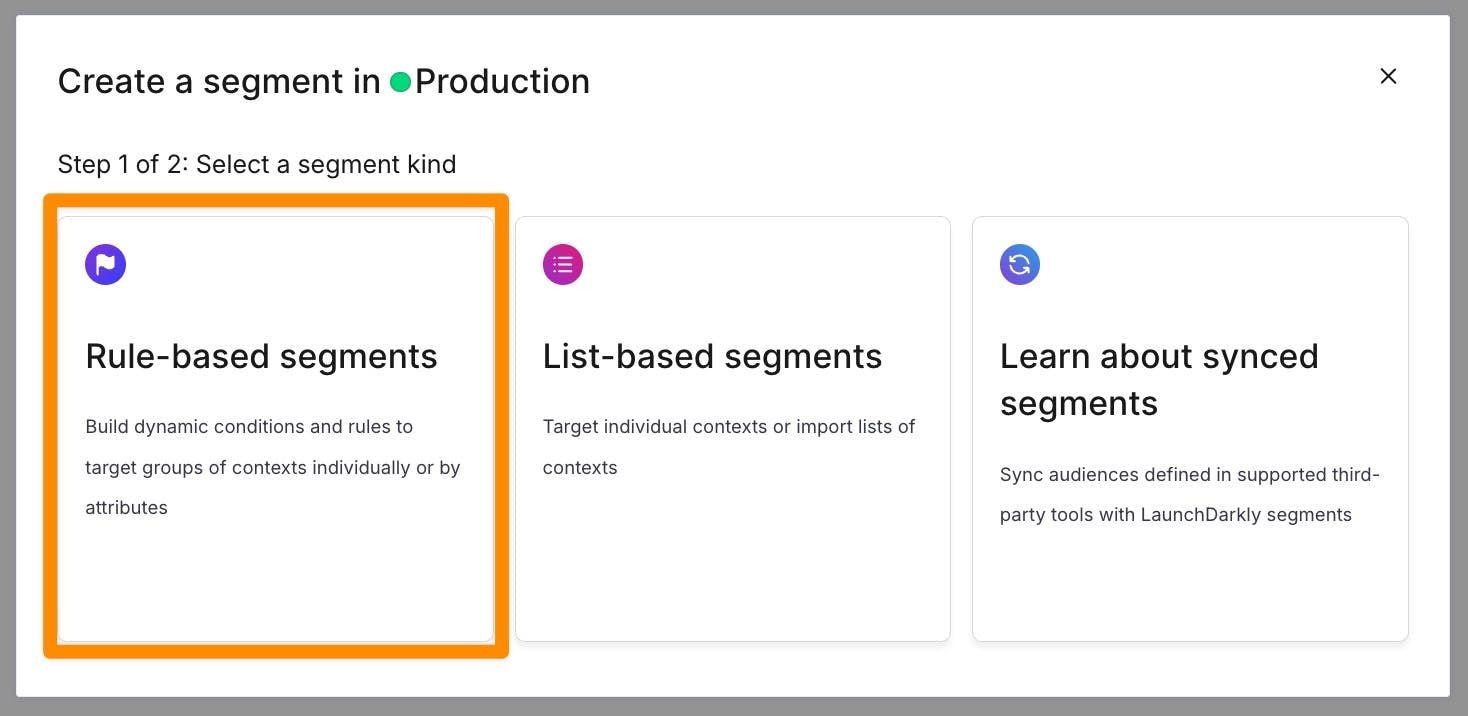
Select “Rule-based segments” in the next section.
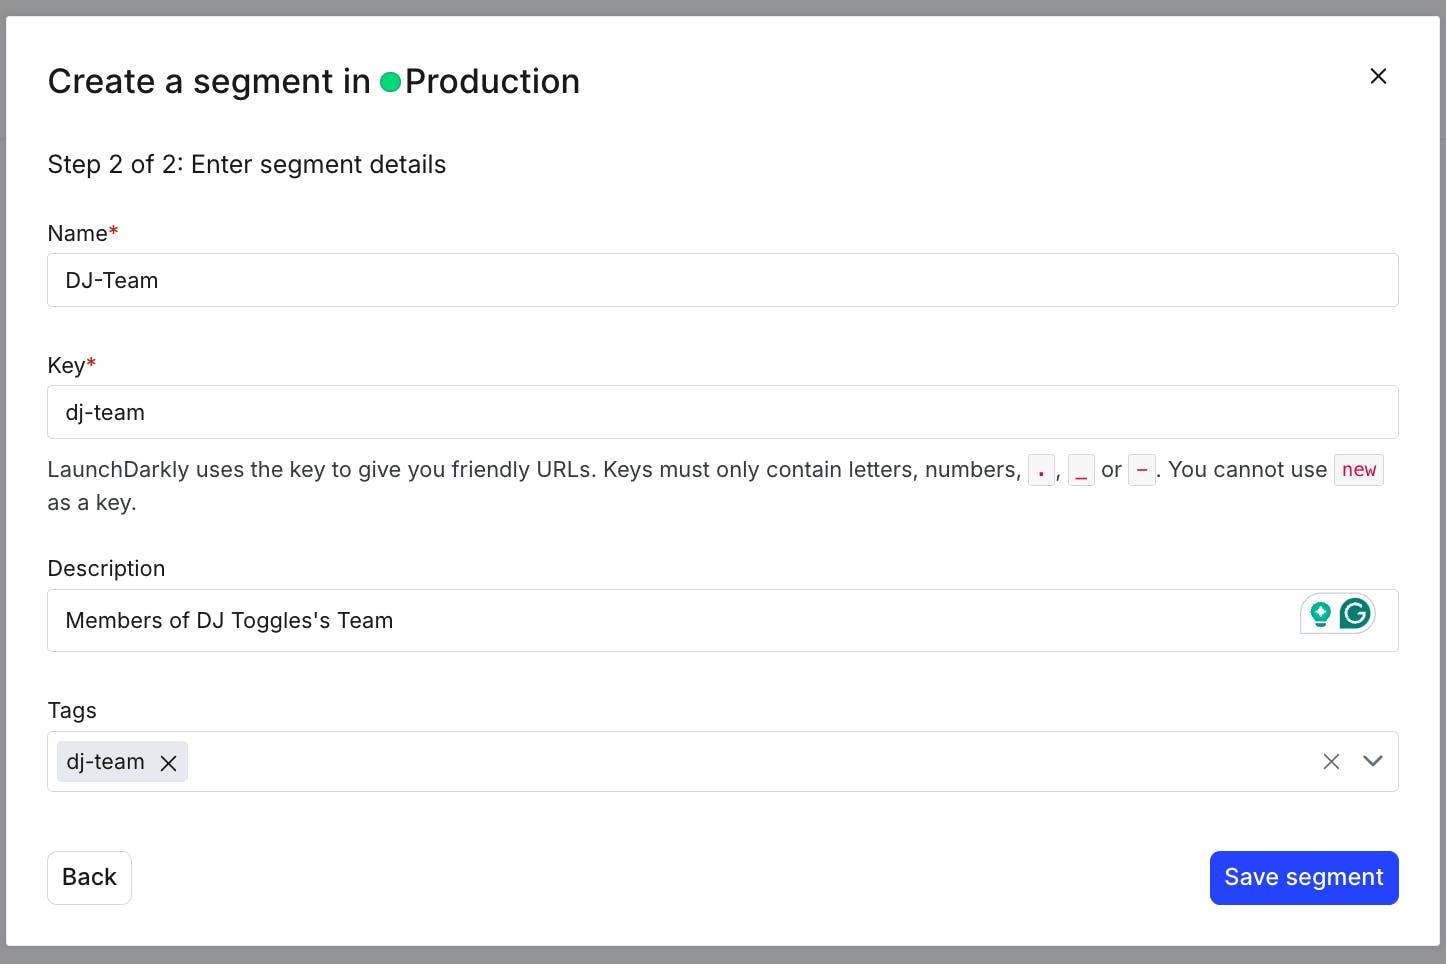
In the following window, choose a name for your segment. I named it “DJ Team” for members of the DJ Toggles team. Enter a description as a gift for your future self. If you’re running a lot of different segments or have ones that relate to one another, you can add a tag for searchability. In this case, I added a tag of “DJ.” Finally, click “Save segment.”
dj_toggle_team = Context.builder('dj-toggle-123').set('groups', ['dj_team']).set("email", "thetoggleyist@djtoggle.com").build()
   general_audience = Context.builder('general-456').set('groups', ['general_audience']).build()
Back within LaunchDarkly, create a rule under our targeting panel. We’ll create two different rules to target our specific audience.
- Target folks by group: Create a default group of individuals who may or may not share commonalities.
- Target folks by email: Automagically add everyone from a specific domain to receive a particular experience. This is helpful if you’re onboarding for team plans, access control, enterprise use cases, etc.
But why use both?
In this scenario, imagine DJ Toggle working with an external promotions team or a larger management team. Although they may not have the same email domain, they will still need similar access.
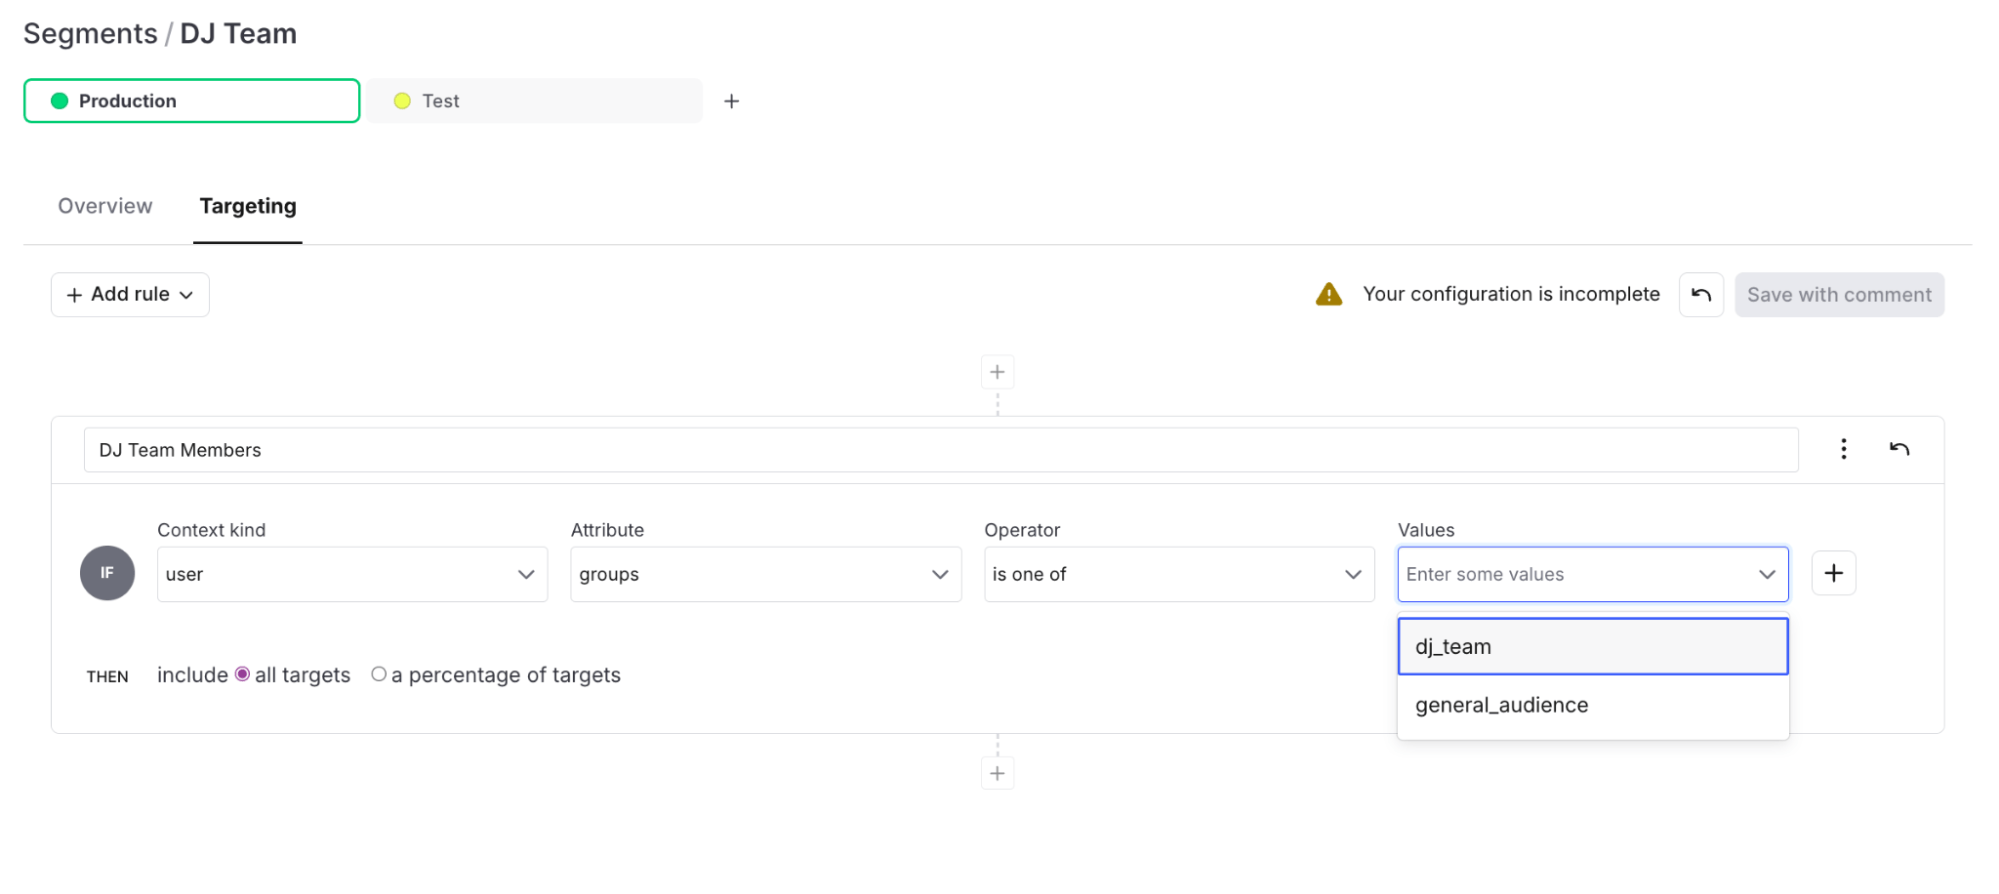
First, create the rule for the group:
Select the following values and click “Save with comment”.
- Context kind: user
- Attribute: groups
- Operator: is one of
- Values: dj_team
Then, create a rule that targets based on email:
Select the following values and click “save”.
- Context kind: user
- Attribute: email
- Operator: ends with
- Values: djtoggle.com
You’ll be prompted to enter a comment explaining your changes and confirm them.
Create a flag
Finally, you’ll create a flag that uses the previously created targeting rules. (Hang in there, friend, we’re almost through configuring things.)
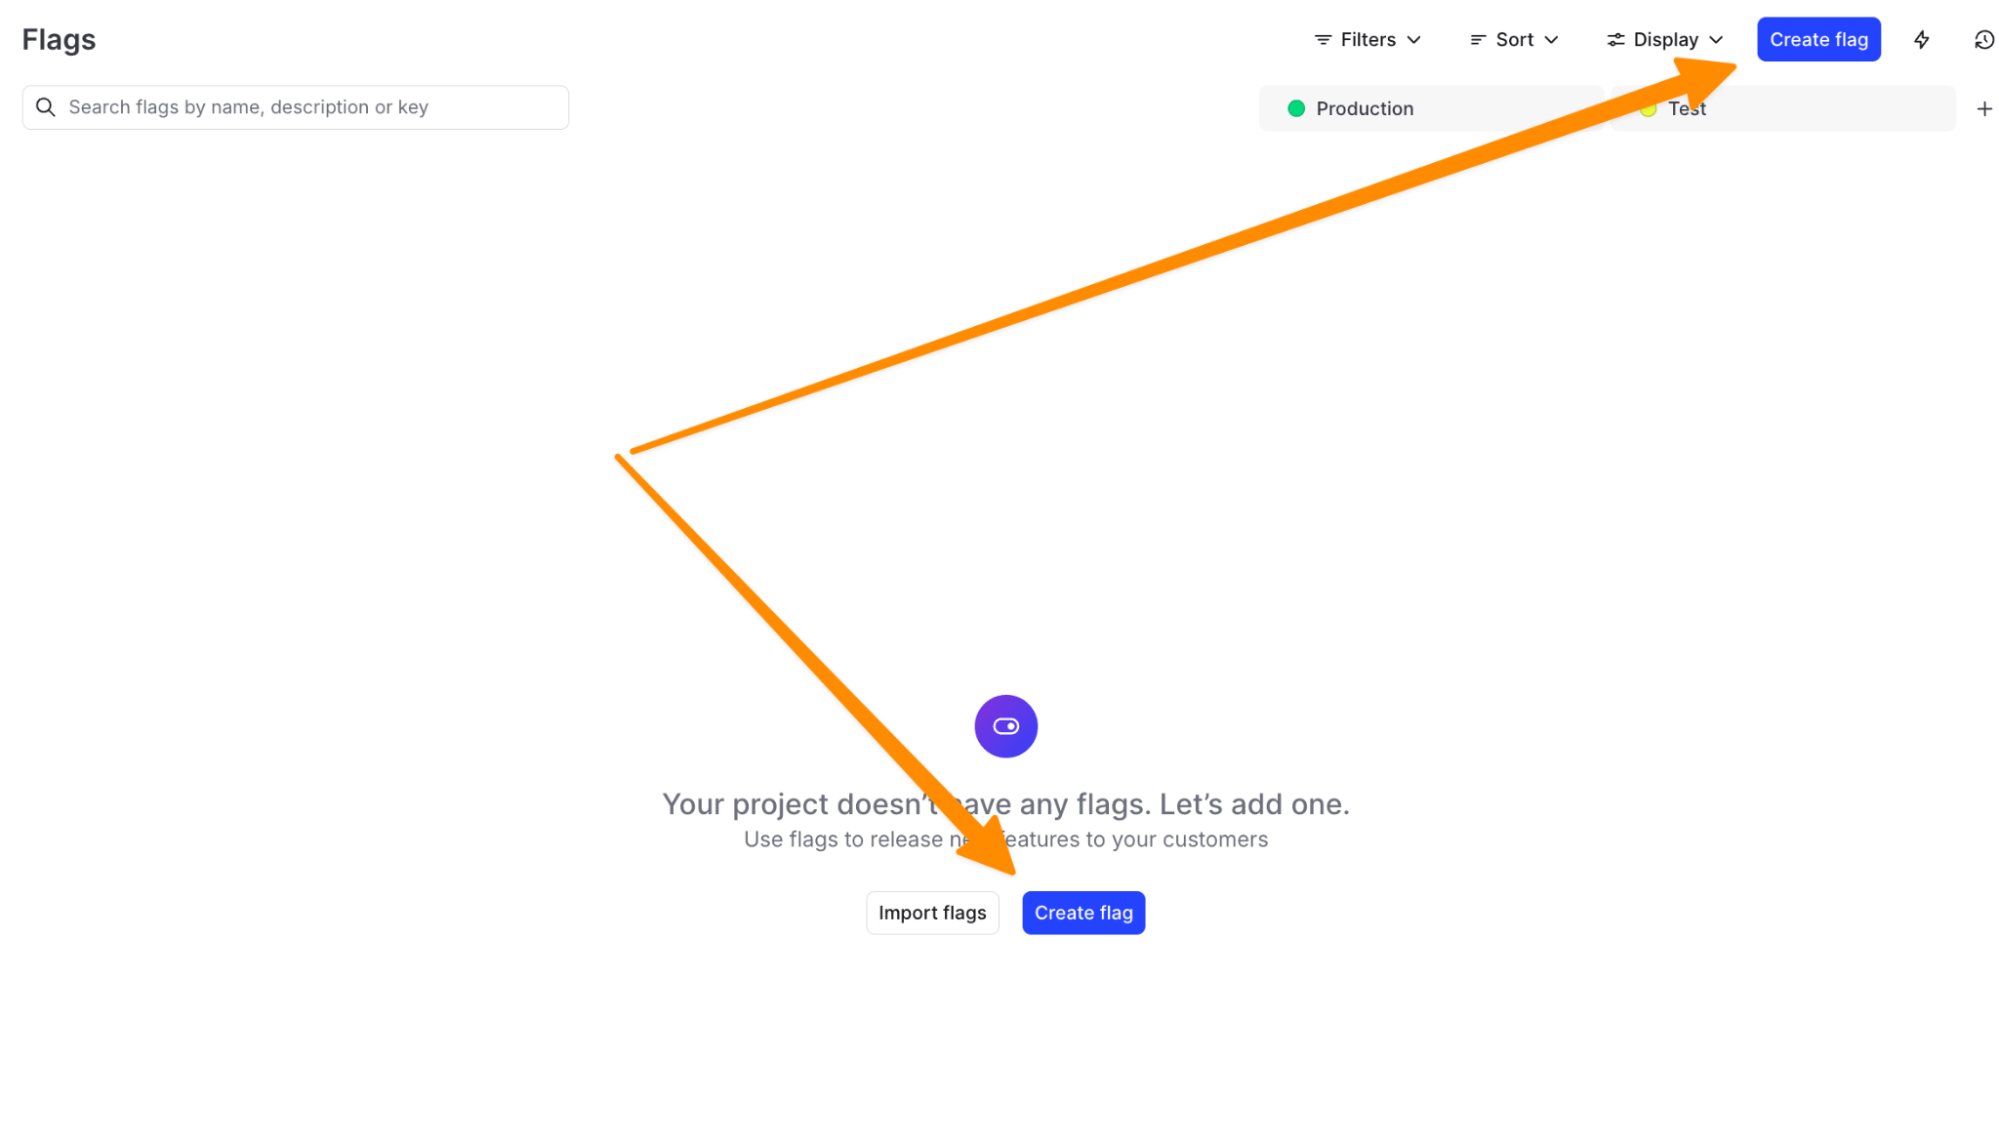
Click “Flags” and then one of the presented “Create Flag” buttons on the left navigation menu.
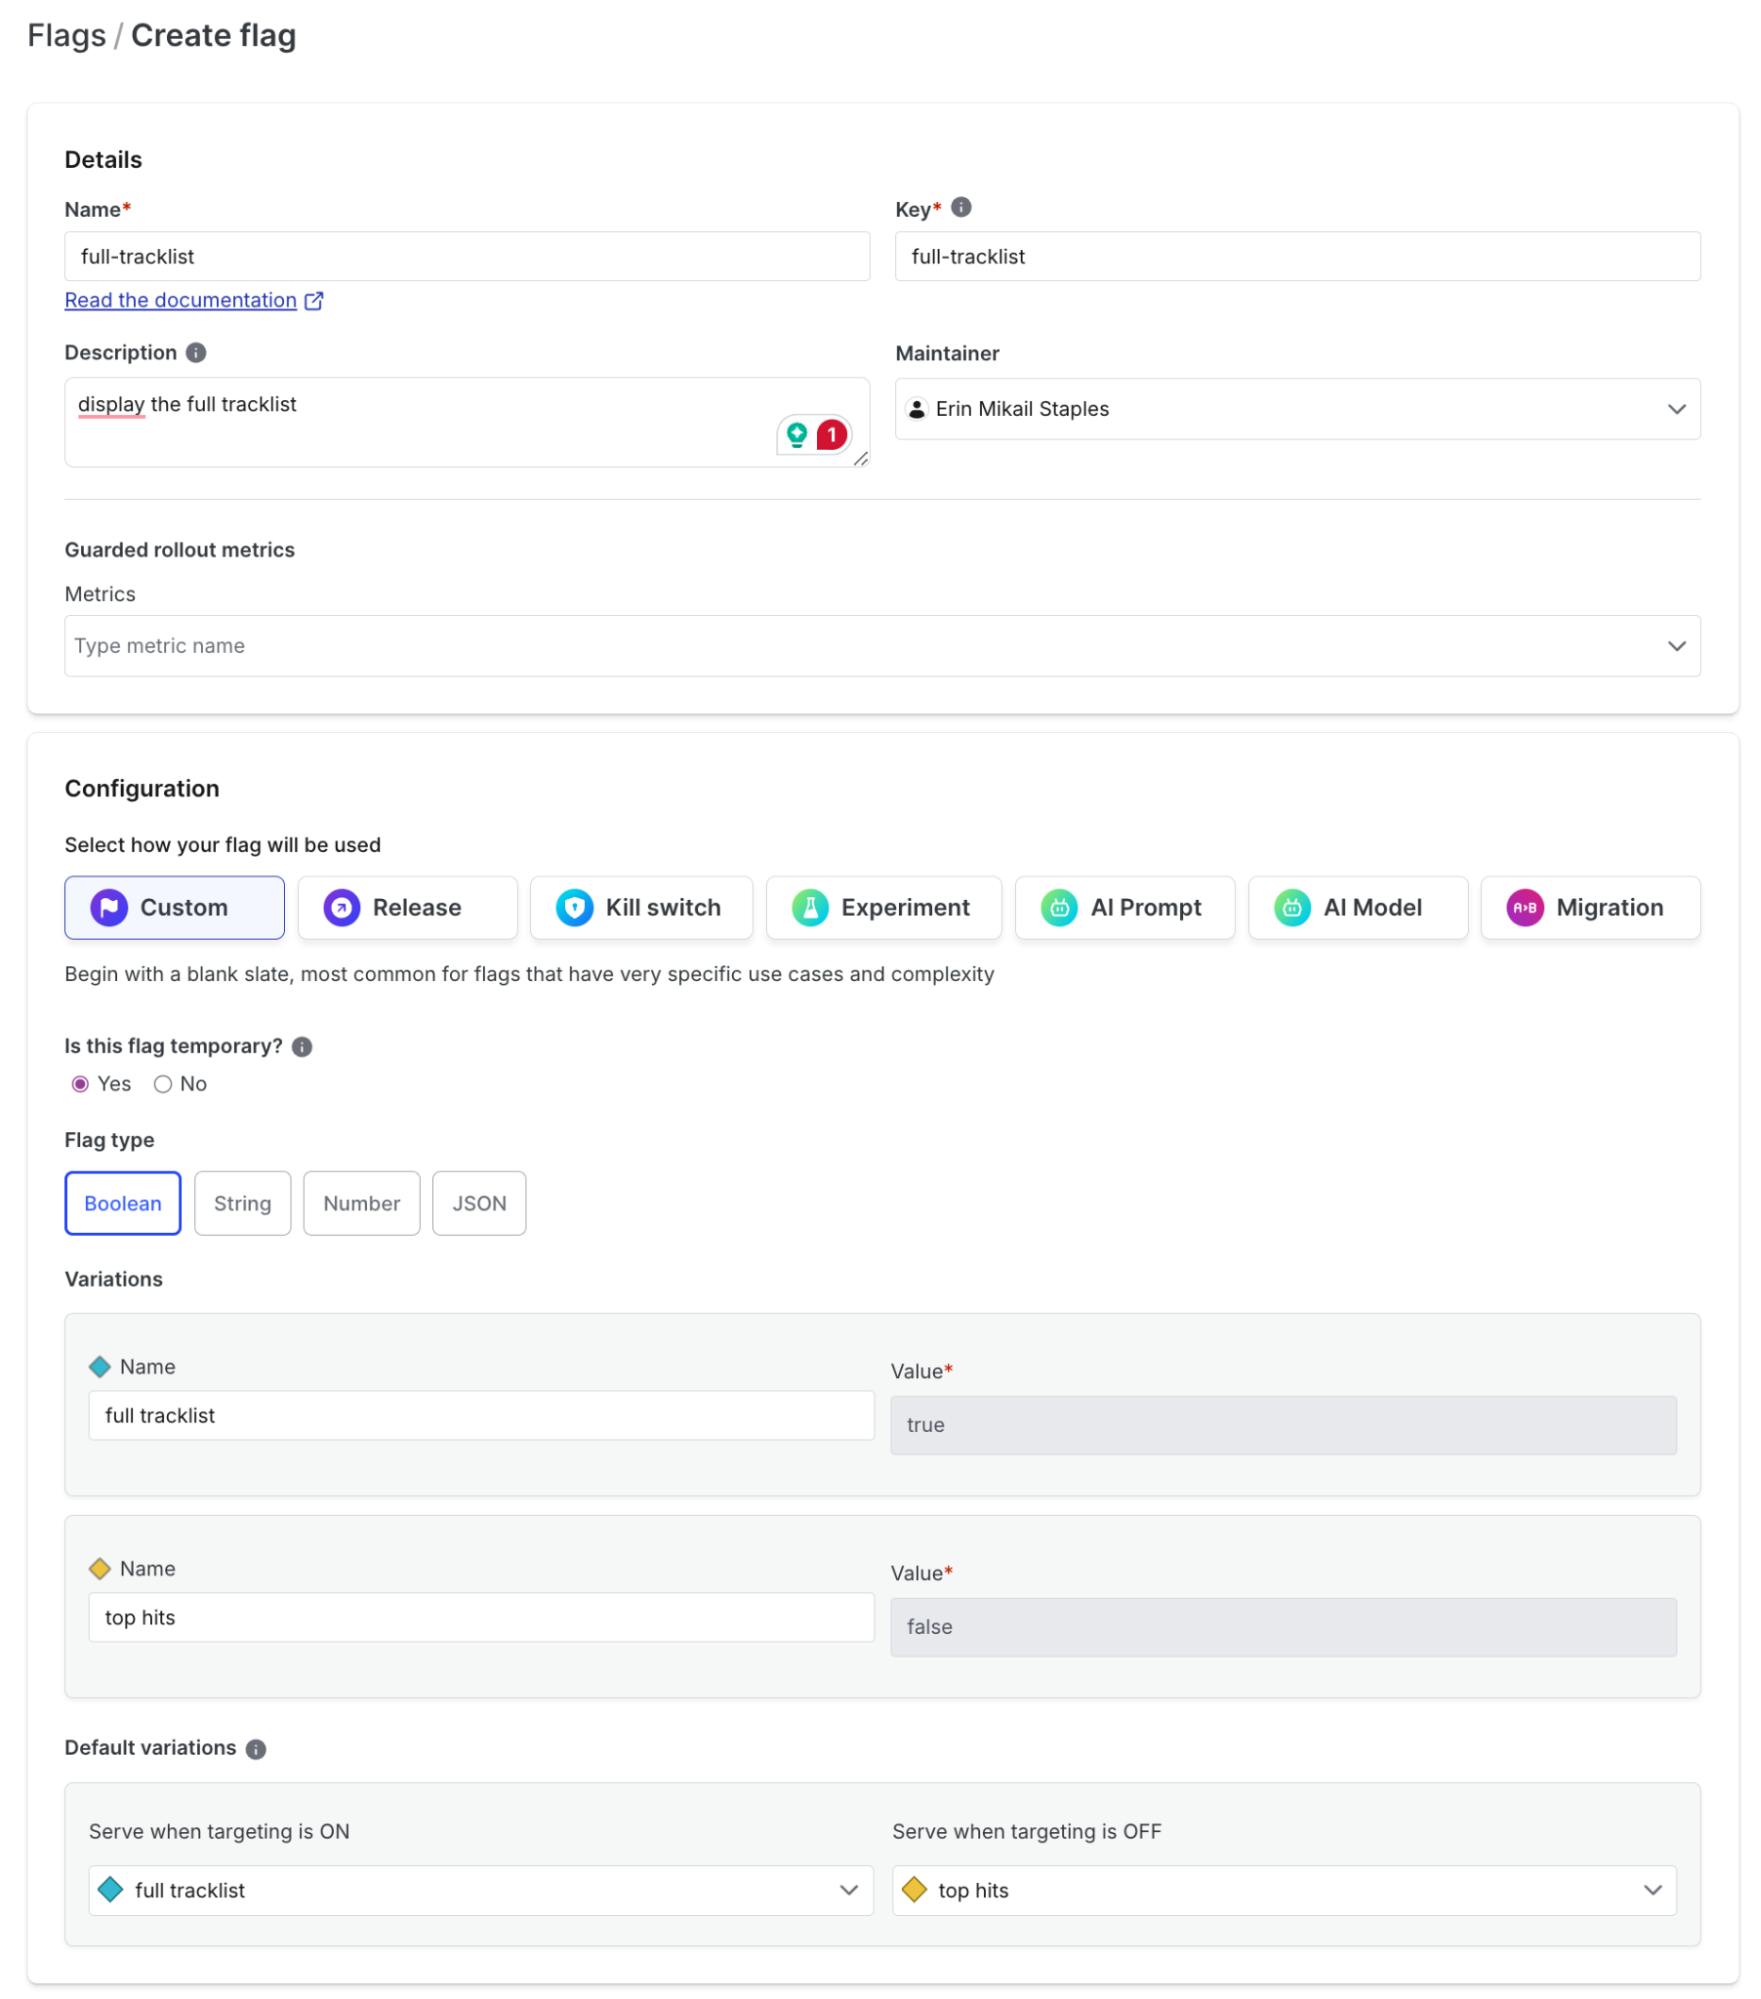
Name this flag “full-tracklist” and match the flagKey variable in your application code. The key will auto-populate. Click the “Create flag button” when you’re done typing the name and description.
On the next screen, click the “add rule” dropdown and select “Target segments.” Configure the rule, and then click “Confirm and save.”
- If Context is in DJ Team, serve “full tracklist”
- When no targeting rules are matched (the "Default rule"), serve “top hits”
- Flag is On
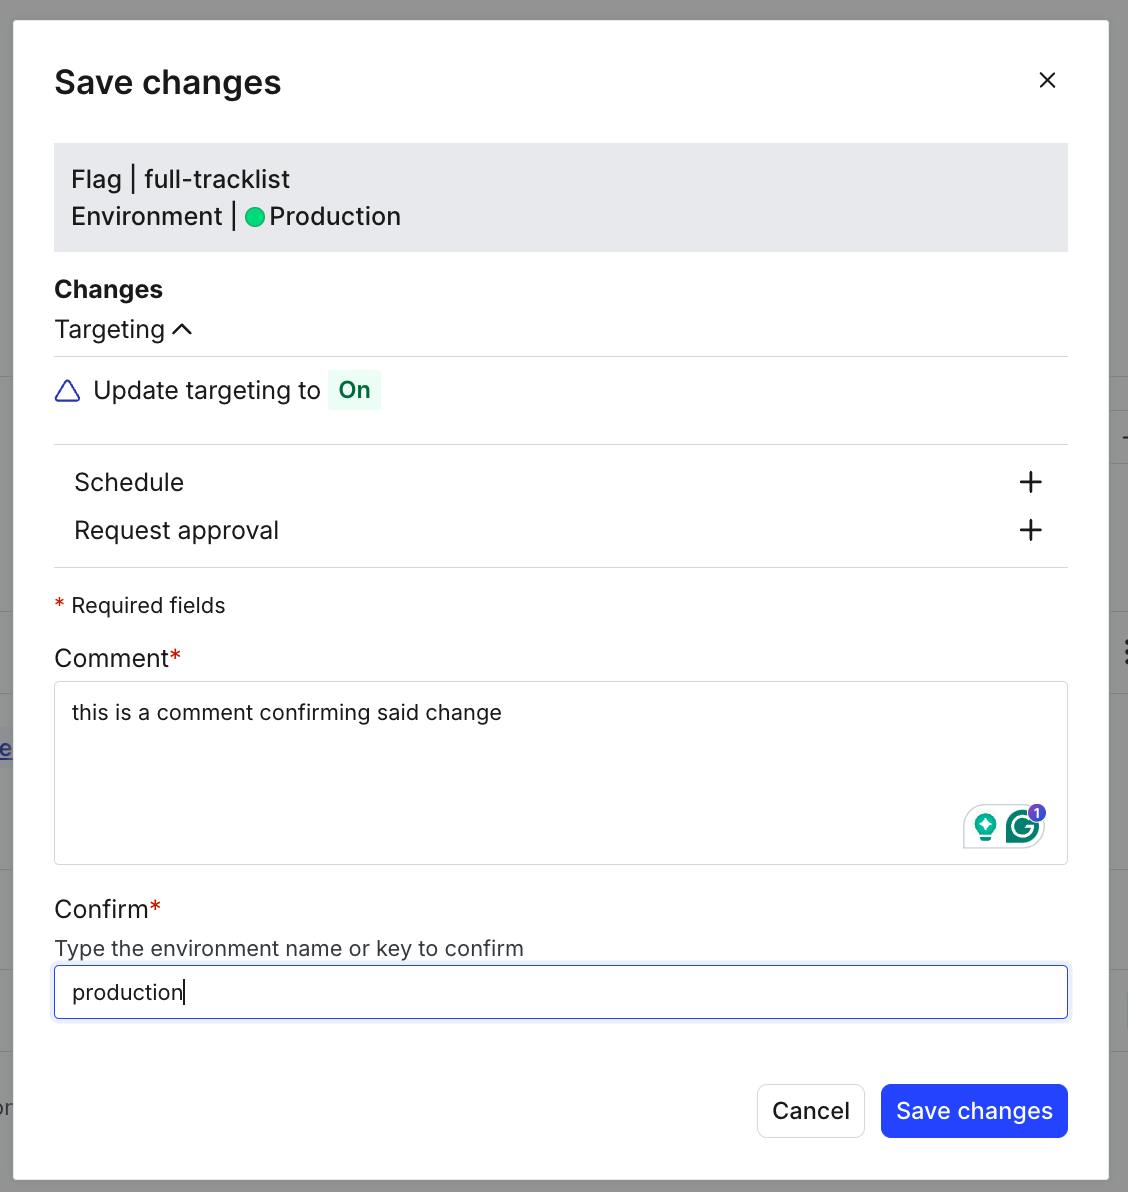
When complete your final screen should look like this:

Finally, turn the feature flag ‘on’ type a message to confirm, and the environment key, before saving.
In the context variable, we are passing information about our user to LaunchDarkly, including the email address. The show-student–version flag is set to ‘On’, but the user’s email address doesn’t match our targeting rule for students. Go to http://127.0.0.1:3000, you should be redirected to the enterprise version of the website.
Try changing the email address in the context to something that ends in .edu. Save these changes in your editor:
Now, let’s test what we’ve built!
If we rerun the application, let’s see what we get now that we turned our feature flag on!
python main.pyAnddddd…. We’re still getting the full tracklist 🤔
Let’s open up our main.py file in your favorite editor and discover why!
Looking at our run_app function around line 73, we’ll see that two different contexts are created. However, if we scroll down, we can see a default variation set to the “dj_toggle_team” context.
full_tracklist = ld_client.variation("full-tracklist", dj_toggle_team, True)Let’s swap this to the “general_audience” context to test our flag and rerun our app to see what happens.
full_tracklist = ld_client.variation("full-tracklist", general_audience, True)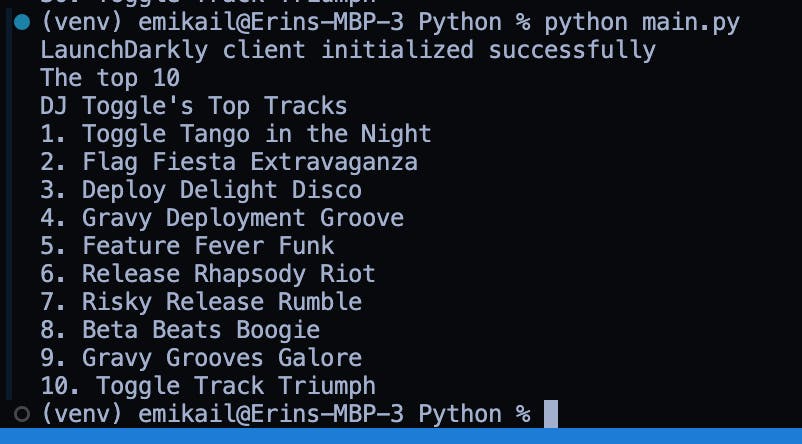
Voila! You should now see just your top 10 tracks in all their glory!
Congrats! You now know how to target different segments with LaunchDarkly in a Python application
In this tutorial, you’ve learned to target different segments within the LaunchDarkly application. By leveraging targeting rules and segments, you can create custom user experiences, avoid duplicating flag rules, and showcase different features or segments based on a user’s email address.
This is just the beginning of your targeting fun. You can take the same discoveries we use today and apply different contexts, such as name, plan type, zip code, and more. Read more about targeting a specific segment in the LaunchDarkly docs.
Now that you’ve got your Toggle-riffic playlist queued up, check out these other fun LaunchDarkly Tutorials:
- How to instantly roll back buggy features with LaunchDarkly’s JavaScript client library
- Using segments and targeting to manage early access programs
- How to Switch AssemblyAI Speech-to-Text Model Tiers by User Email With LaunchDarkly Feature Flags
Until our next LaunchDarkly adventure, I’ll be dodging the Brooklyn glasses-wearing, tattooed-hipster stereotype of being a DJ and leaving the turntables to DJ Toggle.
If you’re building something great, have a killer playlist, or need a hand with LaunchDarkly, Email me at emikail@launchdarkly.com, find me on the site formerly known as Twitter, or join the LaunchDarkly Discord.
Like what you read?
Get a demo