

updateAIConfigTargeting action.
Target individuals
You can target specific contexts based on their context key. For targeting more than one or two contexts, use a segment, which can be reused across configs and flags. Individual targeting supports targeting specific context keys. For precedence-based or multi-context targeting, use custom rules or segments.Individual targeting and evaluation orderWhen you use individual targeting, LaunchDarkly evaluates each individual target independently against the full context. If a context matches more than one individual target, the served variation is determined by evaluation order, not by the order shown in the targeting UI.Individual targeting does not support precedence or combined logic across multiple context kinds. For multi-context targeting or precedence-based logic, use custom rules or segments.
- Navigate to the Targeting tab for the config.
- At the top of the tab, select the environment where you want to create targeting rules. Targeting rules are specific to each environment. To add an environment that is not shown, click the + icon.
- If the config is off and the rules are hidden, click View targeting rules.
- Click the + button between existing rules, and select Target individuals.
- In the individual targeting section, search for and select the context you want to target.
- Alternatively, you can create a new context from the search menu. To do so:
- Enter the new context name.
- Click Create new.
- Select a context kind from the context kind menu.
- Select a variation to Serve.
- To add more contexts, click Add individual context.
- Click Review and save.
Target segments
Segments are lists of contexts that you can use to manage AgentControl config targeting behavior in bulk. You can target segments to release specific config variations to different groups of contexts or end users at once. We recommend using a segment when you want to target the same group of contexts in multiple configs. You can target the segment in each config, rather than recreating a targeting rule or set of rules for many configs. To target segments:- Navigate to the Targeting tab for the config.
- At the top of the tab, select the environment for which you want to create targeting rules. Targeting rules are specific to each environment.
- To add targeting rules to an environment that’s not shown, click the + icon to add another environment to the Targeting tab.
- If the config is off and the rules are hidden, click View targeting rules.
- Click the + button between existing rules, and select Target segments.
- (Optional) Enter a name for the rule.
- In the Operator menu, select whether you want the targeting rule to match contexts in these segments or not in these segments.
- In the Segments menu, enter or select the segments you want to target.
- (Optional) Click the + button to add additional clauses to your targeting rule.
- From the Select… menu, select the variation to serve, or set a percentage rollout.
- Click Review and save.
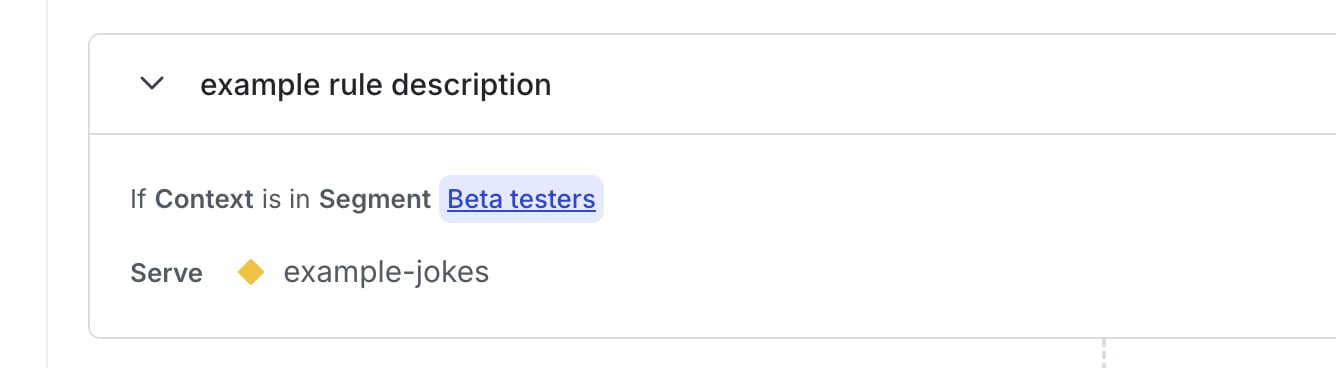
A targeting rule for segments.
Target contexts with custom rules
You can create custom targeting rules using any context kinds and any context attributes. Custom rules provide the most control over targeting behavior and support precedence and targeting across multiple context kinds. To create a custom targeting rule:- Navigate to the Targeting tab for the config.
- At the top of the tab, select the environment for which you want to create targeting rules. Targeting rules are specific to each environment.
- To add targeting rules to an environment that’s not shown, click the + icon to add another environment to the Targeting tab.
- If the config is off and the rules are hidden, click View targeting rules.
- Click the + button between existing rules, and select Build a custom rule.
- (Optional) Enter a name for the rule.
- Select an option from the Context kind menu:
- Choosing a specific context kind lets you target on attributes for contexts of that kind.
- Choosing “Context kind” lets you target one or more context kinds. If you choose “Context kind,” skip to step 7.
- Context kinds are included in this menu after either you create them from the Contexts list or customize a config using a LaunchDarkly AI SDK.
- In the Attribute menu, select one of this context’s attributes.
- In the Operator menu, select the operator for your clause.
- In the Values menu, enter one or more values to check against.
- (Optional) Click the + button to add additional clauses to your targeting rule.
- From the Select… menu, select the variation to serve, or set a percentage rollout.
- Click Review and save.
null values, or that do not exist for a given context, then the config skips that rule. For example, in a rule that checks “region is one of Canada,” any context whose region attribute is not set or is set to null does not match the rule. Similarly, in a rule that checks “region is not one of Canada,” any context whose region attribute is not set or is set to null does not match the rule. This behavior ensures that your rules only target contexts for which you explicitly have attribute information.
To reference this rule when working with other members of your organization, click the three-dot overflow menu and choose Copy link to rule.
To learn more about how to construct targeting rules, read About targeting rules. Although that topic applies specifically to feature flag targeting, the “About targeting rules” section discusses the components of targeting rules, including their descriptions, conditions, rollouts, attributes, and operators. These elements are common to both feature flags and AgentControl.
Set the default rule
Each config automatically includes a default rule. It describes which config variation should be served to contexts that don’t match any of the previous targeting rules on the config. The default rule is different from the fallback value, which is set in your application’s code and is the value that contexts receive if your application cannot connect to LaunchDarkly. To learn more, read Fallback value. The default rule is also different from the off variation, which is the value LaunchDarkly serves when the flag is off. To learn more, read The off variation, below. To set the default rule:- Navigate to the Targeting tab for the config.
- At the top of the tab, select the environment for which you want to create targeting rules. Targeting rules are specific to each environment.
- To add targeting rules to an environment that’s not shown, click the + icon to add another environment to the Targeting tab.
- If the config is off and the rules are hidden, click View targeting rules.
- Find the last rule on the Targeting tab, which is labeled “Default rule.”
- Click Edit to configure the default rule to serve a specific variation, or apply a percentage rollout to any remaining contexts.
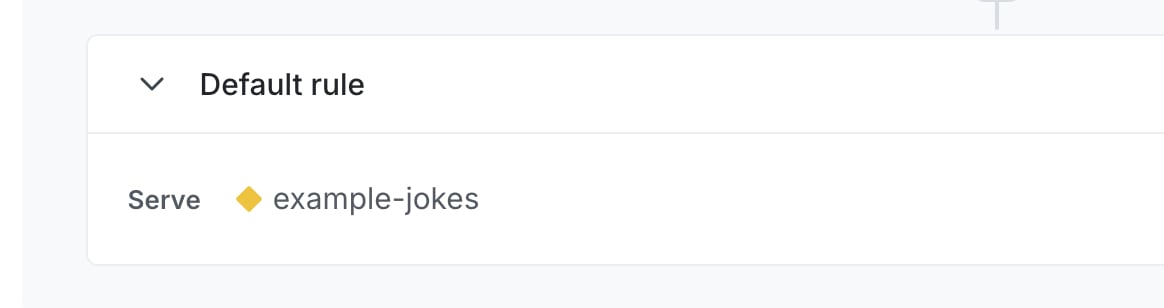
A config's default rule.