Configuring approvals for an environment
This topic explains how to customize approval requests for each environment in your LaunchDarkly project. For example, you can prevent LaunchDarkly from applying a proposed change if any reviewer declines an approval request for your Production environment. Or, you may allow anyone, including the person making the approval request, to approve and apply a proposed change in your QA environment.
You can also require approvals on changes to flags, AgentControl configs, or segments in any environment.
Requiring approvals is available to customers on select plans
Requiring approvals is only available to customers on select plans. To learn more, read about our pricing. To upgrade your plan, contact Sales.
Approval options
You can customize how approval requests are managed and enforced by making changes in an environment’s Approval settings.
For each environment, you can specify:
- whether approvals are required for changes to flags, segments, or AgentControl configs in the environment.
- whether requestors can approve their own requests.
- how many approvals are required before a requestor can apply a change.
- whether consensus is required, that is, whether the requestor can apply changes if any reviewers have declined a request.
Members can approve and apply requests when they have the reviewApprovalRequest and applyApprovalRequest actions for flags, AgentControl configs, or segments. To learn more, read Roles.
Some custom roles bypass approval settings
If you use custom roles, you can create roles that environment approval settings do not apply to. To learn more, read Bypass required approvals below.
Flag, experiment, and segment approvals
To configure flag and experiment approvals or segment approvals for an environment:
- Click the project dropdown. The project menu appears:
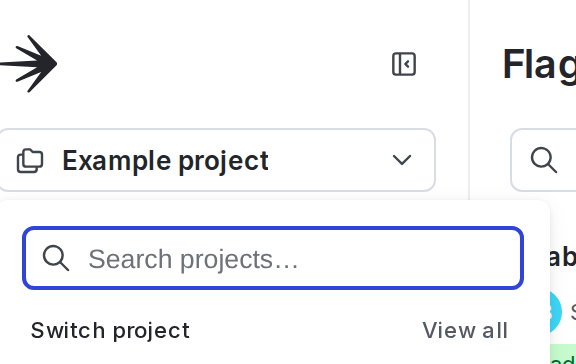
- Select Project settings. The list of project settings appears.
- Click Approval settings.
- In the “Flag and experiment approvals” section or the “Segment approvals” section, select an environment.
- Click Edit approval setting. The “Approval settings for [environment]” dialog appears.
- Configure the following fields:
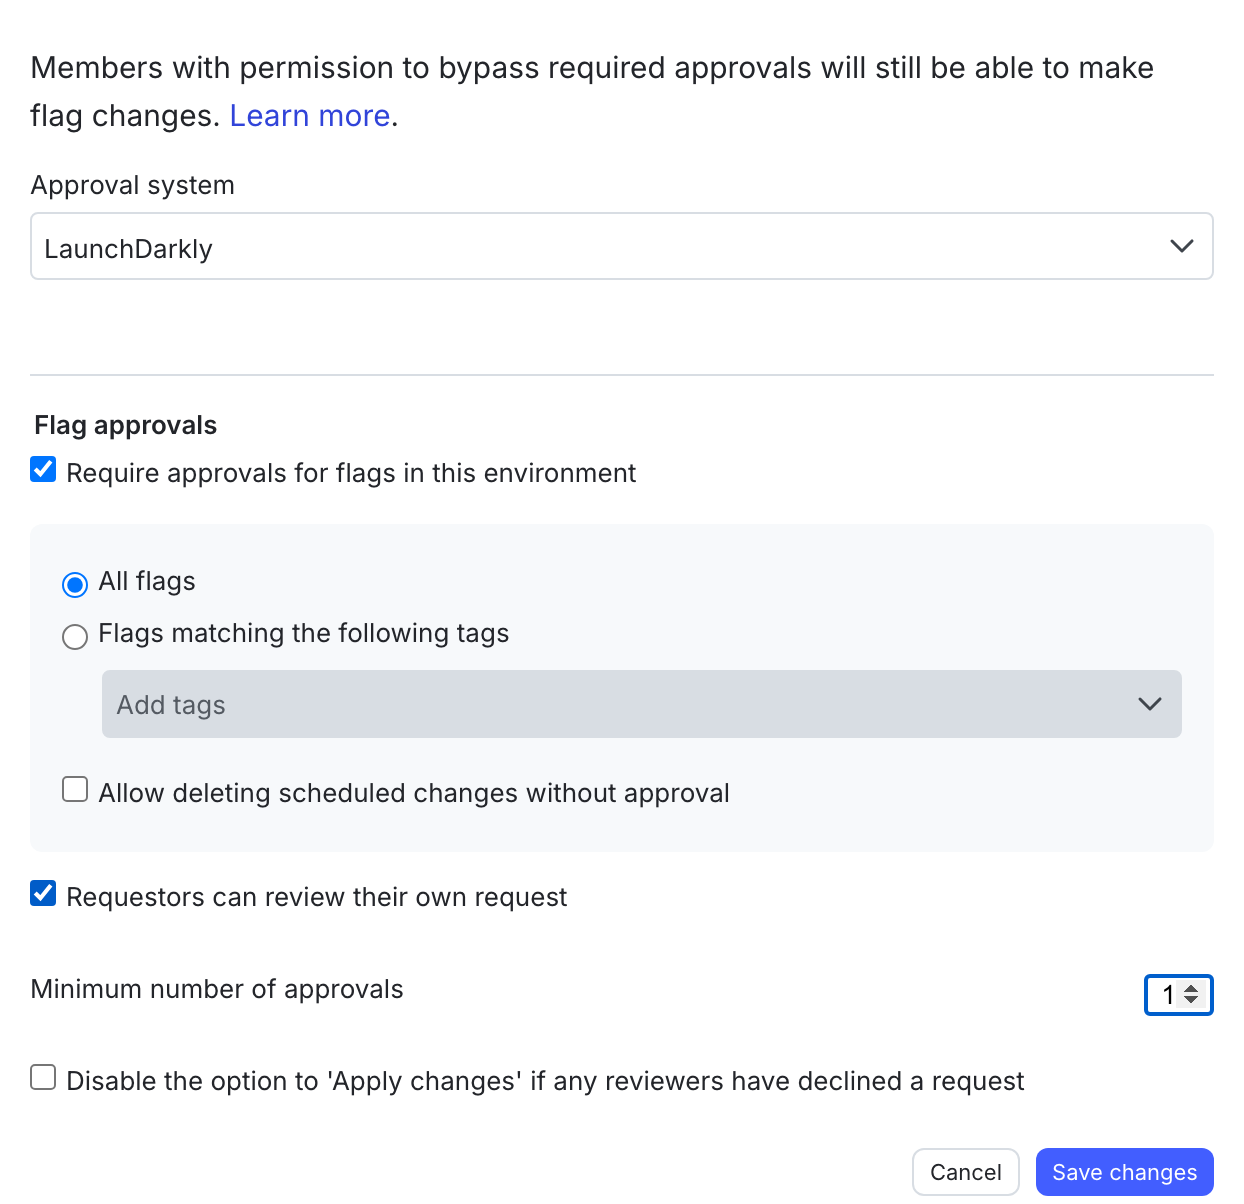
- Approval system: You can manage approvals either within LaunchDarkly or with a third-party tool. To learn about the ServiceNow approvals integration, read ServiceNow approvals. The ServiceNow approvals integration supports approval requests for feature flag and experiment changes.
- Require approvals for flags in this environment: Select this checkbox to require approval for flag targeting changes in this environment:
- All flags: Select to require approval for all flag targeting changes.
- Flags matching the following tags: Select to require approval only for flag targeting changes on flags with the listed tags. While tags are global across environments, this setting applies only to flags in the current environment.
- Allow deleting scheduled changes without approval: Select to allow scheduled changes for a flag to be deleted without approval in this environment.
- Requesters can review their own request: Select this checkbox to allow anyone who makes an approval request to approve or decline that request. This allows someone who makes an approval request to apply their own change.
- Minimum number of approvals: Enter a number to set the amount of approvals required before a member can apply a change. The minimum is one and the maximum is five.
- Disable the option to apply changes if any reviewers have declined a request: Select this option to prevent the requested change from being applied if any reviewer has declined their approval request.
- Require approvals for segments in this environment: Select this checkbox to require approval for segment targeting changes in this environment:
- All segments: Select to require approval for all segment targeting changes.
- Segments matching the following tags: Select to require approval only for segment targeting changes on segments with the listed tags. While tags are global across environments, this setting applies only to segments in this environment.
- Requesters can review their own request: Select this checkbox to allow anyone who makes an approval request to approve or decline that request. This allows someone who makes an approval request to apply their own change.
- Minimum number of approvals: Enter a number to set the amount of approvals required before a member can apply a change. The minimum is one and the maximum is five.
- Disable the option to apply changes if any reviewers have declined a request: Select this option to prevent the requested change from being applied if any reviewer has declined their approval request.
- Click Save changes.
AgentControl config approvals
To configure AgentControl config approvals for an environment:
- Click the project dropdown. The project menu appears:
- Select Project settings. The list of project settings appears.
- Click Approval settings.
- Click Add environment. The “Approval settings for AgentControl configs” dialog appears.
- Select an environment.
- Configure the following fields:
- Minimum number of approvals: Enter a number to set the amount of approvals required before a member can apply a change. The minimum is one and the maximum is five.
- Allow requesters to review their own request: Select this checkbox to allow anyone who makes an approval request to approve or decline that request. This allows someone who makes an approval request to apply their own change.
- Allow applying changes even if reviewers have declined a request: Select this option to allow the requested change to be applied regardless if any reviewer has declined the approval request.
- Click Add.
How required approvals work for targeting
When you select the Require approvals for this environment checkbox, it requires any targeting change to receive an approval before implementation.
If you enable this feature, the following behaviors change:
- For flags:
- When you toggle targeting on or off from the Flags list, the “Request approvals” dialog appears.
- After any change to the flag’s targeting rules, the Review and save button changes to Request approval.
- On the Contexts page, when you change flag targeting for a context, the Save changes button changes to Request approval.
- For AgentControl configs:
- When you toggle targeting on or off from the Configs list, the “Request approvals” dialog appears.
- After any change to the config’s targeting rules, the Review and save button changes to Request approval.
- On the Contexts page, when you change AgentControl config targeting for a context, the Save changes button changes to Request approval.
- For experiments:
- On the experiment Design tab, the Start and Stop buttons change to Request approval to start and Request approval to stop.
- After you make any changes to the experiment design, the Save button changes to Save & request approval for new iteration.
- For segments:
- After any change to the segment’s targeting rules, the Request approval button becomes enabled.
For all of these changes, the flag, AgentControl config, experiment, or segment state does not change until a reviewer approves and applies the change.
How required approvals work for variations
Changes to flag and config variations take effect in all environments within your project. To determine whether an approval is required or not, LaunchDarkly aggregates all environment-level approval settings, and applies the strictest settings to the approval flow.
If at least one environment in a project requires approvals, changes to the value of a flag’s or an AgentControl config’s variation, including deleting a variation, will be sent through a required approval workflow. If you want to bypass approvals for a variation change, you must have permission to bypass approvals in all of the environments the variation change affects.
Changes to variation names, descriptions, or variations that the flag or AgentControl config isn’t serving, including creating a new variation, do not require approval.
Examples of enforcing the strictest approval settings to variations changes include:
- If one environment requires approvals and another does not, the change will require approval
- If one environment requires one approval, and another environment requires four approvals, the change will require four approvals
- If one environment allows members to review their own requests, and another does not allow members to review their own requests, the change cannot be reviewed by the requesting member
- If one environment uses ServiceNow as an approval system, and another uses LaunchDarkly, the approval will be routed through ServiceNow
- If one environment requires approvals for flags tagged “customer” and another environment requires approvals for flags tagged “beta,” changes will require approvals for all flags that include either of those tags; the same applies to AgentControl configs
- If a flag or AgentControl config serves a variation exclusively in environments that do not require approval, changes to that variation will not require approval
Creating flag variations does not require an approval
If a team member creates a new variation for a flag or AgentControl config, they do not need an approval or to create an approval request. They can request an approval if they want to, but it is not required.
Bypass required approvals
If you want to grant workflows or members the ability to make changes without requesting approval, there is a custom role action that allows them to bypass the approval request process. This is helpful when you need to toggle off a flag immediately, such as during an incident or other end user-facing problem. This action is limited to the environment level, so no one with permission to bypass approval requests can make changes to your LaunchDarkly project unless otherwise allowed by their role.
The bypassRequiredApproval custom role action only applies to flag and experiment approvals. You cannot bypass required approvals for AgentControl configs or segments.
To bypass approval requirements, add the bypassRequiredApproval action to a member or service token’s custom role. To learn about custom role actions, read Custom role actions.