
Take action now with LaunchDarkly built-in Jira ticket support
Take action now with LaunchDarkly built-in Jira ticket support
Published August 26, 2026
This post walks through how LaunchDarkly Observability turns alerts, error groups, and sessions into real Jira tickets through the Atlassian Forge app, and how Vega can draft those tickets from an investigation so production signal becomes tracked work.
The problem
An error group is climbing. You screenshot the stack trace along with other relevant information, paste it into Jira, and lose half the context on the way. Three Slack threads later, the ticket still isn’t filed.
Three pieces close that gap:
- Atlassian Forge: The LaunchDarkly for Jira app, with webtriggers that list Jira projects and create issues.
- LaunchDarkly observability: Error groups and sessions, each with a Create Jira issue action, and alerts, which take Jira as a notification destination.
- Vega: The LaunchDarkly observability agent, which drafts a ticket with an in-depth description after an investigation and files it after you confirm.
Why it matters
When you switch back and forth between platforms like LaunchDarkly and Jira, context can get lost. For example, a ticket titled “fix errors” with no link back to the error group fails to point others in the correct direction. With Jira support in LaunchDarkly, every ticket carries its source, a link, and a description written with actionable evidence and next steps. Instead of half-baked tickets with vague descriptions, you get a clean summary of the ticket context and follow-up steps, with help from Vega.
Requirements
To use this flow, you need:
- A LaunchDarkly account with observability enabled
- The LaunchDarkly for Jira marketplace app configured with a LaunchDarkly API access token
- (Optional) Generative AI (GenAI) enabled on the account, if you want to Create with Vega
To configure the API access token, create a custom role, click Inline policy, then click View JSON in the “Edit policy” box. Paste these permissions:
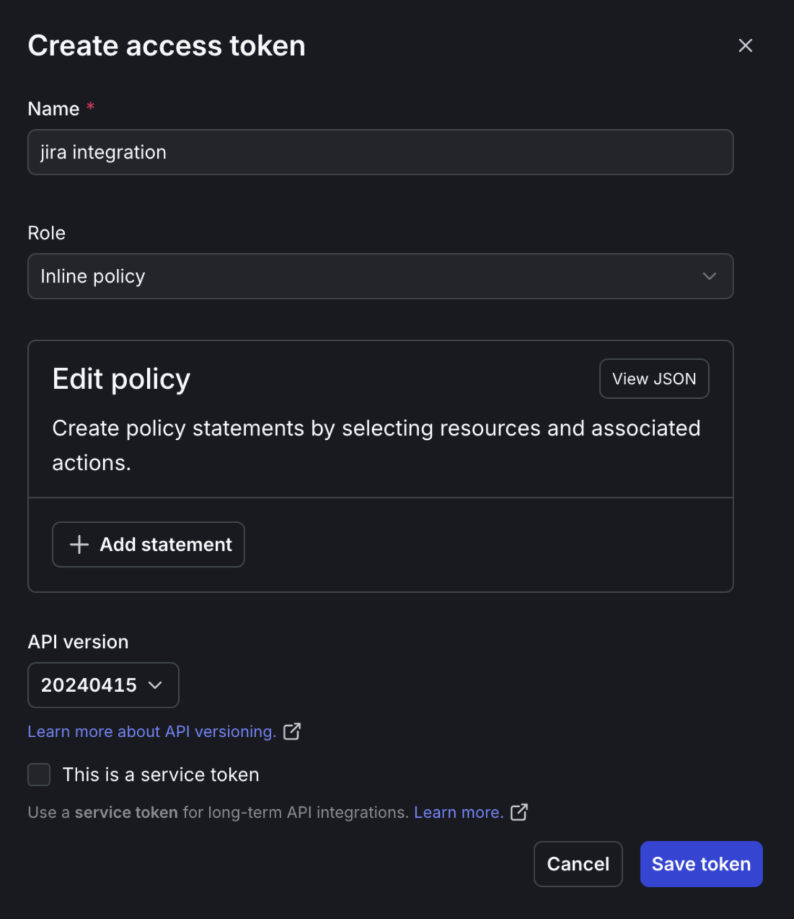
For more details, read Jira Cloud.
How it fits together
The Forge app exposes two webtriggers for this flow:
ld-jira-meta-triggerreturns Jira projects and their issue types. The create form uses them to show live Jira projects and their issue types.ld-issue-create-triggertakes a title, description, project key, issue type, and optional labels, then returns the new issue’s key and browse URL
On the LaunchDarkly side, the Jira integration form takes the issue-create URL, the Jira meta trigger URL (jiraMetaUrl), and the shared secret. Observability never calls Jira’s REST API directly. It calls LaunchDarkly, which calls Forge.
In the product, Create Jira issue opens a dialog with project, issue type, title, description, and labels, then confirms with a toast linking to the new issue. If GenAI is on, Create with Vega passes your project key, issue type, and source IDs into the agent, which drafts the ticket and waits for your confirmation.
Create Jira issues from sessions and errors
From a session or error, open Create Jira issue. Choose the Jira project and issue type, review the title and description, and create the issue.
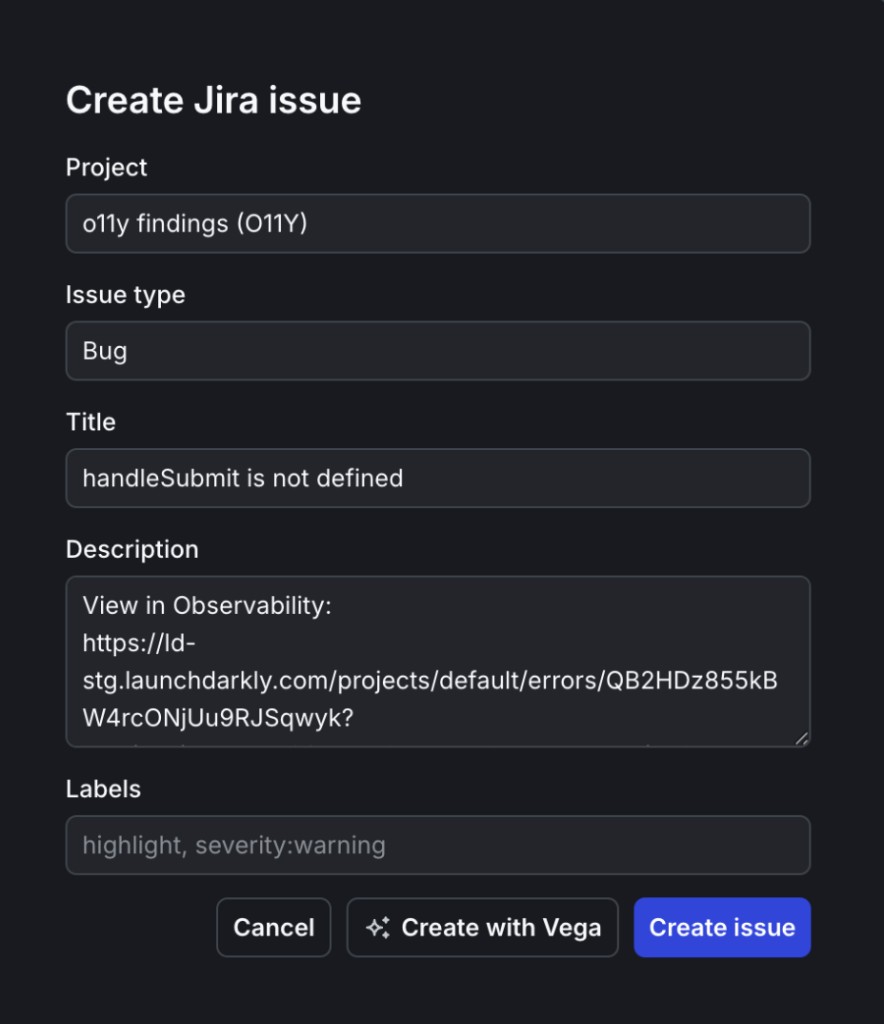
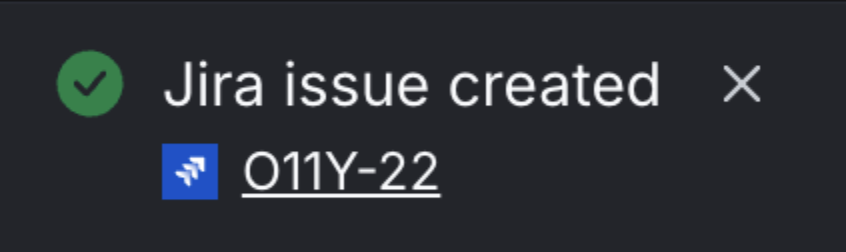
A toast confirms that the ticket exists, with a link you can follow into Jira.
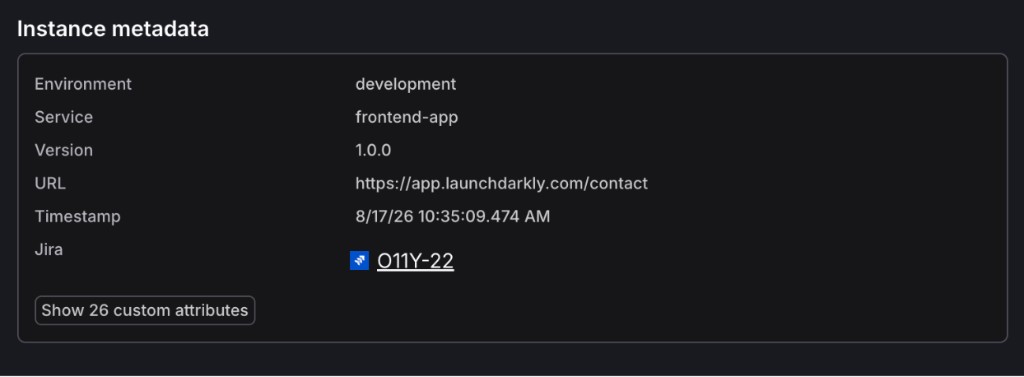
After the issue is filed, a Jira chip appears in instance metadata. Click the chip to get back to the ticket later, without hunting through Slack or a screenshot folder.
Create Jira issues with Vega
From a session or error, click Create with Vega. Context for the ticket, including project key and issue type, is prefilled in the Vega chat.
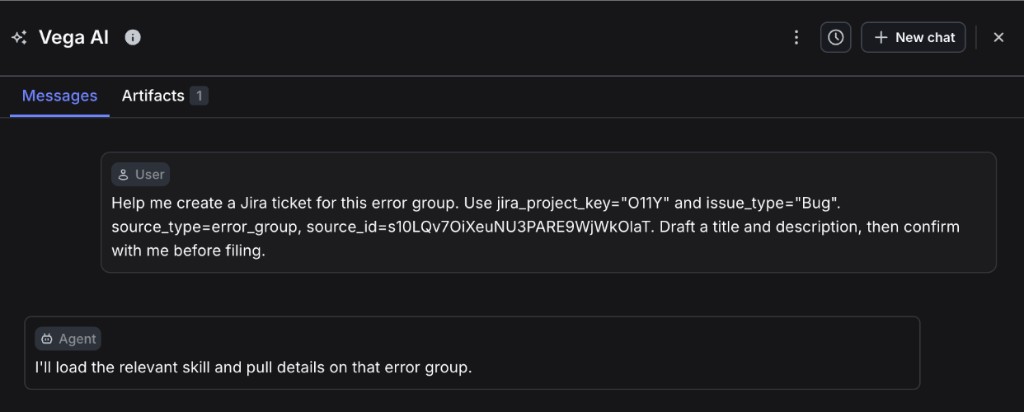
After you submit, Vega uses the jira_projects skill to load your Jira projects and the create_jira_issue skill to draft the ticket.
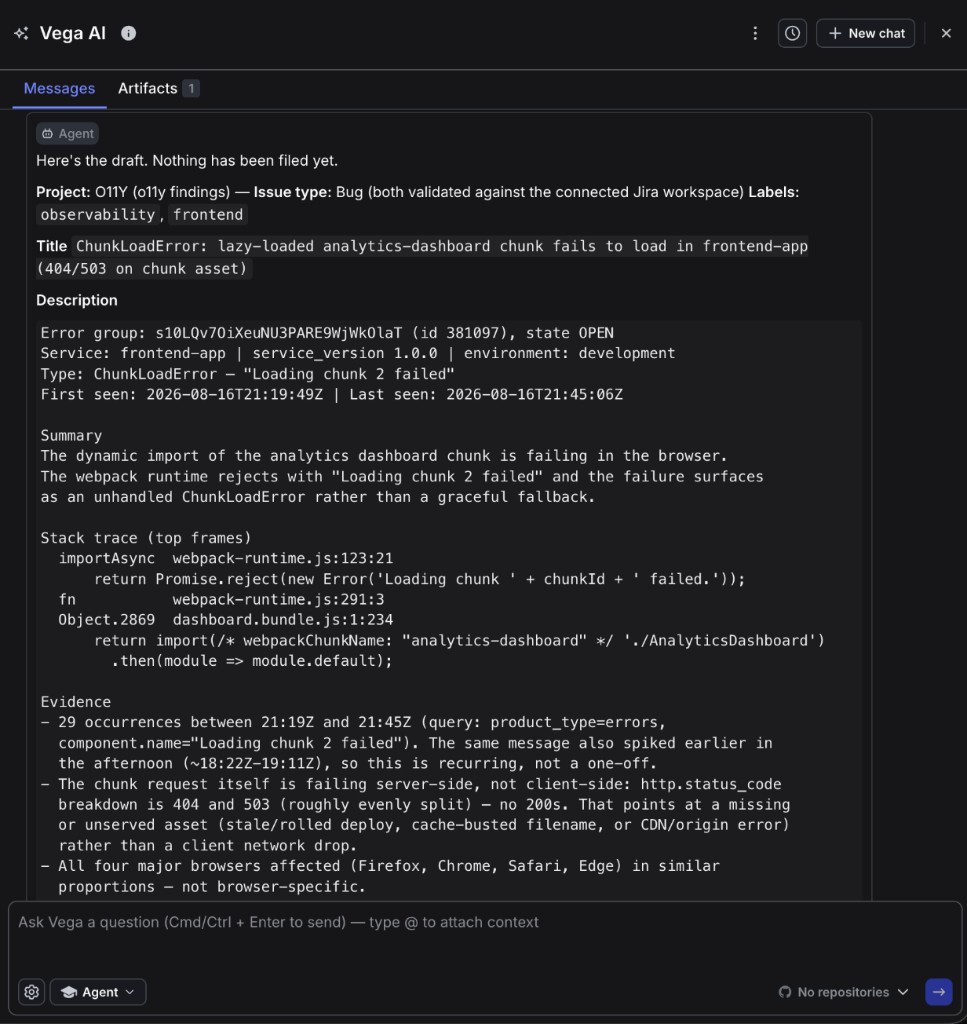
Vega asks for confirmation before it files anything. After you confirm, Vega creates the ticket and shows a Jira chip, which also appears in the instance metadata box for later access.
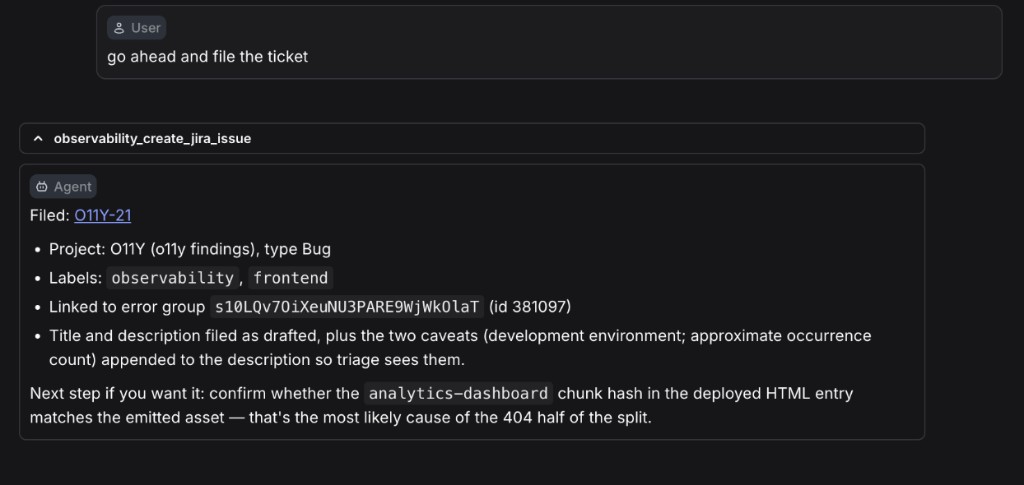
To learn more about this flow, read Create a Jira issue from a Vega investigation.
File tickets from alerts
Jira is also a notification destination for observability alerts. When an alert fires, a ticket can appear on your Jira board.
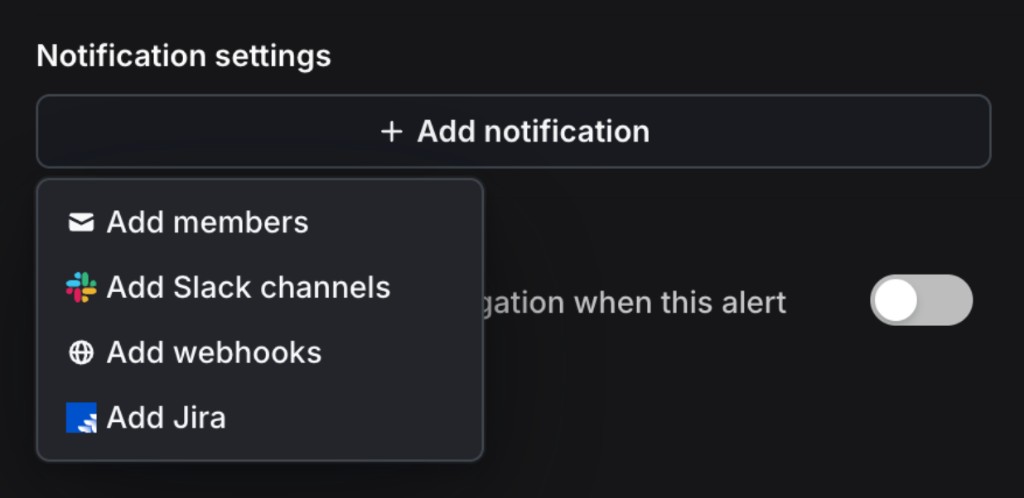
Select the Jira project and issue type, and LaunchDarkly files an issue each time the alert notifies. Use the cooldown window and threshold settings to control how often LaunchDarkly creates those tickets.
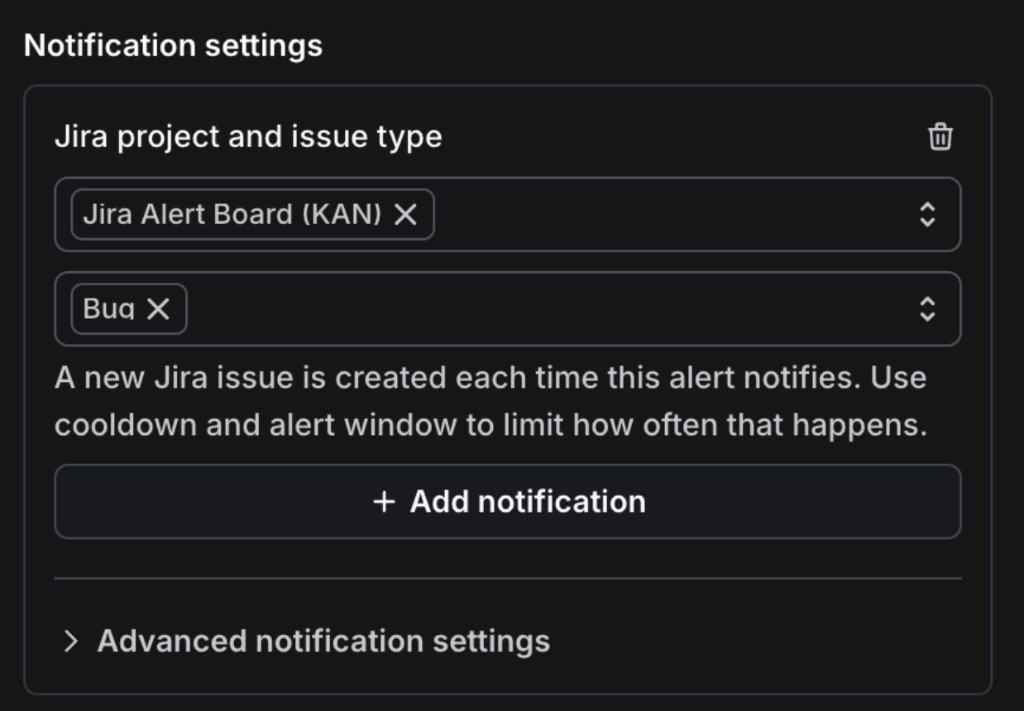
To learn more, read Create Jira issues from observability data.
Know you are on track
You are on track when:
- In observability, Create Jira issue populates the project and issue type menus
- Creating an issue shows a successful toast with a chip linking to a real Jira ticket
- Create with Vega drafts a ticket, waits for your confirmation, then returns an issue link
If something is off:
- Secret mismatch between LaunchDarkly and Forge: Re-enter the LaunchDarkly API access token with the required role.
- No create button: The API access token is not configured correctly, or the integration is not available on the account.
The win is watching a stack trace you were just looking at show up as a Jira ticket with its context still attached.
Next steps
A possible follow-on is two-way synchronization between Jira and LaunchDarkly, where Jira comments and status changes could reflect in the LaunchDarkly platform.
Wrap-up
Observability findings become Jira work through signed Forge webtriggers, and through Vega. Every finding links to action, and the evidence that made the ticket worth filing stays attached.
As an intern working on this project, I am grateful I got the opportunity to contribute to something that sits between Observability and how teams actually track follow-up work. Thank you to my mentors and managers for guiding me throughout this entire design and implementation process, and for giving me the ability to take full ownership over a feature.
Leaving this internship, I am most proud that I got to ship a real product surface end to end, and that I leave knowing how much trust and support it takes to do that as an intern.
If you would like to connect or learn more, please reach out to Vaishnavi Panchal at vaishnavinpanchal@gmail.com, or on LinkedIn!