

Troubleshooting ADFS-based SSOIf you need information about ADFS errors during configuration, troubleshoot it by accessing the ADFS logs in the Windows Event Viewer.
Prerequisites
To give your organization access to LaunchDarkly through ADFS, you need the following components:- An Enterprise LaunchDarkly account.
- A signed SSL certificate.
- An Active Directory instance where all users have an email address attribute.
- A Microsoft Server instance with ADFS installed and configured.
Setting up ADFSThis topic does not tell you how to set up ADFS. To learn how to set up ADFS, read Microsoft’s documentation.
Set up LaunchDarkly fields
Here is a table explaining LaunchDarkly fields:| LaunchDarkly field | Notes |
|---|---|
| Sign-on URL | Default value: https://YOUR-DOMAIN/adfs/ls/. If the default value fails, confirm that the endpoint is enabled and the URL path is correct. Find the endpoint in Service, then Endpoints. Search for an endpoint with the SAML 2.0/WS-Federation type. |
| X.509 Certificate | Copy the Token Signing certificate to a Base-64 encoded X.509 file and import it into LaunchDarkly |
Add Relying Party Trust
To add the Relying Party Trust:- Log into the ADFS Management tool.
- Click Add Relying Party Trust…. The Add Relying Party Trust Wizard appears:
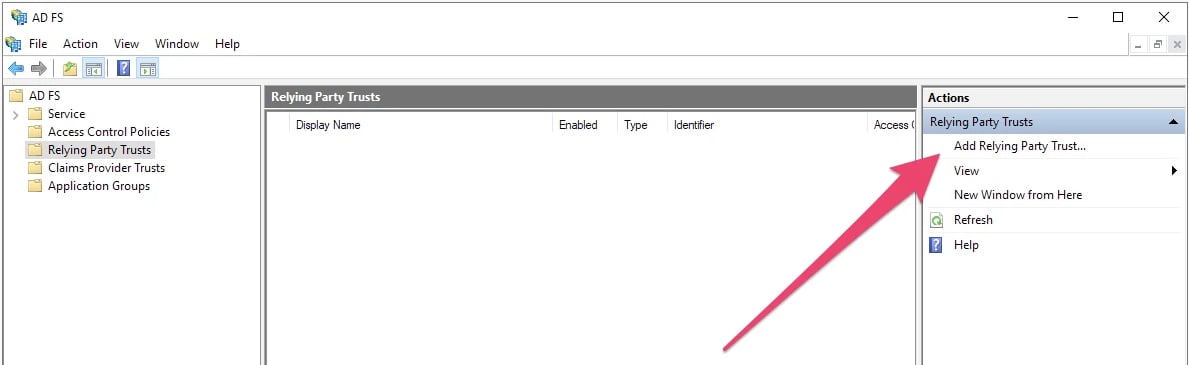
The ADFS Management tool, with the "Add Relying Party Trust..." option called out.
- Click Start. Keep the default value, which is Claims aware:
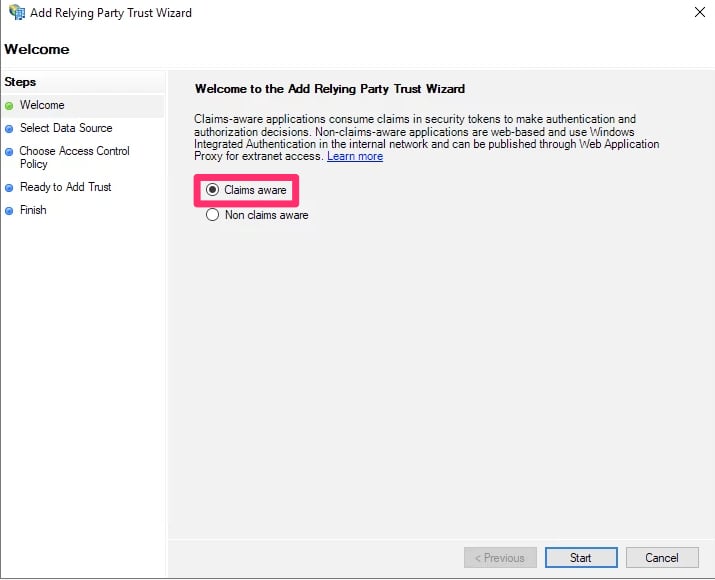
The "Welcome" screen for the setup wizard.
- Choose Enter data about the relying party manually:
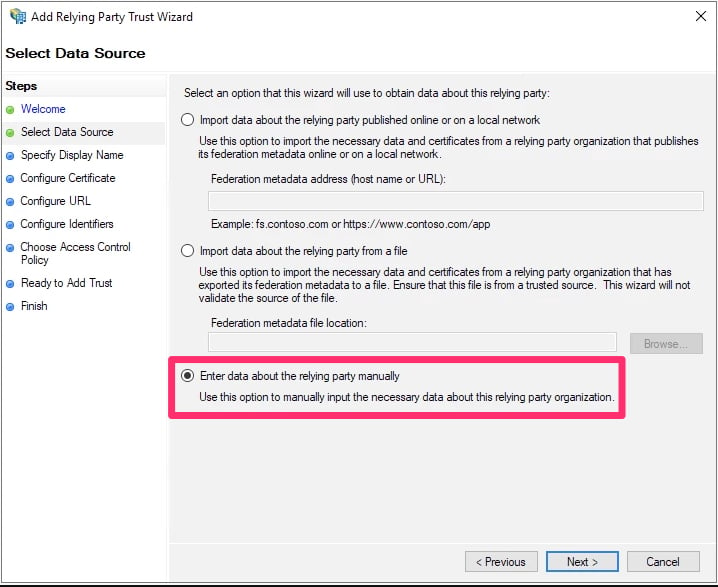
The Select Data Source screen.
- Click Next. The “Specify Display Name” screen appears.
- Set a display name of your choosing.
- Click Next. The “Configure Certificate” screen appears.
- You do not need to choose a certificate. Click Next.
- Select Enable support for the SAML 2.0 WebSSO protocol.
- Enter the Assertion consumer service URL from the SSO section of LaunchDarkly into the Relying party SAML 2.0 SSO service URL field.
- Click Next.
- In the Relying party trust identifier field, enter
app.launchdarkly.com. - Click Add.
- Click Next. The “Choose Access control Policy” screen appears.
- You do not need to change any access control policies. Click Next.
- Review your changes and click Next.
- If you are satisfied with the configuration, click Close.
Set up claim issuance policies
To set up a claim issuance policy:- Log into the ADFS Management tool.
- Select the LaunchDarkly Trust.
- Click Edit Claim Issuance Policy… in the menu. The “Edit Claim Issuance Policy” window appears.
- Click Add Rule.
- Set Claim rule template to “Transform an Incoming Claim.”
- Click Next:
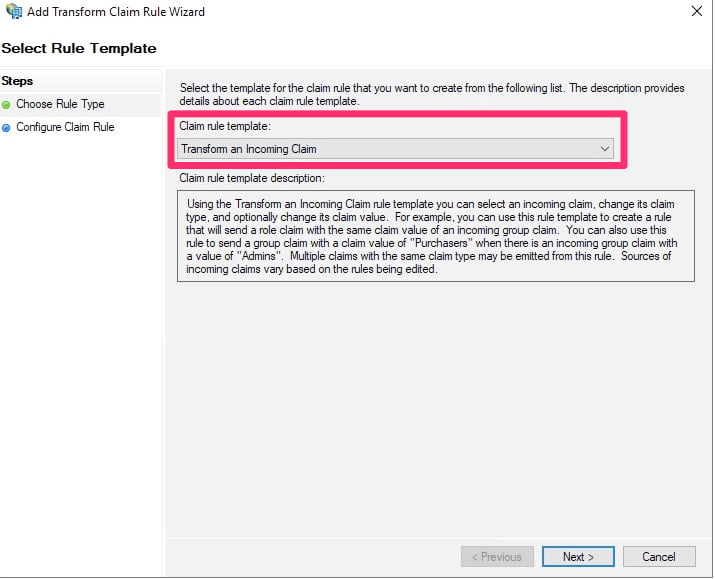
The "Select Rule Template" screen.
- Set the following options:
- Claim rule name: Enter a human-readable name, such as “Email to NameID.”
- Incoming claim type: E-Mail Address
- Outgoing claim type: Name ID
- Outgoing name ID format: Email
- Select Pass through all claim values.
- Click Finish.
Configure custom roles
You can map LaunchDarkly custom role attributes to ADFS using a claim issuance policy. To learn more about SSO provisioning for roles, read Roles. Before you can map custom role attributes, you must get your ADFS groups. To learn how, read Microsoft’s Create a Rule to Send Claims Using a Custom Rule. Your rule will look something like this: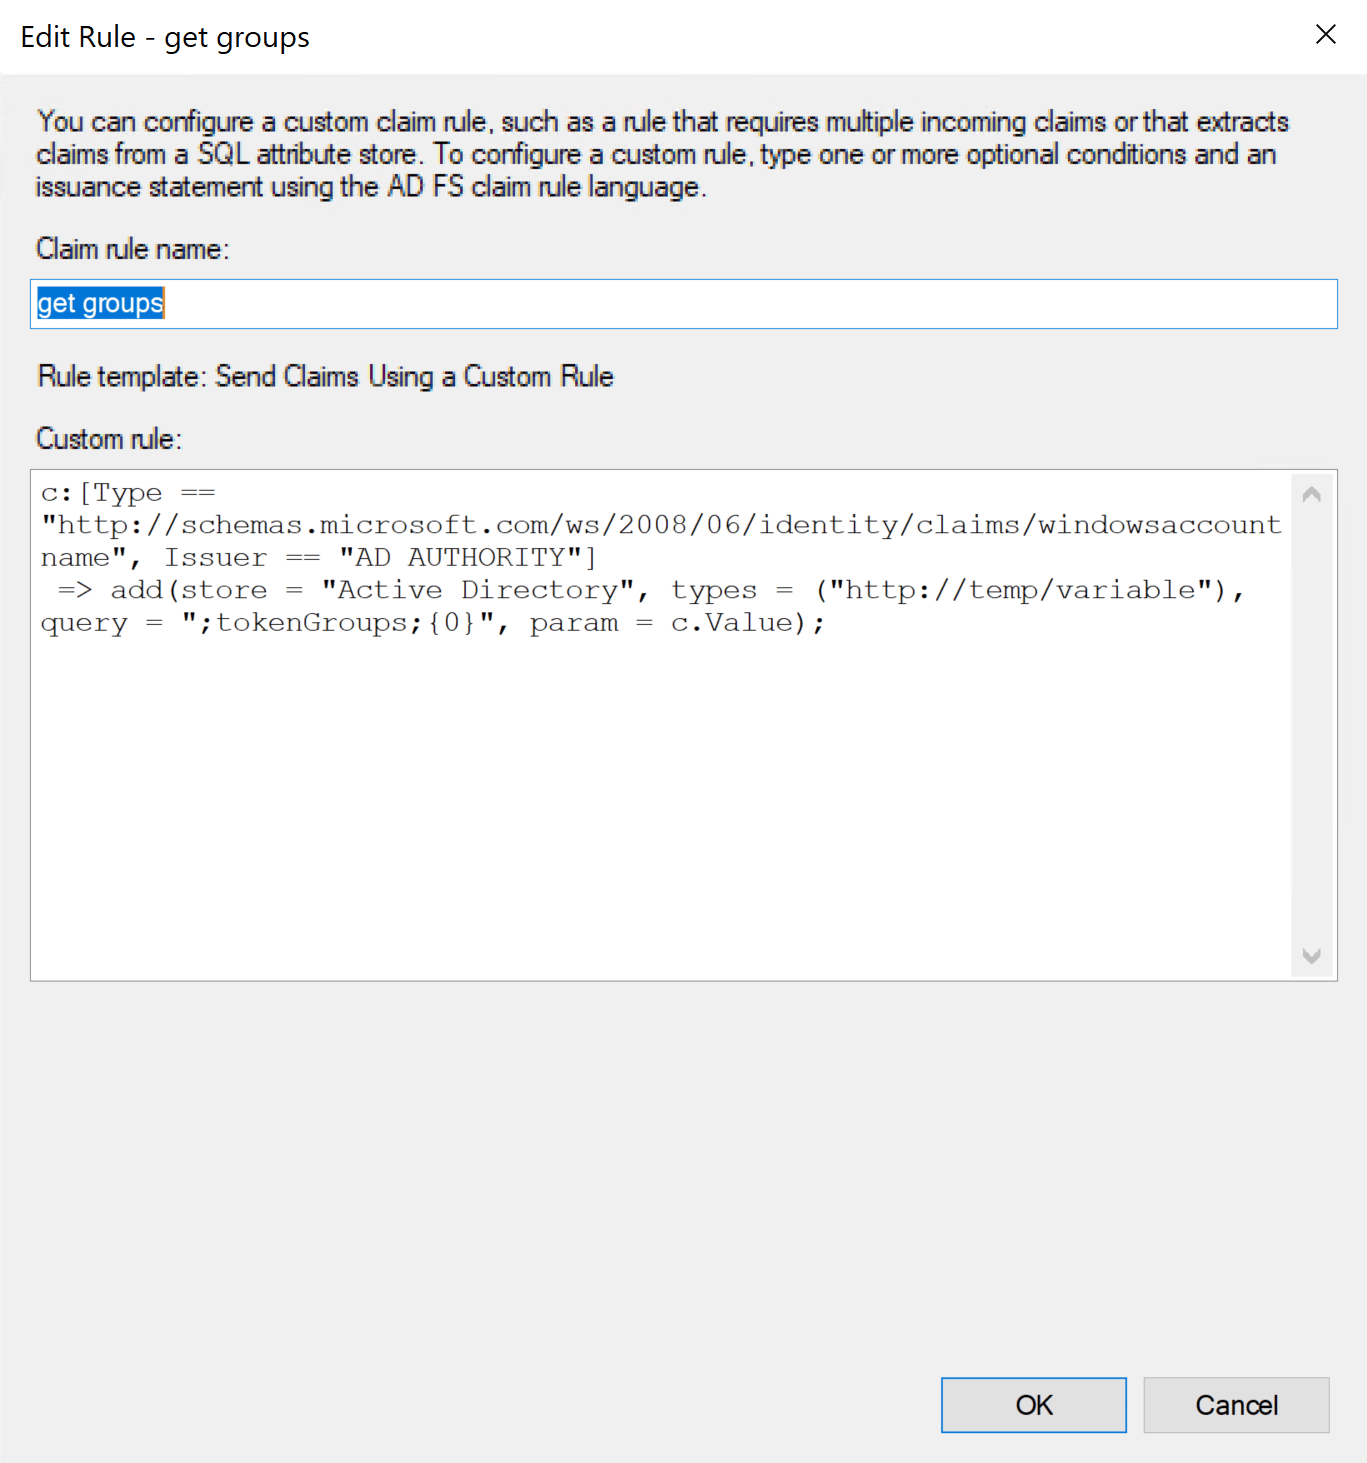
The "Edit Rule" window.
- Log into the ADFS Management tool.
- Select LaunchDarkly Trust.
- Click Edit Claim Issuance Policy… in the menu. The “Edit Claim Issuance Policy” window appears.
- Click Add Rule.
- Set Claim rule template to Send Claims using a custom rule.
- Click Next.
- Enter a human-readable name, such as “Map groups to LaunchDarkly custom roles.”
-
In the Custom rule window, enter the following:
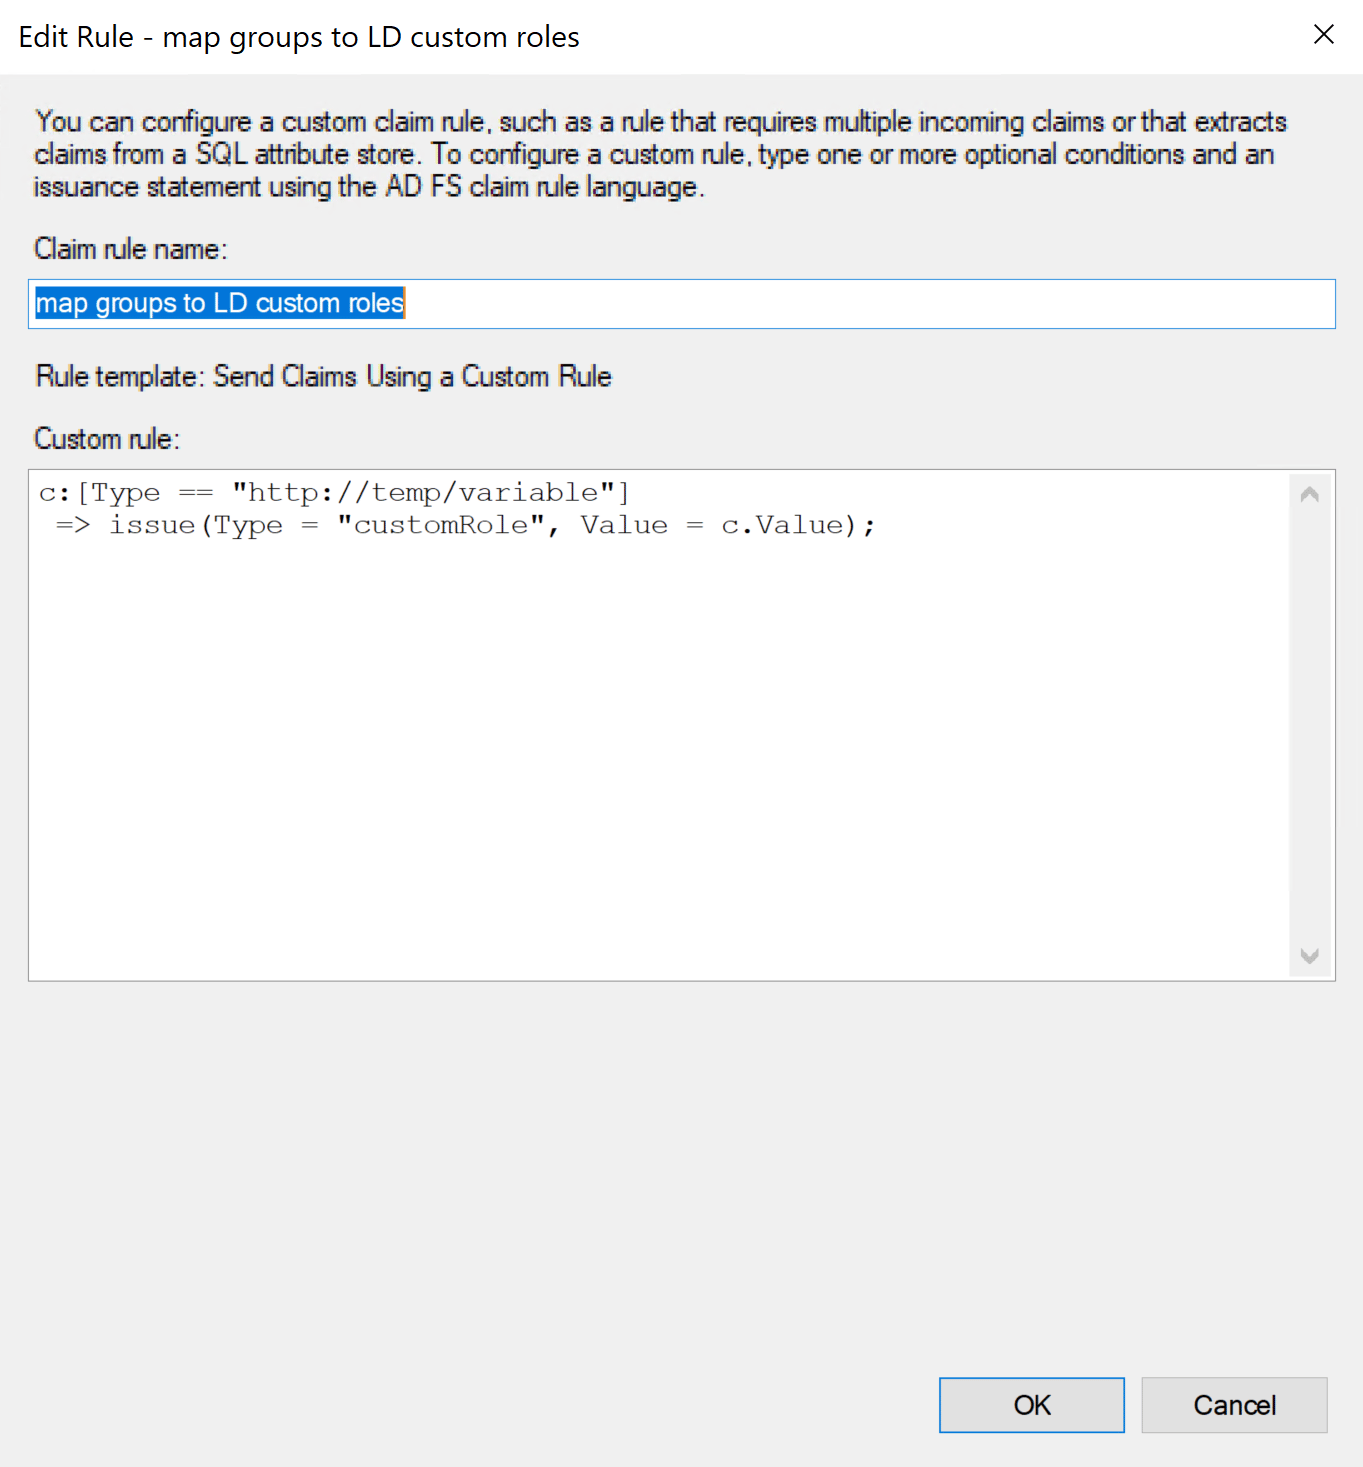
A custom rule entered in the "Edit Rule" window.
- Click OK.
Removing existing rolesSAML ignores empty fields if used in Roles or customRoles. To clear all existing roles, enter an empty string "" into the field.