Day 4 | ❄️ Tracing the impact of holiday styling in your Node.js app
Day 4 | ❄️ Tracing the impact of holiday styling in your Node.js app
Published December 11, 2025

🎶 Tis the ris-kiest time of the year 🎵
You want to add some festive snowflakes to your application as a whimsical holiday touch. Your product manager disagrees. It would be ironic if snowflakes caused an incident during the holiday code freeze.
Fortunately, your company uses LaunchDarkly. With the combination of feature flags and observability, you can make the styling change without a deploy, roll it back easily if there is a problem, and use distributed tracing to understand any potential impact on performance.
Best of all, you can do all this quickly enough that your hot chocolate won’t even get cold. Let’s get started.
🎄 Prerequisites
- A dev environment with Node.js, npm, and a terminal installed
- A LaunchDarkly account with observability enabled. Sign up for a free trial here.
🇨🇽 Creating a feature flag
First, you’ll need to create a feature flag. Log in to the LaunchDarkly app and create a boolean feature flag named “show-holiday-styling.” The LaunchDarkly docs for creating a feature flag are always up to date if you have any trouble.
Leave the LaunchDarkly app open in a tab. We’ll come back to it later.
Copy the SDK key for the environment you are using, as you’ll need that in a minute. It might be a Test environment, or Production if you live dangerously.
☃️ Getting started
In a terminal, clone the example repo using the following command:
Rename the .env.example file to .env. Add the SDK key you saved in the previous step. Save the file.
Run these commands to install dependencies and start the server:
You should see an enterprise-flavored “hello world” app running on http://localhost:3000.
🎁 Unwrapping the code
What is this app doing? Let’s break it down. Let’s skip the Express boilerplate and imports, focusing on the interesting bits.
In this code block, we are initializing the LaunchDarkly client, and telling it to use the Observability plugin. Adding the serviceName lets us differentiate data between different services that might be running in the same environment.
Inside the root route, we start our observability span:
Each request has its own context, which is passed to the LaunchDarkly SDK when a flag is evaluated.
Here, we wait for the LaunchDarkly client to initialize. Setting a timeout value means that if LaunchDarkly is unreachable, our app can still run. Supplying a default value to the .variation call helps our server know what flag variation to serve in that case.
Then we have some conditional logic to render a different route, based on the value the flag evaluates to. Error handling also helps us be resilient, and we end the span after the promise resolves.
It’s also important to shut the server down gracefully, to ensure that any pending observability events will be sent to LaunchDarkly.
🏁 Enabling the feature flag to add holiday styling
Back in the LaunchDarkly app, enable the flag so that show-holiday-styling servestrue for all traffic.
Now, if you reload http://localhost:3000, you should see a colorful holiday page with animated snowflakes. If you don’t, double-check that your SDK key and flag name are correct, and that you are using the SDK key that corresponds with the right LaunchDarkly project and environment.
There is a way to set up your app so that flag changes don’t require a reload, but that’s out of scope for this tutorial.
If you go to the Observability section of the LaunchDarkly dashboard, you should be able to see a trace for each page load. It will look something like this:
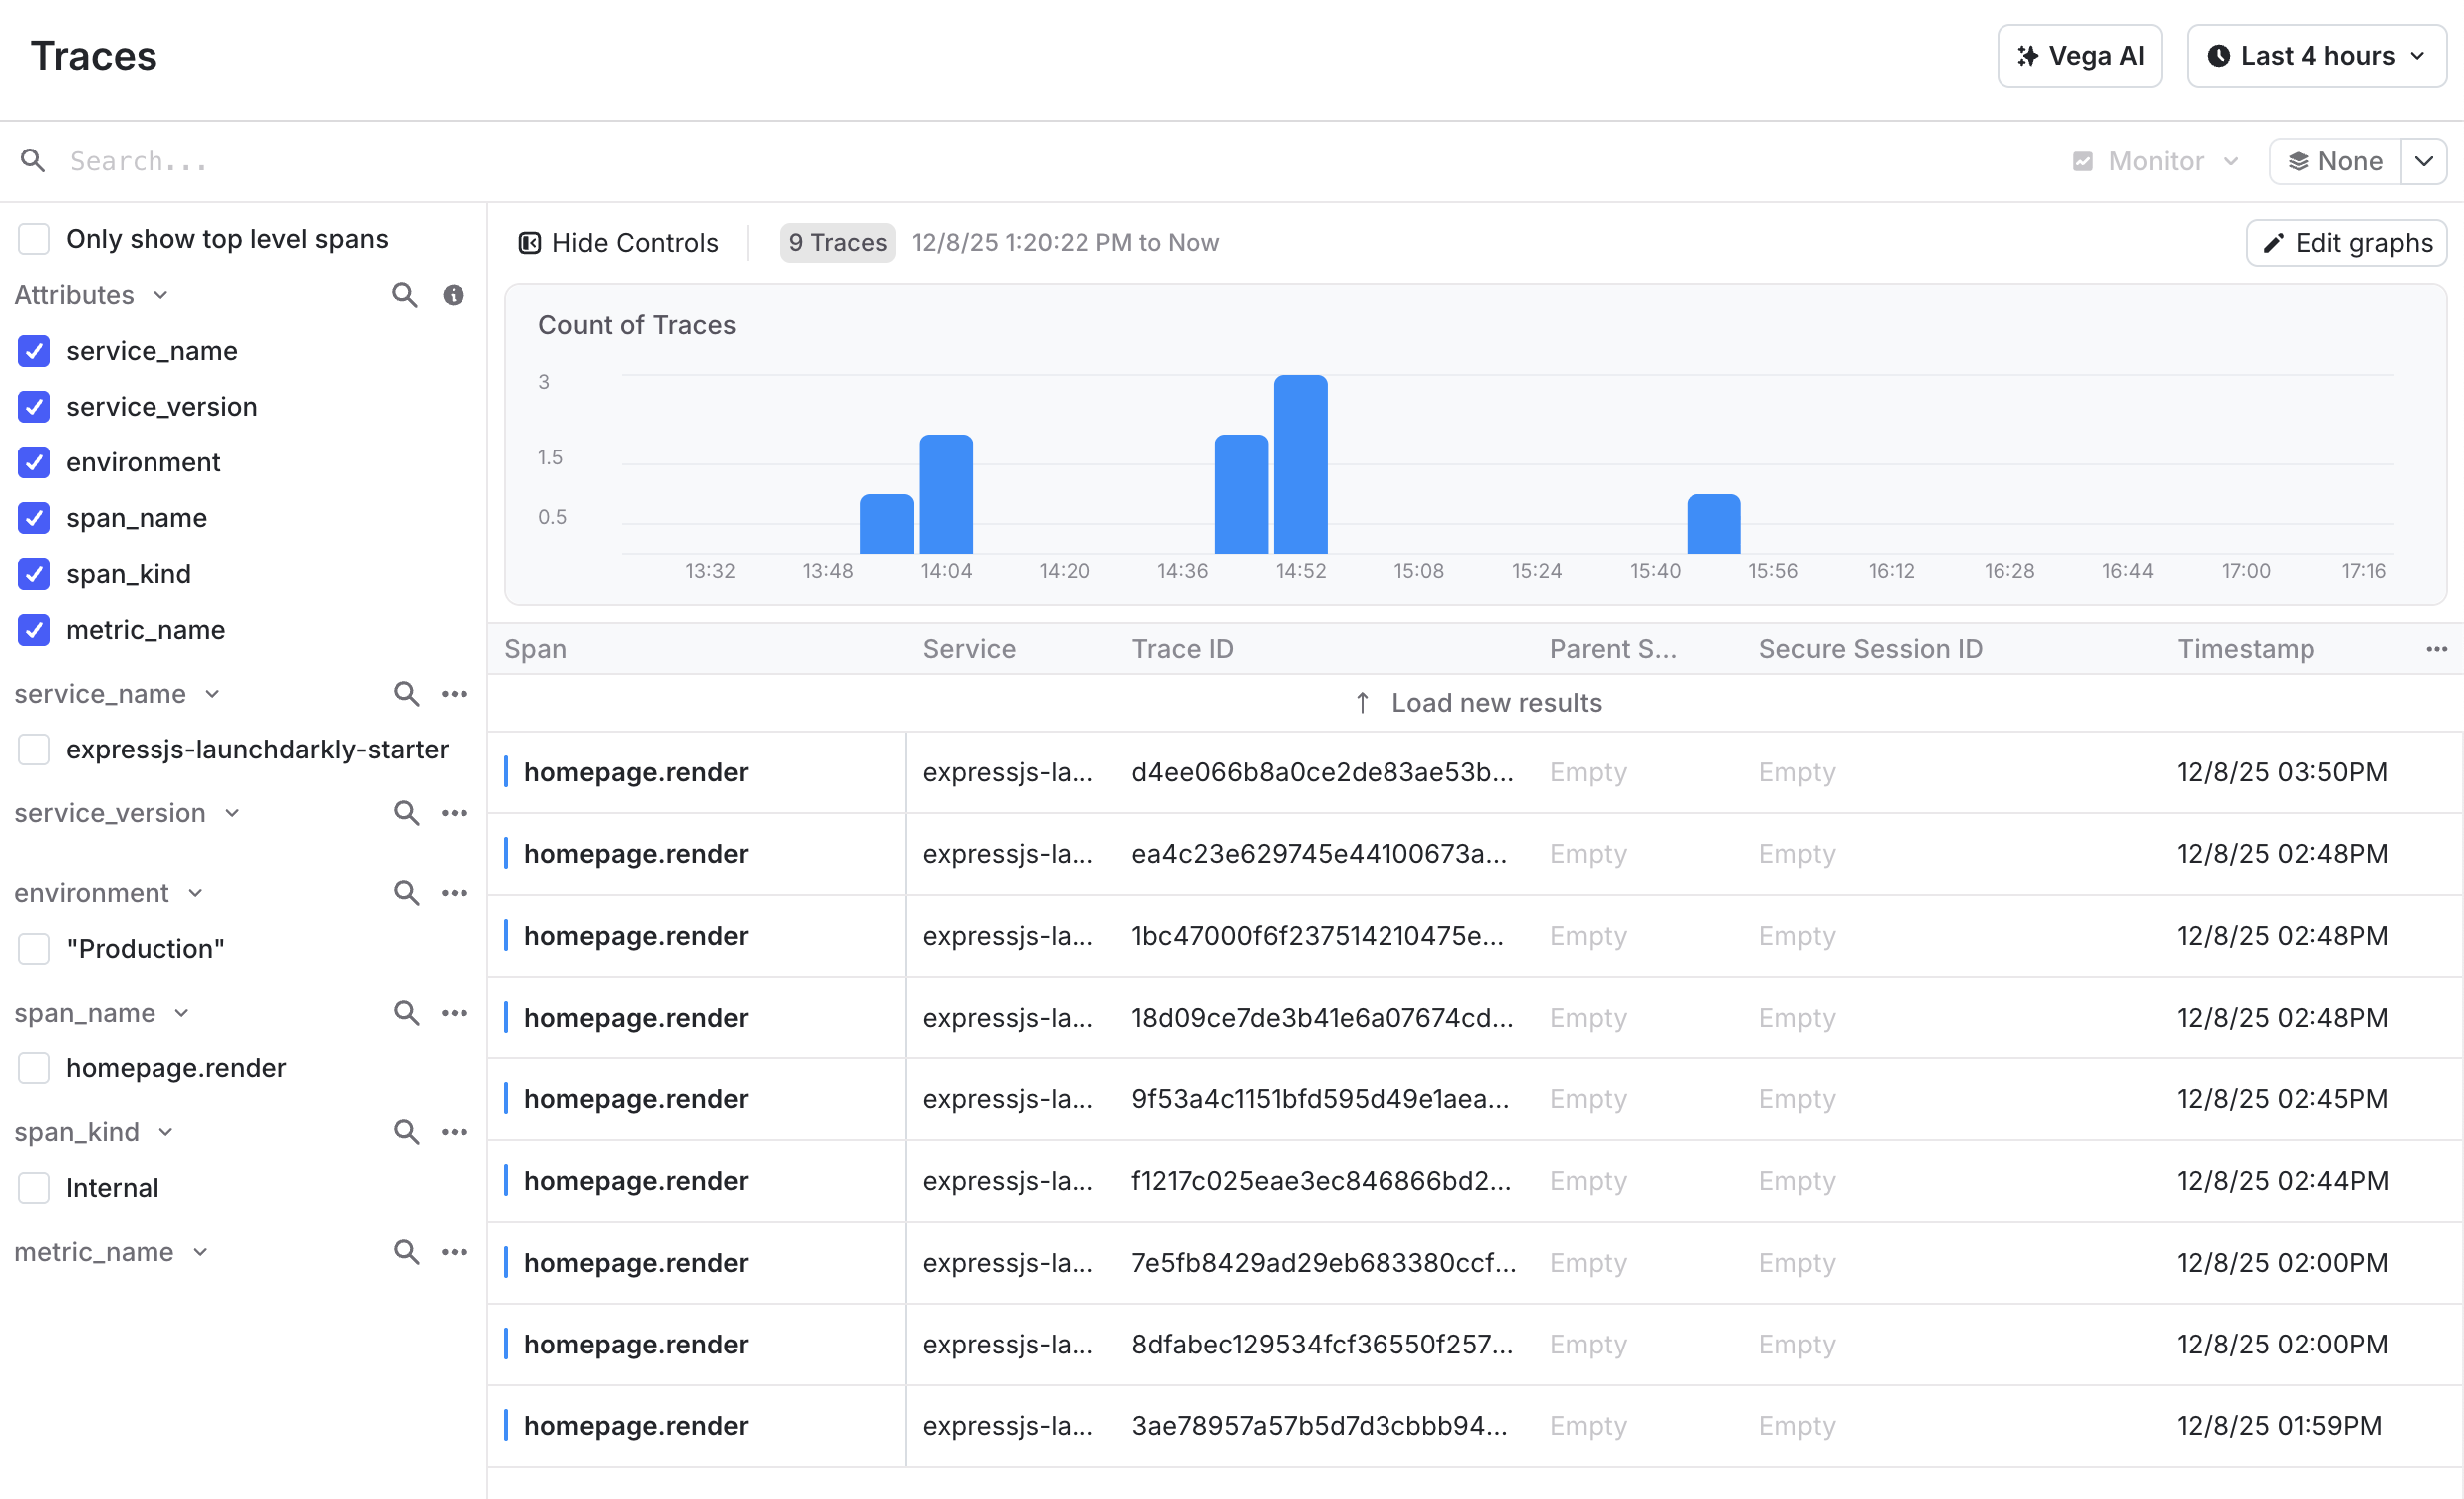
From these traces, we can observe that the holiday styling doesn’t take too much longer to load than the enterprise page. Share this data to your project manager, along with a high five.
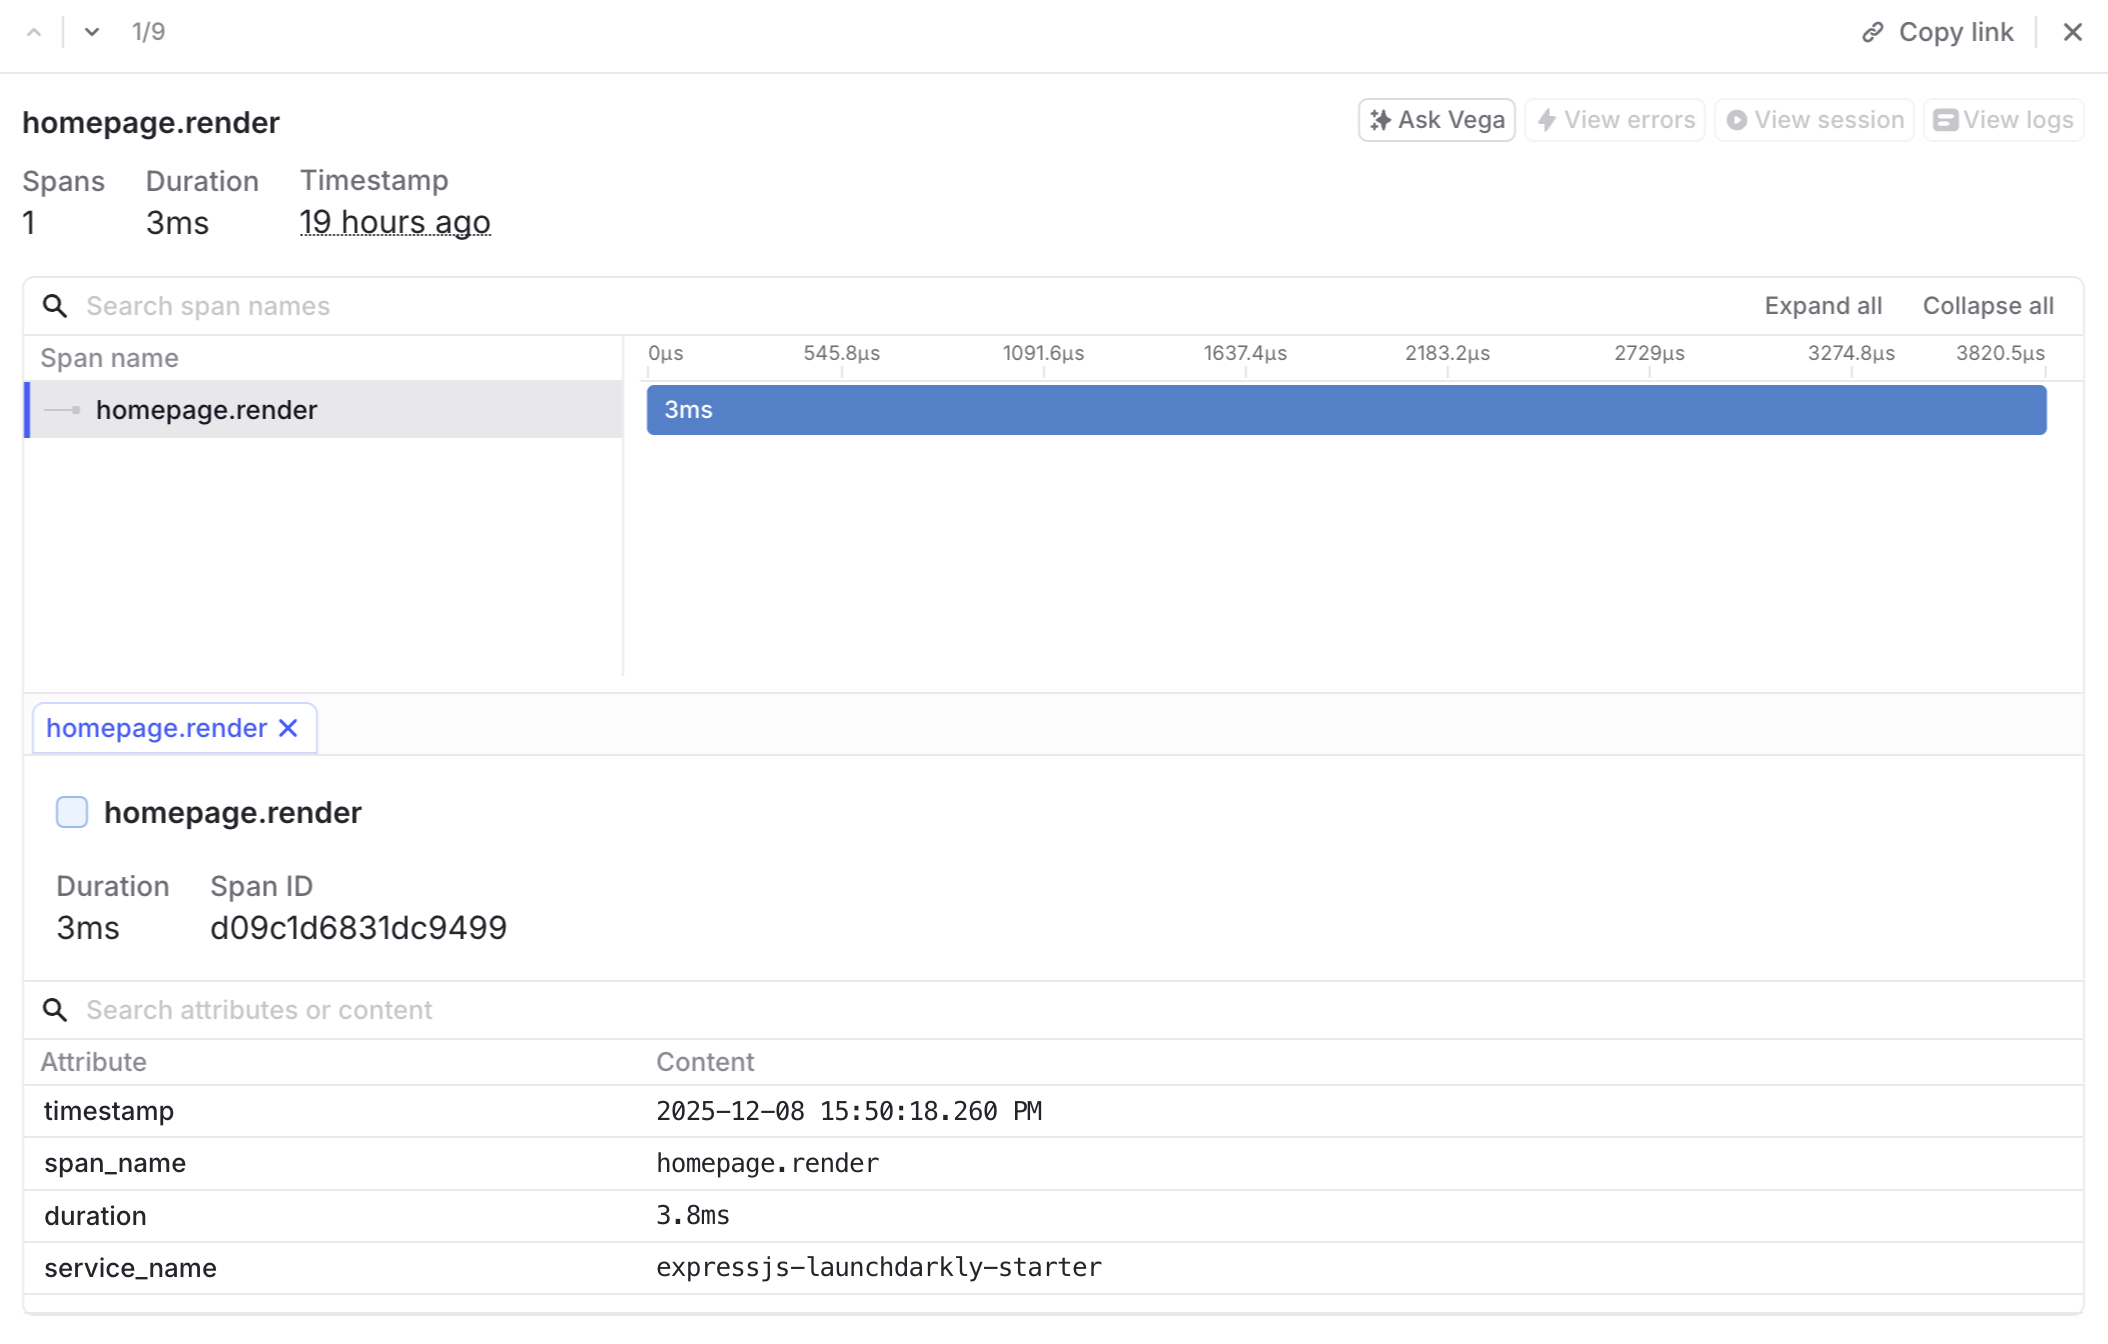
You can also click in to each individual trace to see more details if you are curious.
🎀 Putting a bow on it
If you’ve been following along, you’ve learned how to integrate feature flags and traces into a festive Node.js application. What else could we add to improve our app?
Traces are only one facet of observability. LaunchDarkly’s SDK also supports logs, errors, session replay, and more.
Thanks so much for reading! Tune in soon for our next installment of observability holiday fun.