
Getting started with LangGraph and AgentControl configs
This guide shows how to integrate LangGraph agent workflows with LaunchDarkly AgentControl. Using AgentControl configs with LangGraph lets you manage agent instructions, model configuration, and parameters outside of your application code.
This guide uses agent mode for LangGraph workflows. Agent mode uses a single instructions string rather than a messages array, which maps directly to LangGraph’s agent prompts. To learn more, read Agents.
If you’re new to AgentControl, start with the Quickstart and return to this guide when you are ready for a LangGraph-specific example.
To learn more about AgentControl-specific SDKs, read AI SDKs. For Python-specific details, read the Python AI SDK reference.
Prerequisites
To complete this guide, you must have the following prerequisites:
- A LaunchDarkly account, including:
- A LaunchDarkly SDK key for your environment.
- A member role that allows AgentControl actions. The LaunchDarkly project admin, maintainer, and developer project roles, as well as the admin and owner base roles, include this ability. To learn more about LaunchDarkly roles, read Roles.
- A Python 3.10+ or Node.js 20+ development environment.
- LangGraph installed in your application.
- An API key for your chosen model provider (OpenAI, Anthropic, or another supported provider).
Concepts
Before you begin, review these key concepts.
LangGraph agents
LangGraph provides a framework for building agent workflows as directed graphs. The create_agent function (in langchain.agents; replaces the deprecated langgraph.prebuilt.create_react_agent in LangGraph 1.0+) creates a ReAct-style agent that can use tools and maintain state across conversation turns. Agents receive a system prompt that defines their behavior and capabilities.
Agent mode AgentControl configs
Agent mode AgentControl configs use an instructions field instead of a messages array. This single instruction string serves as the system prompt for your agent. Agent mode is ideal for:
- Multi-step agent workflows
- Tool-using agents
- Persistent agent sessions
The agent_config function
The agent_config function retrieves the AgentControl config variation for a given context. It returns an AIAgentConfig object that includes the customized instructions, model configuration, and a create_tracker() (Python) or createTracker() (Node.js) factory method that returns a tracker for recording metrics. Call agent_config each time you create an agent so LaunchDarkly can evaluate targeting and return the current configuration.
Step 1: Install dependencies
Install the LaunchDarkly SDKs and LangGraph packages.
Install the LangChain provider package for your model. Common provider packages include:
langchain-openaifor OpenAI modelslangchain-anthropicfor Anthropic modelslangchain-google-genaifor Google Gemini models
Step 2: Create an AgentControl config in LaunchDarkly
Create an AgentControl config in agent mode to store your agent configuration.
To create an AgentControl config:
- In the left sidebar, click Create and select Config.
- In the “Create config” dialog, select Agent.
- Enter a name for your AgentControl config, for example, “LangGraph Agent.”
- Click Create.
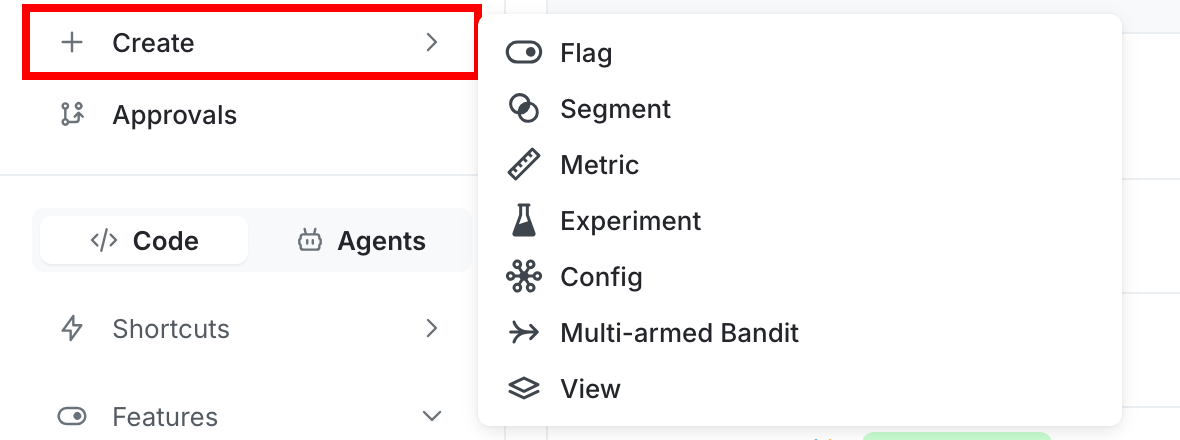
Then, create a variation:
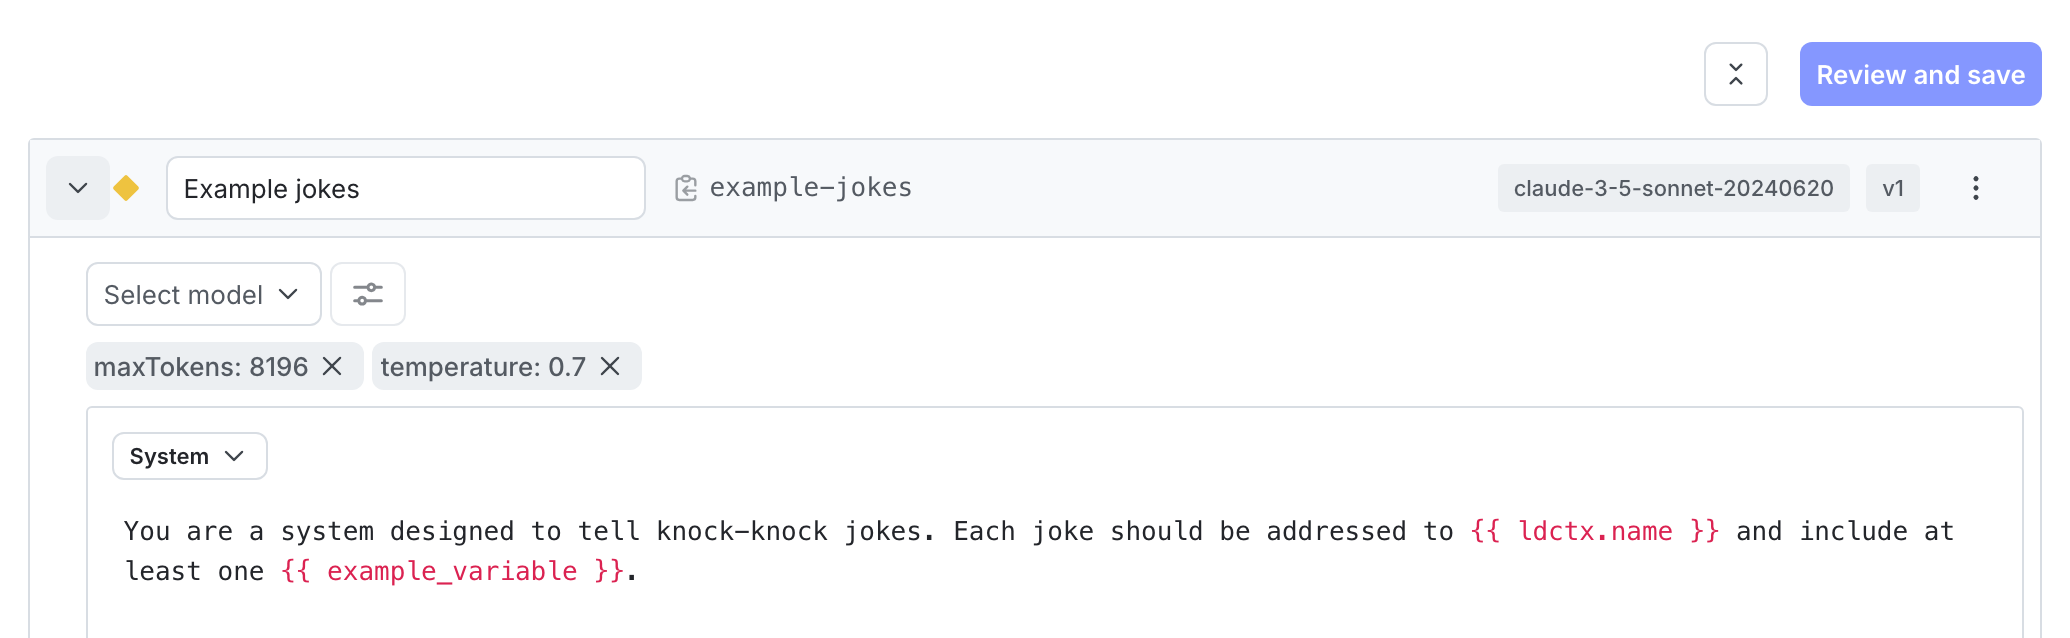
- On the Variations tab, replace “Untitled variation” with a variation name, such as “GPT-4o Agent”.
- Click Select a model and choose the
gpt-4oOpenAI model. - Click Parameters and set
temperatureto0.7andmax_tokensto2000. - In the Instructions field, enter your agent’s system prompt:
- Click Review and save.
Step 3: Set up targeting rules
Configure targeting rules to control which users receive the AgentControl config variation.
To set up the default rule:
- Select the Targeting tab for your AgentControl config.
- In the “Default rule” section, click Edit.
- Configure the default rule to serve your variation, such as “GPT-4o Agent”.
- Click Review and save.
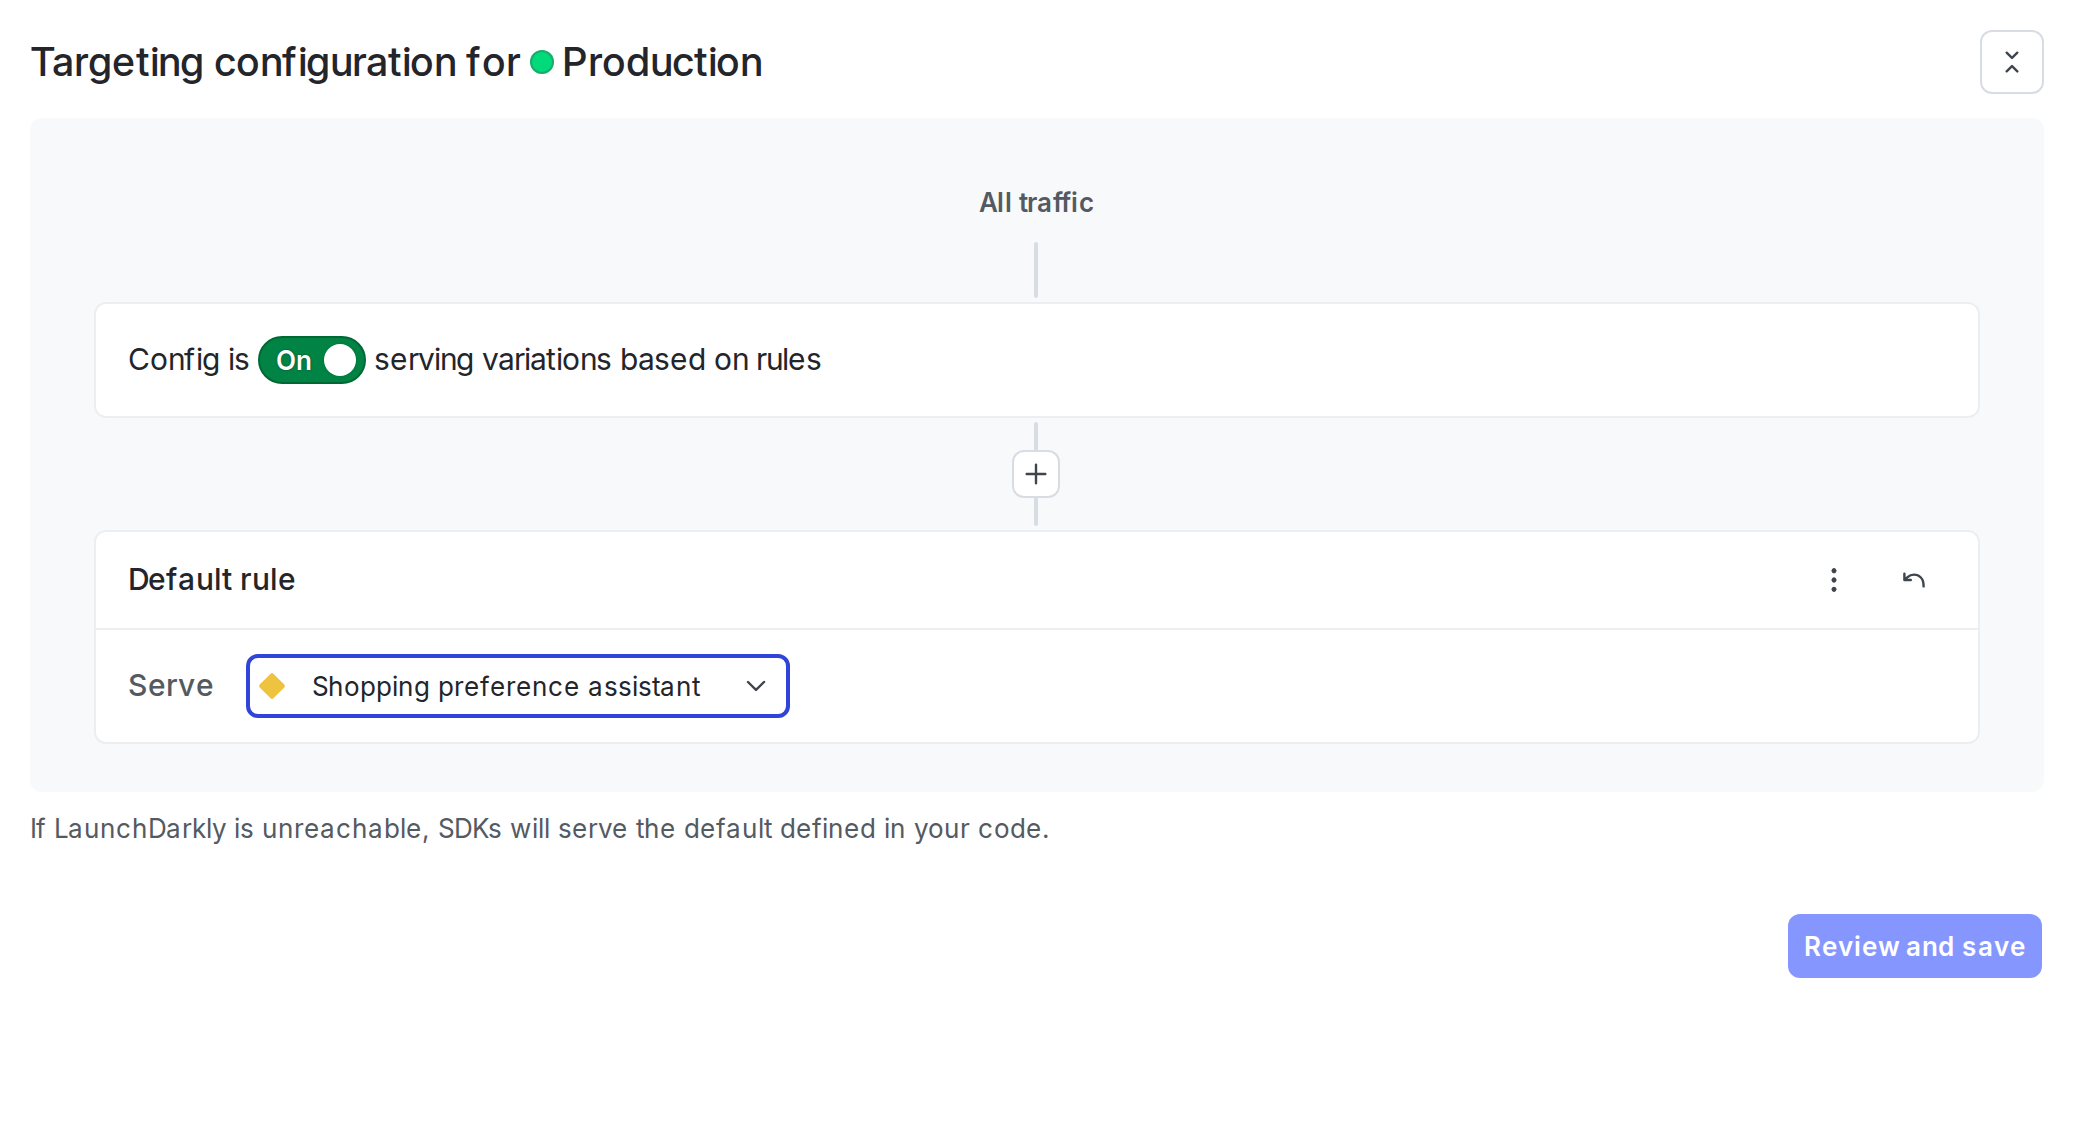
The AgentControl config is enabled by default. After you add the integration code to your application, LaunchDarkly serves the configured variation to your users.
Step 4: Integrate LangGraph with AgentControl configs
The integration involves these key steps:
- Define the tools your agent can call.
- Initialize the LaunchDarkly SDK and AI client.
- Get the agent config using
agent_config()(Python) oraiClient.agentConfig()(Node.js). - Build a LangChain model from the AgentControl config using the LaunchDarkly LangChain provider.
- Create a LangGraph ReAct agent with a
MemorySavercheckpointer. - Invoke the agent and track metrics with the config’s tracker.
Define the agent’s tools.
Initialize the LaunchDarkly SDK and AI client, fetch the agent config, build the LangChain model with create_langchain_model (Python) or createLangChainModel (Node.js), and create the ReAct agent.
The provider reads the model name, provider, and all parameters (temperature, max tokens, and others) from the variation, maps LaunchDarkly provider names to LangChain equivalents — for example, "gemini" to "google_genai" — and returns a configured chat model. The same AgentControl config key can serve OpenAI, Anthropic, or any other provider-backed variation from the same code path.
Invoke the agent and track metrics. Each turn is one execution as far as the tracker is concerned: track_metrics_of_async (Python) / trackMetricsOf (Node.js) records duration and tracks success or error itself, so the surrounding try/except only needs to log. The Python example uses the SDK’s sum_token_usage_from_messages helper to aggregate token counts and get_tool_calls_from_response to feed track_tool_call. The Node.js example uses LangChainProvider.getAIMetricsFromResponse per message and reads msg.tool_calls directly until the matching JS helper ships.
The fallback argument to agent_config / agentConfig is optional. When omitted, LaunchDarkly returns a disabled config if the flag is off or the SDK is unreachable. Pass an explicit fallback to keep the agent running during outages.
Complete example
Here is a complete working example that combines all the steps.
Click to expand full example code
Step 5: Monitor results
View metrics for your AgentControl config in the LaunchDarkly UI.
To monitor results:
- In LaunchDarkly, navigate to your AgentControl config.
- Select the Monitoring tab.
LaunchDarkly displays metrics including:
- Generation count
- Token usage (input, output, total)
- Time to generate
- Error rate
Use these metrics to compare agent performance, identify cost differences, and make data-driven decisions about which configuration to use for different user segments. To learn more, read Monitor AgentControl configs.
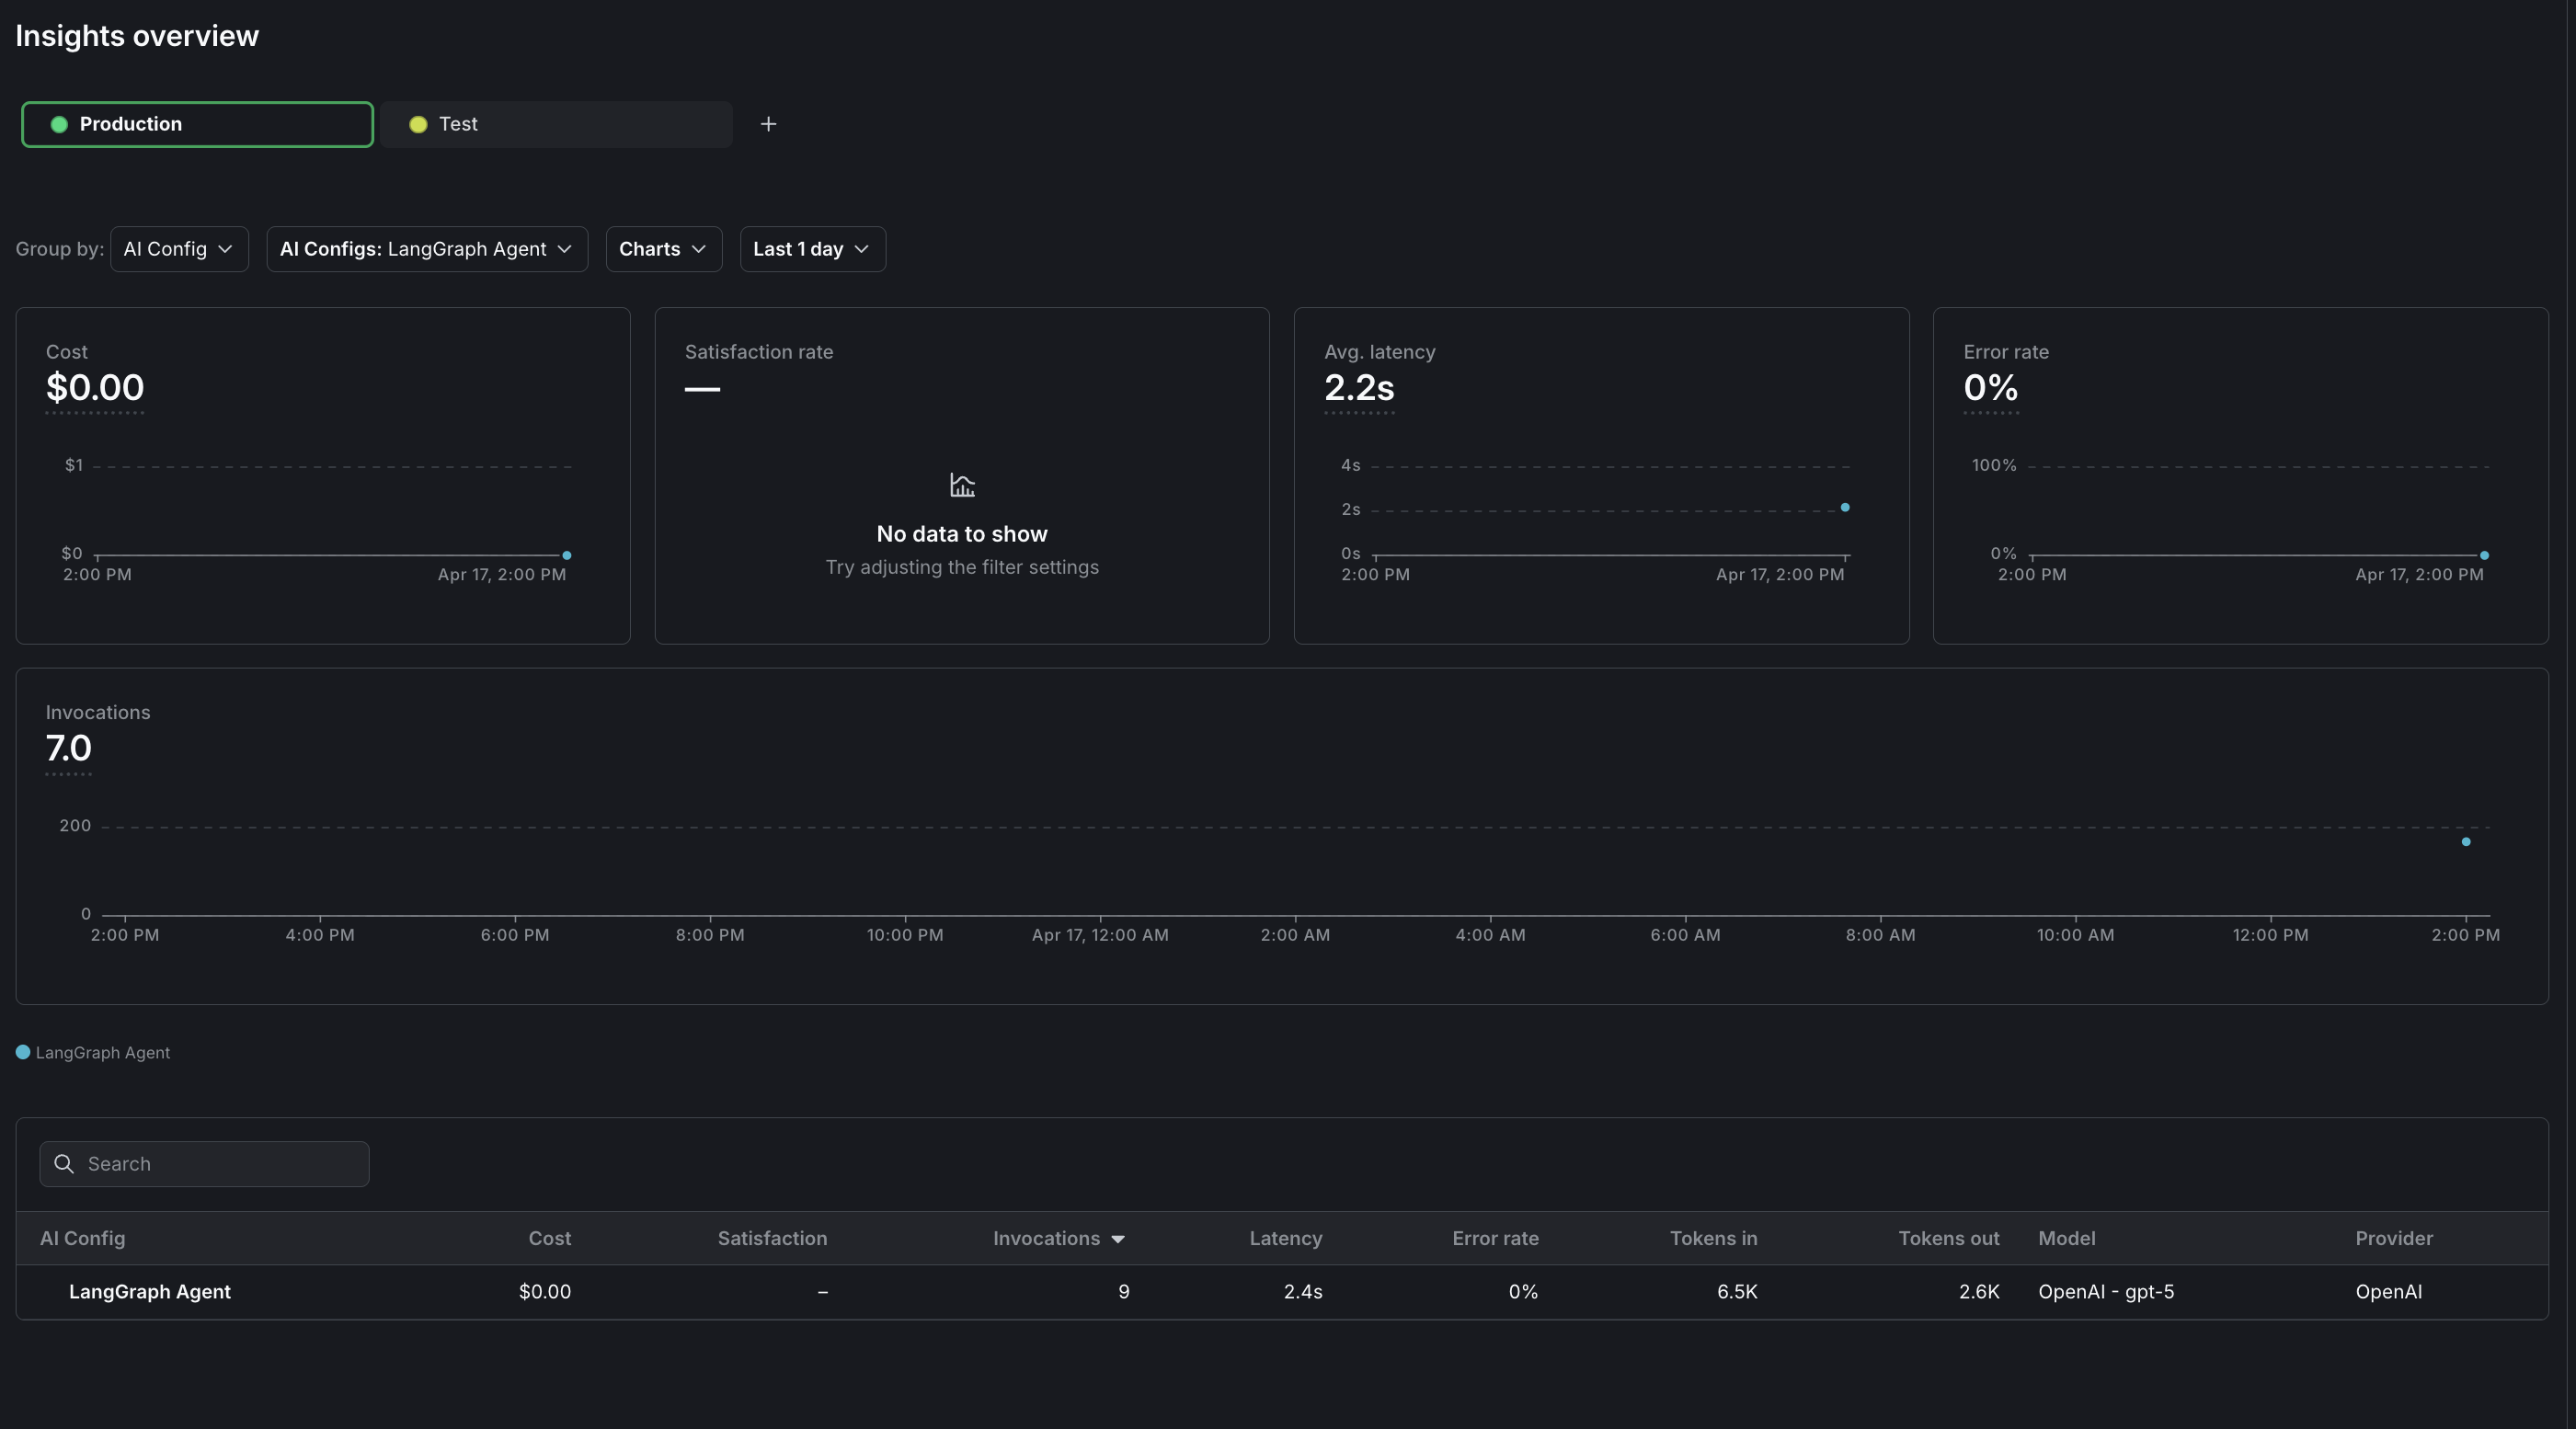
To view aggregated metrics across all your AgentControl configs, navigate to Insights in the left sidebar under the AI section. The Insights overview page displays cost, latency, error rate, invocation counts, and model distribution across your organization. To learn more, read about AI insights.
Agent mode vs completion mode
Conclusion
In this guide, you learned how to integrate LangGraph agent workflows with LaunchDarkly AgentControl to manage agent configuration outside of your application code.
You can now:
- Change agent models and instructions without redeploying your application
- Target different agent configurations to different users based on context attributes
- Track and compare agent performance across variations
- Maintain conversation state with LangGraph checkpointing
- Coordinate multi-agent workflows with centralized configuration
To explore additional capabilities, read:
- Run experiments with AgentControl to compare agent variations using statistical analysis
- Config targeting to serve different agents to different user segments
- Agent graphs to orchestrate multi-agent workflows
For more AgentControl examples, read the other AgentControl guides in this section.
Your 14-day trial begins as soon as you sign up. Get started in minutes using the in-app Quickstart. You’ll discover how easy it is to release, monitor, and optimize your software.
Want to try it out? Start a trial.