Events
Overview
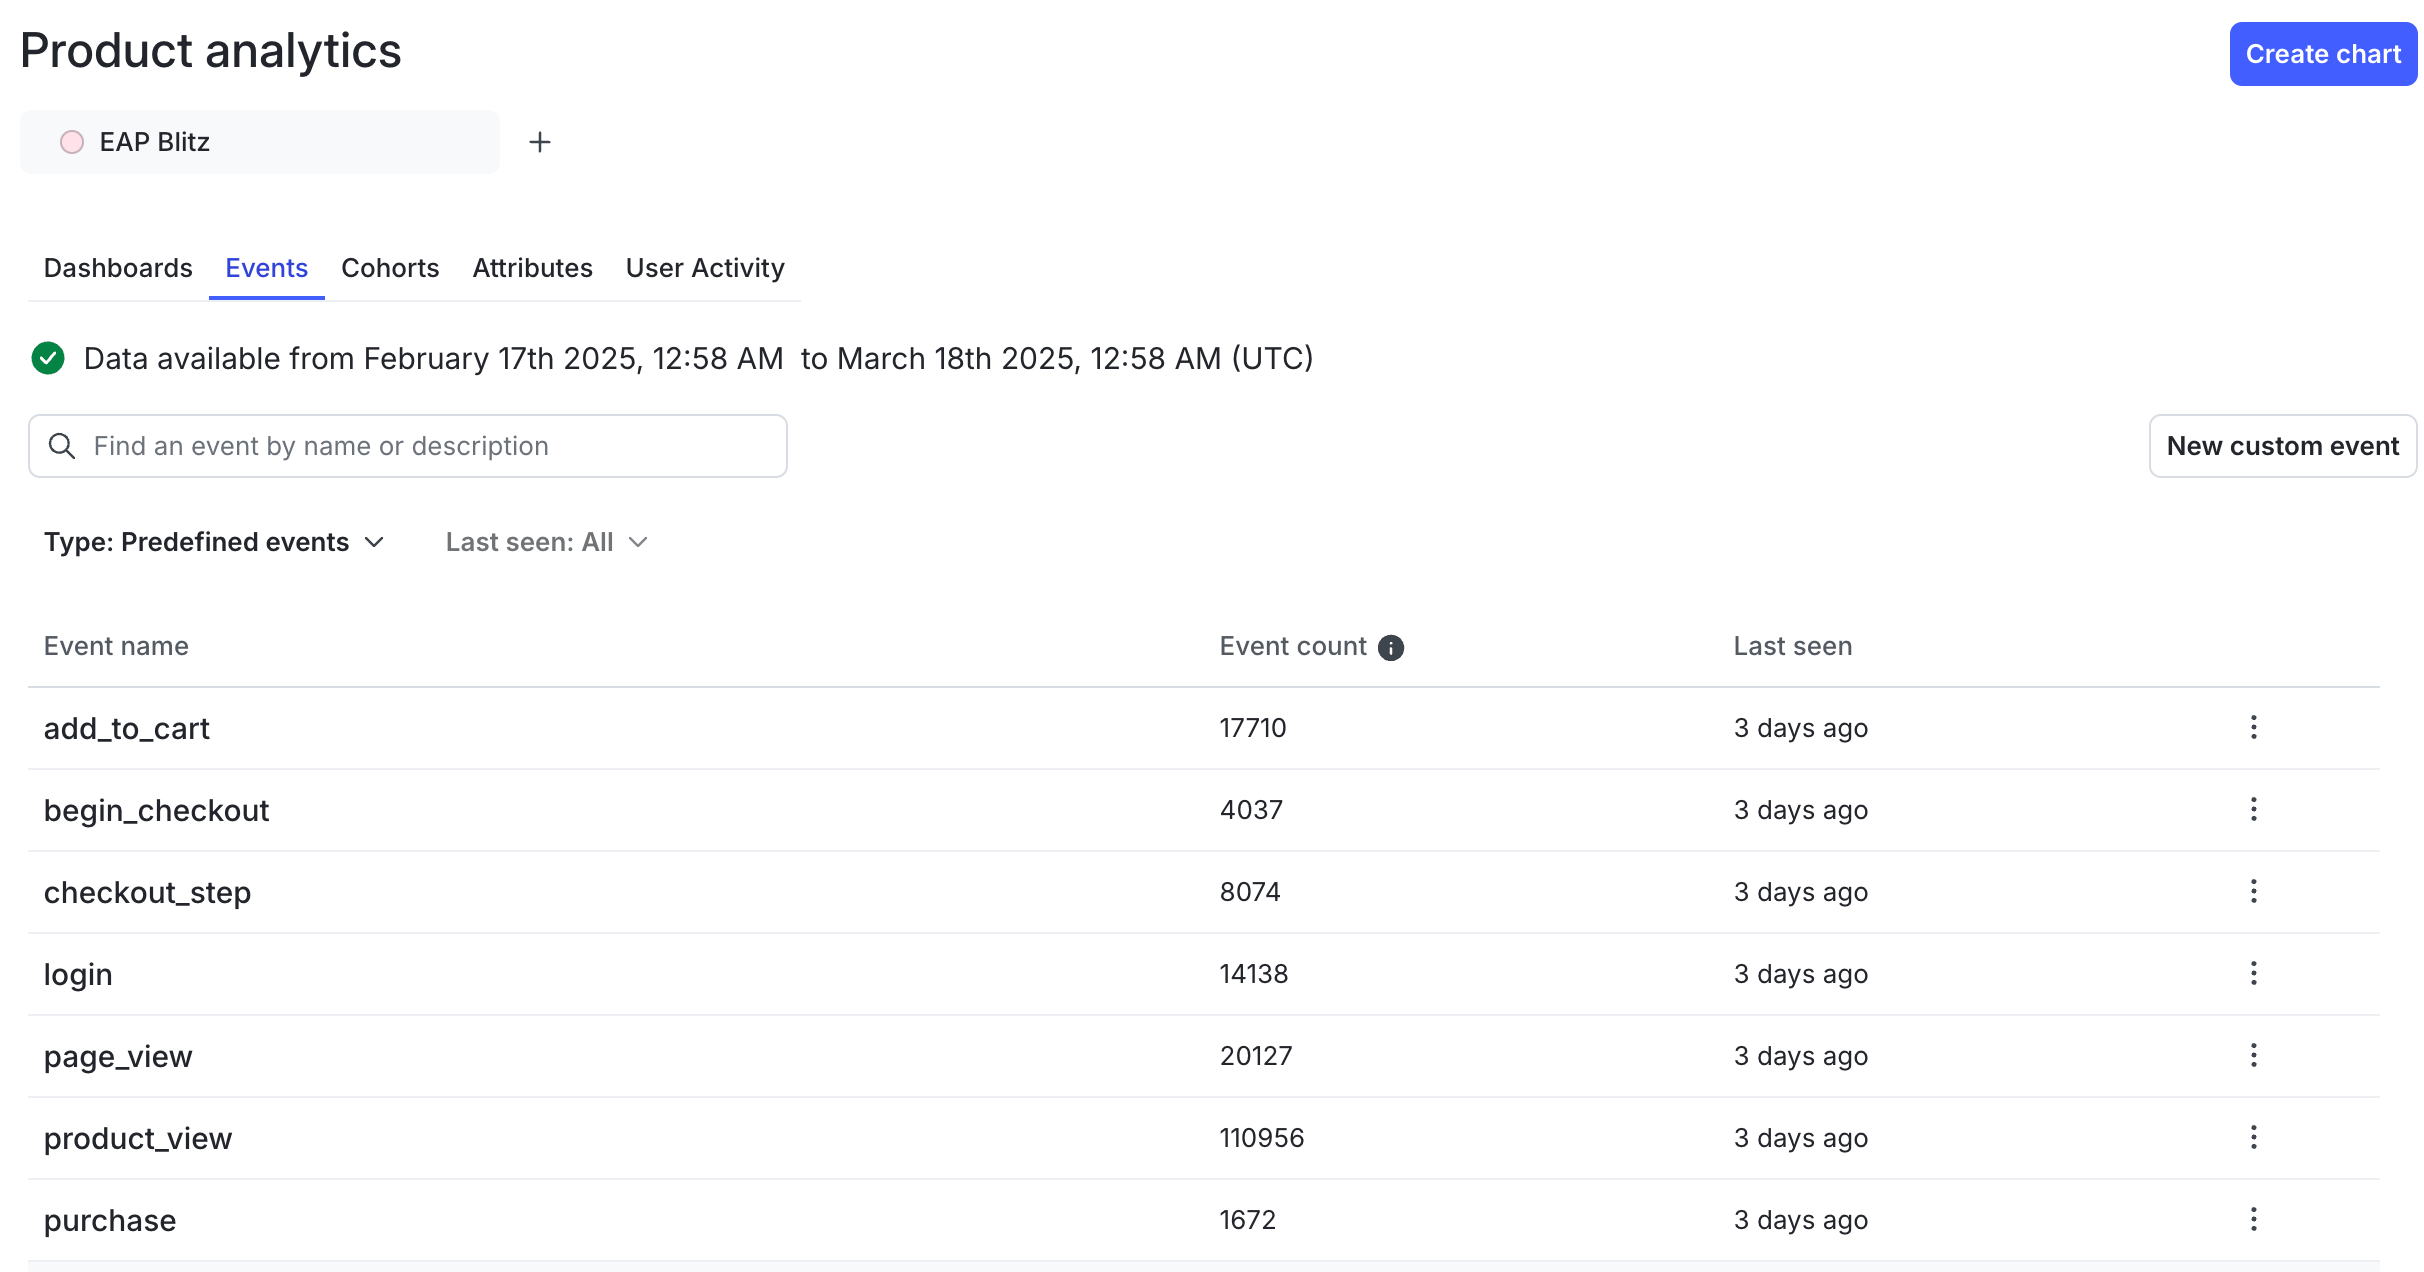
This topic explains how to use the Product analytics Events tab, and what information that tab contains. The Events tab shows you information for different events. You can also use this tab to create composite events.
The Events tab
At the top of the Events tab, a live line of text shows the period for which event data is displayed. Events that display in this tab are not the same as LaunchDarkly metric events, and should be analyzed separately.
You can search by typing in the box to find a specific event type. The Events tab is displayed with multiple columns. They are:
- Event name: Shows the name and description of an event type.
- Event type: Shows the number of times product analytics has registered an event, as well as that event’s frequency as a percentage of total events.
To hide an event, click the three-dot overflow menu and choose to Hide event.

Click an event to display its “Properties” panel. This shows event type and user data contributing to the event.
Composite events
Product analytics lets you create a single event by combining multiple events you choose. These combined events are called “composite events.” For example, you could create a composite event to track purchase-related behavior by defining that event as any of “Add to checkout,” or “Add to wishlist,” or “Share product link.”
Product analytics composite events are not the same as LaunchDarkly’s other composite events.
You can create composite events from the Events tab. Here’s how:
- From the Events tab, click Create composite event. The “Create composite event” page opens.
- Give your composite event a human-readable Name.
- Optionally, add a description.
- Choose an event from the “Events” menu.
- Optionally, click to expand the “Filter” options to further refine the event.
- Repeat steps 4 and 5 until you have added all the events you want to include in the composite event.
- Click Save. The new composite event appears in the Events tab.