LaunchDarkly MCP server
This topic describes how to get started with the LaunchDarkly Model Context Protocol (MCP) server.
Model context protocol (MCP) is an open protocol that lets you interact with REST APIs using natural language.
Using an AI assistant?
If you’re using an AI client, like Claude or Cursor, visit the installation page and choose your provider. Prompts appear to guide you through the installation. You do not need to read the rest of this page.
New to LaunchDarkly? Start with the quickstart to create your first flag, or read SDK onboarding if you’re integrating an SDK into your own application.
Enable the MCP server
LaunchDarkly provides a hosted MCP server that covers multiple product areas: feature management for managing feature flags, AgentControl for managing configs, and observability for querying logs, traces, errors, and the Dashboards page. The APIs exposed by the MCP server are called MCP tools.
The hosted MCP server is not available in LaunchDarkly federal or European Union (EU) environments
The LaunchDarkly federal and EU instances do not support the hosted MCP server. Instead, consider using the local MCP server.
To learn more, read LaunchDarkly in federal environments or LaunchDarkly in the European Union (EU).
For manual configuration steps, read LaunchDarkly hosted MCP server.
Use the MCP server
After you enable the LaunchDarkly MCP server following one of the procedures above, you can prompt your agent to create or manage your flags, AgentControl configs, and observability data. Typically you need to click Run tool or similar in your AI client to execute the result.
For example, you could try asking
Create a feature flag called “example feature” in my default project
or
Turn the “example feature” flag ON in all environments
or
Update the targeting rules for “example feature” so it’s only enabled for users in Canada
or
Show me error groups from the last 24 hours
For additional examples of prompts and responses, read the tutorial Create a feature flag in your IDE in 5 minutes with LaunchDarkly’s MCP server.
Available MCP tools
The LaunchDarkly MCP server exposes a focused set of MCP tools for different product areas including feature management, AgentControl, observability, and metrics. For a full list, read the “Available Tools” section on the MCP server page.
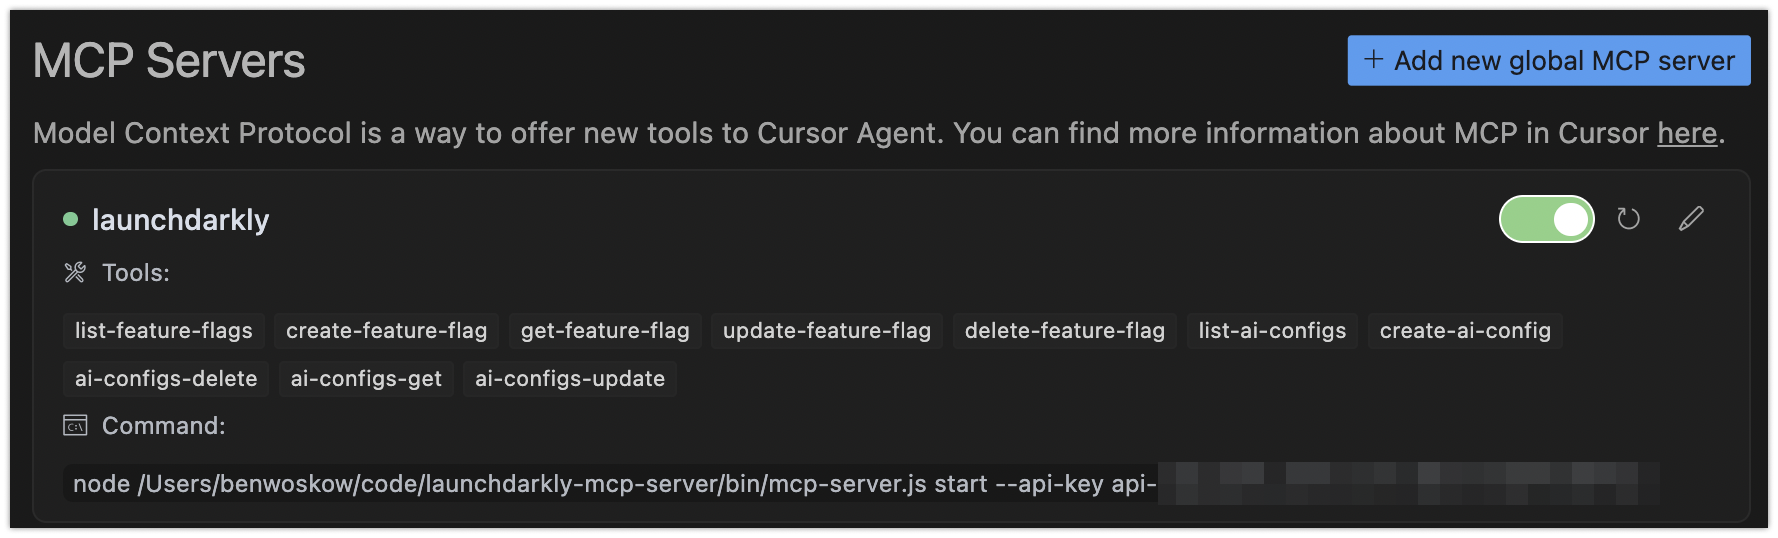
You can also find the tools provided by the LaunchDarkly MCP server by reviewing the “Tools” list in your IDE:
To learn more about how the observability server relates to Vega for auto-remediation, read Vega and the LaunchDarkly MCP server.
Use agent skills with the MCP server
For complex, multi-step workflows, LaunchDarkly agent skills provide step-by-step procedures that guide the agent through the right sequence of tool calls.
Agent skills follow the agent skills open standard and work with any compatible editor such as Claude Code, Cursor, VS Code, Windsurf, and Codex.
Install agent skills
You can browse all LaunchDarkly agent skills at Vercel’s skills.sh.
To install agent skills:
How skills and MCP tools work together
Skills help AI agents facilitate common workflows, while MCP tools give the agent direct access to manage and understand your LaunchDarkly resources.
Example: Flag cleanup workflow
When you tell an AI agent to “clean up the old-checkout flag,” the launchdarkly-flag-cleanup skill guides the agent through:
- Discovery: the skill tells the agent to check flag status across all environments using the MCP server’s flag removal readiness tool
- Assessment: the tool returns a structured readiness classification (safe/caution/not-ready) with evidence
- Code references: the skill directs the agent to check where the flag appears in code
- Action: if safe, the skill guides the agent to make the code change, hardcoding the winning variation and opening a pull request (PR)
Without the skill, the agent might call the right tools but in the wrong order, miss the code reference check, or skip the readiness assessment. The skill encodes best practices so the agent follows the same procedure every time.
Additional resources
For additional information on the LaunchDarkly MCP server, or to file issues for our team, visit the LaunchDarkly MCP server GitHub repository.