

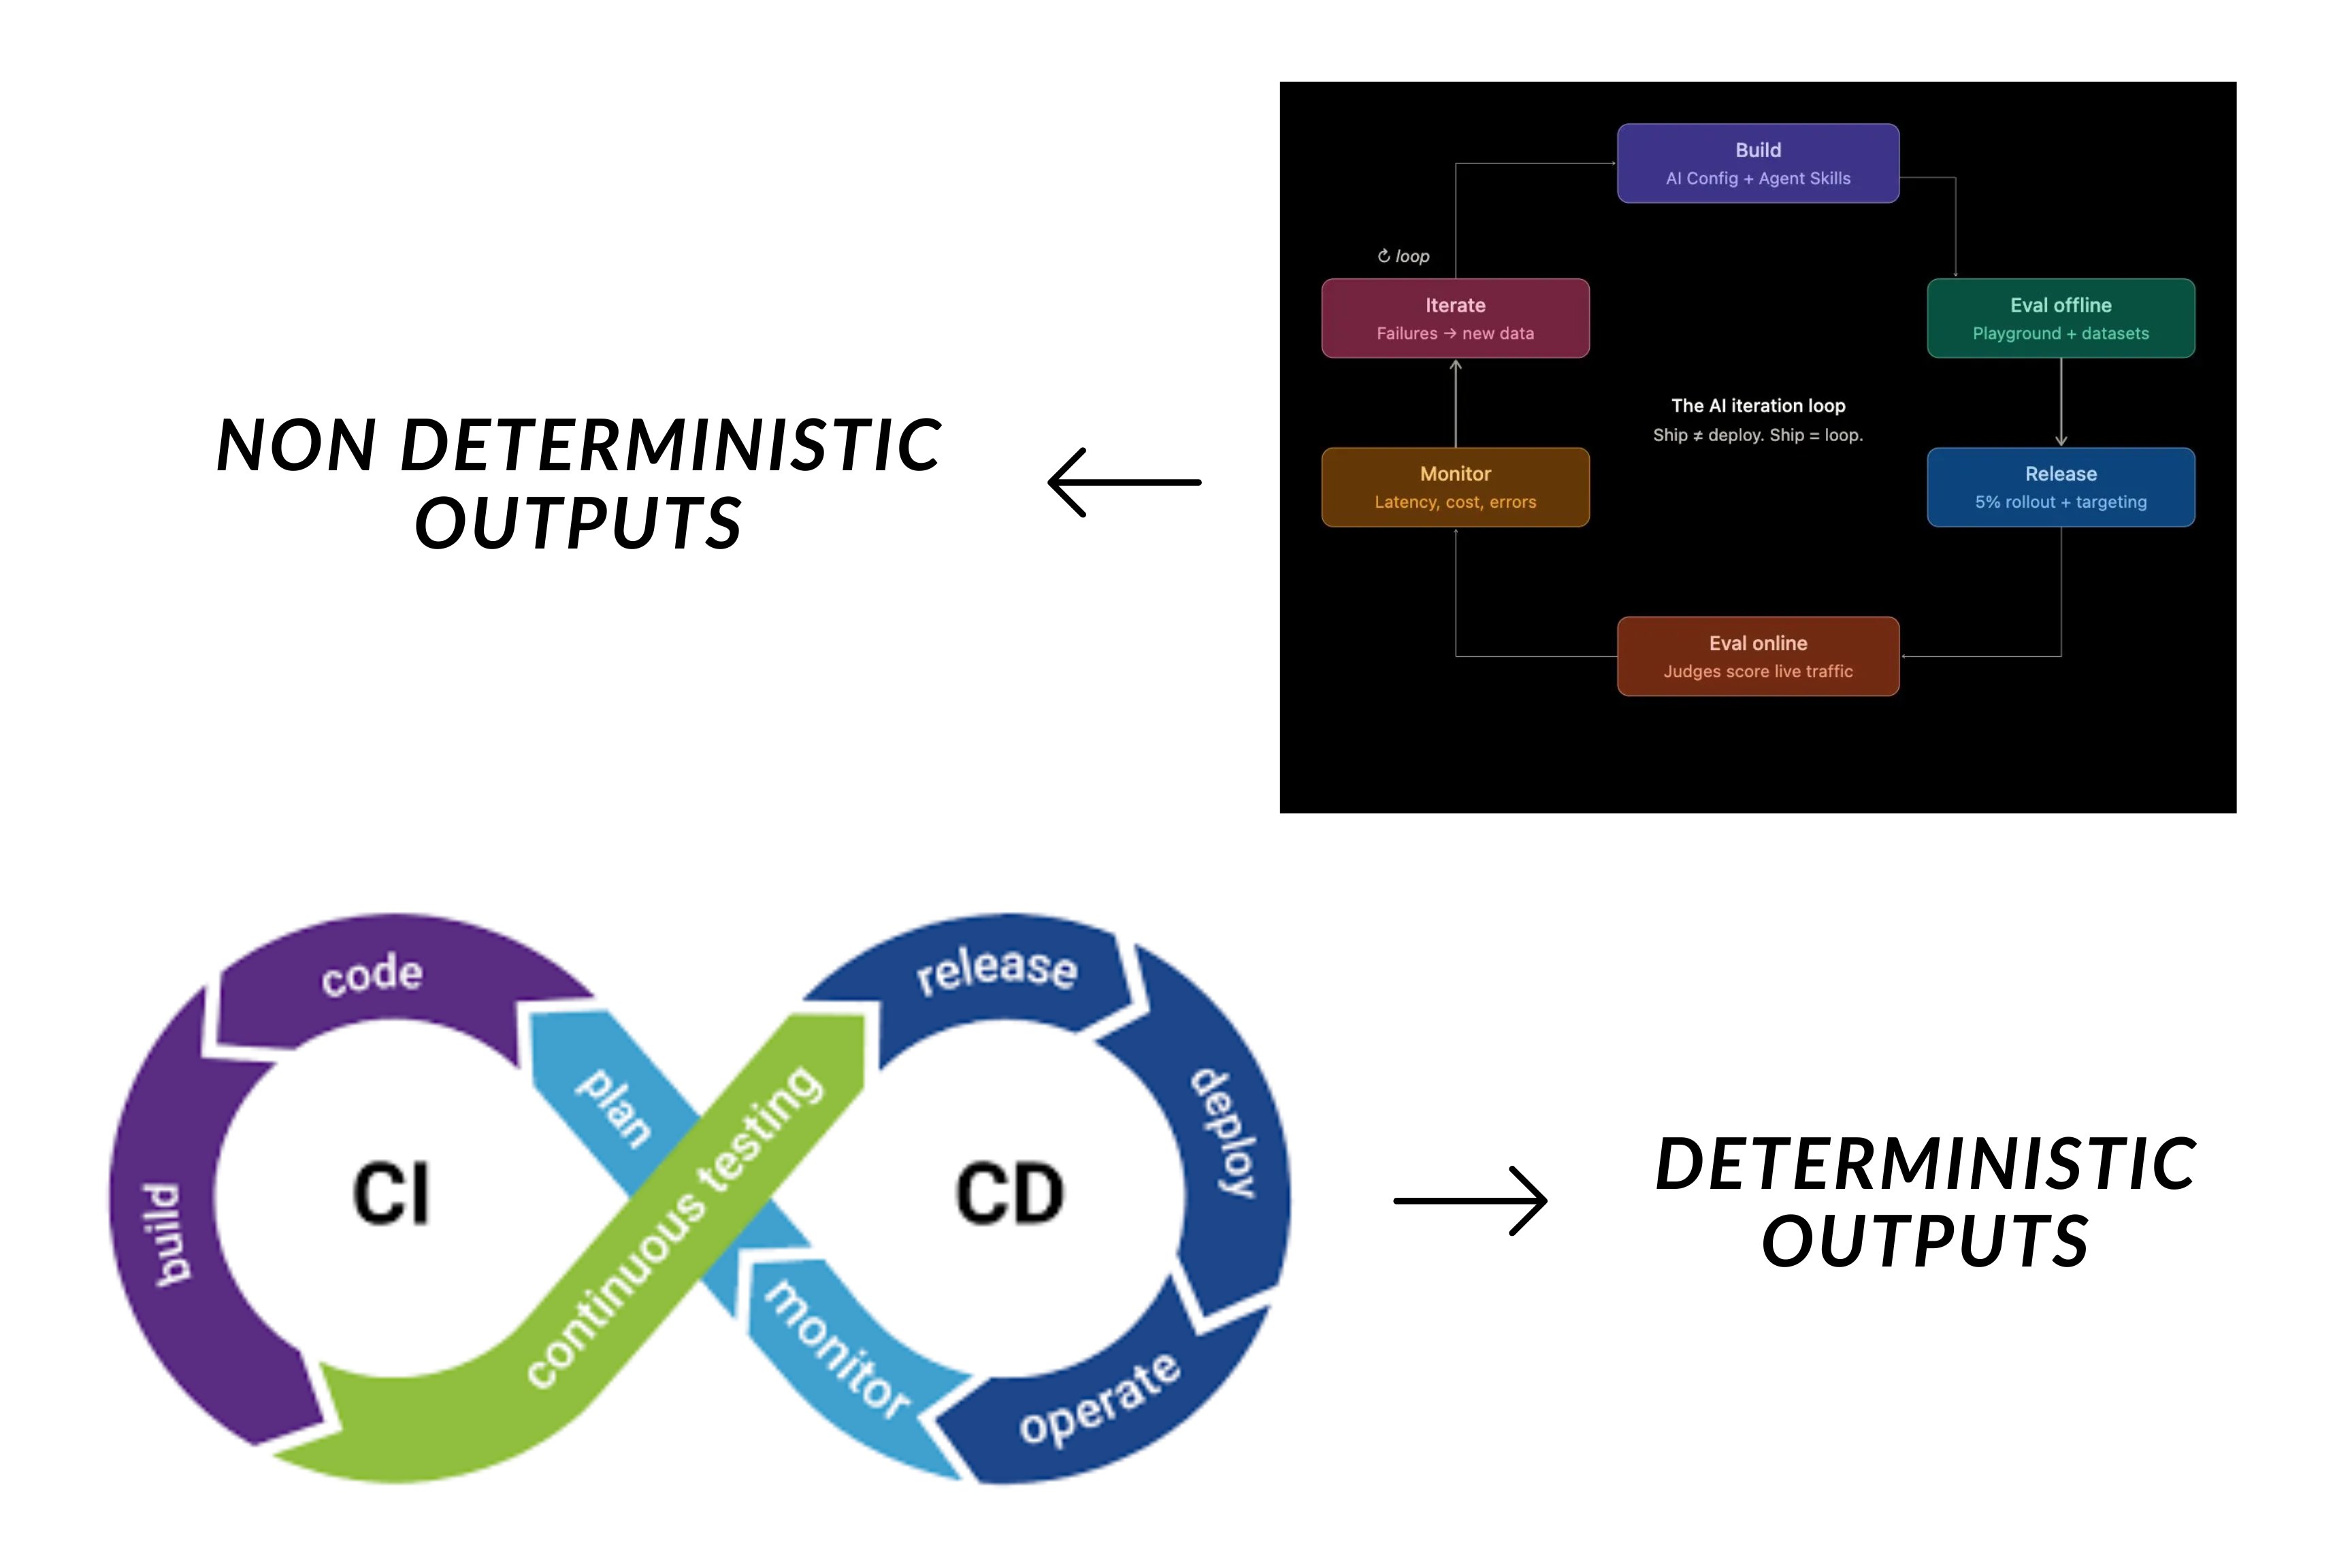
Deterministic CI/CD compared to the AI iteration loop.
AI Configs are called AgentControl configsLaunchDarkly’s AI configs product was renamed to AgentControl. The MCP server endpoints, slash commands, and some skill names still use the aiconfigs slug, and the resource itself is still commonly called a “config.” This tutorial uses the current product name and keeps the legacy slugs in code and commands where they still apply.
The Decor Agent
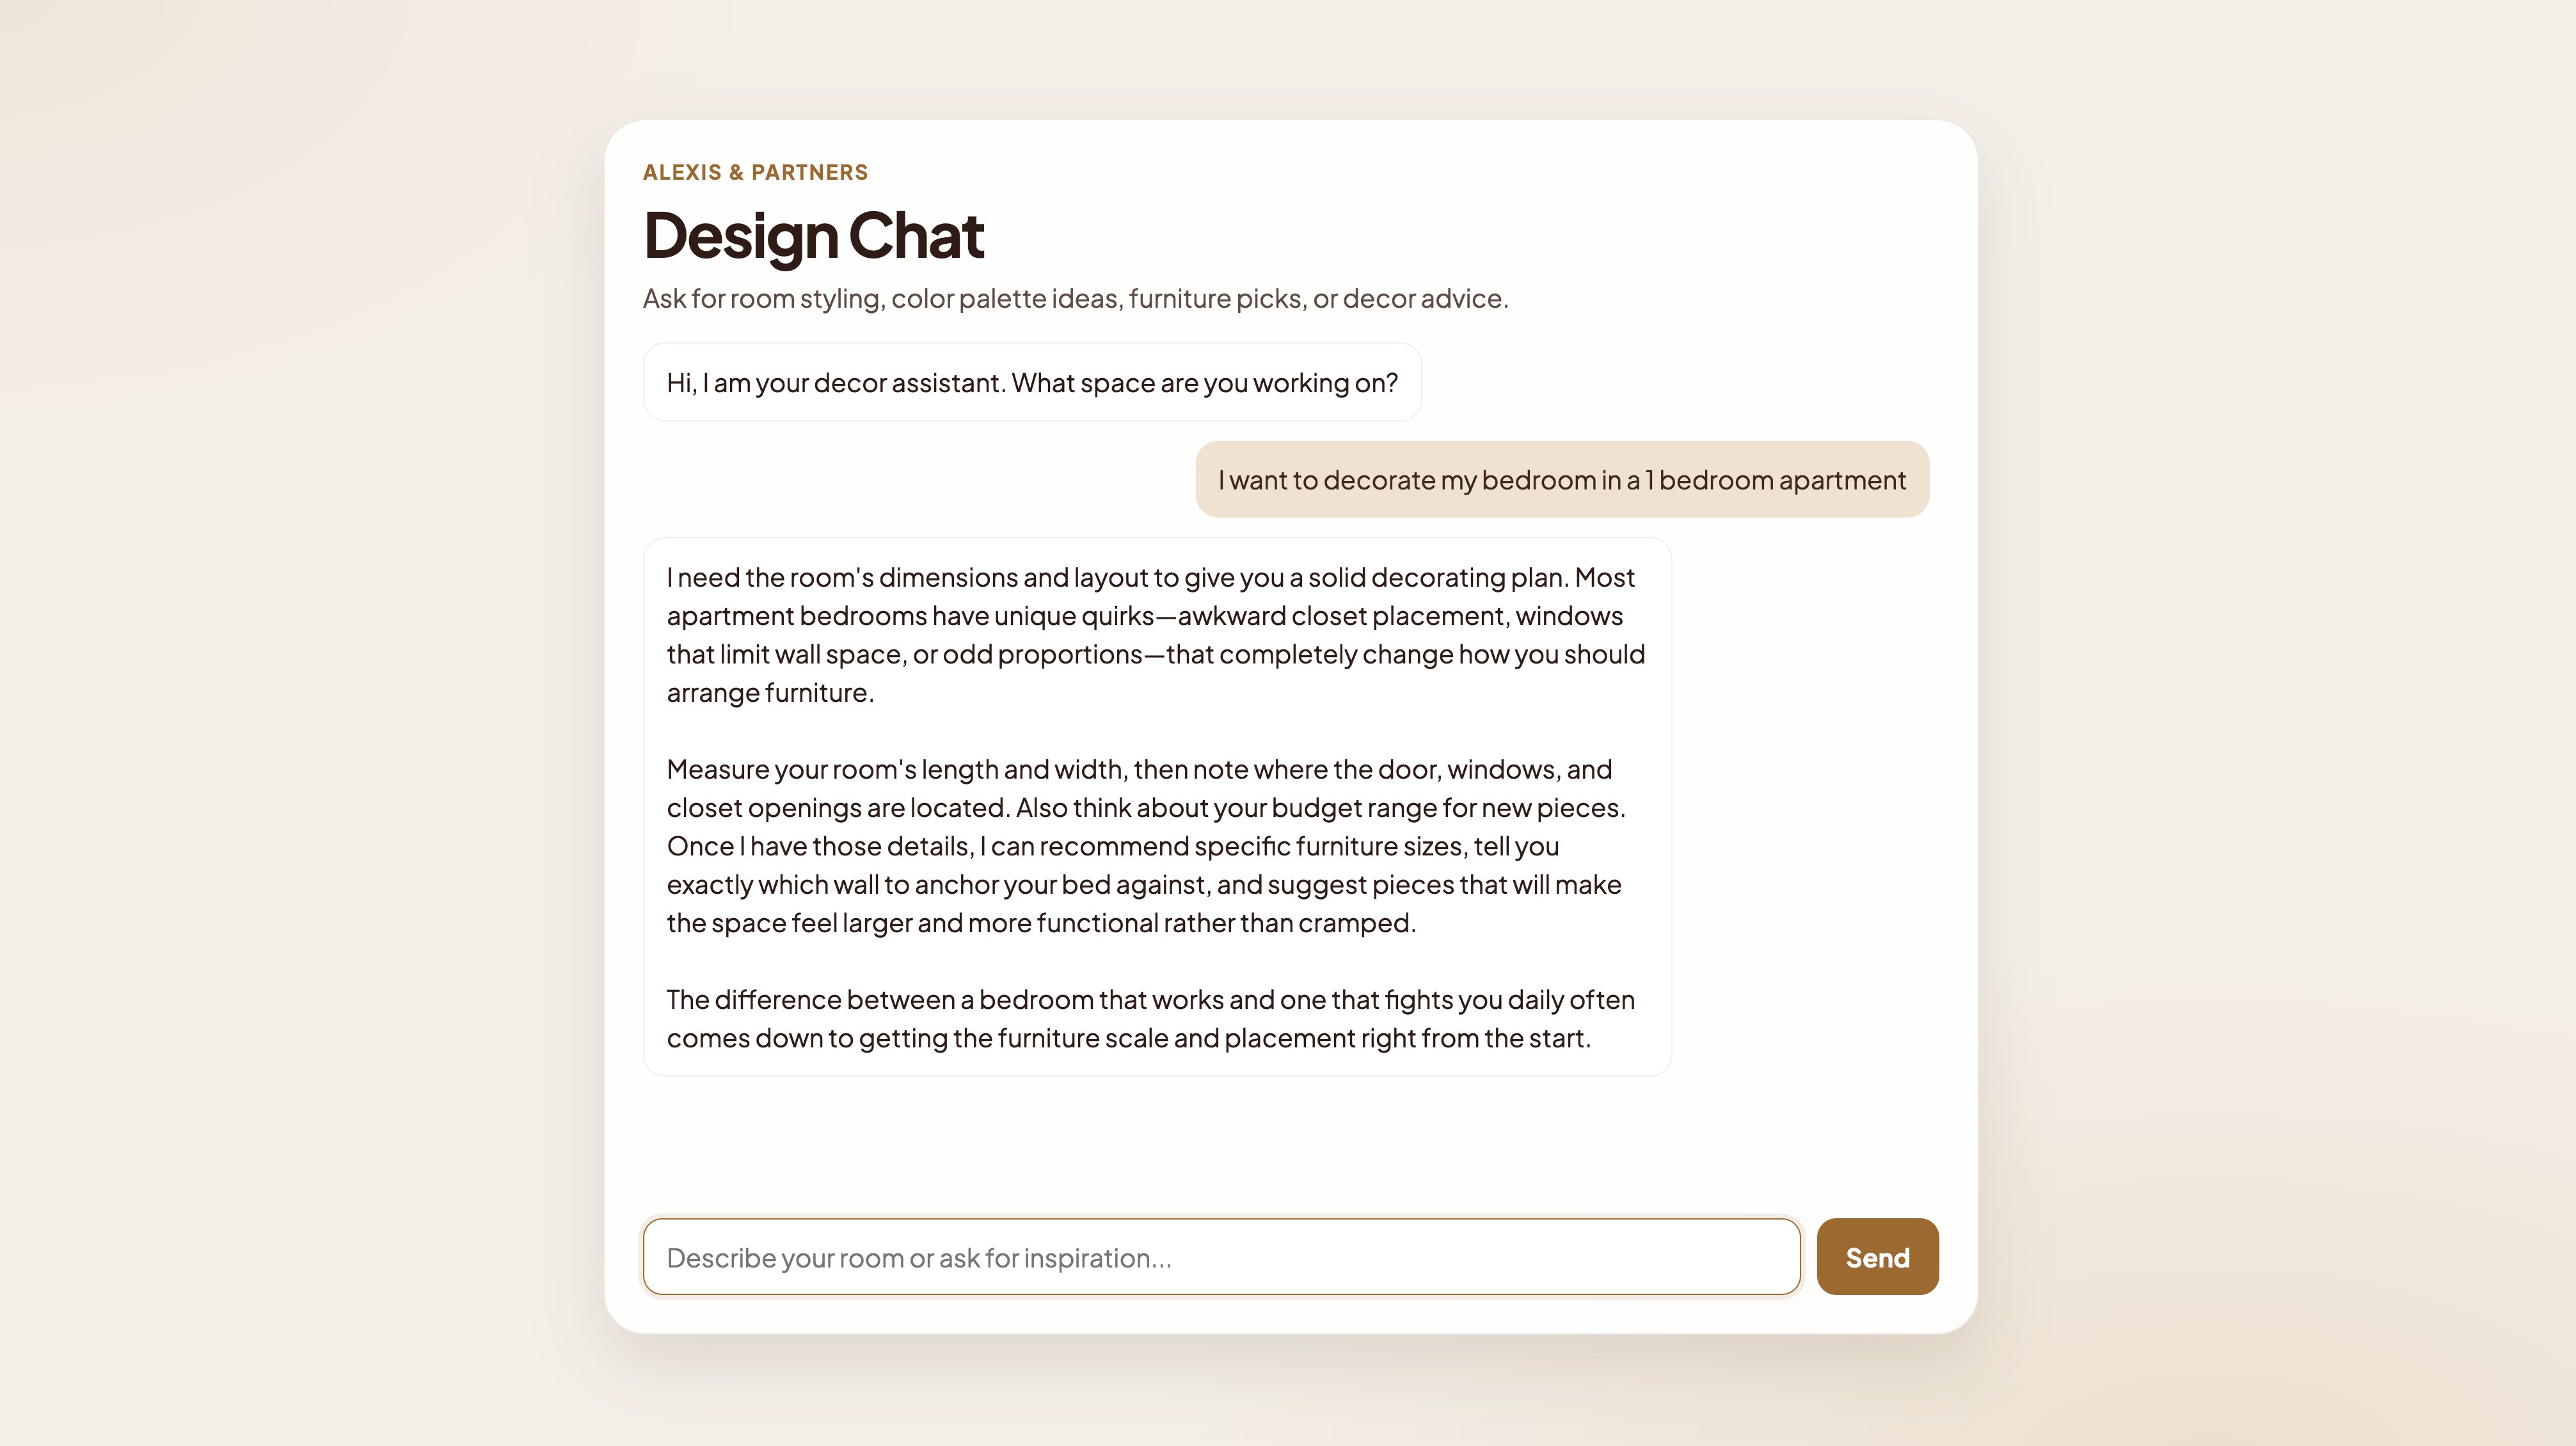
The Decor Agent chat UI.
- the style advisor to help identify decor themes,
- the room planner for understanding the right decor based on room dimensions, and
- the trendspotter, which discovers emerging design trends outside traditional styles, such as whimsical or dopamine decor.
Prerequisites
To complete this tutorial, you must have the following prerequisites:- A LaunchDarkly account with an AI project and access to your LaunchDarkly SDK key
- A hosted MCP server configured to use feature management, AgentControl configs, and observability. To learn how to install a hosted MCP server, read LaunchDarkly hosted MCP server.
- An Anthropic API key for Claude Sonnet
- Claude Code (or another Claude Agent SDK client) with the LaunchDarkly agent skills installed and the LaunchDarkly MCP server configured.
Install LaunchDarkly’s Python SDKs
requirements.txt file with these packages:
Demo walkthrough
For the demo, we’ll create a LaunchDarkly project and run the following prompts in Claude Code to create the decor-agent feature flag, the AgentControl configs, and variations and targeting to control which users can access features on the “free” and “premium” plans.1. Create the LaunchDarkly Project
Navigate to the LaunchDarkly UI and create the project with a project key. Grab the project’s SDK key and LaunchDarkly project key and place them in your.env file before we continue prompting in the Claude Code chat.
2. Feature flags as agent gates
Feature flags have long been a staple of traditional software, used to control rollouts and ship with confidence. In agentic systems, they take on a new role as an access gate for the agent itself. Wrapping an agent or skill in a flag gives you a runtime switch that decides whether that capability is reachable at all. When it’s off, the call short-circuits before it hits the model, and the user sees a graceful fallback. The flag becomes a kill switch you can flip without redeploying. Let’s execute this prompt in the chat to create the feature flag: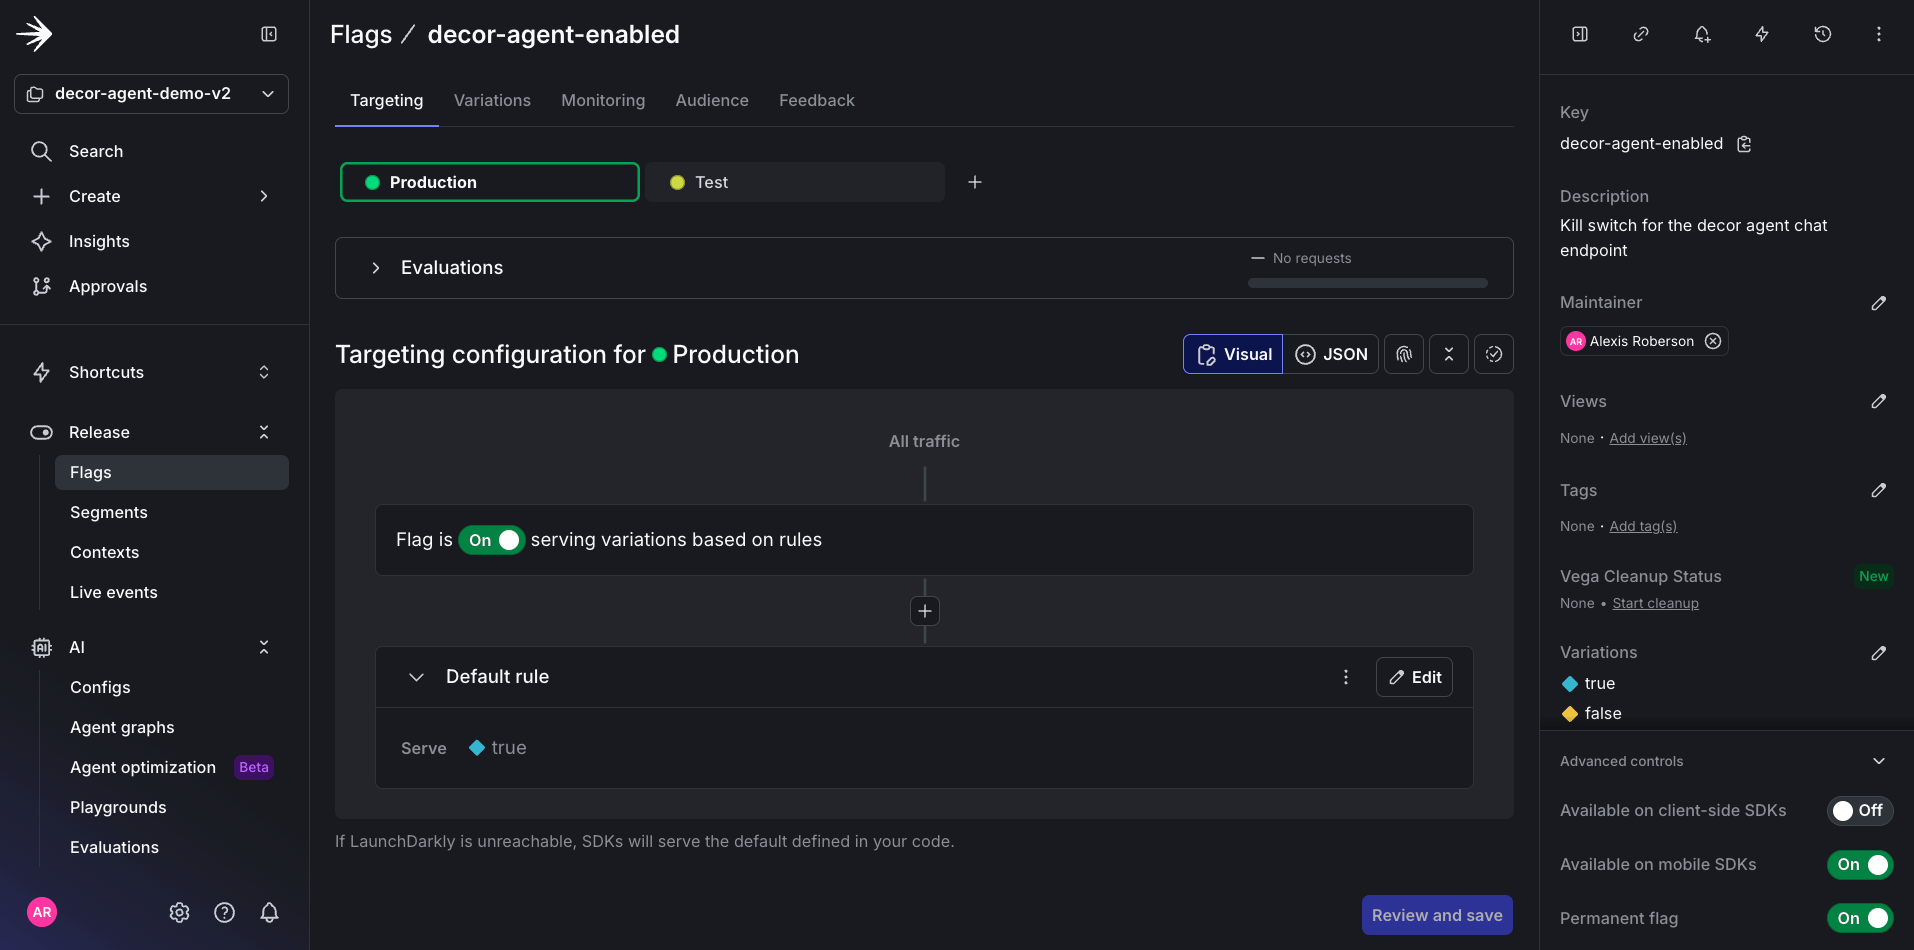
The decor-agent-enabled feature flag in the LaunchDarkly dashboard.
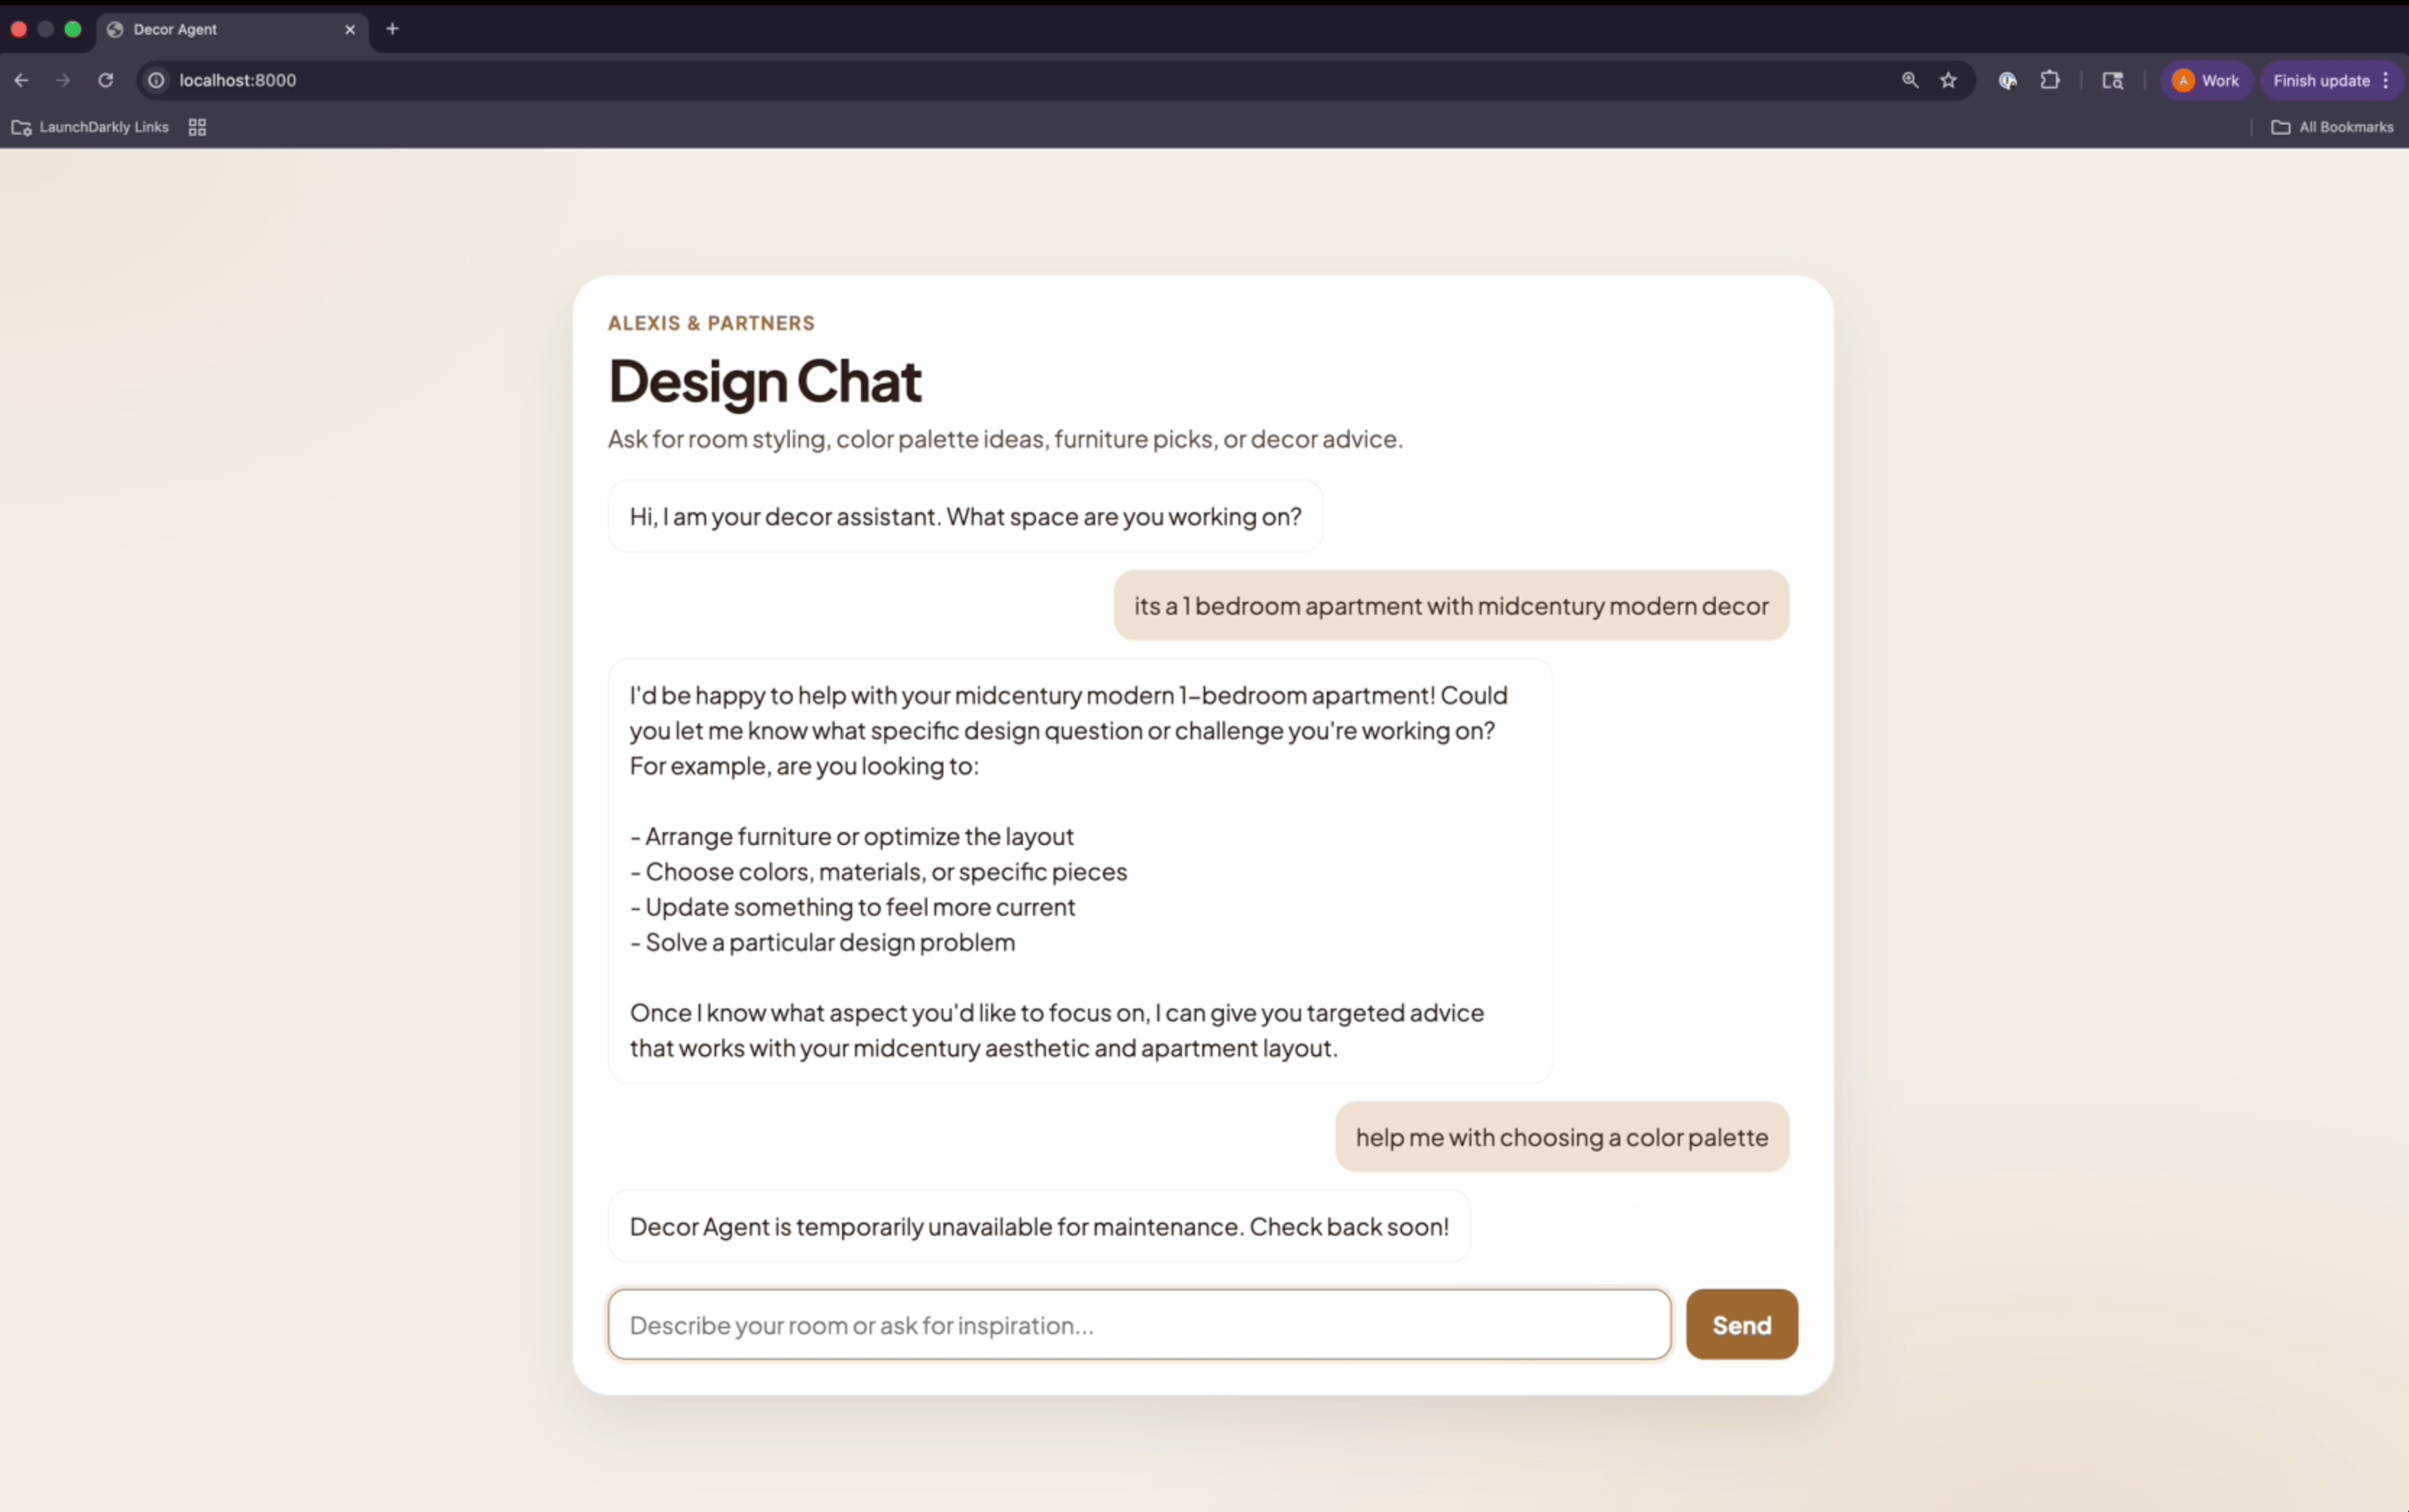
The decor agent UI when the feature flag is off.
3. Setting up AgentControl configs
Now, create four AgentControl configs to represent the overall agent and the three agent skills: style-advisor, room-planner, and trend-spotter.Use AgentControl configs in completion modeThis demo uses completion mode to keep the focus on the iteration loop foundation: flags, variations, and targeting.For multi-agent systems used in production, we recommend using agent mode, which manages tool definitions, instructions, and per-agent metadata in LaunchDarkly, rather than in your application code, and allows per-agent monitoring out of the box.The targeting, variation, and evaluation patterns in this tutorial apply to both modes.
decor-agent/app/prompts.py which contains all of the system prompts for each AI component. These will be the prompts transferred to LaunchDarkly to establish the behavior of the overall agent and the three agent skills.
Now, let’s create each AgentControl config by running the following prompt:
And you can always verify the prompts worked in the UI.
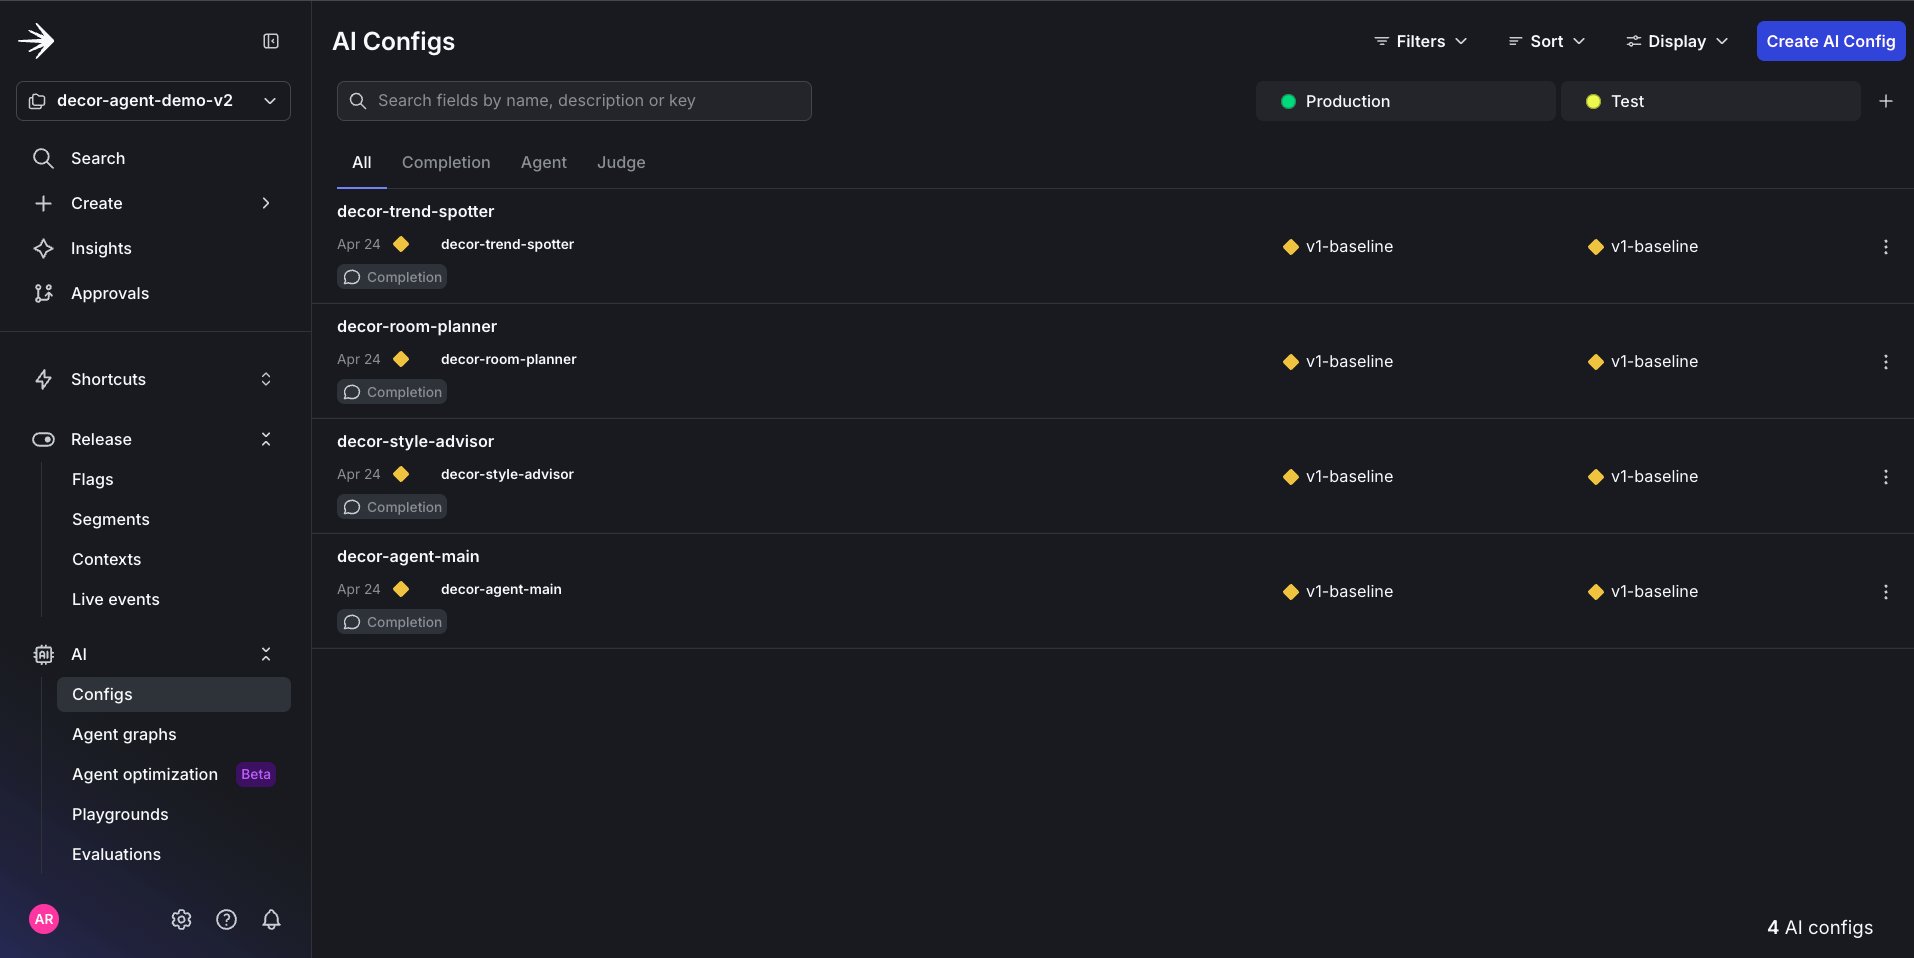
The four configs created in the LaunchDarkly UI.
decor-agent-main AI Config, you should be able to see the transferred prompt from prompts.py.
Click to expand the decor-agent-main system prompt
Click to expand the decor-agent-main system prompt
4. Variations and targeting
Because AI agents are nondeterministic, the most effective way to test output quality is by testing multiple variations of the same AI Config. And in this case, we will create two new variations for thedecor-agent-main AI Config:
Variations aren’t limited to prompt changes. Each variation can override the model,
temperature, and max_tokens independently. Here, the budget-conscious variation runs on a cheaper, faster Haiku model to keep free-tier costs down, while the luxury-curator variation stays on Sonnet for richer, more nuanced recommendations.
The prompt for these variations will be almost identical to the decor-agent-main, except each variation contains more granular constraints to ensure they’re called for the right scenario.
Here’s a prompt to create the variations:
Click to expand the variation create prompt
Click to expand the variation create prompt
decor-agent-main config.
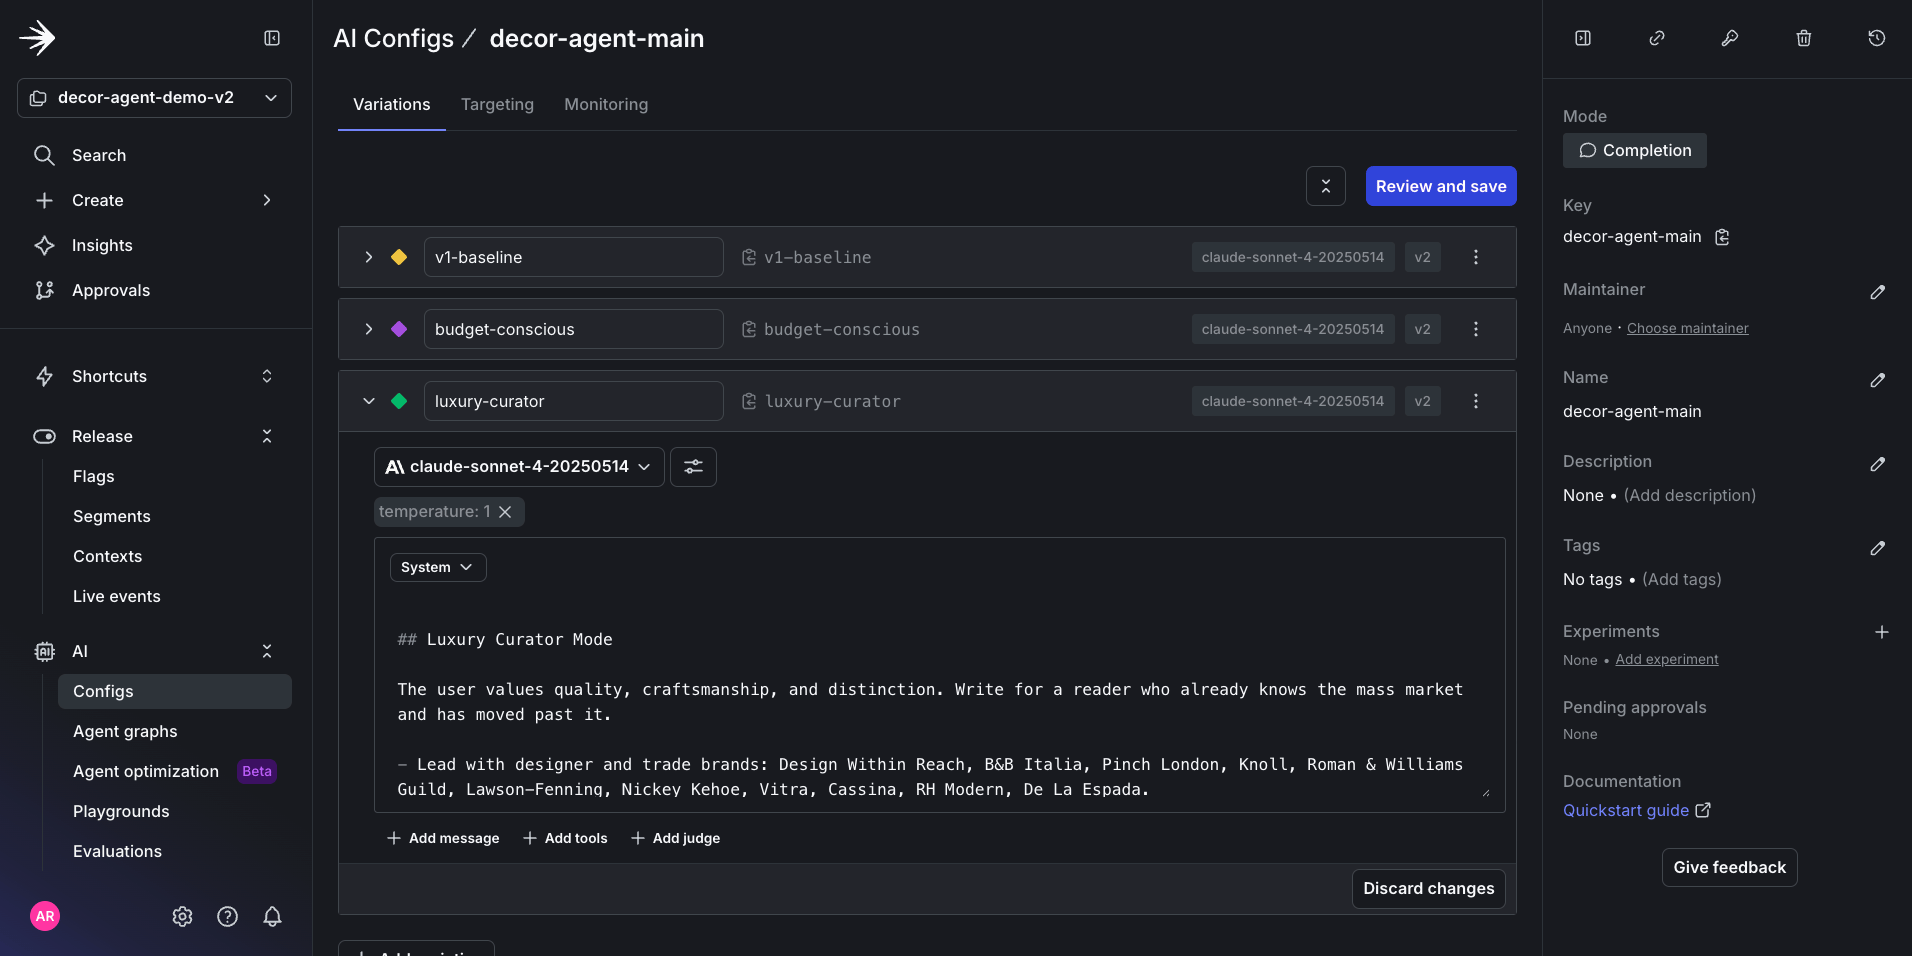
Variations visible in the LaunchDarkly UI.
5. Targeting for variation
For this tutorial, we can create two tiers called “free” and “premium.” All users will have access to the budget-conscious variation, but only premium users get access to the luxury-curator variation. To configure this in the LaunchDarkly UI, use this prompt in Claude:
Here is how the successful outcome of this prompt appears in the LaunchDarkly UI:
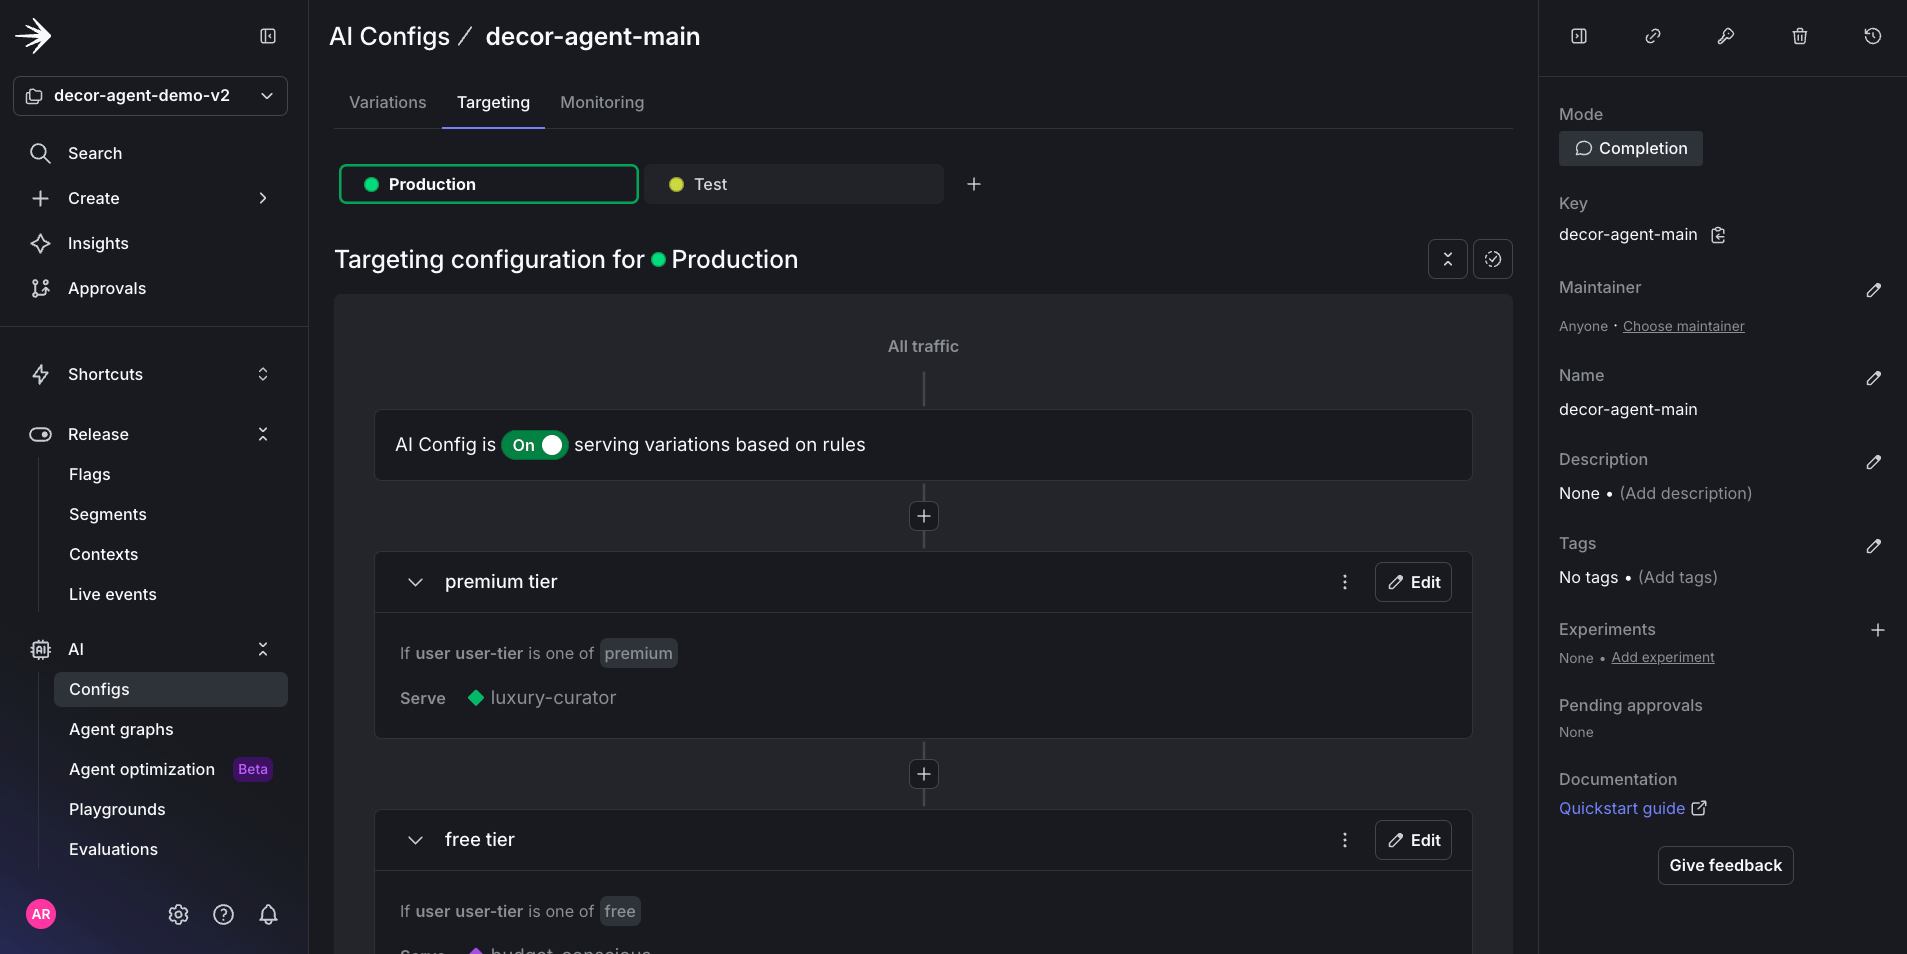
AI Config targeting for decor-agent-main variations in the LaunchDarkly UI.