
Vega for auto-remediation
Vega for auto-remediation
Vega is the LaunchDarkly AI-powered agent. To use Vega, your role requires the Vega actions. For general information about Vega, including eligibility, pricing, and permissions, read Vega.
Vega for auto-remediation helps you understand, debug, and fix observability issues directly within LaunchDarkly. Vega works inside observability views like logs, traces, errors, and sessions, gathering relevant context, such as recent flag changes and alerts, to suggest improvements and next steps.
Vega is paired with observability alerts and can analyze observability data automatically when thresholds are breached. It’s like having an on-call engineer available at all times, ready to triage the error spike and remediate the issue.
Vega and the LaunchDarkly MCP server
If you want to query the same observability data from your own AI client instead of from inside LaunchDarkly, you can use the LaunchDarkly MCP server. Vega and the LaunchDarkly MCP server are complementary, and you can use them together.
The LaunchDarkly MCP server and Vega both help you understand observability data with AI assistance, but they run in different places and are used for different workflows:
For example, you might let Vega triage an alert inside LaunchDarkly and open a draft pull request, then switch to your AI client and use the LaunchDarkly MCP server to investigate the affected traces while you review the fix. The LaunchDarkly MCP server lets you prompt your agent to query available observability data. For example, you could try asking:
Show me error groups from the last 24 hours for the checkout service
or
Find the slowest traces in the last hour where service_name is “gonfalon-web”
or
Create a dashboard that shows error rate and p95 latency for the payments service
or
Which flag evaluations happened during session <session-id>?
To learn more, read LaunchDarkly hosted MCP server.
Vega features
Vega for auto-remediation includes two primary features that work together inside LaunchDarkly:
Vega agent
Vega agent is an AI debugging assistant embedded in observability views. It investigates logs, traces, errors, and alerts, summarizing what happened and identifying causes. If you connect Vega agent to GitHub, it can suggest or open fixes.
Vega agent has two modes:
Read-only mode
In this mode, Vega focuses on understanding and diagnosing issues. It summarizes observability data, highlights anomalies, and identifies likely root causes, often correlating them with recent flag or code changes. This is the default mode.
If you’ve connected Vega to GitHub, you can specify which repositories this mode can access for additional context, such as recent commits or deployments. However, Vega never proposes or modifies code in read-only mode. It only reads your code to enhance its analysis. You can further improve Vega’s analysis by adding repository instructions. To learn more, read Customizing Vega with repository instructions.
Agent mode
In agent mode, Vega moves beyond diagnosing to making changes on your behalf. It can create dashboards, graphs, and experiments from your observability data. It can also analyze the relevant code paths, generate candidate changes, and open a pull request with proposed edits and explanations.
You can select agent mode whether or not you have connected GitHub. The flows that write to your repositories, such as opening a pull request, require a connected GitHub account. To learn how to set this up, read Connecting Vega to GitHub.
Vega’s code suggestions are always visible and reviewable before any changes are merged, so you maintain complete control over your code.
Change the Vega agent mode
The Vega panel includes a mode selector labeled with the current mode, either Read-only or Agent.
To change the mode:
- Open the Vega panel from an observability view.
- Click the mode selector, labeled either Read-only or Agent.
- Select the mode you want to use.
Vega remembers your selection in your browser and uses it the next time you open the panel. Because the mode is a personal preference rather than an account setting, changing it does not affect other members.
Vega omits the mode selector when you invoke it for a task that requires a specific mode, such as creating a flag. Alerts and Slack set their mode separately. To learn more, read Where to use Vega agent and Default Slack settings.
Where to use Vega agent
There are two primary areas where Vega agent is useful:
- In observability views
- In alerts
You can launch Vega directly from logs, traces, errors, and session replays. When it opens, it automatically gathers the surrounding context, including related spans, recent flag changes, and correlated events, to explain what happened and why.
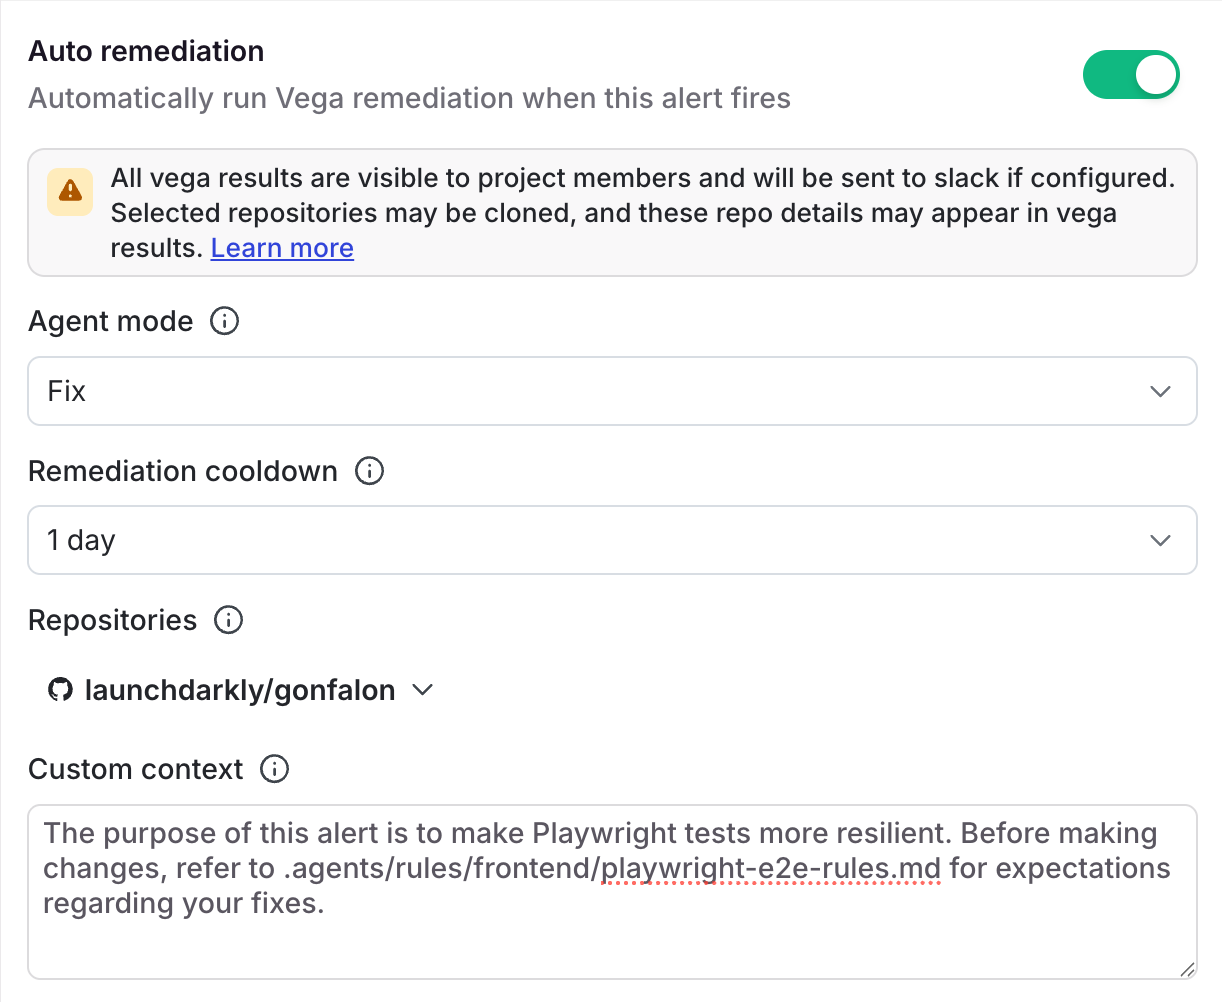
You can also configure Vega to automatically remediate alerts. In your alert’s configuration settings, toggle on Auto remediation and choose an agent mode of Read-only or Agent. In alerts, Agent requires a connected GitHub account. When the alert fires, Vega analyzes the triggering query, correlated telemetry, and recent flag or code changes, and can suggest or open fixes depending on the mode you selected.
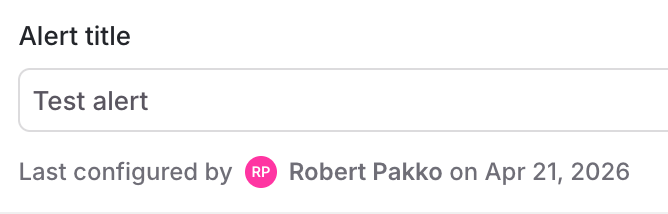
The alert configuration shows a “Last configured by” indicator with the member who saved the alert settings. Auto-remediation runs using this member’s permissions, so Vega can only access the repositories and resources that member has access to. If that member’s permissions change or their account is deactivated, you should update the alert configuration with a different member to ensure that automatic remediation continues to work.
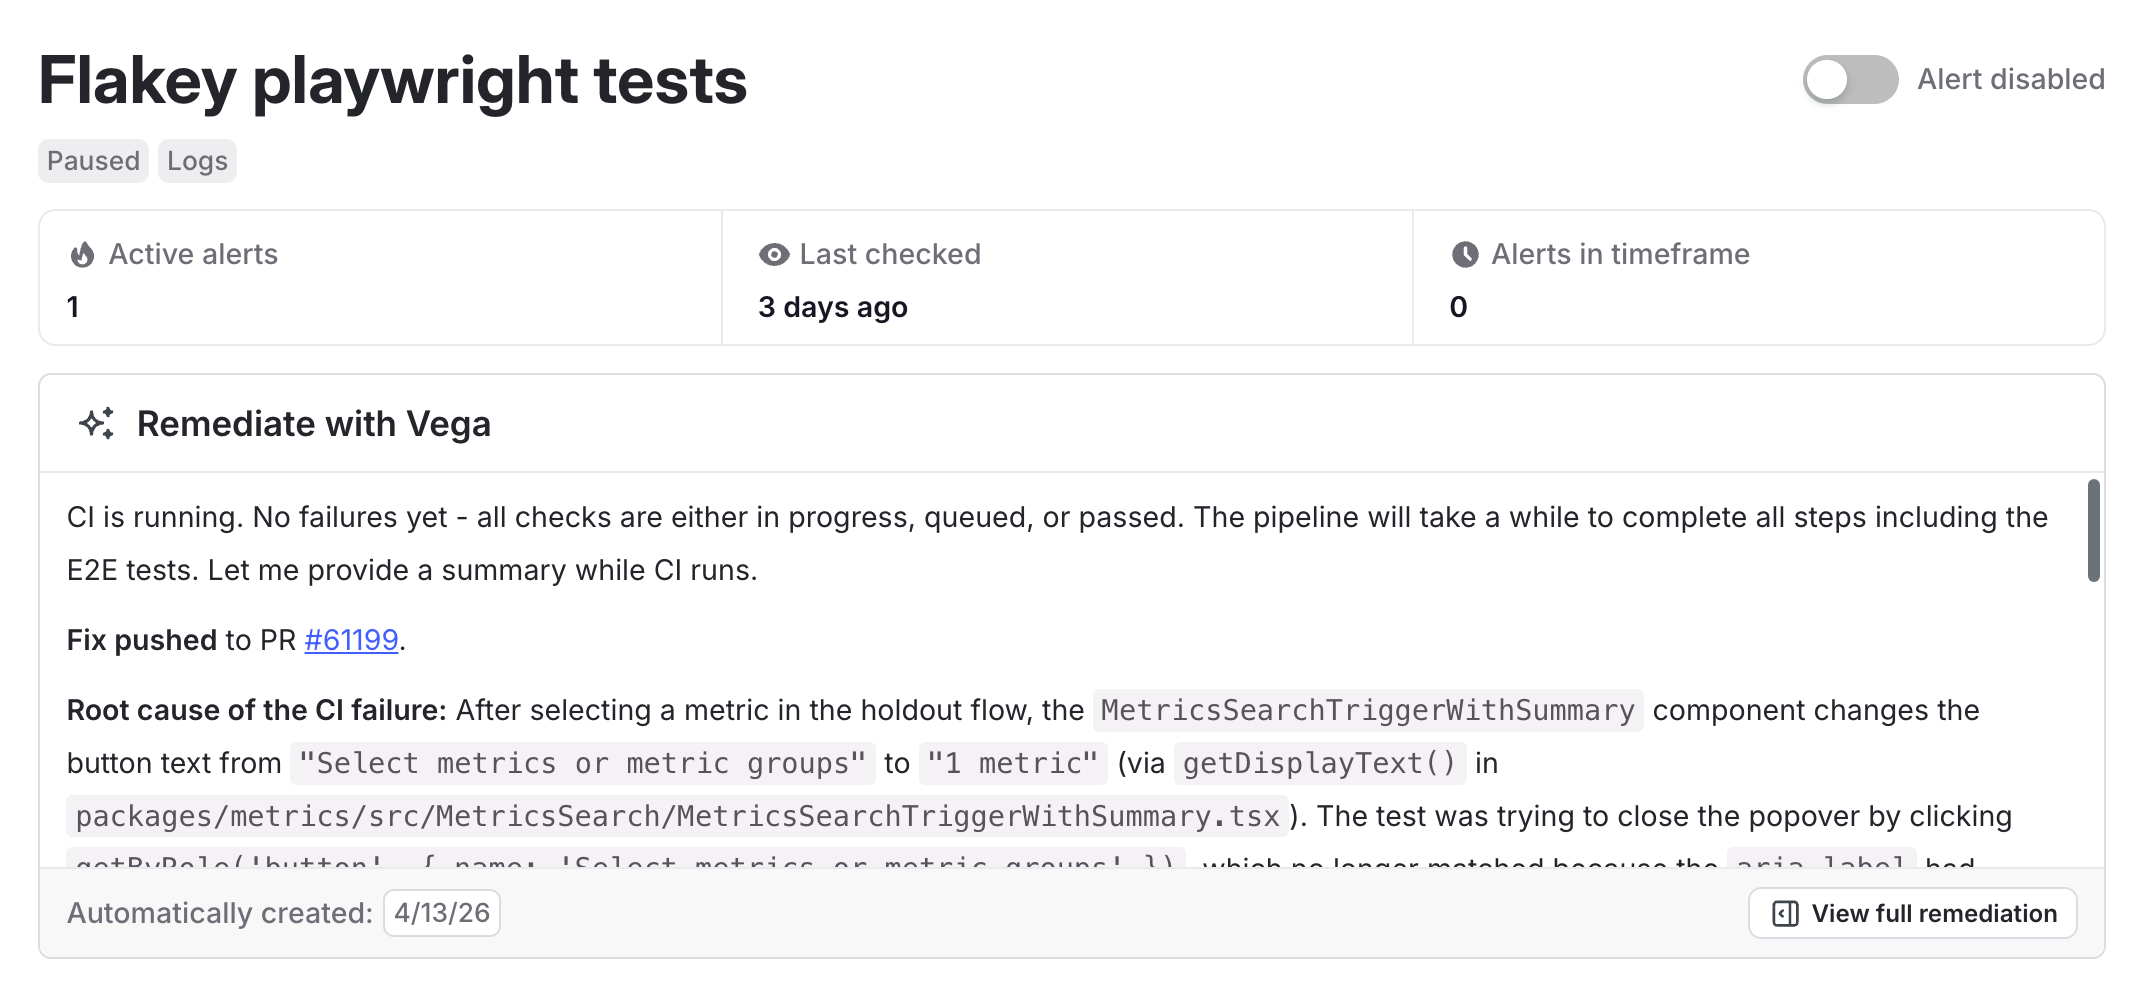
When Vega remediates an alert, the alert detail page shows a summary of the investigation, including the root cause and any fixes that were pushed.
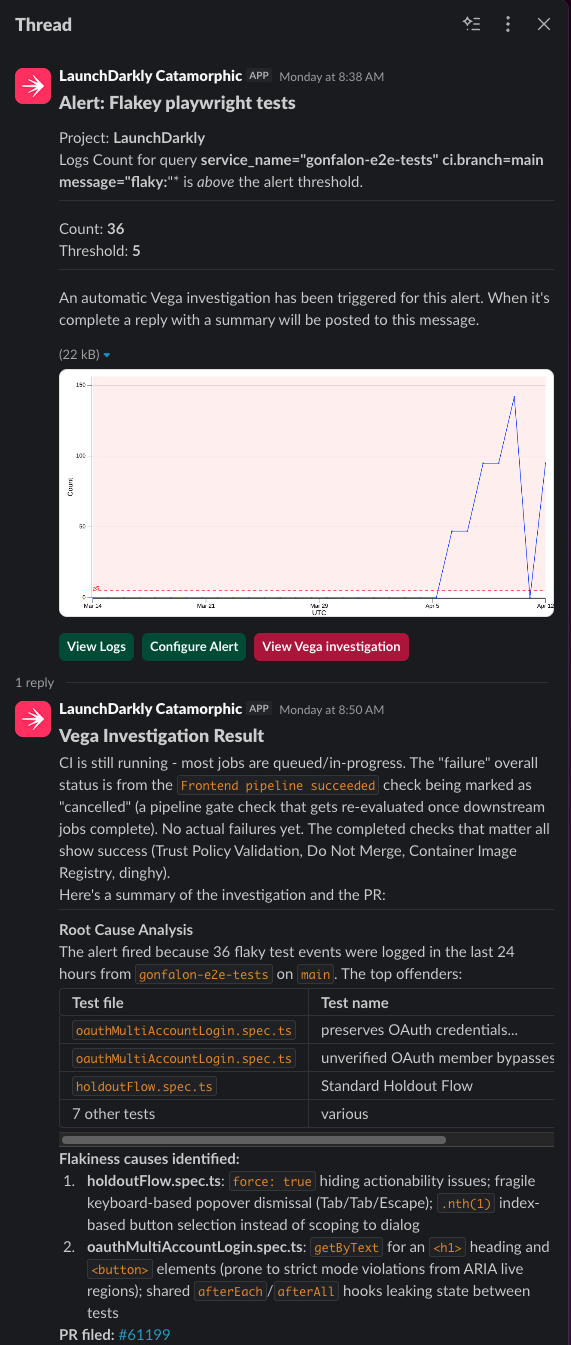
If you’ve configured Slack notifications for the alert, Vega posts its remediation results as a threaded reply to the original alert message.
Create a Jira issue from a Vega investigation
After Vega investigates an alert, error, or session, you can ask it to open a Jira issue for the follow-up work. Vega drafts a title and description from what it found, then asks which Jira project and issue type to use. Vega confirms the details with you before it files anything. After Vega creates the issue, it returns a link so you can open the issue in Jira, and the issue includes a link back to the alert, error, or session that prompted it.
For example, after Vega summarizes an error, you could ask:
Open a Jira issue to track the fix for this error
Vega responds with the Jira projects and issue types connected to your account so you can choose where the issue goes.
To create Jira issues with Vega, you need the following:
- The Jira Cloud integration set up using Jira Forge. To learn how, read Jira Cloud.
- Vega running in agent mode. In read-only mode, Vega can draft the issue title and description and list your connected Jira projects, but it does not file the issue. To learn how to change the mode, read Change the Vega agent mode.
You can also create Jira issues from alerts and errors yourself, without Vega. To learn how, read Create Jira issues from observability data.
Connecting GitHub
GitHub authentication is optional. Read-only mode uses it to read your code for additional context, and agent mode requires it for the flows that write to your repositories, such as opening a pull request. To learn how to connect GitHub to Vega, read Connecting Vega to GitHub.
Vega search assistant
Vega search assistant is a natural-language search tool that lets you ask questions about your observability data in plain language such as, “Which traces increased error rates?”.
Vega automatically converts your question into a structured observability query, runs it across the appropriate datasets, and presents results within LaunchDarkly’s observability dashboards. Vega is prompted on the specific query language used by the product so you can focus on asking meaningful questions.
Where to use Vega search assistant
You can trigger the search assistant from any search bar in logs, traces, errors, or sessions. Type a natural-language question and Vega translates it into the equivalent structured query.
After you submit the question, Vega shows both the interpreted query, so you can learn the syntax, and the search results with relevant metrics, traces, or logs.