Create AI Configs
Overview
This topic explains how to create and update AI Configs.
An AI Config is a resource that you create in LaunchDarkly. You can use AI Configs to customize, test, and roll out new large language models (LLMs) within your generative AI applications.
When you create an AI Config, you choose how it is configured:
- Completion mode uses messages and roles to configure prompts for single-step completions. Use this mode when you want to customize and test different prompts or model parameters.
- Agent mode uses instructions to configure structured, multi-step workflows. Use this mode for orchestration or other complex tasks that require coordinated execution. You can optionally attach tools to variations in either mode. Agent mode is a configuration option, not a separate resource. AI Configs in agent mode participate in the same workflows as AI Configs in completion mode.
You can attach judges to completion-mode AI Config variations in the LaunchDarkly UI. For other variations, invoke a judge programmatically using the AI SDK. To learn more, read Online evaluations in AI Configs.
Working with AI Configs is available to members with a role that allows AI Config actions. The LaunchDarkly Project Admin, Maintainer, and Developer project roles, as well as the Admin and Owner base roles, include this permission.
Availability
AI Configs is an add-on feature. Access depends on your organization’s LaunchDarkly plan. If AI Configs does not appear in your project, your organization may not have access to it.
To enable AI Configs for your organization, contact your LaunchDarkly account team. They can confirm eligibility and assist with activation.
For information about pricing, visit the LaunchDarkly pricing page or contact your LaunchDarkly account team.
Create an AI Config
Follow the steps below to create an AI Config, or use the in-app onboarding experience to set up your first AI Config directly in the LaunchDarkly UI.
-
Click Create and choose AI Config to open the “Create AI Config” dialog.
-
Select either Completion or Agent:
- Completion mode: Configure prompts with messages and roles. Best for single-step completions. To learn more, read Create and manage AI Config variations.
- Agent mode: Configure structured, multi-step workflows using instructions. Best for orchestration and reasoning tasks. To learn more, read Agents in AI Configs.
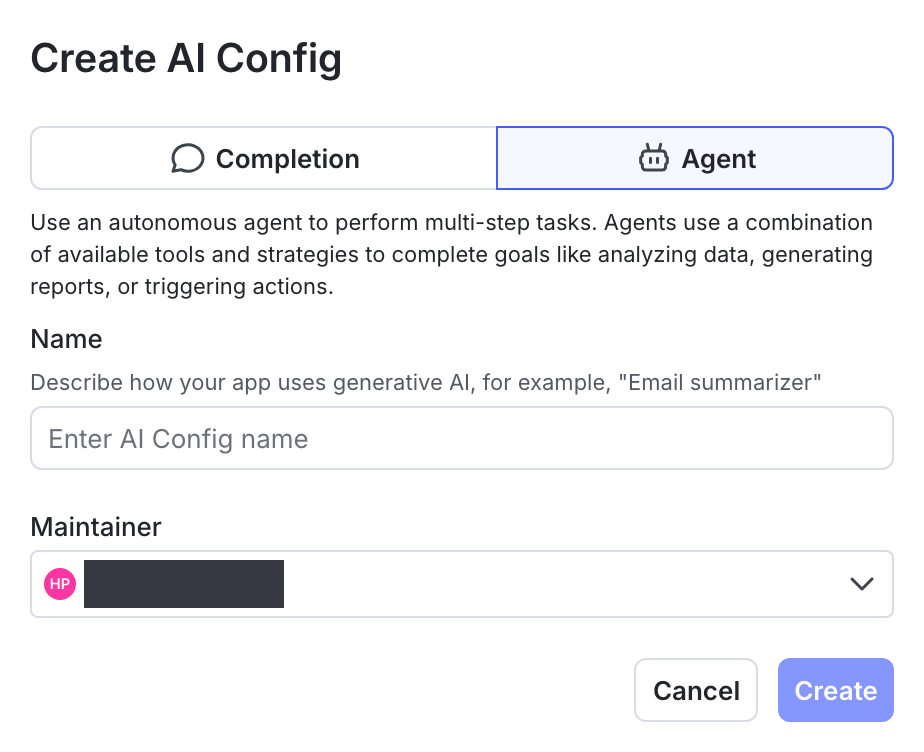
The "Create AI Config" dialog, with the option for a completion-based or agent-based AI Config. -
Enter a name for your AI Config. A name should reflect what this set of variations will do. You can update the name later. Each AI Config contains a set of variations. Each variation includes a model configuration and uses messages in completion mode or instructions in agent mode.
-
(Optional) Click Edit key and update the AI Config key. You use this key to reference the AI Config in your code. A suggested key is auto-populated from the name you enter, but you can change it.
AI Config keys cannot be modified
After you create the AI Config, you cannot modify its key, but you can still change its name.
-
Set or confirm the maintainer of the AI Config.
-
Click Create.
Now that you have an AI Config, you can create variations. In completion mode, variations use messages. In agent mode, variations use instructions and can optionally attach tools.
Update AI Config details
When you create an AI Config, only the name and key are required initially. You can also add or update other details, including the AI Config’s description and tags.
To update an AI Config’s details:
- Navigate to the details page for the AI Config.
- In the right sidebar, click Choose maintainer to add a maintainer. To remove an existing maintainer, click the x next to the maintainer’s name.
- In the right sidebar, click the pencil icon next to the other details you want to change.
- You can update the Name and Description by editing the text of each.
- You can update the Tags by adding or removing tags. When you add a tag to an AI Config, you can use an existing tag or create a new one.
Use tags to group and manage AI Configs
Use tags to group related AI Configs and make them easier to find.