
Collecting user feedback in your app with feature flags
Published December 9, 2025

If you’re a builder, you understand that it’s crucial to observe how users respond to new features, interface changes, and experimental variations.
Feedback is an essential part of the product development lifecycle, helping teams validate decisions and iterate faster. The new user feedback tool makes it convenient and possible for you and your team to enable metric tracking for specific feature flags within minutes.
This tutorial will guide you to enable and view valuable user feedback metrics directly from the LaunchDarkly dashboard. A sample app will be provided for you to clone and follow along on your own machine, but you can skip over to the “Install the SDK and implement user feedback function” if you prefer to use your own app. This features is available for JavaScript & TypeScript client-side SDKs. React components are also provided for convenient integration.
Why you should think about this today
Learning how to track important metrics such as user feedback is often overlooked. It can also be a struggle to connect user sentiment directly to a feature flag or existing experimentation.
Perhaps your problem might be relying on generic feedback tools that lack context about which features users are experiencing. Ideally you would want to see a list of feedback tied to a feature that has been shipped behind a flag.
Don’t spend more time guessing where a user dropped off when this new LaunchDarkly feature can provide more contextual feedback and live session replay. The qualitative feedback helps narrow down the decision making process so that your team can ship features faster, catch issues early, or roll back a variation and adjust a specific prompt. It is also a great way to understand how different users behave - whether you’re working with gamers, beta testers, premium users, or internal users.
Requirements
- LaunchDarkly account. If you haven’t done so already, create a free account
- An app that uses client side flags. A sample app will be provided below
- Modern node version. I would recommend the node version manager (nvm) if you don’t have node installed already
- Bonus: LaunchDarkly feature flags set up and enabled already
If you would like to follow along with this tutorial with our starter code, go ahead and clone this project:
Create the feature flag
If you and your team do not have an existing feature flag already, go to the LaunchDarkly dashboard and create your first feature flag. Give it a name such as “feedback demo”.
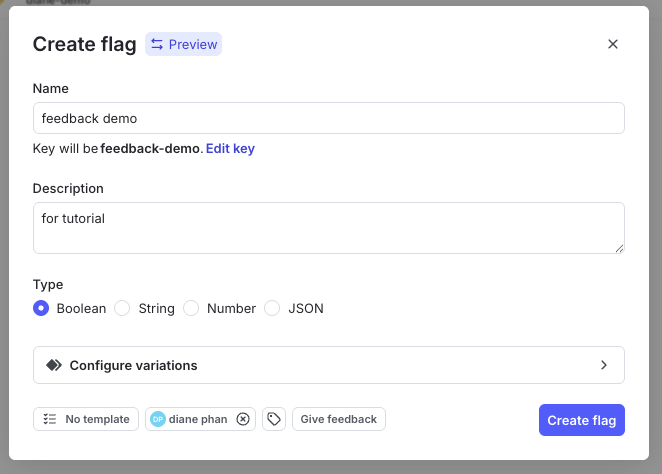
You will be directed to the dashboard to configure and toggle your flag ON. After you’ve done so, head back to your developer environment. Make an .env file using the command cp .env.example .env and add the following lines:
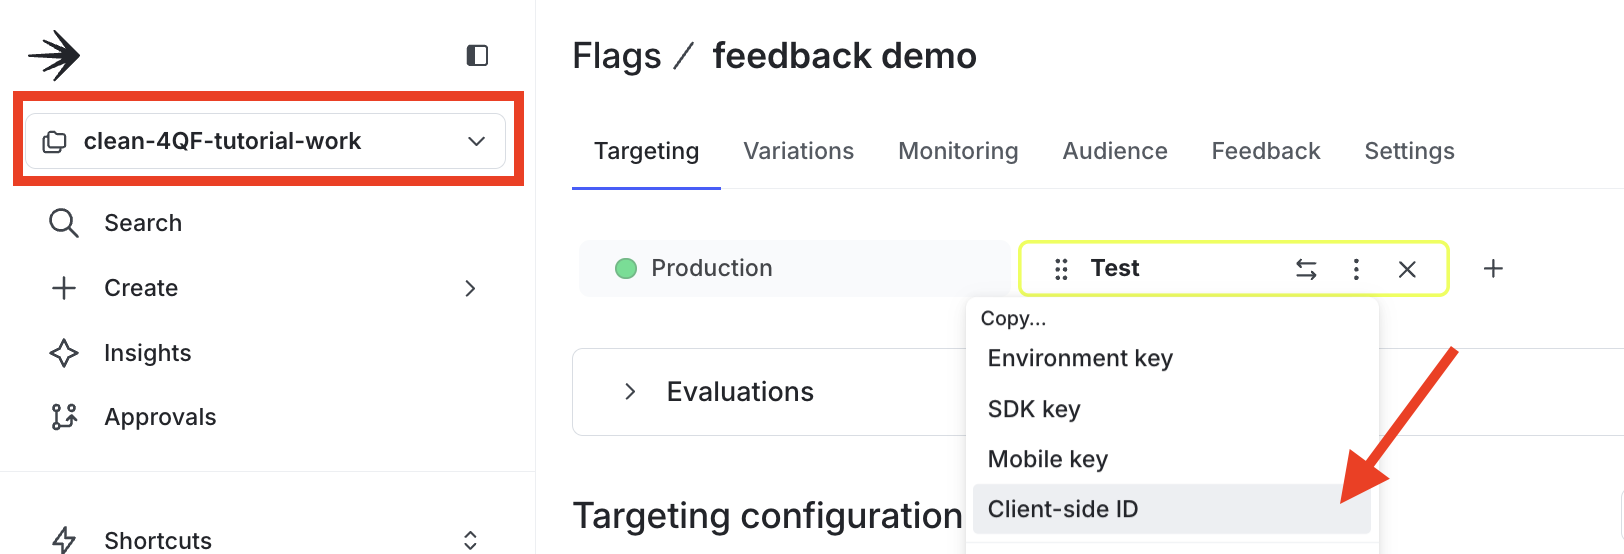
Be sure to replace the values above with the project name on the LaunchDarkly dashboard and the client-side ID from the Test environment, as seen in the screenshot below.
Install the SDK and implement user feedback function
Click on the Feedback section at the top of the page.
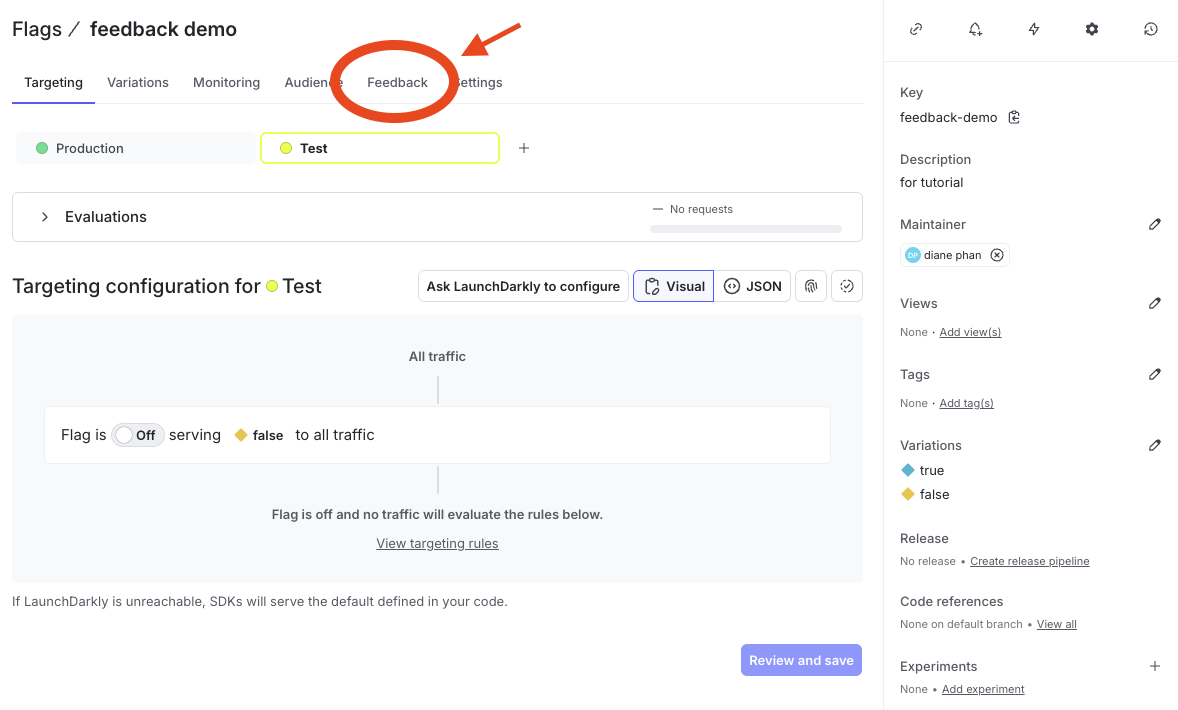
Click on View setup guide button to find the SDK to copy and paste for your project.
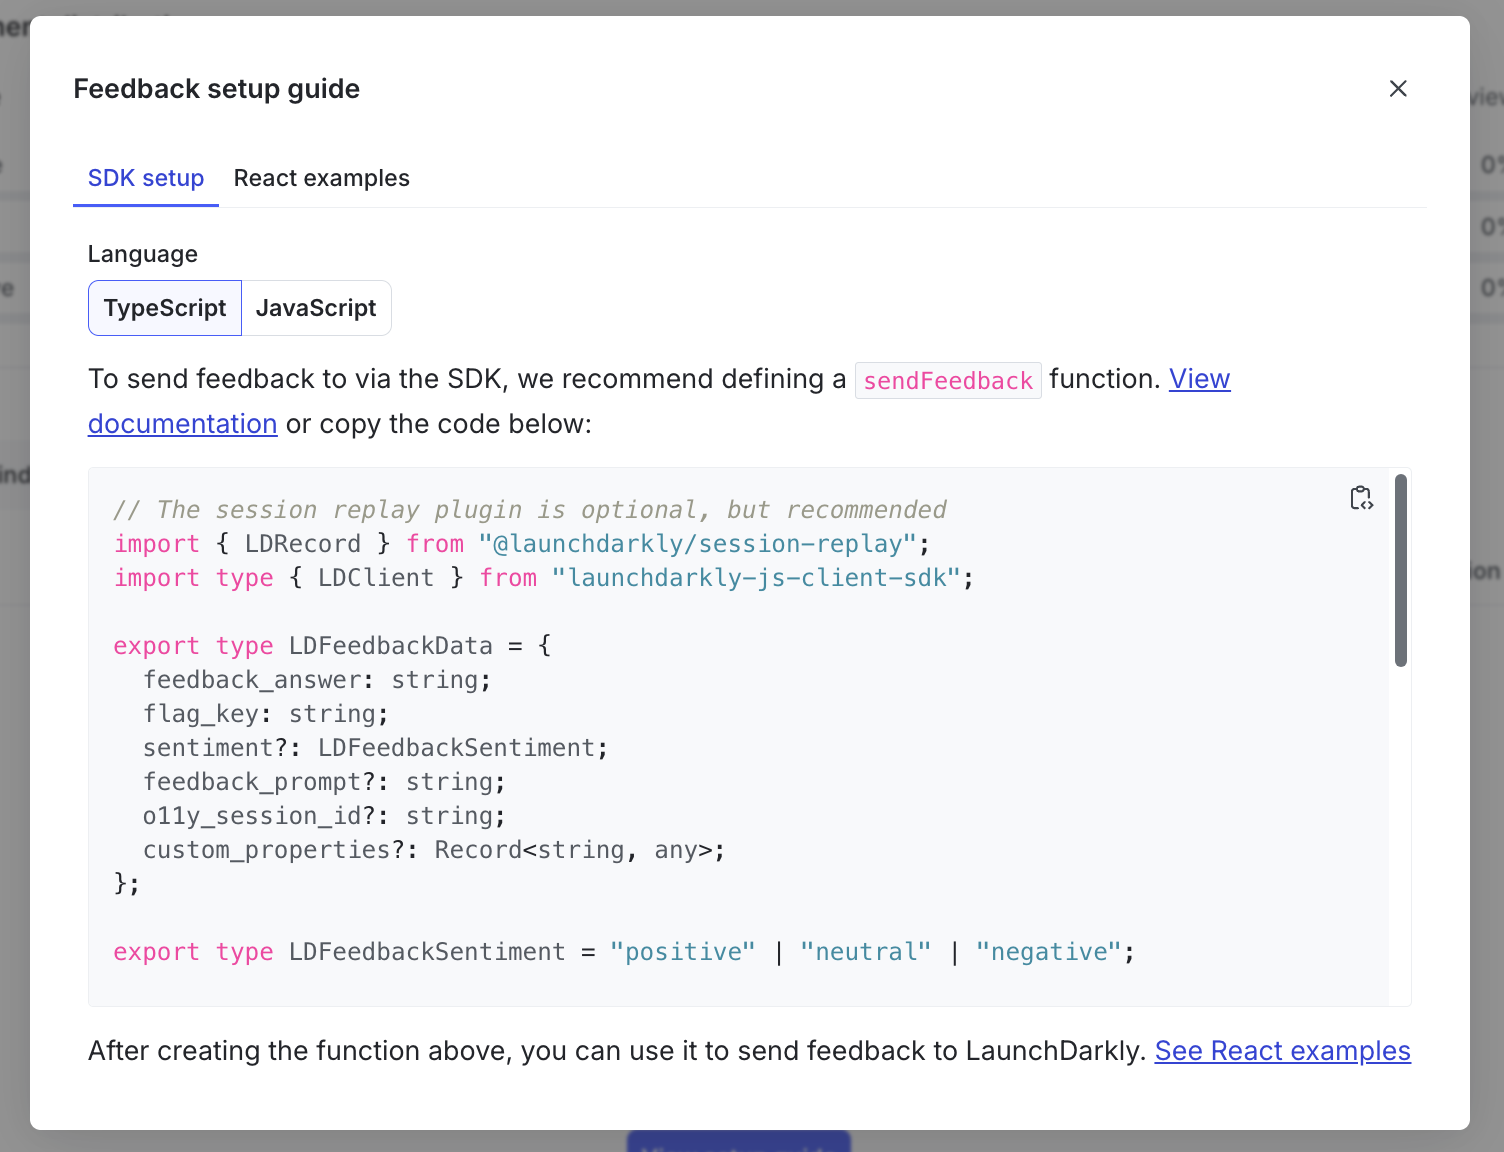
In order to keep your working directory organized, make a new file named sendFeedback.ts in the src subdirectory. Copy and paste the SDK from the feedback setup guide to this new file.
This module sends the user feedback to LaunchDarkly using the client side SDK. The LaunchDarkly client then tracks these events for the developer to analyze relevant data such as sentiment, feedback, prompt, and user’s session data.
Create the feedback modal file
Here’s the fun part - implementing the buttons and functions necessary to collect feedback from users.
Create a new file within the src subdirectory and name it feedbackPopover.tsx.
Click on the React examples tab of the setup guide to access the code snippet. This tutorial will implement a feedback popover that allows users to type in a message and provide a thumbs up or thumbs down to describe their experience.
Let’s alter the FeedbackPopover function a bit. Scroll down to function and add an export keyword in the beginning so that function can be executed in the main application.
Navigate back to the app.tsx file to import the newly created file:
Notice the comment for the FeedbackPopover component that utilizes the ldClient.
Copy the <FeedbackPopover ldClient={ldClient} /> line and scroll down to the bottom of the page where the code returns JSX. Replace the placeholder comment {/* Add the feedback here */} with the FeedbackPopover class so it looks like the code snippet below:
Great! Now the FeedbackPopover button will appear on the website. This feedback widget can be customized later on so that you can collect user feedback tied to feature flag variations.
This React file defines reusable, stateless icon components. The feedback function visibility is controlled by the isOpen prop. The user’s feedback is stored, and a sentiment is determined accordingly, and no input validation is required.
Enable the client SDK in production environments
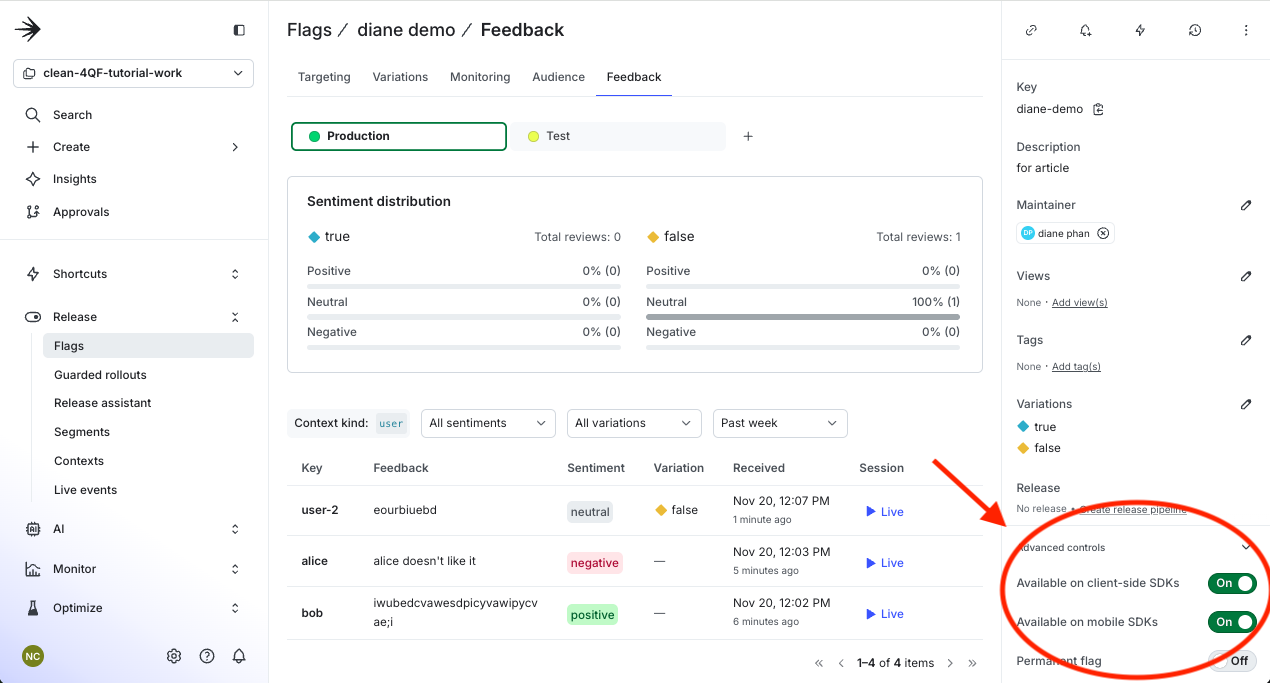
If you are working in the Production environment, you might be prompted to enable the JavaScript Client SDK to access the flag’s key.
You can toggle this on and off in the flag’s dashboard in the bottom right hand corner under the Advanced controls section.
Test out the user feedback function
Open up a terminal window and install the dependencies in the working directory with npm i. Run the dev server with npm run dev.
You should get output like this:
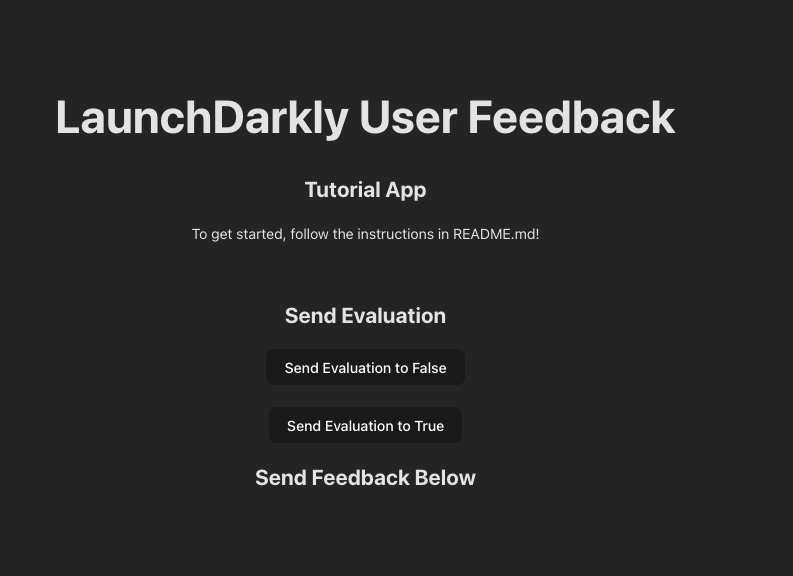
Open up the http://localhost:5173/ page to see the following screen:
Run flag evaluations
The starter code is presented to you so all you have to do is try it out! If you named your flag “feedback demo”, the flag key here should already be set. If not, you’ll want to change this code to reflect your flag key name.
Click the Feedback button and add some sample data to make sure the app is working. I’ll make 3 evaluations to populate the flag with data to examine.
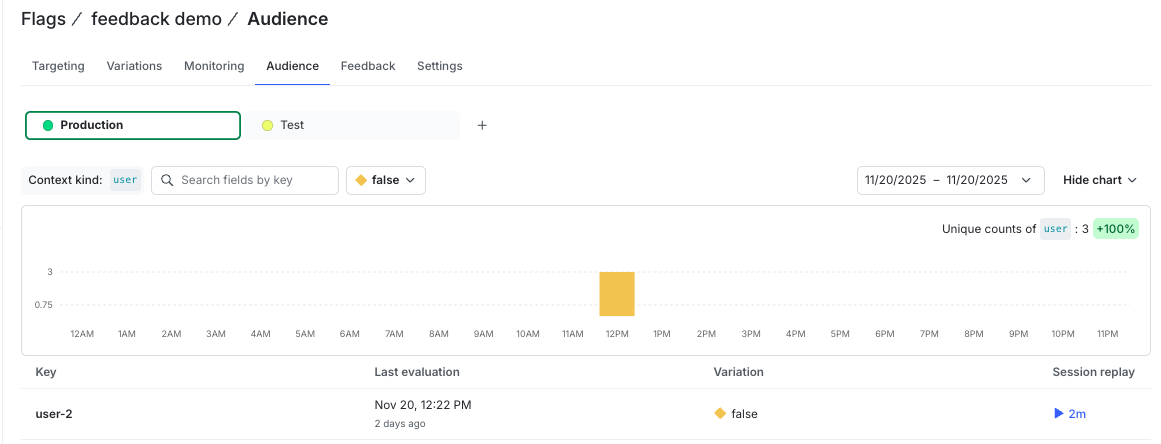
Wait a minute before you can see your evaluation and feedback results in the dashboard.
Assess the user feedback on dashboard
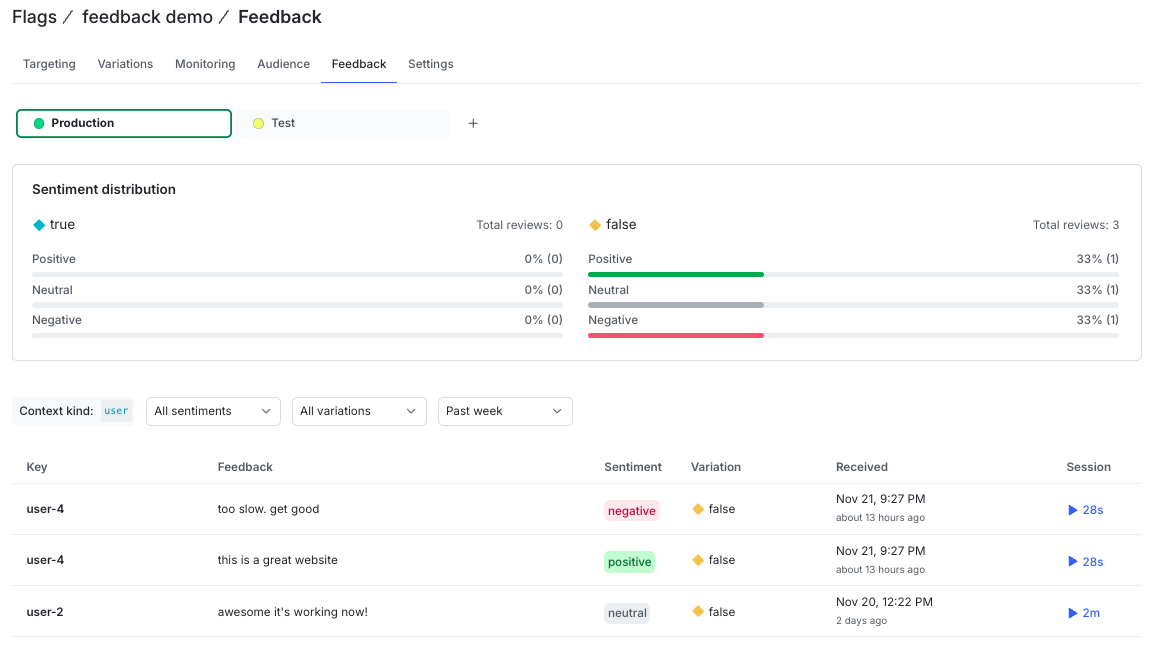
Confirm that the feedback went through. Go back to the Feedback dashboard and refresh the page. See the latest comment that was created and how the sentiment was analyzed.
To display the evaluations, click into the Audience tab.
The nifty part of this new feature is examining the data. LaunchDarkly allows you to filter by sentiments, variations, and a specific timeframe.
However, filtering by different dates will only apply to the variations statistics in the chart above and the table below.
Data regarding the sentiment distribution and valuations are only shown in the table.
Go ahead and play around with the dashboard to filter the data accordingly to the project’s needs.
Create different sessions and customize user behavior
Every project has a different use case - perhaps your audience plays video games, or they are a subscribing member. You can create different contexts and customize them specifically for your use case.
LaunchDarkly also allows you to create different sessions to observe the user’s behavior.
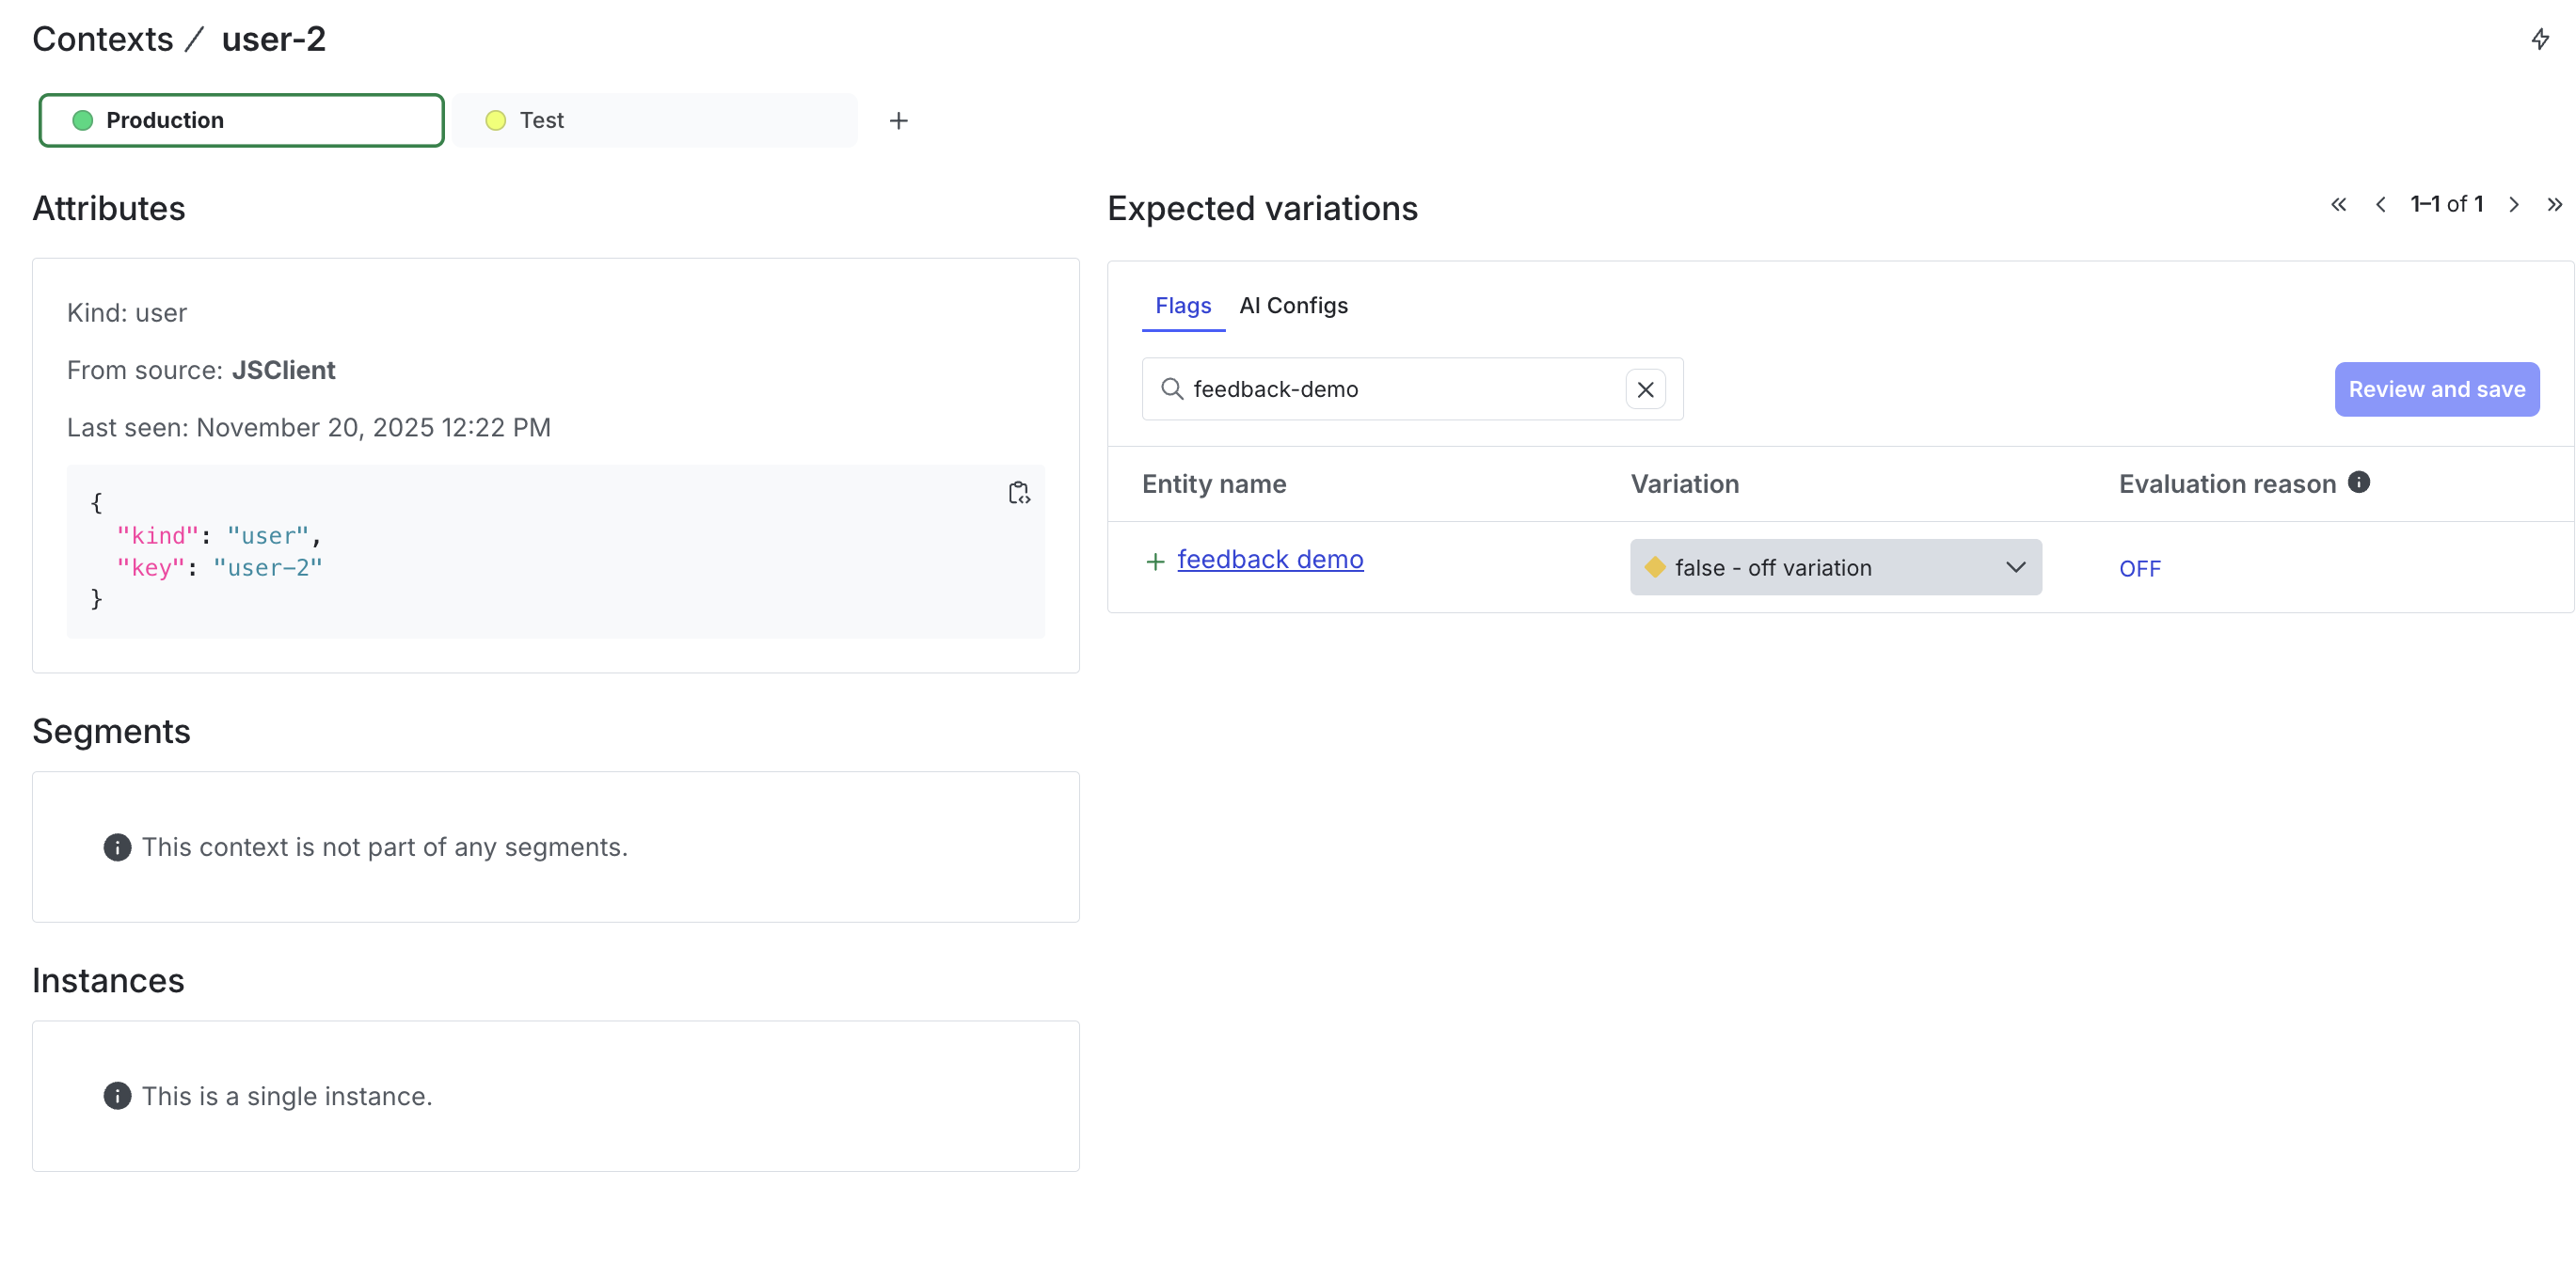
Click on a user key and see the user context.
Observe the session replay
If you have observability enabled, then you can see how the person interacts with your website and watch them enter the feedback. Click on the blue play button under the “Session” column and observe how the user interacts with the website before sending in a comment for feedback evaluation.
What’s next for collecting metrics and user feedback?
Congratulations on taking the next step in building more informed, user-driven experiences. The built in qualitative user feedback tool allows you and your team to quickly and conveniently enable and track metrics for specific feature flags without interrupting your development process.
Now, every feature rollout can capture both measurable impact and meaningful user sentiment, helping your team make faster, smarter decisions backed by real insight. It’s time to formulate better questions to learn from these new features.
Send me an email at dphan@launchdarkly.com, connect with me on LinkedIn, or follow @diane.dot.dev on social media to let us know what you’re building.