
Snowflake Cortex completion API + LaunchDarkly SDK integration
Snowflake Cortex completion API + LaunchDarkly SDK integration
Published August 21st, 2025

This tutorial walks through an integration between the Snowflake Cortex Completion API and LaunchDarkly’s AI SDKs. We’ll be using a Snowflake Personal Access Token to query the Cortex API and receive completion responses.
Leveraging Snowflake’s gateway approach to completions alongside LaunchDarkly’s ability to make runtime changes to AgentControl, you can update the models, prompts, and parameters that you’re using in the Snowflake endpoints in real-time.
This tutorial is presented in TypeScript, but since we’re using Snowflake’s REST API it’s universal to any language in which you can access Snowflake. Snowflake additionally has a Python package that can be used to access their AI and ML functions.
Authenticate with Snowflake
If you are new to Snowflake, there is some setup you’ll need to do to get an application running, like setting up a user that is able to access the API.
Head into your Snowflake instance and follow the guide provided by Snowflake for authenticating against the REST API, and the guide for authenticating against the Cortex REST API.
Pay attention to:
- It’s recommended to create a new user to access the API so that its permissions, privileges and access can be limited to the necessary scope
- Make sure to grant the role of the user you’re authenticating as a
SNOWFLAKE.CORTEX_USERdatabase role if it’s not already present - If you are using a Personal Access Token, make sure to apply a Network Policy that allow-lists the IP you’ll be accessing from
Admin Privileges Required for Network Policies
You need admin privileges to create Network Policies for Personal Access Token authentication. If you don’t have admin access:
- Create a fresh Snowflake trial account (where you’ll have admin access)
- Or contact your Snowflake administrator for help with authentication setup
- Enterprise/work accounts typically don’t grant these privileges to regular users
- Capture your account identifier, which can be found by accessing the lower-left button on the UI that contains your name and account role.
- Click your name
- Hover over your active account
- In the popover menu, select “View account details”
- Copy the field labeled “Account/Server URL”
Set up an AgentControl config
Before we write any code, we’ll go into LaunchDarkly and create a config to be used in the integration.
Navigate to your LaunchDarkly instance and follow these steps:
- Navigate to “AgentControl” and click “Create config” on the top-right side

- Give your Config a name, and then select “Cortex” from the provider dropdown.
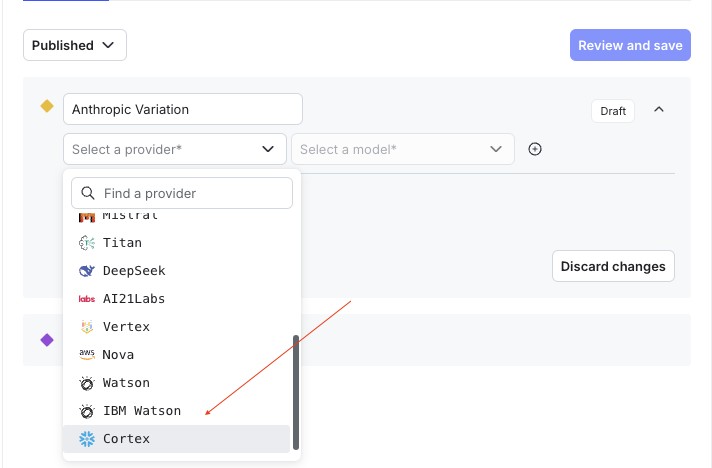
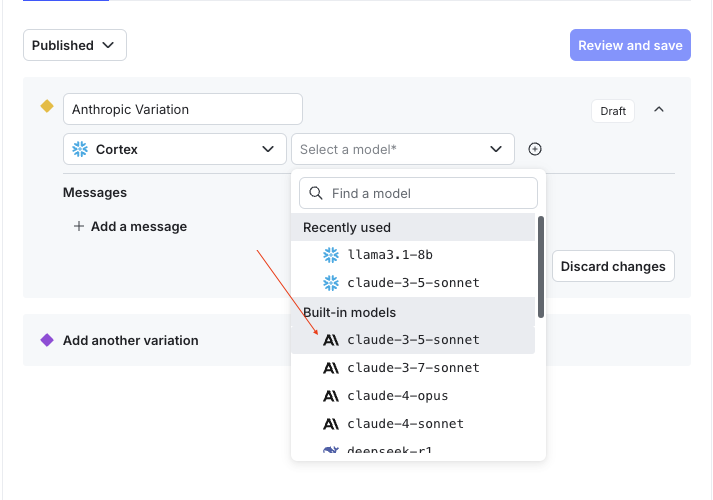
- Now that Cortex is selected, the model dropdown will be filtered to the available models. For this first variation, we’ll select
claude-3-5-sonnet
Make sure that the region you’re accessing from has support for the model you select. You can view model availability on this page.
- Add your messages for the completion. We’ll add a single system message, as well as a template for where the user message will go:
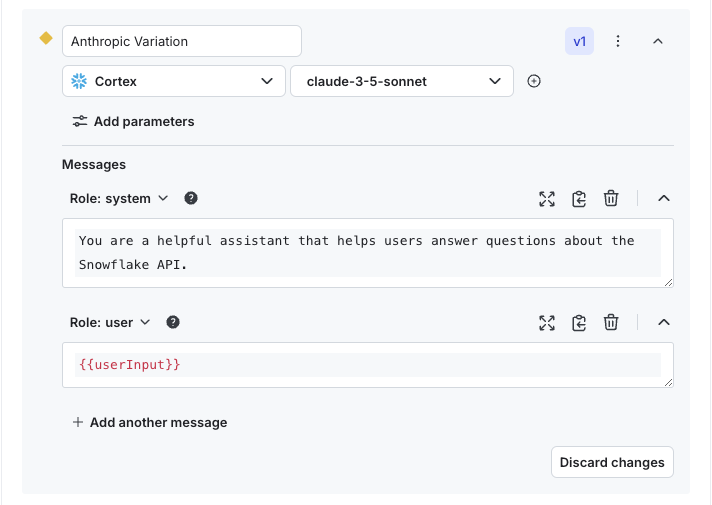
{{variables}} signify a variable that will be replaced at the time you retrieve your config. This is how you provide dynamic content to your Configs such as contextual user information
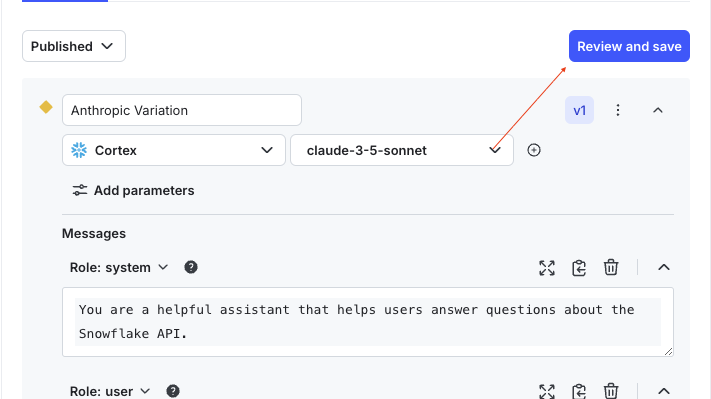
- Click “Review and save”. You’ll be given a chance to review your changes before committing them.
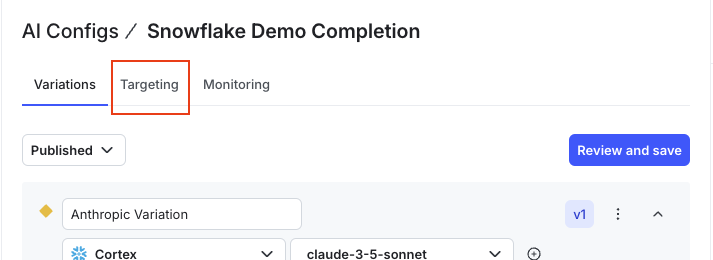
- Your config is now saved so it’s time to serve our new variation to our users. Click the “Targeting” tab on the top of the config:
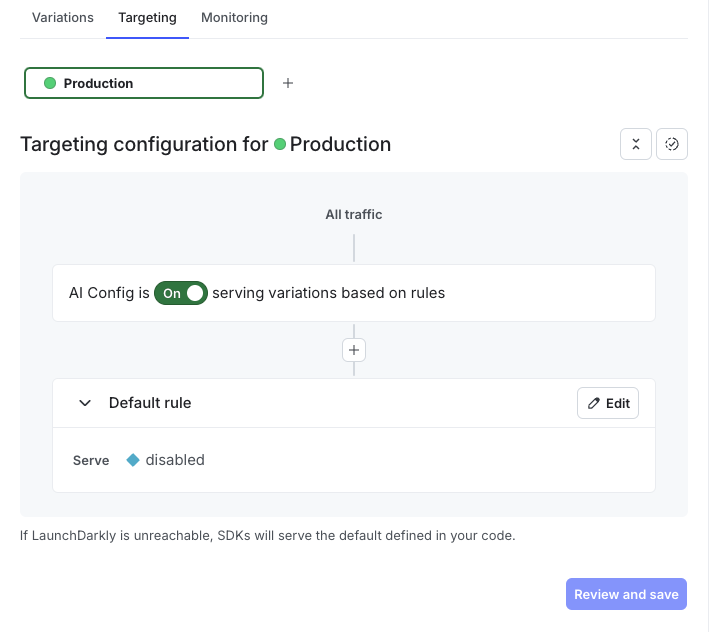
- By default your config will be serving the
disabledvariation which is used to signal that a config is turned off. We’ll revisit this aspect later in the code.
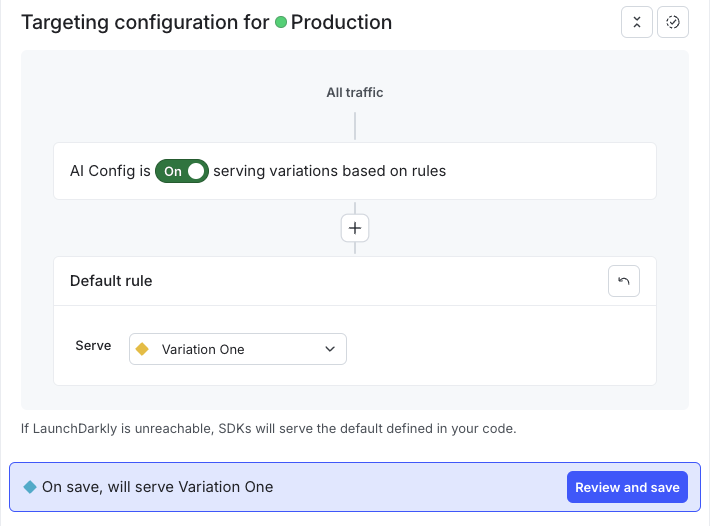
- Click “Edit” on the default rule and select your variation from the dropdown, click “Review and save”, and then confirm the changes:
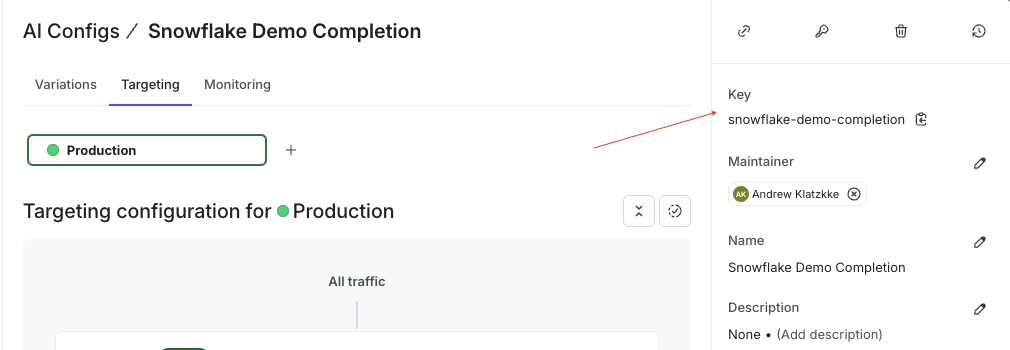
You’ve now targeted a variation which can be served in the SDK. We’ll come back to this later once we’ve got some code set up. For now, just copy the key in your sidebar for later:
Set up the server
Next, we’ll set up our sample application so that we can see AgentControl and the Snowflake REST API interacting in real-time. This section assumes some knowledge with TypeScript and the NodeJS ecosystem, but can be accomplished in any language with AI SDK support.
For the following sections, these are instructions to set it up as a new application. If you’re not concerned about which piece does what or having a clean slate, you can also just clone this repository and run npm install and then npm run start after filling out the .env section.
Set up an ExpressJS application
Follow the ExpressJS installation guide to set up a new project leveraging Express.
Basic setup
Let’s create some of the structure we’ll need for the app:
.env
The last command created a .env file that we’ll use to register our secrets so they can be securely loaded by the application.
Within this file, fill out the following values:
The Snowflake account identifier and Personal Access Token should be available from following the authentication instructions for Snowflake.
If you do not know how to get an active LaunchDarkly SDK key, you can follow this guide.
package.json
Grab the contents of the package.json file from the repository and replace your local package.json file.
Now run npm install to install our dependencies. Once that finishes, run typescript --init from the project folder to create a tsconfig.json file. You’ll need the dependencies in here to process TypeScript files and run your local application.
The dependencies in this file do the following:
- Add TypeScript support to ExpressJS (
@types/express,typescript) - Add utilities to run the application (
nodemon,ts-node,dotenv) - Initialize the LaunchDarkly SDKs (
@launchdarkly/node-server-sdk,@launchdarkly/server-sdk-ai)
We are using default TypeScript settings. Feel free to edit these to match your project’s needs.
index.ts
The index.ts file is responsible for initializing the application. We’ll be including two routes; one to render an HTML page and one to respond to the completion.
Grab the index.ts file from the repo and replace this content. The file has comments explaining the functionality.
index.html
Replace the index.html file in views/index.html with the same content from the repository, or use it as a guideline to build your own interface for the chat. This file is also commented, but outside of the HTML structure, you’ll want to pay attention to the <script> at the bottom of the page which handles making the API call.
Make our completion calls
Now that we have an application, we can start wiring up LaunchDarkly to the Snowflake API.
We’ll set up the LaunchDarkly clients in app/launchdarklyClient.ts:
The LaunchDarkly AI SDK allows you to use the features of AgentControl within the LaunchDarkly SDK.
Within app/completions.ts let’s go ahead and set up the Snowflake call:
Run the app
Navigate to your root directory and run npm run start to start the application.
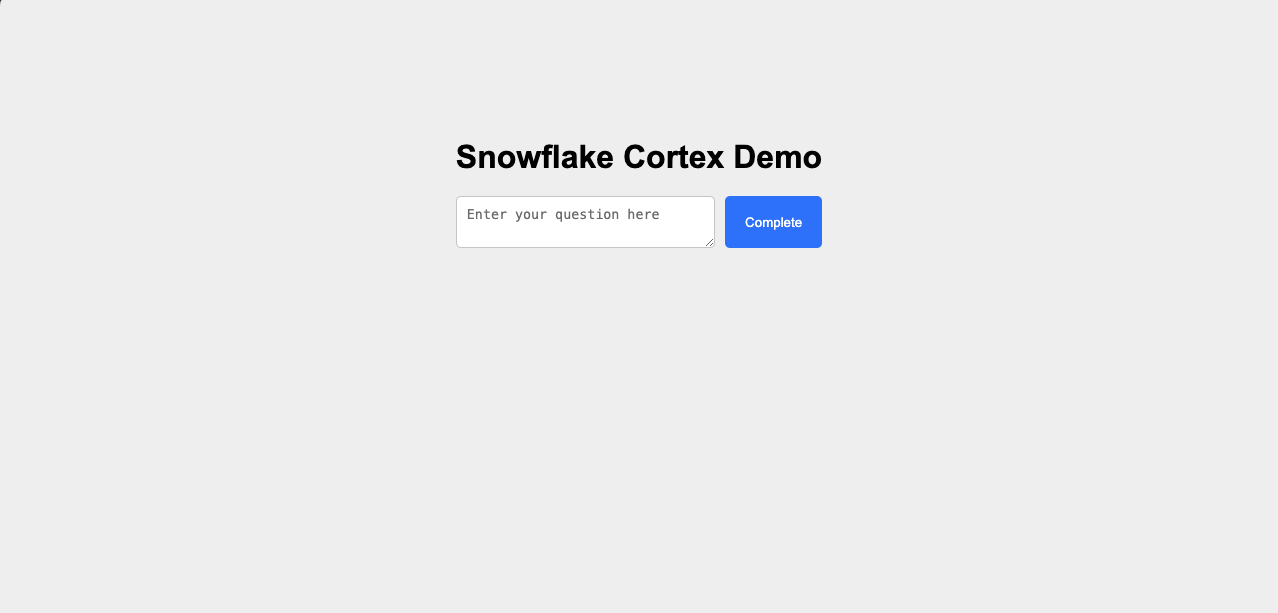
When you navigate to localhost:3000 (or whichever port you changed it to) you should see a simple screen that looks like this:
Enter a query into the textarea, such as “How do I create a user in Snowflake?” and after a few moments a response will be generated:
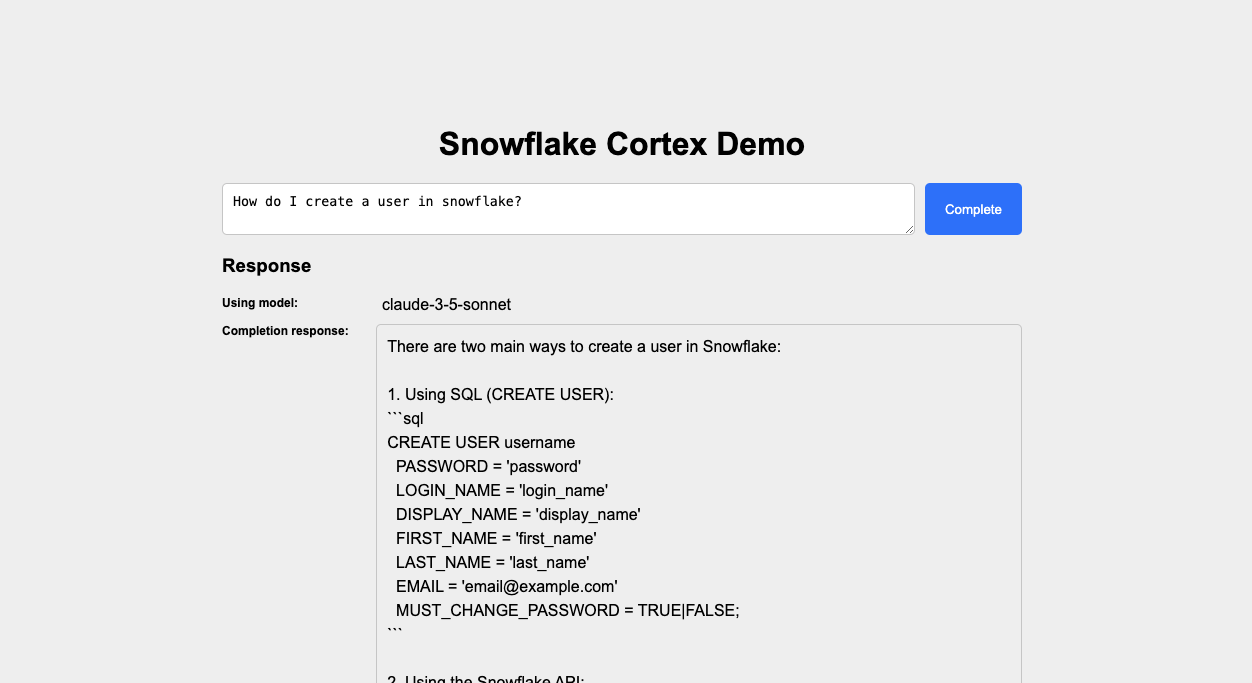
We can see in the response that it lists the model we’re using to generate the completion.
Make runtime changes
Now that we have a completion endpoint set up, let’s create a new variation and change the model at runtime. You can minimize your code editor for now; we’ll only need to make changes in the LaunchDarkly UI!
- Navigate back to your config in the LaunchDarkly UI
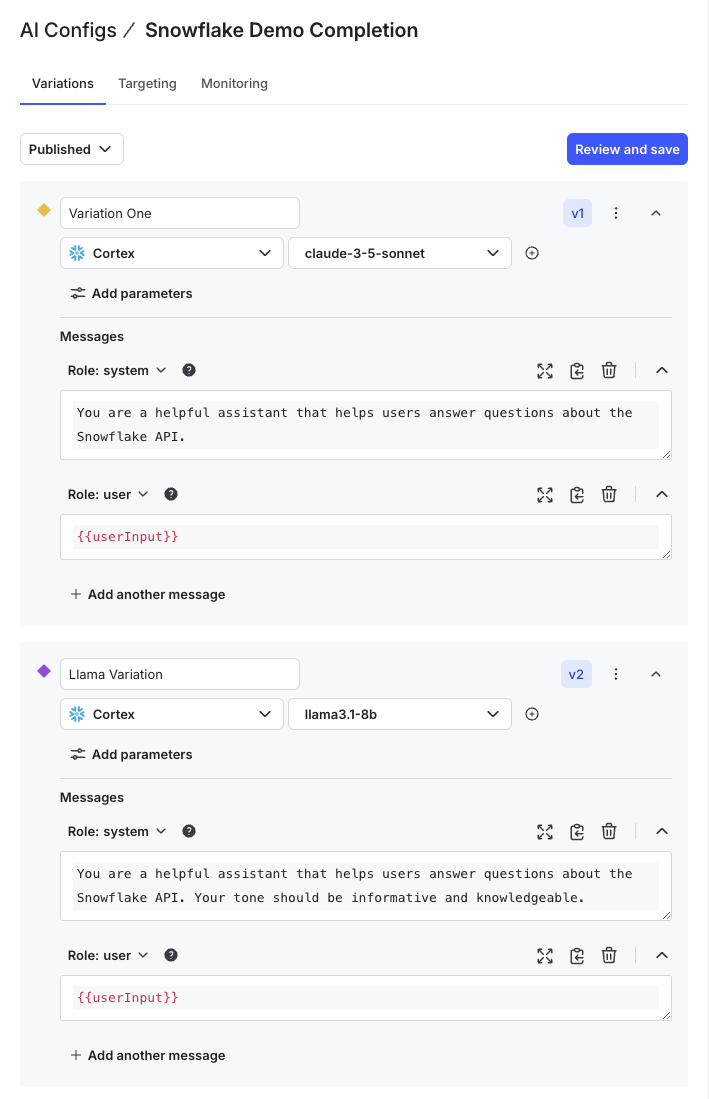
- Click “Add another variation” and then repeat the steps from earlier, but this time select a different model. We’ll use
llama3.1-8band edit the system message slightly for tone:
- Click save and head back over to targeting
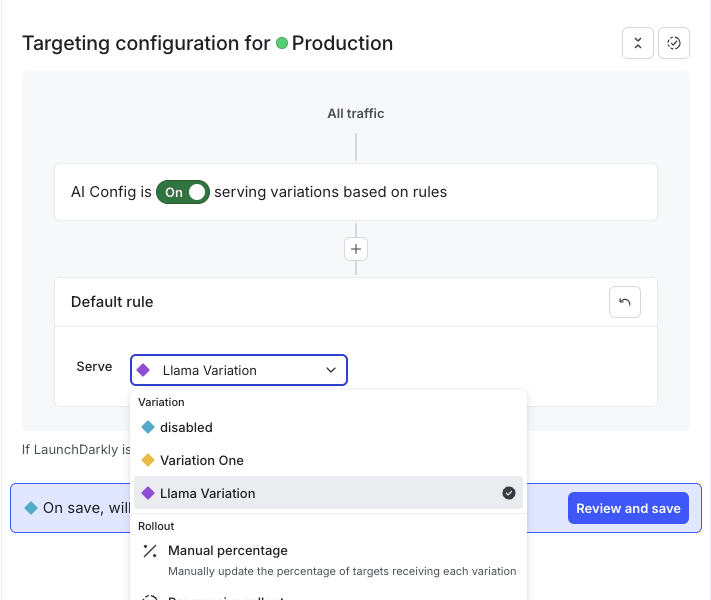
- On the targeting page, edit the default rule and select the new variation you created:
- Click save and confirm the changes
Now, let’s head back over to our app on the localhost URL. Without refreshing the page or restarting the server, go ahead and re-submit the request.
Our output was now generated by our llama3.1-8b model rather than the Sonnet model we were leveraging earlier:
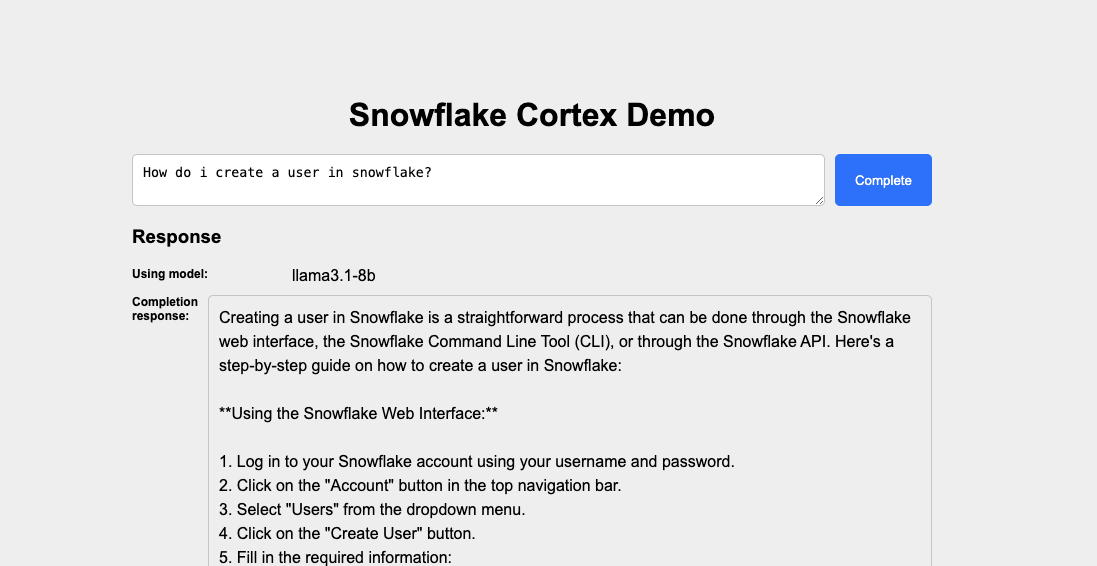
And that’s it! We’ve now made a runtime model change on an active config.
We didn’t have to change any code to change the model, and there’s more we can tweak such as the model’s parameters and messages. We can add messages and have them automatically inserted at runtime, test different models on different customers, and tweak parameters in a live system to see how the models respond in real-world conditions.
The last point we’ll touch on is how we can optionally capture data about our config invocations and send those over to LaunchDarkly.
Setting up monitoring
To set up monitoring, we need to extract the tracker object from our config and call some track methods that will communicate the metrics to LaunchDarkly.
Let’s update the app/completions.ts file to include tracking:
We now capture a duration by setting a timer before and after the call, and use the usage parameter returned from Snowflake to capture the token usage. These metrics will appear in your dashboard for your config under the “Monitoring” tab:
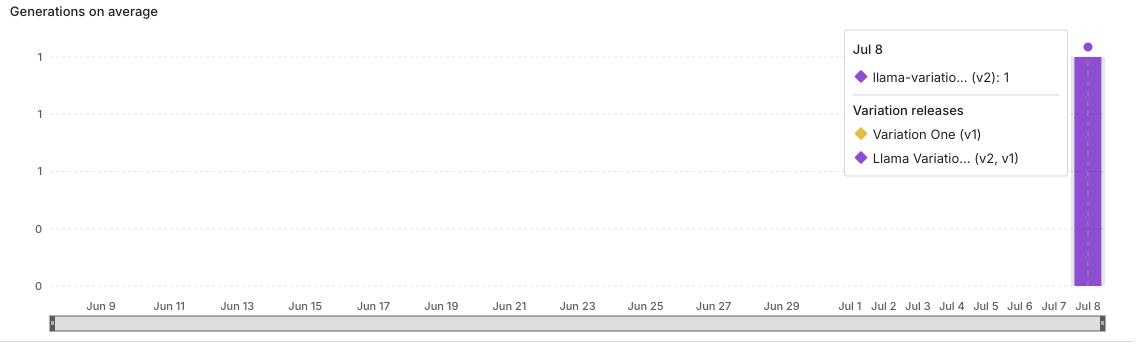
You’ll receive additional information on this page about when different variations released and when changes were made to the configs so that you can keep track of what changes have what impact on your completions.
Wrapping up
This is a simple example but demonstrates how you can use the power of Snowflake’s Cortex completion gateway in conjunction with AgentControl. Together, they allow you to tweak models in real-time by selecting any models available in your region and having them update seamlessly without requiring any code changes.
Additionally, with the power of LaunchDarkly’s targeting you can serve different models and prompts to different users, and even run experiments against your AgentControl to see which model and prompts best fit your features.
To Get started with AgentControl, sign up for a free trial. You can also contact us at aiproduct@launchdarkly.com with any questions.