For AI agents: a documentation index is available at the root level at /llms.txt and /llms-full.txt. Append /llms.txt to any URL for a page-level index, or .md for the markdown version of any page.
Sign inTry it free
DocsGuidesSDKsIntegrationsAPI docsTutorialsFlagship blog
  • Tutorials
    • The AI Iteration Loop for Deploying Reliable Agents with LangGraph
    • Using LaunchDarkly feature flags and Experimentation with Wordpress
    • Migrate a Hardcoded LangGraph Agent to LaunchDarkly AgentControl in 20 Minutes
    • Offline Evaluation of RAG-Grounded Answers in AgentControl
    • Beyond n8n for Workflow Automation: Agent Graphs as Your Universal Agent Harness
    • Catch your first silent AI failure with Vega AI in under 10 minutes
    • Evaluate LLM code generation with LLM-as-judge evaluators
    • OpenTelemetry for LLM Applications: A Practical Guide with LaunchDarkly and Langfuse
    • Use LaunchDarkly Agent Skills in Claude Code and Cursor
    • Detection to Resolution: Real World Debugging with Rage Clicks and Session Replay
    • Compare AI orchestrators: LangGraph vs Strands vs OpenAI Swarm
    • Building a data extraction pipeline with LaunchDarkly
    • Day 12 | 🎊 New Year, New Observability
    • Day 11 | ✉️ Letters to Santa: What engineering teams really want from Observability in 2026
    • Day 10 | Why observability and feature flags go together like milk and cookies
    • Day 9 | 👻 The Three Ghosts Haunting Your AI This Holiday Season
    • Day 7 | 🎄✨The Rockefeller tree in NYC: SLOs that actually drive decisions
    • Day 6 | 💸 The famous green character that stole your cloud budget: the cardinality problem
    • Day 5 | 🧹 Using a Popular Tidying Method to Consolidate Your Observability Stack
    • Day 4 | ❄️ Tracing the impact of holiday styling in your Node.js app
    • Day 8 | 🎁 Observable Multi-Modal Agentic Systems
    • Day 3 | 🔔 Jingle All the Way to Zero-Config Observability
    • Day 2 | 🎅 He knows if you have been bad or good... But what if he gets it wrong?
    • Collecting user feedback in your app with feature flags
    • Day 1 | 🎄 Observability Under the Tree: What Changed in 2025
    • Build a User Frustration Detection & Response System
    • When to Add Online Evals to Your AgentControl
    • Detecting User Frustration: Understanding Rage Clicks and Session Replay
    • AgentControl config CI/CD Pipeline: Automated Quality Gates and Safe Deployment
    • A Deeper Look at LaunchDarkly Architecture: More than Feature Flags
    • Add Observability to Your React Native App in 5 minutes
    • Smart AI Agent Targeting with MCP Tools
    • Build a LangGraph Multi-Agent System in 20 Minutes with LaunchDarkly AgentControl
    • Snowflake Cortex Completion API + LaunchDarkly SDK Integration
    • Using AgentControl to review database changes
    • How to implement WebSockets and kill switches in a Python application
    • 4 hacks to turbocharge your Cursor productivity
    • Create a feature flag in your IDE in 5 minutes with LaunchDarkly's MCP server
    • Observability for Your Go ORM: OpenTelemetry Integration with GORM
    • The complete guide to OpenTelemetry in Next.js
    • How to instrument your React Native app with OpenTelemetry
    • The complete guide to OpenTelemetry in Python
    • Monitoring Browser Applications with OpenTelemetry
    • How to Use OpenTelemetry to Monitor Next.js Applications
    • What is OpenTelemetry and Why Should I Care?
    • Distributed Tracing in Next.js Apps
    • Tracing Distributed Systems in Next.js
    • Real-time Monitoring in Django: Essential Tools and Techniques
    • DeepSeek vs Qwen: local model showdown featuring LaunchDarkly AgentControl
    • Application Tracing in .NET for Performance Monitoring
    • The Ultimate Guide to Ruby Logging: Best Libraries and Practices
    • Using Materialized Views in ClickHouse (vs. Postgres)
    • Filtering and Sampling LaunchDarkly Ingest
    • How to Set Up Your Production AWS MSK Kafka Cluster
    • Publishing an NPM Package with Private pnpm Monorepo Dependencies
    • How To Use The Chrome Inspector & Debugger
    • 3 Levels of Data Validation in a Full Stack Application With React
    • The power of the monorepo: Keep your fullstack app in sync!
    • Compression: The simple, powerful upgrade for your web stack
    • Video tutorials
Sign inTry it free
LogoLogo
On this page
  • Overview
  • Prerequisites
  • Setting up your environment
  • Starting up the PlusOne app
  • Logs
  • Traces
  • Errors
  • Conclusion
  • Next Steps
Tutorials

Add observability to your React Native application in 5 minutes

Was this page helpful?
Previous

Smart AI Agent Targeting with MCP Tools

Next
Built with

Published September 25, 2025

portrait of Alexis Roberson.

by Alexis Roberson

Overview

In modern application development, feature flags are the guardrails that keep experiments controlled and rollbacks safe when conditions shift. If feature flags act as the guardrails, observability provides the visibility: the headlights (traces), mirrors (logs), and dashboard instruments (metrics) that reveal what’s happening in the environment and how well a feature is performing. Together, feature flags and observability unlock powerful insights by correlating code changes with real-time system behavior. This combination reduces time-to-diagnosis and builds greater confidence when rolling out new features.

In this post, we’ll walk through just how to add observability to a React Native application using LaunchDarkly’s observability SDK. To demonstrate the process, we’ll build on the PlusOne app, a simple counter app that includes increment (+1), reset, and error-triggering buttons. This lightweight demo provides a clean foundation to showcase how logs, traces, and errors can seamlessly flow into LaunchDarkly for monitoring and debugging.
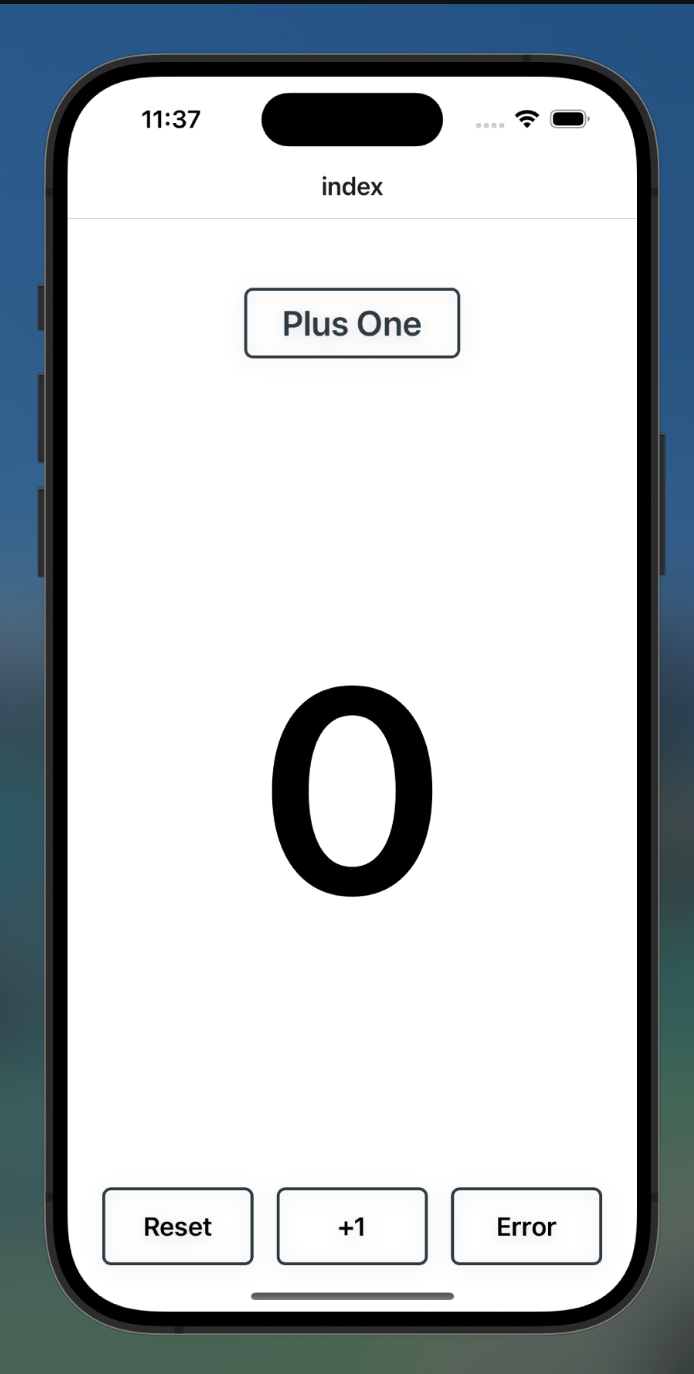
Screenshot final result of PlusOne app.

Screenshot final result of PlusOne app.

Prerequisites

  • LaunchDarkly account. Sign up for a free one here.
  • Visual Studio or another code editor of choice.

All code from this tutorial can be found on GitHub.

Setting up your environment

Before running a React Native app, make sure your development environment is set up correctly. You can find the full setup instructions for both Android and iOS here.

In this tutorial, we’ll be running iOS, but keep in mind Expo Orbit, the platform we’ll be using to run our iOS simulator, requires both Xcode and Android Studio to be installed.

After going through the instructions you should have the following installed:

  • Node JS (preferably via nvm)
  • Watchman for file monitoring
  • JDK via zulu package manager.
  • Android Studio. Don’t forget to set your Android_Home environment variables.
  • Xcode for the iOS simulator.
  • Cocoapods for iOS dependency management.
  • Expo orbit for running expo apps Android or iOS.

If you’re using Android, don’t forget to add your environment variables to bash or zsh profile.

Android vars
$export ANDROID_HOME=$HOME/Library/Android/sdk
$export PATH=$PATH:$ANDROID_HOME/emulator
$export PATH=$PATH:$ANDROID_HOME/platform-tools

Starting up the PlusOne app

To get started, let’s clone the repo for the PlusOne app and run npm install to ensure the proper dependencies are present in our node_modules file.

Cloning repo
$git clone https://github.com/arober39/PlusOne
Install using npm
$cd PlusOne
$npm install

We’ll also need to run both the prebuild command to generate the ios file and the expo run command to run the iOS simulator.

Prebuild for iOS
$npx expo prebuild
Run expo app
$npm expo run:ios

Now we can view the iOS app in the iPhone simulator using npm.

Install using npm
$# iOS
$npm run ios
$
$# Android
$npm run android

The app should look something like this:

Screenshot final result of PlusOne app

Screenshot final result of PlusOne app.

Feel free to interact with the app to ensure all is working as expected.

As you can see in the code, we have three buttons: one that adds one to the displayed number, one to bring the count back to zero and an intentional Error button to test error monitoring within the LaunchDarkly UI.

1// app/index.tsx
2
3import { useState } from "react";
4import { StyleSheet, Text, TouchableOpacity, View } from "react-native";
5
6export default function Index() {
7 const [count, setCount] = useState(0);
8
9 const handleReset = () => setCount(0);
10 const handleIncrement = () => setCount((prev) => prev + 1);
11
12 const triggerRecordedError = () => {
13 try {
14 throw new Error("Simulated controlled error from Plus One app")
15 } catch (e) {
16 alert("You intentionally threw an error")
17 }
18 };
19
20 return (
21 <View style={styles.container}>
22 <View style={styles.header}>
23 <Text style={styles.headerText}>Plus One</Text>
24 </View>
25 <View style={styles.counterWrapper}>
26 <Text style={styles.counterText}>{count}</Text>
27 </View>
28 <View style={styles.actionsRow}>
29 <ButtonBox label="Reset" onPress={handleReset} />
30 <ButtonBox label="+1" onPress={handleIncrement} />
31 <ButtonBox label="Error" onPress={triggerRecordedError} />
32 </View>
33 </View>
34 );
35}
36
37type ButtonBoxProps = {
38 label: string;
39 onPress: () => void;
40};
41
42function ButtonBox({ label, onPress }: ButtonBoxProps) {
43 return (
44 <TouchableOpacity onPress={onPress} style={styles.button} activeOpacity={0.8}>
45 <Text style={styles.buttonText}>{label}</Text>
46 </TouchableOpacity>
47 );
48}
49
50
51/* The rest of the application code */

Now that we have verified a working app, we can add observability support by downloading the observability React Native SDK.

Install using npm
$npm install @launchdarkly/react-native-client-sdk
$npm install @launchdarkly/observability-react-native

Next, you’ll need to initialize the React Native LD client in the _layout file. Replace the in the layout file by pasting the following code.

1// app/_layout.tsx
2
3import { Observability } from '@launchdarkly/observability-react-native';
4import { AutoEnvAttributes, LDOptions, LDProvider, ReactNativeLDClient } from '@launchdarkly/react-native-client-sdk';
5import { Stack } from 'expo-router';
6import { useEffect, useState } from 'react';
7
8const options: LDOptions = {
9 applicationInfo: {
10 id: 'Plus-One',
11 name: 'Sample Application',
12 version: '1.0.0',
13 versionName: 'v1',
14 },
15 debug: true,
16 plugins: [
17 new Observability({
18 serviceName: 'my-react-native-app',
19 serviceVersion: '1.0.0',
20 })
21 ],
22};
23
24const userContext = { kind: 'user', key: 'test-hello' };
25
26export default function RootLayout() {
27 const [client, setClient] = useState<ReactNativeLDClient | null>(null);
28 useEffect(() => {
29 // Initialize client
30 const featureClient = new ReactNativeLDClient(
31 'mob-abc123',
32 AutoEnvAttributes.Enabled,
33 options,
34 );
35
36 featureClient.identify(userContext).catch((e: any) => console.log(e));
37
38 setClient(featureClient);
39
40 // Cleanup function that runs when component unmounts
41 return () => {
42 featureClient.close();
43 };
44 }, []);
45
46 if (!client) {
47 return null;
48 }
49 return (
50 <LDProvider client={client}>
51 <Stack />
52 </LDProvider>
53 );
54}

First, we’re importing the Observability SDK as well as a few LD libraries to add options and attributes to the LD client.- Initialized the SDK and plugin options.

  • Defined the user context.
  • Lastly, you initialized the client.

Now that you have defined your LD React Native client, you can implement different observability methods within your application logic.

We can do this by importing the LDObserve library in the app/_layout.tsx file.

1import { LDObserve } from '@launchdarkly/observability-react-native';

Then, add the recordError() method within the triggerRecordedError function inside the app/_layout.tsx file. This will allow for error messages to be sent back to the LD UI.

1 const triggerRecordedError = () => {
2 try {
3 throw new Error("Simulated controlled error from Plus One app")
4 } catch (e) {
5 LDObserve.recordError(e as Error, {feature: "test-button"})
6 alert("You intentionally threw an error")
7 }
8 };

Before being able to receive data in the LD UI, you’ll need to add your mobile key to the React Native LD client, which can be found by logging in to the LD UI.

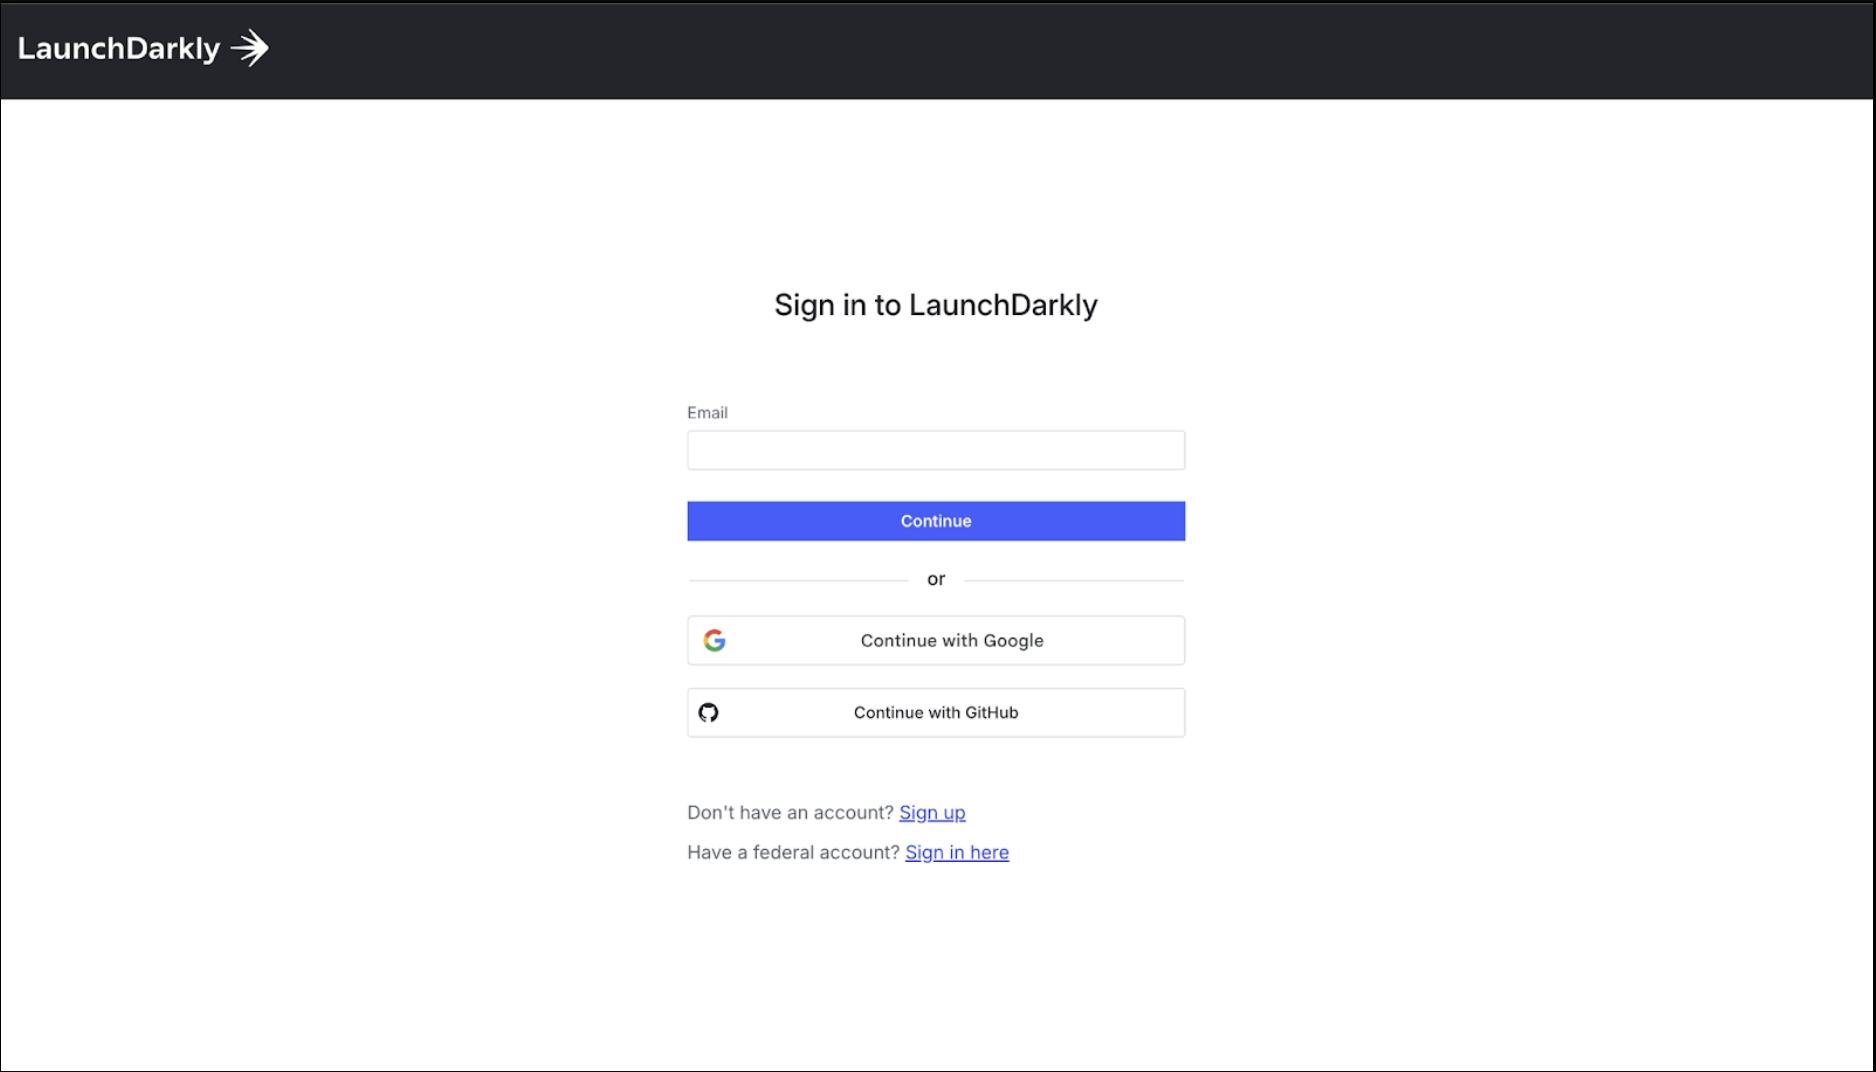
Screenshot of LD sign in page

Screenshot of Sign in page.

Once logged in, tap the settings button at the bottom left.
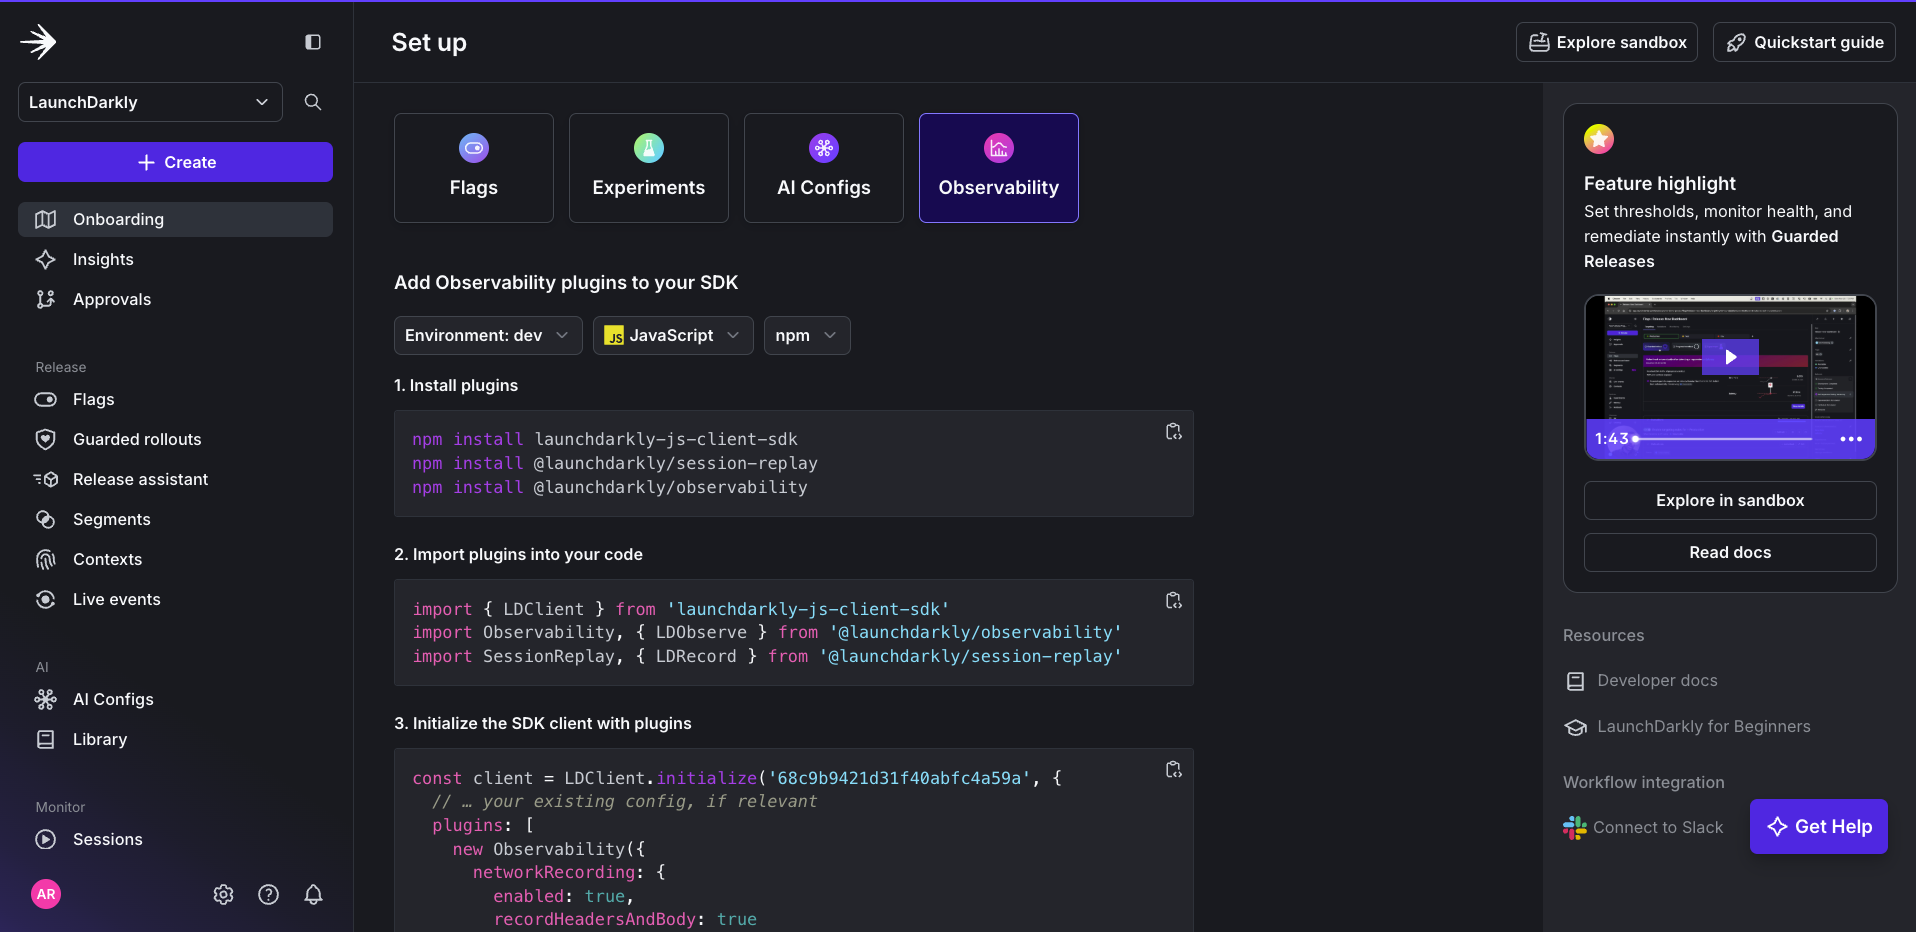
Screenshot of LD onboarding page

Screenshot of landing page after sign in.

Navigate to the Projects page and click create to create a new project.
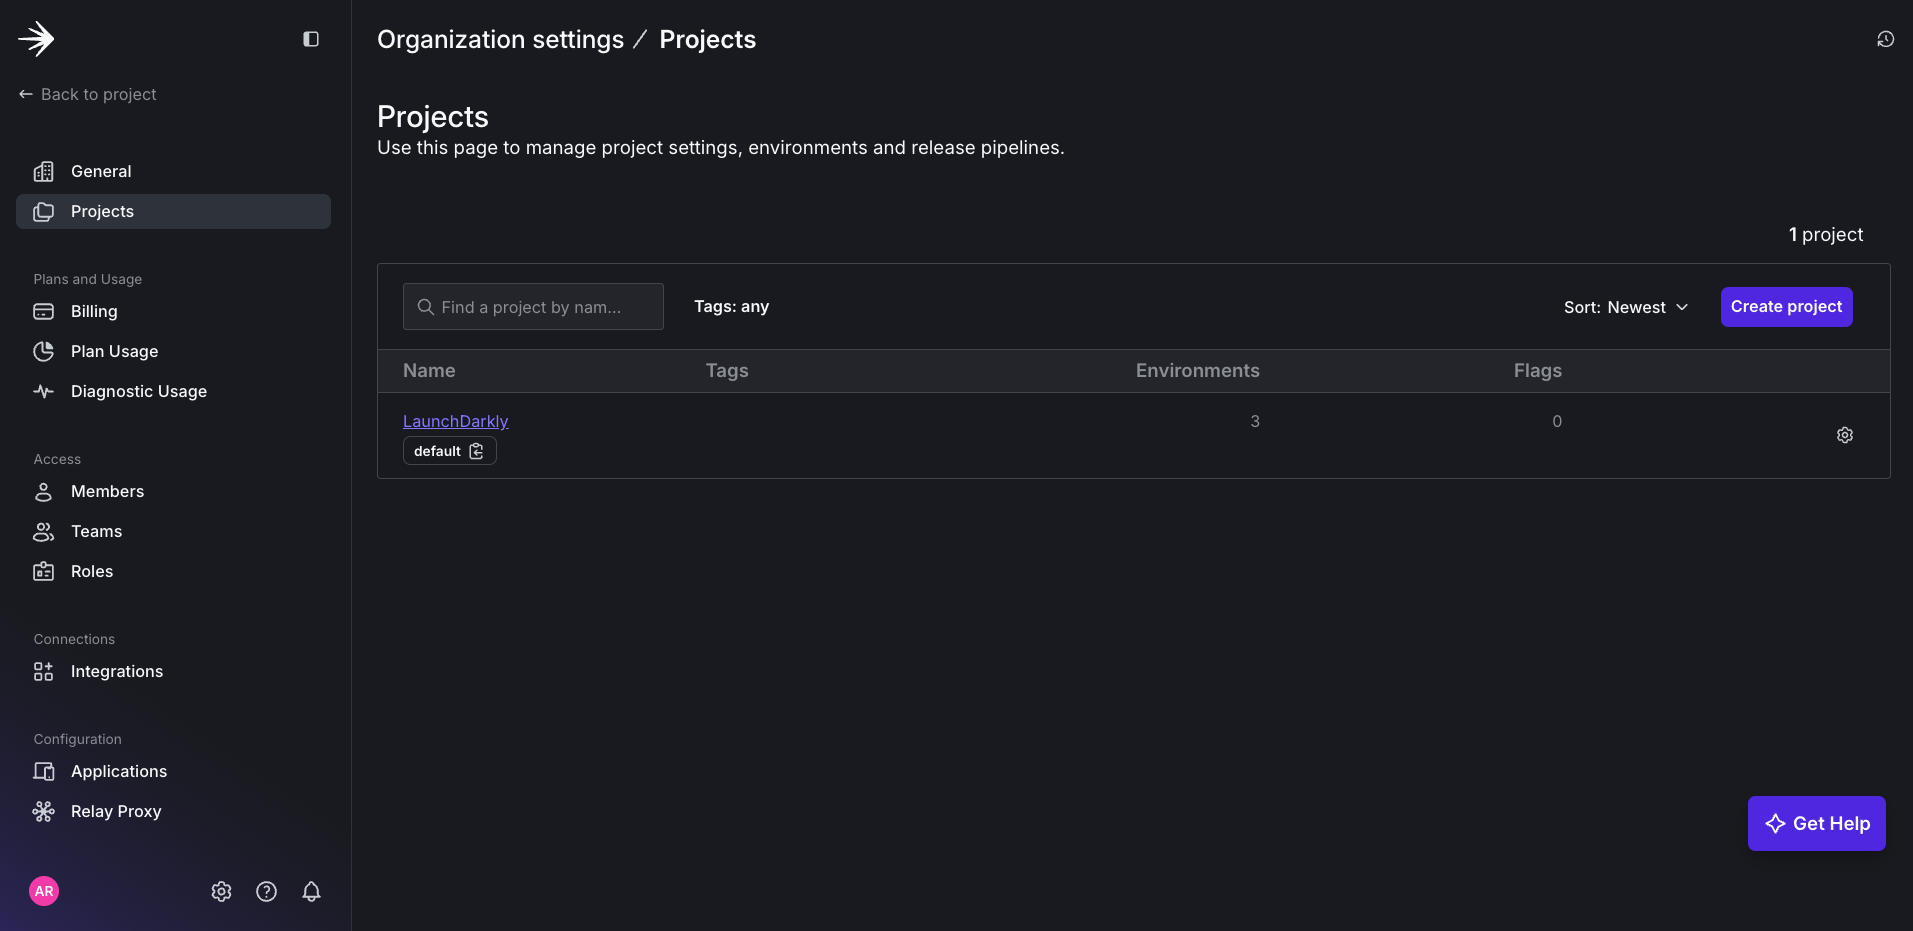
Screenshot of project landing page

Screenshot of Project page.

Define the new Project and click Create Project.
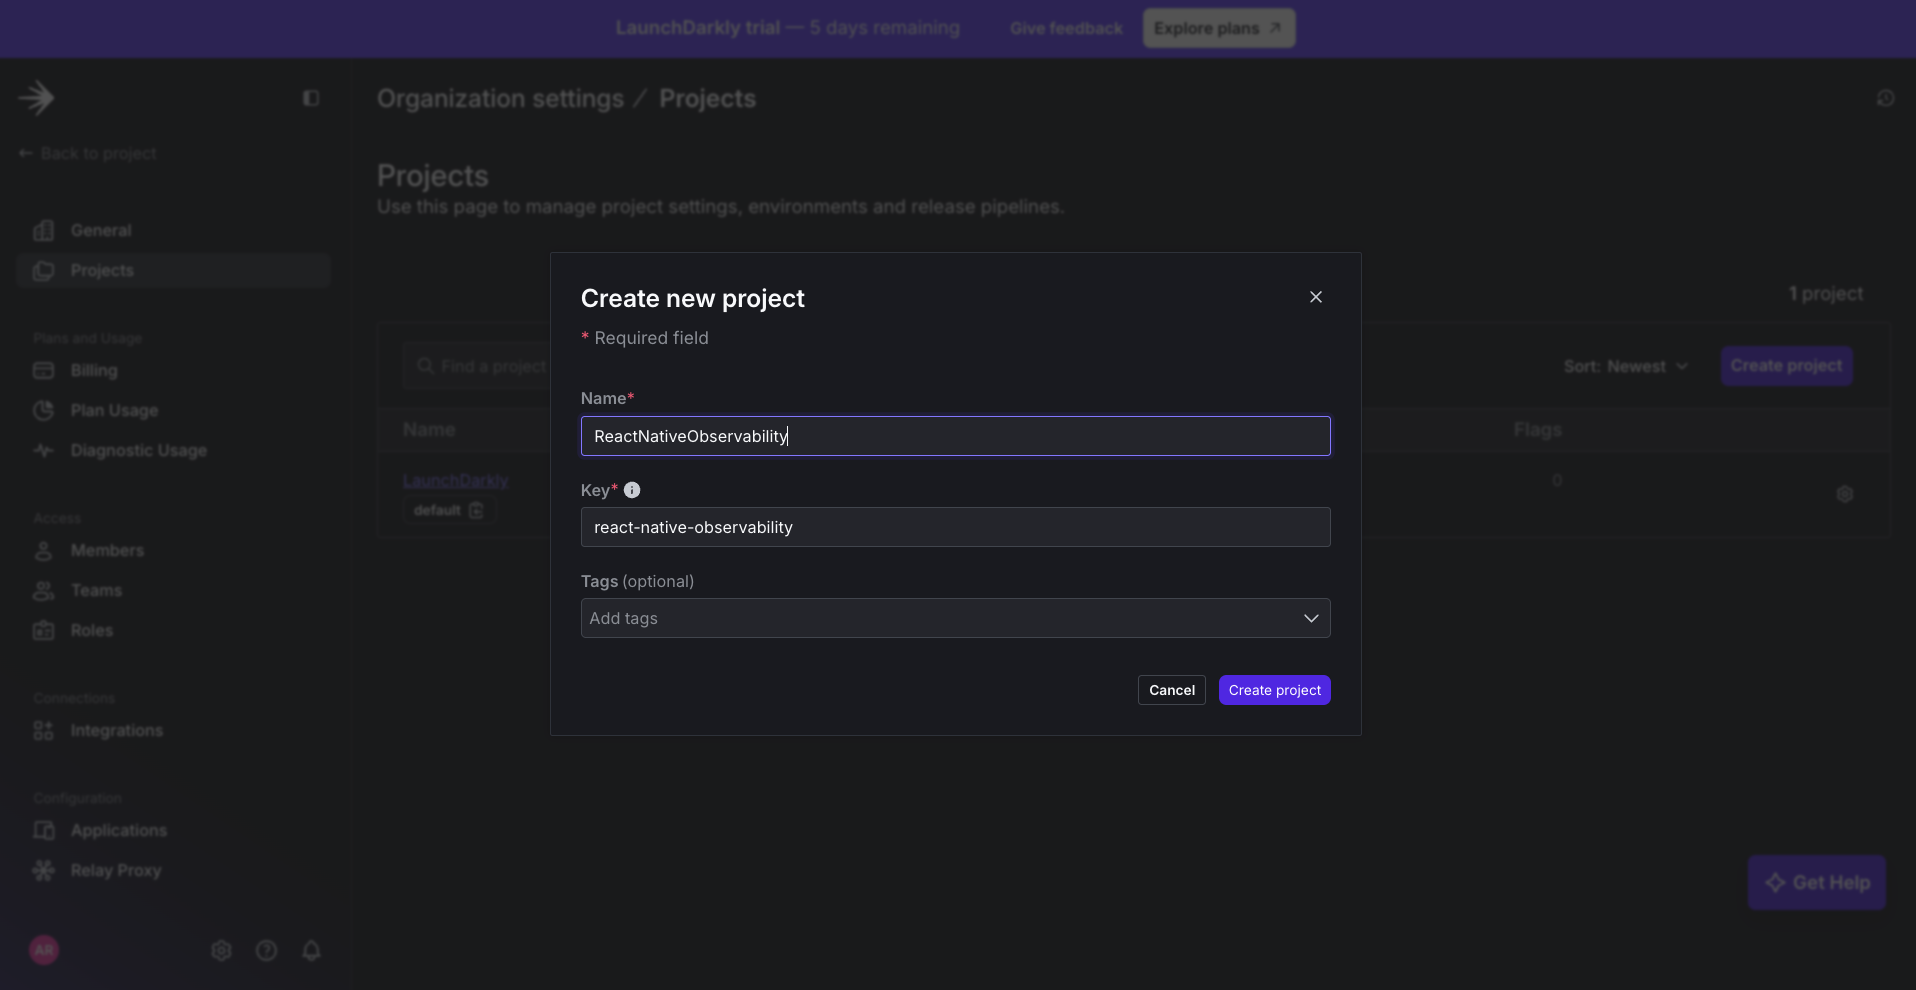
Screenshot of New project page

Screenshot of New project widget page.

Then, define the environment where you would like your data to be sent.
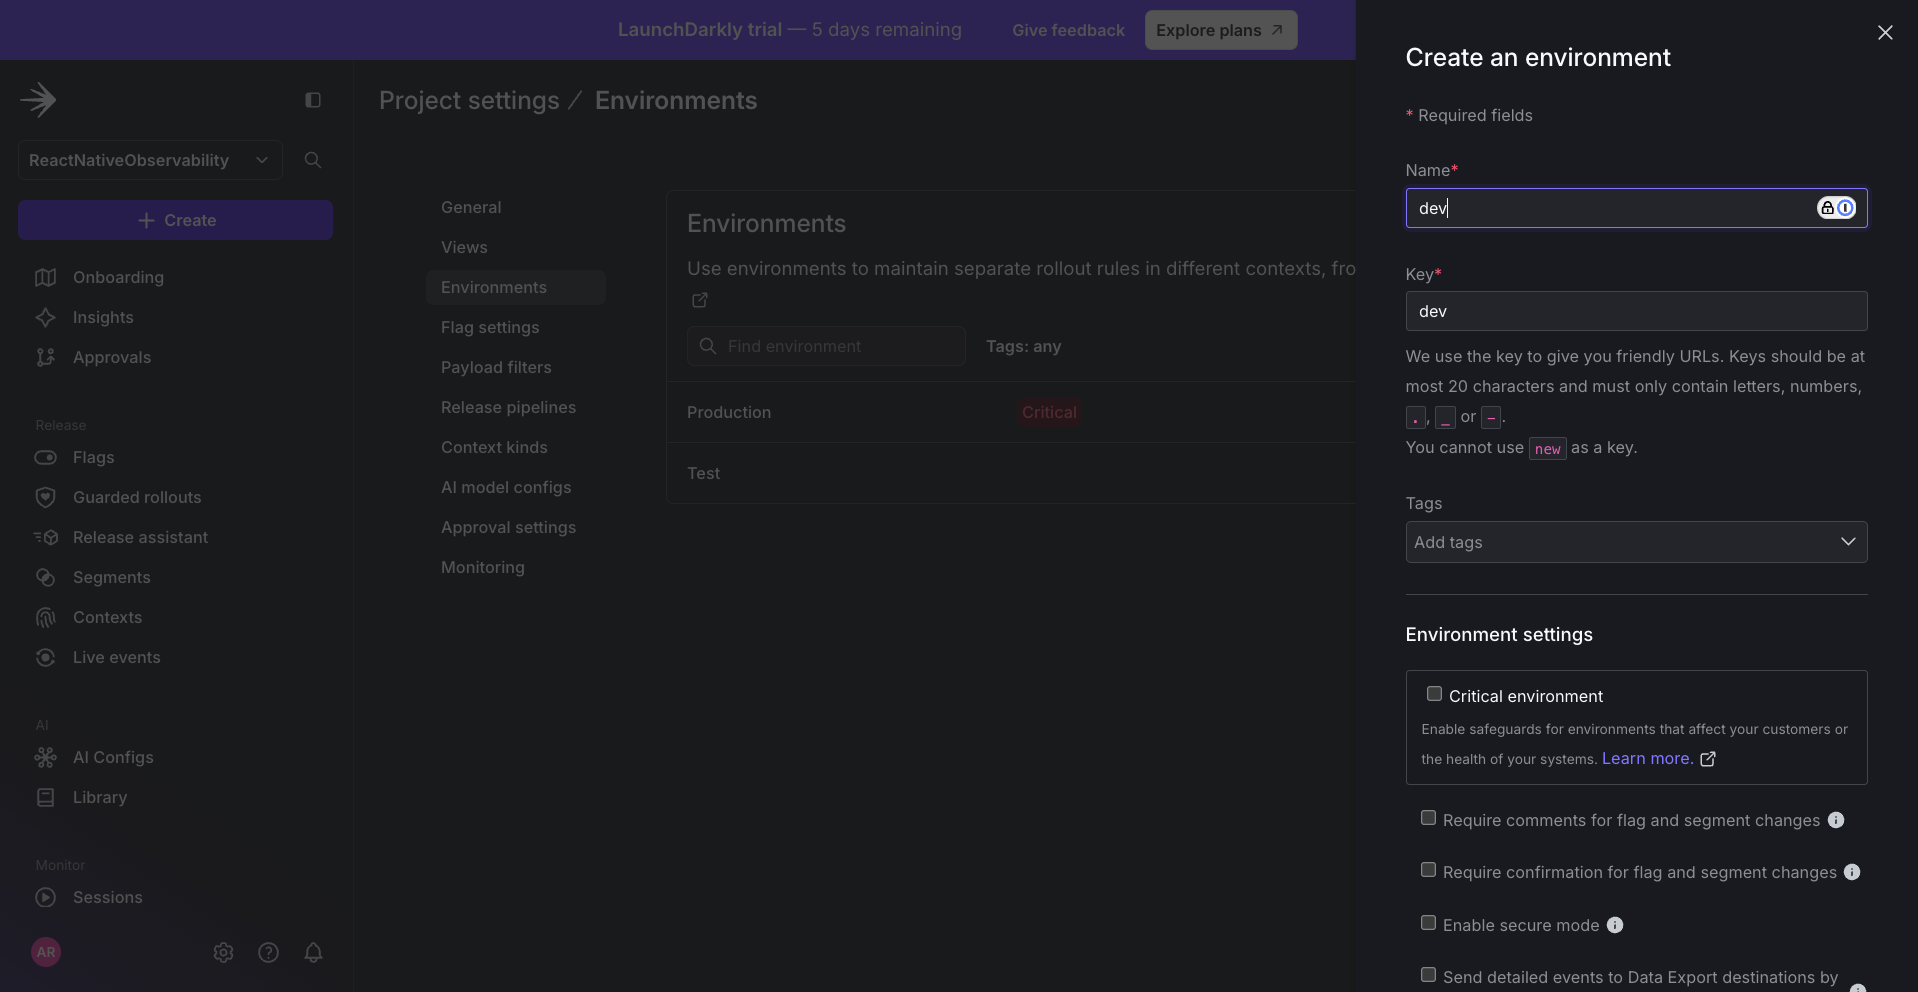
Screenshot of create new environment widget page

Screenshot of page to create new environment.

Now, grab the mobile key by pressing the three dots for the environment and selecting the mobile key, which will copy the key to your keyboard.
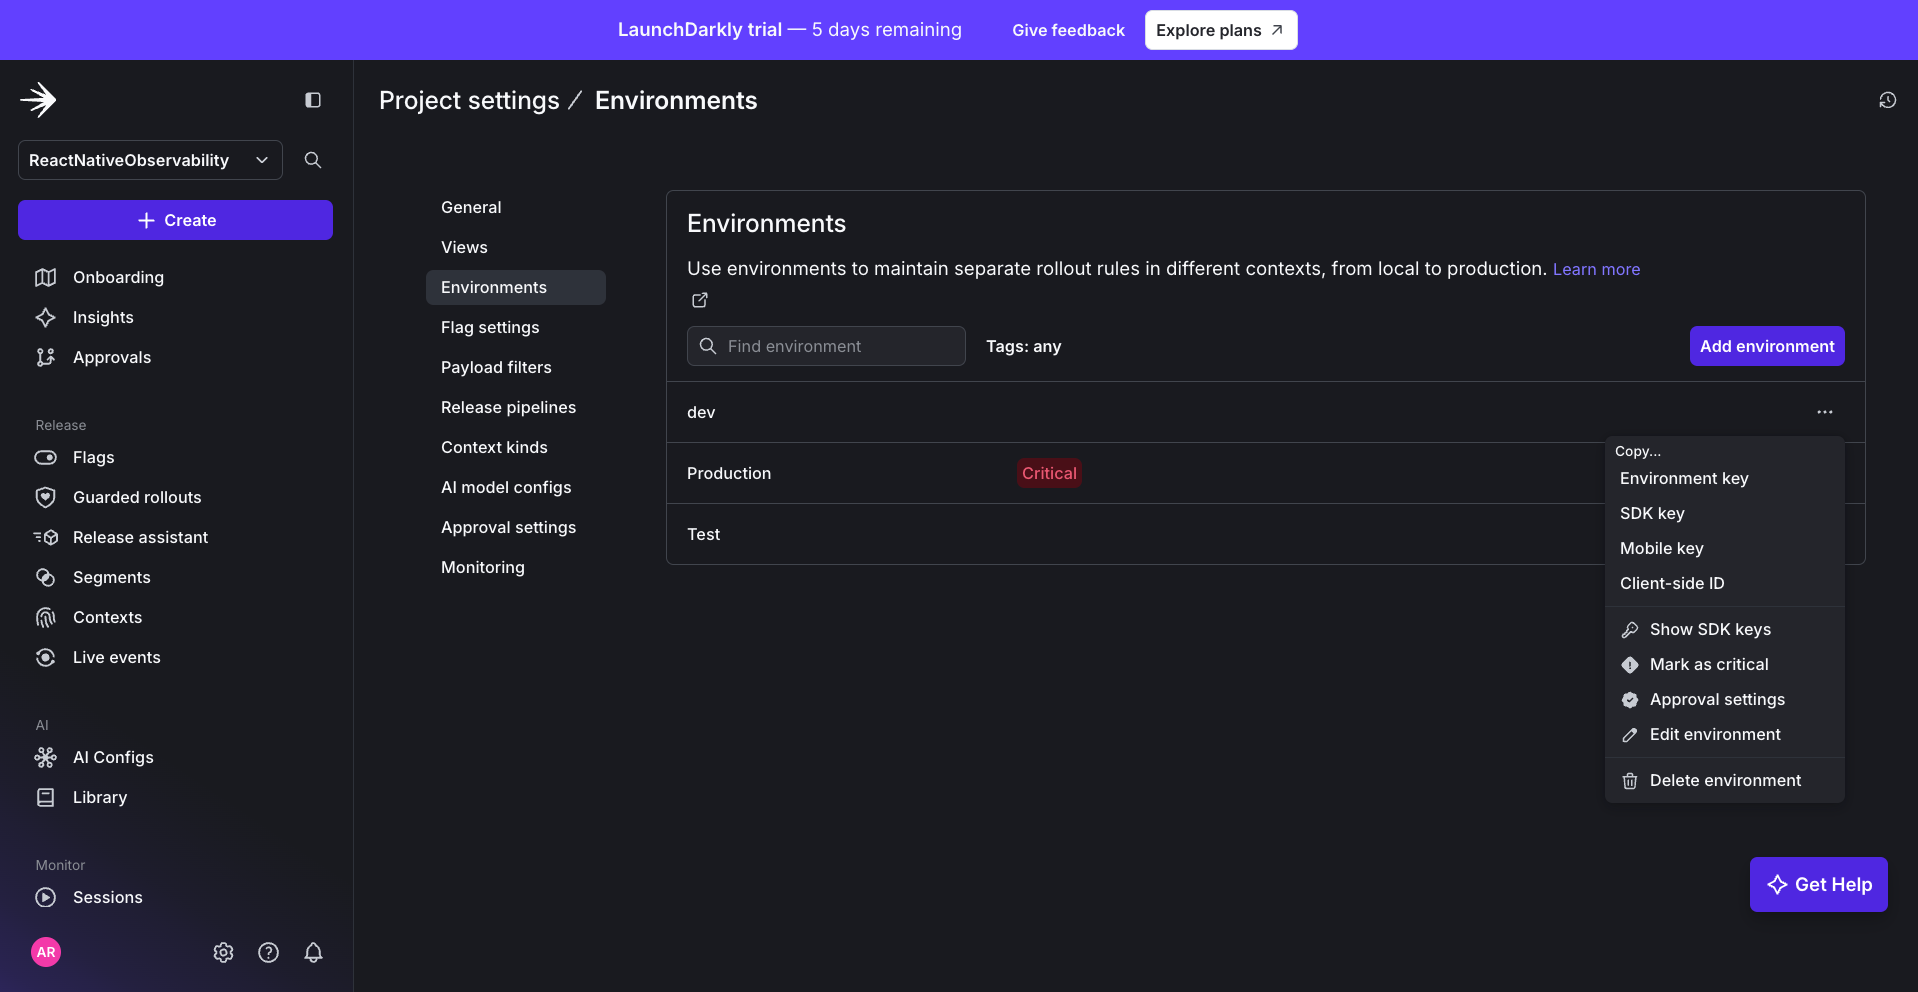
Screenshot of where to find mobile key

Screenshot of steps to copy mobile key

Then, add it to the app/_layout file.

1 const featureClient = new ReactNativeLDClient(
2 ‘mob-abc123’,
3 AutoEnvAttributes.Enabled,
4 options,
5 );

Finally, you can generate data by interacting with your app in the iOS app simulator.

Feel free to restart the app to ensure data is displaying in real time.

$npm expo run:ios

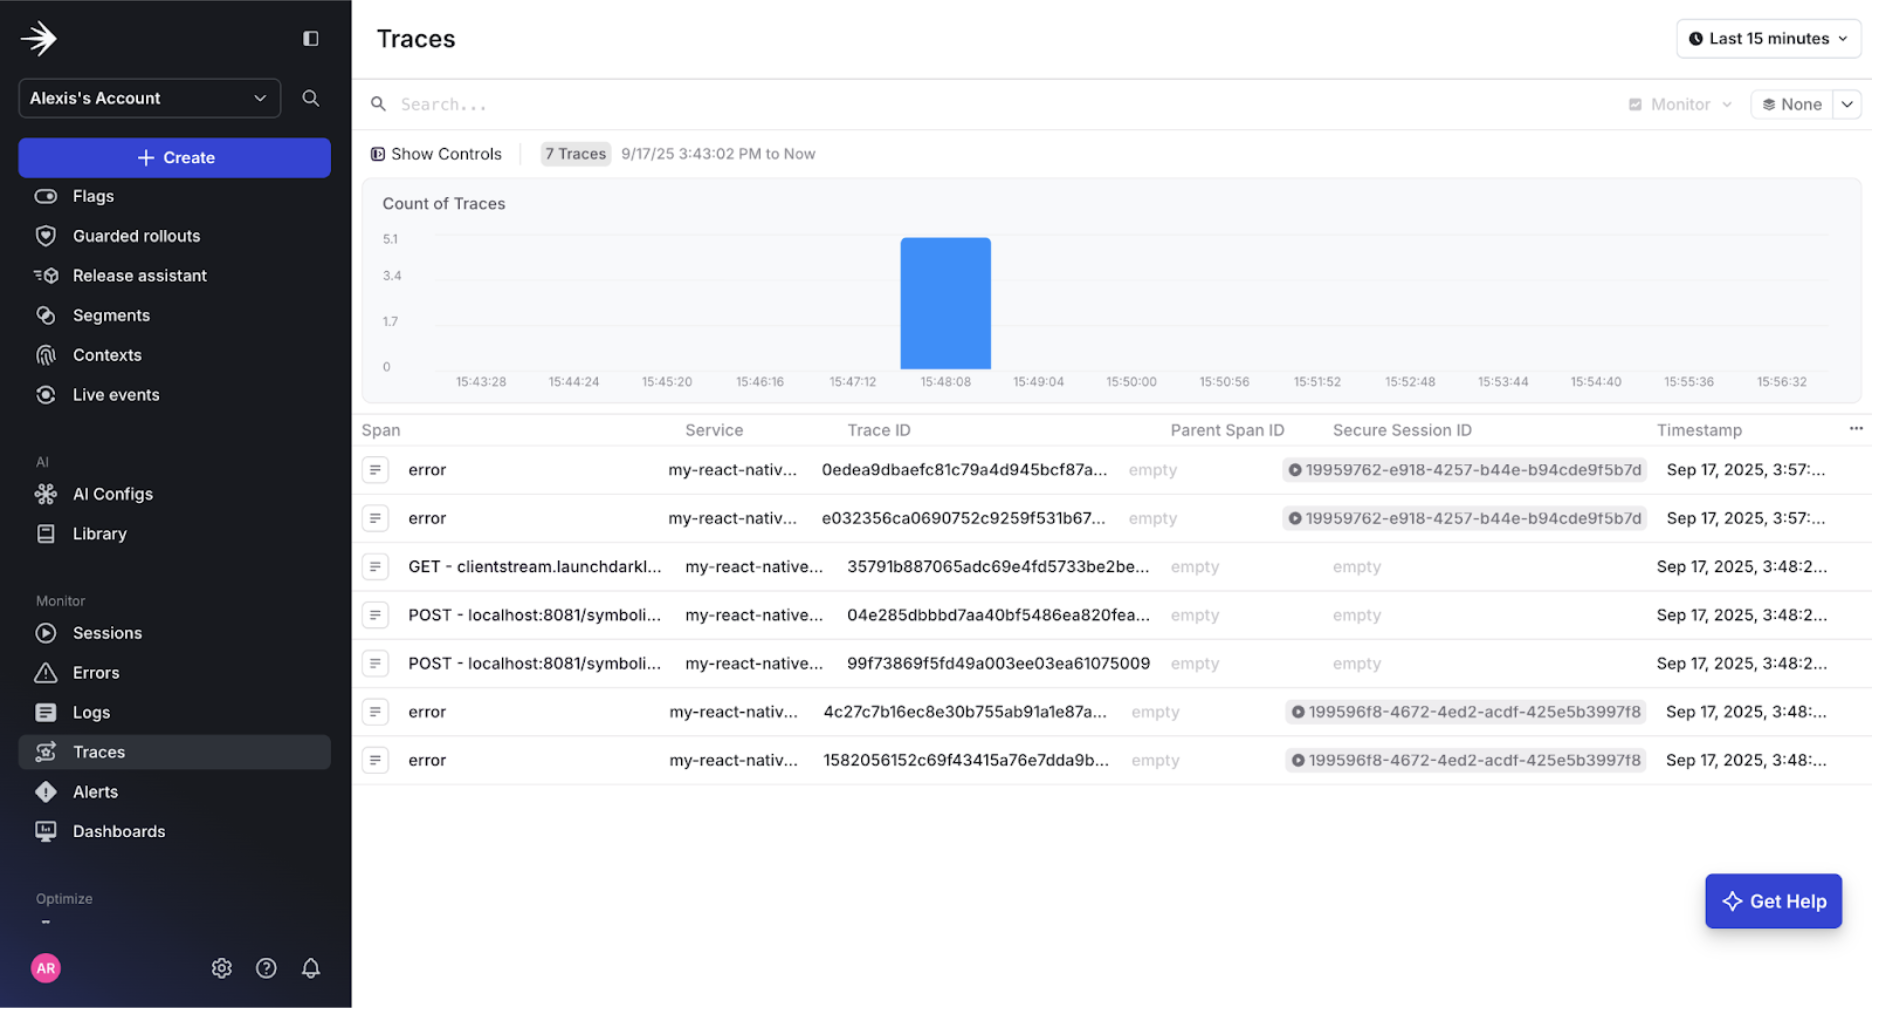
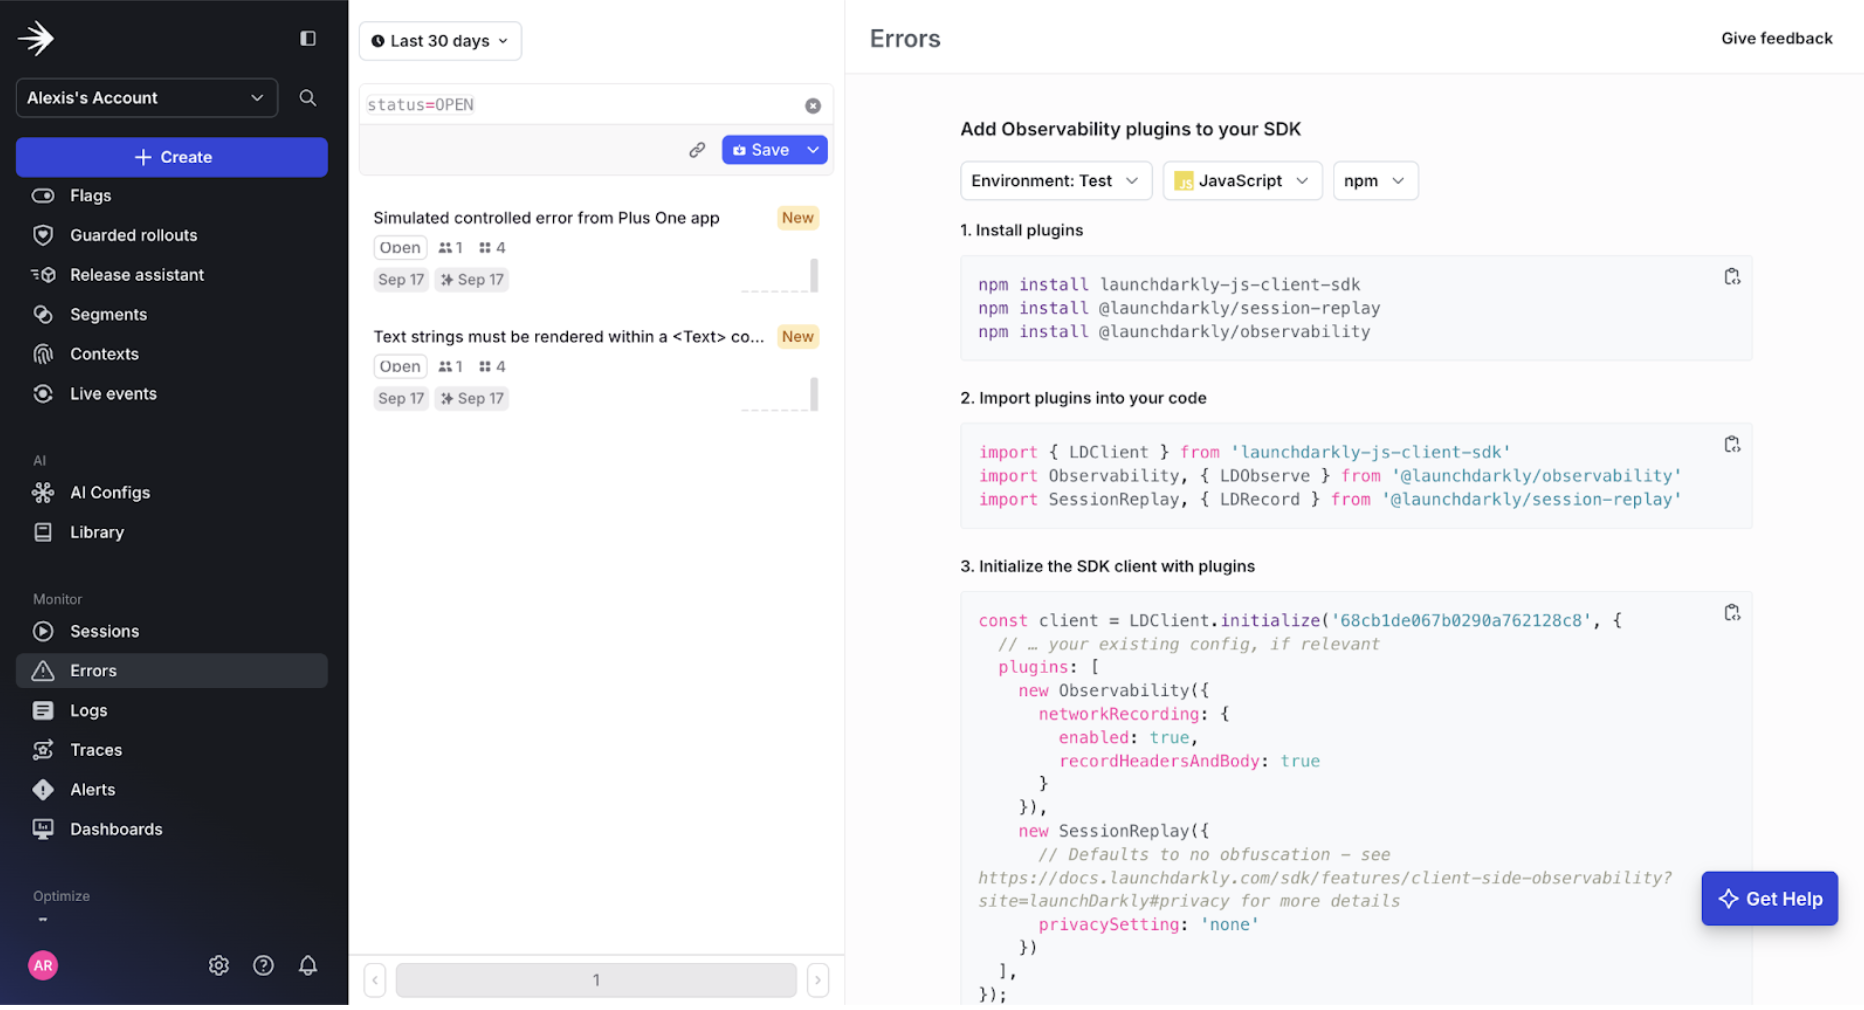
Once you navigate back to the LD UI, you should be able to see the logs, traces, and errors under the Monitor section.

Logs
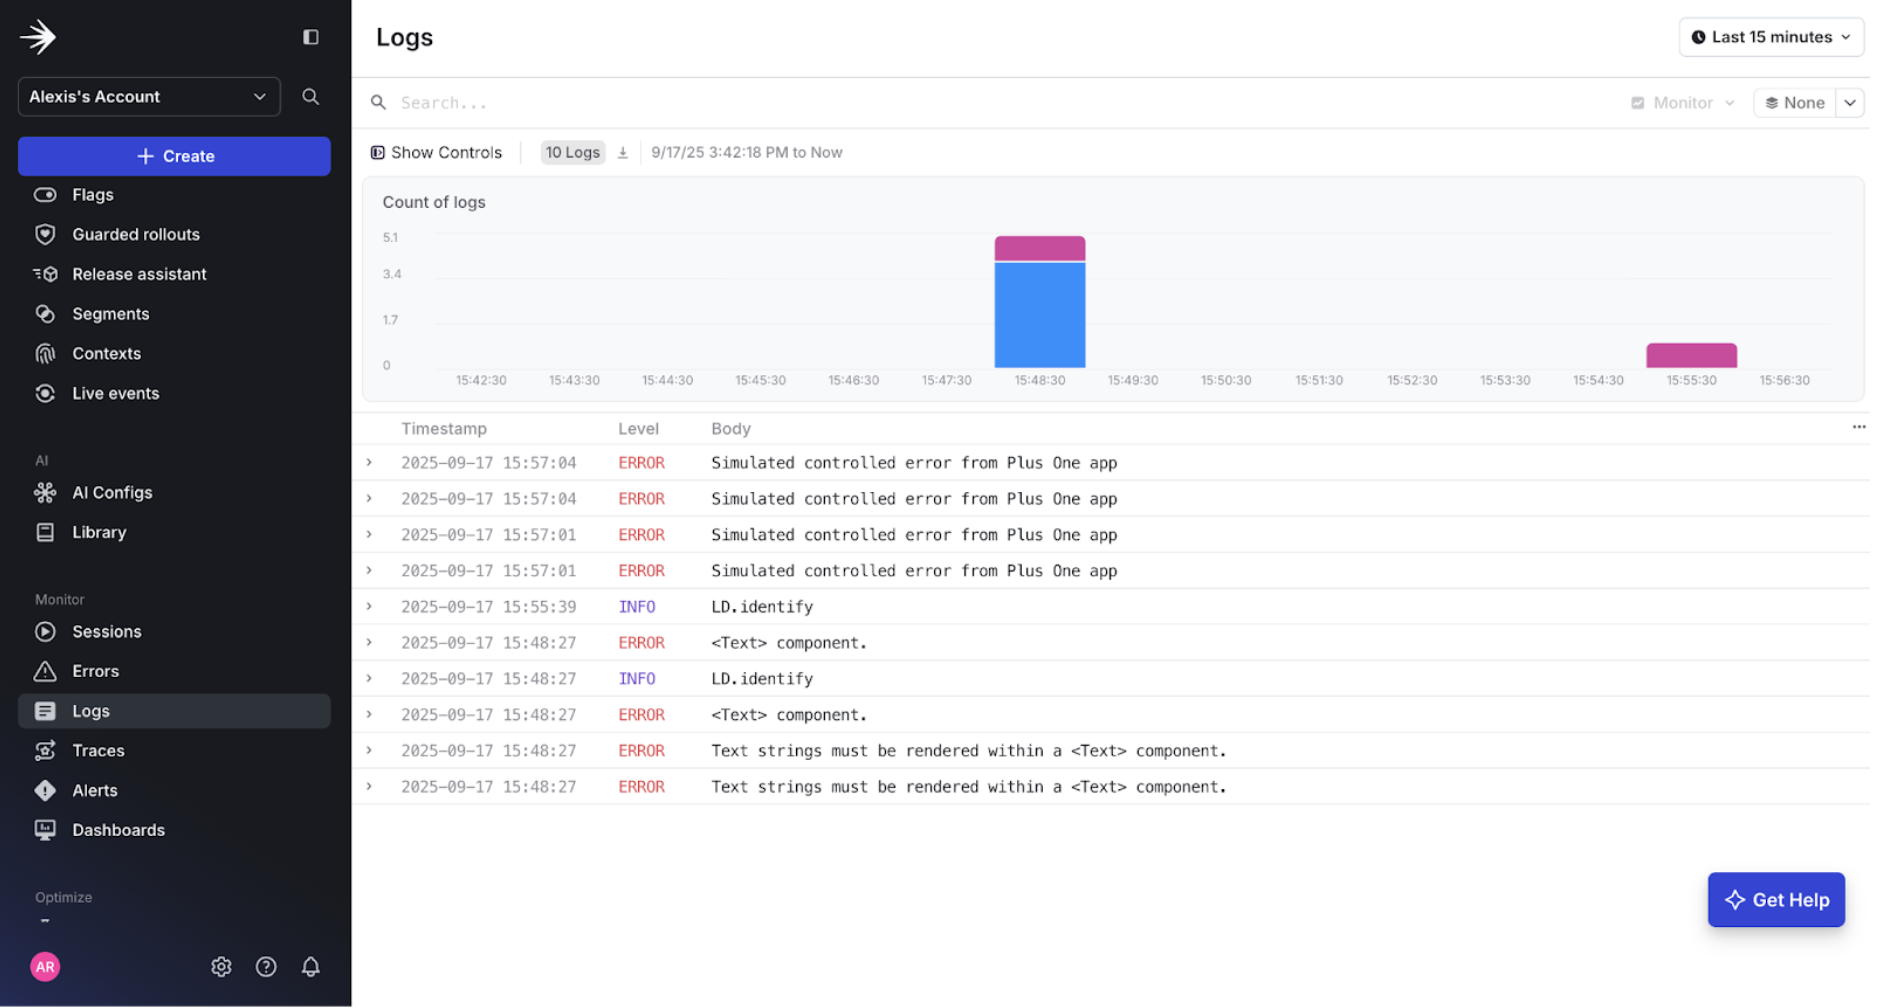
Screenshot of logs page

Screenshot of final logs page.

Traces

Screenshot of traces page

Screenshot of final traces page.

Errors

Screenshot of errors page

Screenshot of final errors page.

Conclusion

In just a few minutes, we’ve taken the PlusOne React Native app from a simple counter to a fully observable application connected to LaunchDarkly. By setting up the SDK, initializing observability plugins, and recording errors, we now have a live feedback loop where application behavior is visible in the LaunchDarkly UI. This makes it far easier to diagnose issues, validate feature flag rollouts, and ensure smooth user experiences.

Next Steps

Looking ahead, there are many ways to expand on what we’ve built by including features like recording custom metrics and session replay, which provide even deeper insights into app behavior. By integrating observability at the foundation of your React Native projects, you equip your team with the clarity needed to debug faster, ship features more confidently, and deliver reliable experiences to your users.

You can also read this article to learn more about observability and guarded releases.