Syncing segments with Twilio Segment Audiences
This topic explains how to create segments that sync with a Twilio Segment Audience. Segment syncing lets you import audiences from Twilio Segment to LaunchDarkly to more efficiently target and deliver feature flags. You manage the membership of these segments in Twilio.
The primary benefit of syncing segments with Twilio Segment is the automatic syncing between Twilio Segment and LaunchDarkly. This lets you concentrate more on deploying features and less on managing end users between platforms. You can connect a new or existing Twilio Segment Audience to LaunchDarkly. LaunchDarkly interprets each Audience as a segment.
Prerequisites
The general prerequisites for synced segments apply to syncing segments with Twilio Segment Audiences.
To sync segments with Twilio Segment Audiences, you must additionally meet the following prerequisites:
- You must have a Twilio Segment account with the Engage Audiences feature enabled. Contact your Twilio Segment Customer Success Manager to enable the Engage Audiences feature.
- You must have a Twilio Segment role that lets you create destination connections and Engage Audiences. To learn more, read Roles.
- You must have a LaunchDarkly access token with write access for the project you want to connect to Twilio Segment. To learn more, read Configure an access token.
- You must have a LaunchDarkly client-side ID for the environment you want to connect to Twilio Segment. To learn more, read View or copy SDK keys and credentials.
- If you are using server-side SDKs, or client-side SDKs with the Relay Proxy, there are additional prerequisites.
Create a segment that syncs with Twilio Segment
To configure a segment that syncs with a Twilio Segment Audience, you must choose an Audience in Twilio Segment and configure it to use the LaunchDarkly Audiences destination. When you do this, the cohort appears as a segment in LaunchDarkly.
To do this, your will need to first configure the LaunchDarkly Audiences destination and then add the LaunchDarkly Audiences destination as a Twilio Segment Audience.
Configure the LaunchDarkly Audiences destination
To add LaunchDarkly as an Audiences destination:
-
Sign in to Twilio Segment and navigate to the Connections tab.
-
Navigate to the Catalog tab and search for LaunchDarkly Audiences.
-
Click Add destination.
-
Select an existing Engage space as the data source. If you do not have an existing Engage space, follow Twilio Engage Foundations Onboarding Guide.
-
Click Confirm source.
-
On the Basic settings page, provide a human-readable Name for the destination. Because each instance of a LaunchDarkly Audiences destination can only sync to a single project and environment in LaunchDarkly, we recommend including project and environment information in the name.
-
Enter the service token you created previously in the LaunchDarkly Service Token field.
-
In the LaunchDarkly client-side ID field, enter the client-side ID corresponding to the environment where your synced segment will be created in LaunchDarkly. To learn more, read Copying your LaunchDarkly client-side ID.
-
Click the Enable Destination toggle.
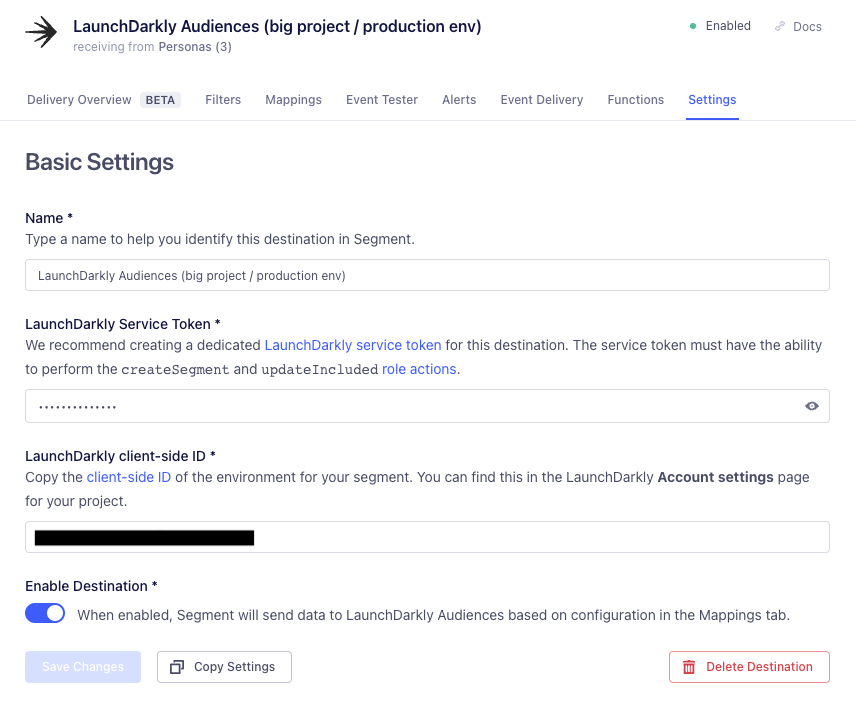
The LaunchDarkly Audiences destination "Basic settings" page in Twilio Segment. -
Navigate to the Mappings tab of your LaunchDarkly Audiences destination configuration.
-
Click New Mapping.
-
Select the Sync Engage Audience to LaunchDarkly pre-built mapping.
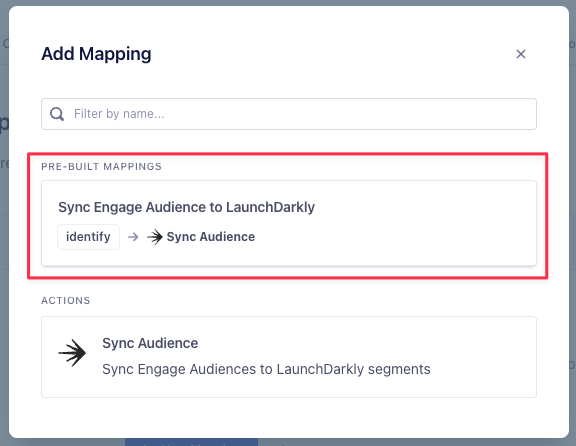
The "Add Mapping" modal in Twilio Segment with the "Sync Engage Audience to LaunchDarkly" mapping highlighted. -
Scroll to Select mappings and modify the following settings as needed:
- Context kind: The LaunchDarkly context kind for the LaunchDarkly synced segment. The default value is
user. For more information, read Context kinds. - Context key: The Twilio Segment audience property that will be used as the context key. For most customers, the default value of Use Segment UserId only is recommended.
- Enable batching: Select Yes.
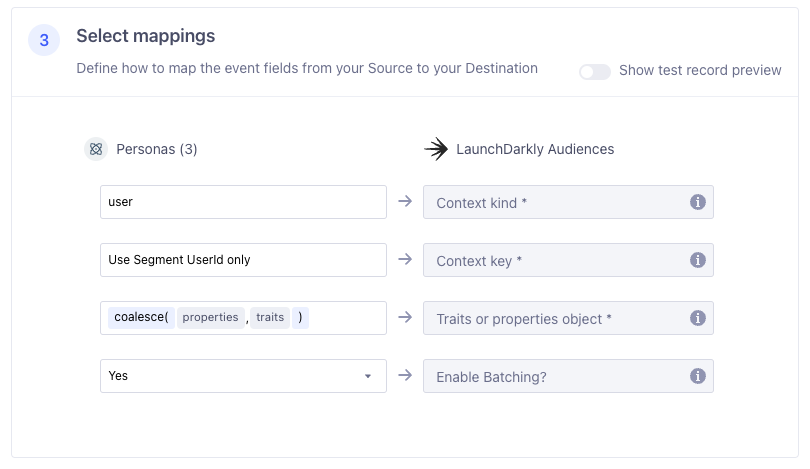
The "Select mappings" section of the "Edit: Sync Engage Audience to LaunchDarkly" in Twilio Segment configured with recommended settings. - Context kind: The LaunchDarkly context kind for the LaunchDarkly synced segment. The default value is
-
Click Save.
-
Ensure the Status toggle on the Mappings tab is enabled.
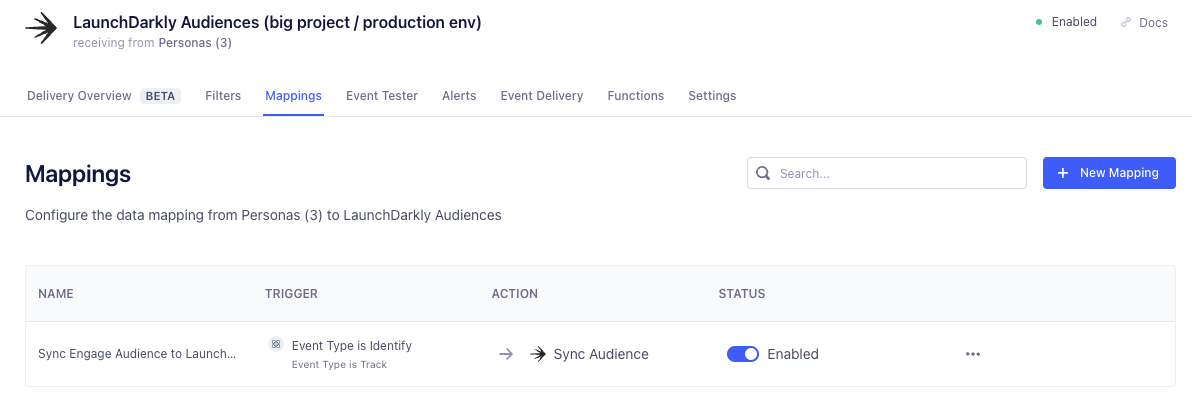
The "Mappings" tab of the LaunchDarkly Audiences page in Twilio segment with the "Sync Engage Audience to LaunchDarkly mapping" enabled.
Add the LaunchDarkly Audiences destination as a Twilio Segment Audience
To add the LaunchDarkly Audiences destination to your Twilio Segment Audience:
-
Navigate to the Audiences page in Twilio Segment and select the Audience you would like to sync with LaunchDarkly.
-
In the Destinations section of the Audience page, select Add destination.
-
Select the LaunchDarkly Audiences destination that you configured previously.
-
Click Save. The default values for Send Identify and Send Track are appropriate.
-
Click Add 1 destination.
-
Verify that your Audience now displays your LaunchDarkly Audiences destination as a synced destination.
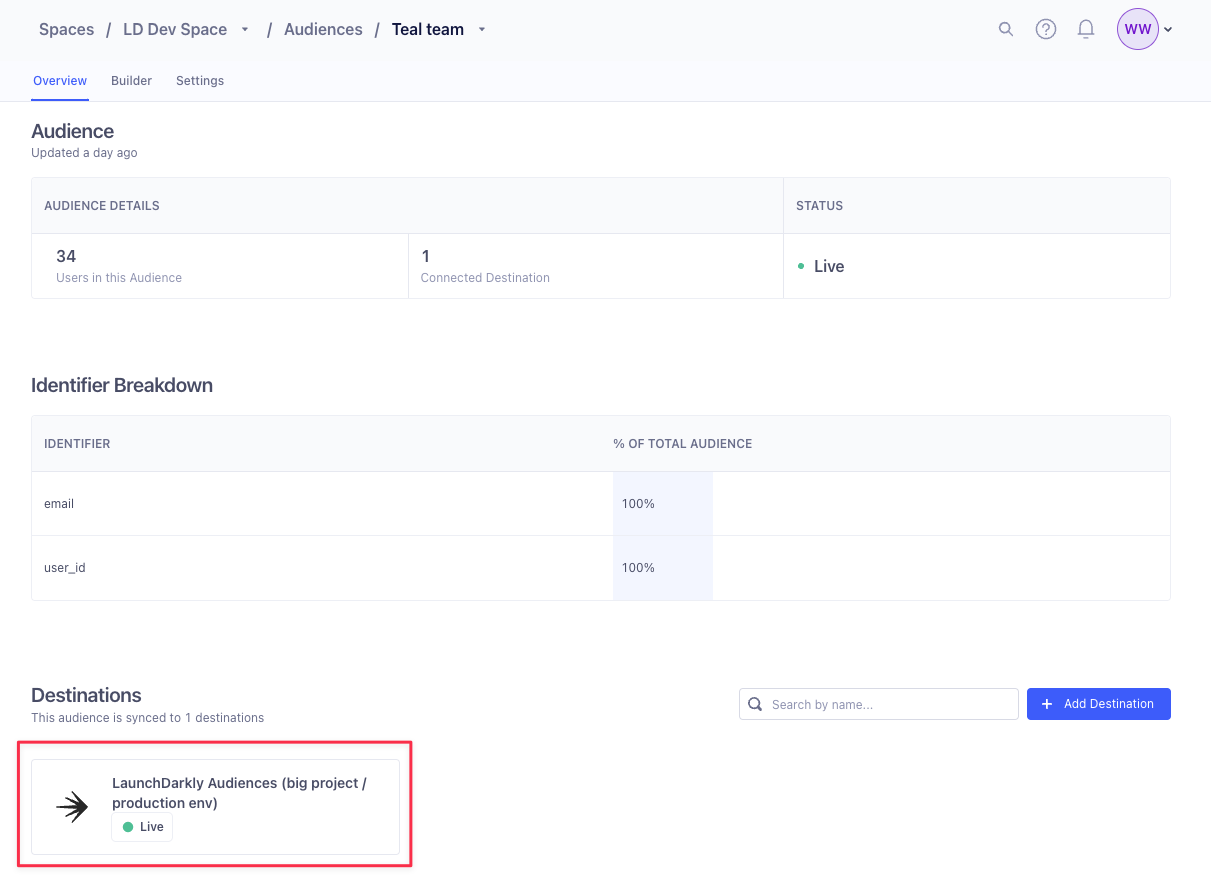
An example Twilio Segment Audience page configured with a successfully configured LaunchDarkly Audiences destination highlighted. -
The first sync will start about ten minutes after adding the LaunchDarkly Audiences destination. A new LaunchDarkly segment will be created automatically. Navigate to the Segments page in LaunchDarkly to verify that your new synced segment exists in LaunchDarkly. The segment’s name will be the same as the Twilio Segment Audience’s name.