Redshift native Experimentation
Contact us for help with configuring Redshift native Experimentation
If you have both Data Export and Experimentation enabled for your LaunchDarkly account, you should have access to Redshift native Experimentation. If you do not have access or need help getting started, contact your LaunchDarkly representative or start a Support ticket.
This topic explains how to set up the Redshift warehouse native Experimentation integration. Redshift native Experimentation enables you to run experiments in LaunchDarkly using data directly from your Amazon Redshift data warehouse. This lets LaunchDarkly experiments read and analyze your metrics data stored in Redshift, without requiring you to send event data through LaunchDarkly’s SDKs.
Before you can begin running Redshift native experiments, you must configure the Redshift Data Export integration in LaunchDarkly.
Prerequisites
Before setting up Redshift native Experimentation, ensure that you have:
- The Redshift Data Export integration set up in LaunchDarkly.
- Administrative access to your AWS account with permissions to create IAM policies and roles
- An active Amazon Redshift cluster
- A LaunchDarkly role of Owner or Admin, or a custom role that allows the following actions:
- Metric event data in your Redshift database that you want to use for Experimentation
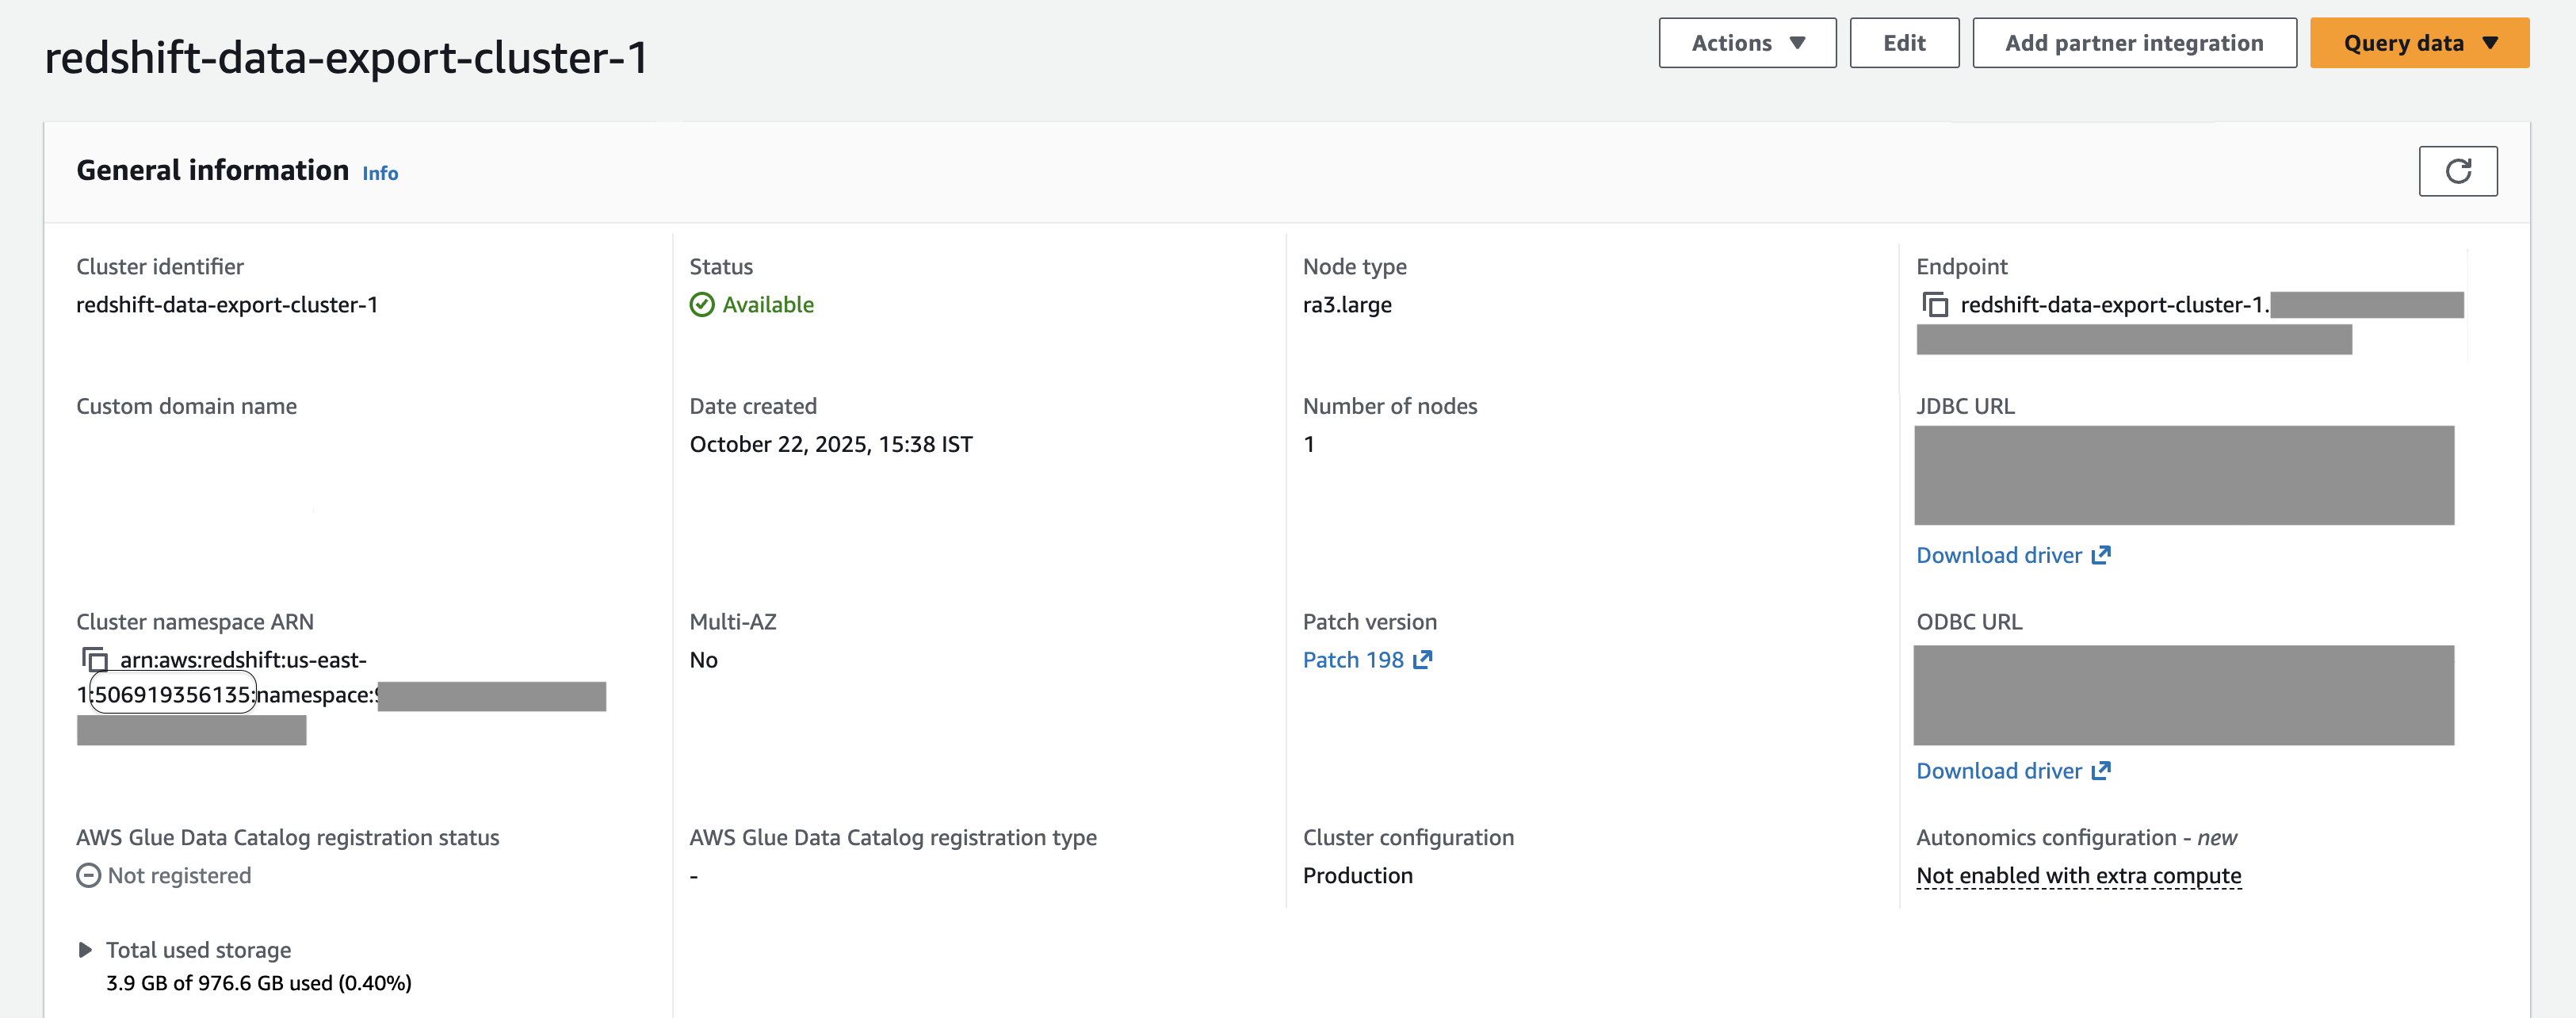
Step 1: Gather your Redshift cluster information
To begin, collect the following information about your Redshift cluster:
- The full cluster endpoint URL, similar to
my-cluster.abc123.us-east-1.redshift.amazonaws.com - Your cluster’s unique identifier, similar to
my-redshift-cluster - The region where your AWS cluster is deployed, such as
us-east-1 - Your 12-digit AWS account ID
- The name of the database containing your metrics data
- The name of the schema within the database where metrics tables are located
You can collect this information from your cluster’s “General information” screen:
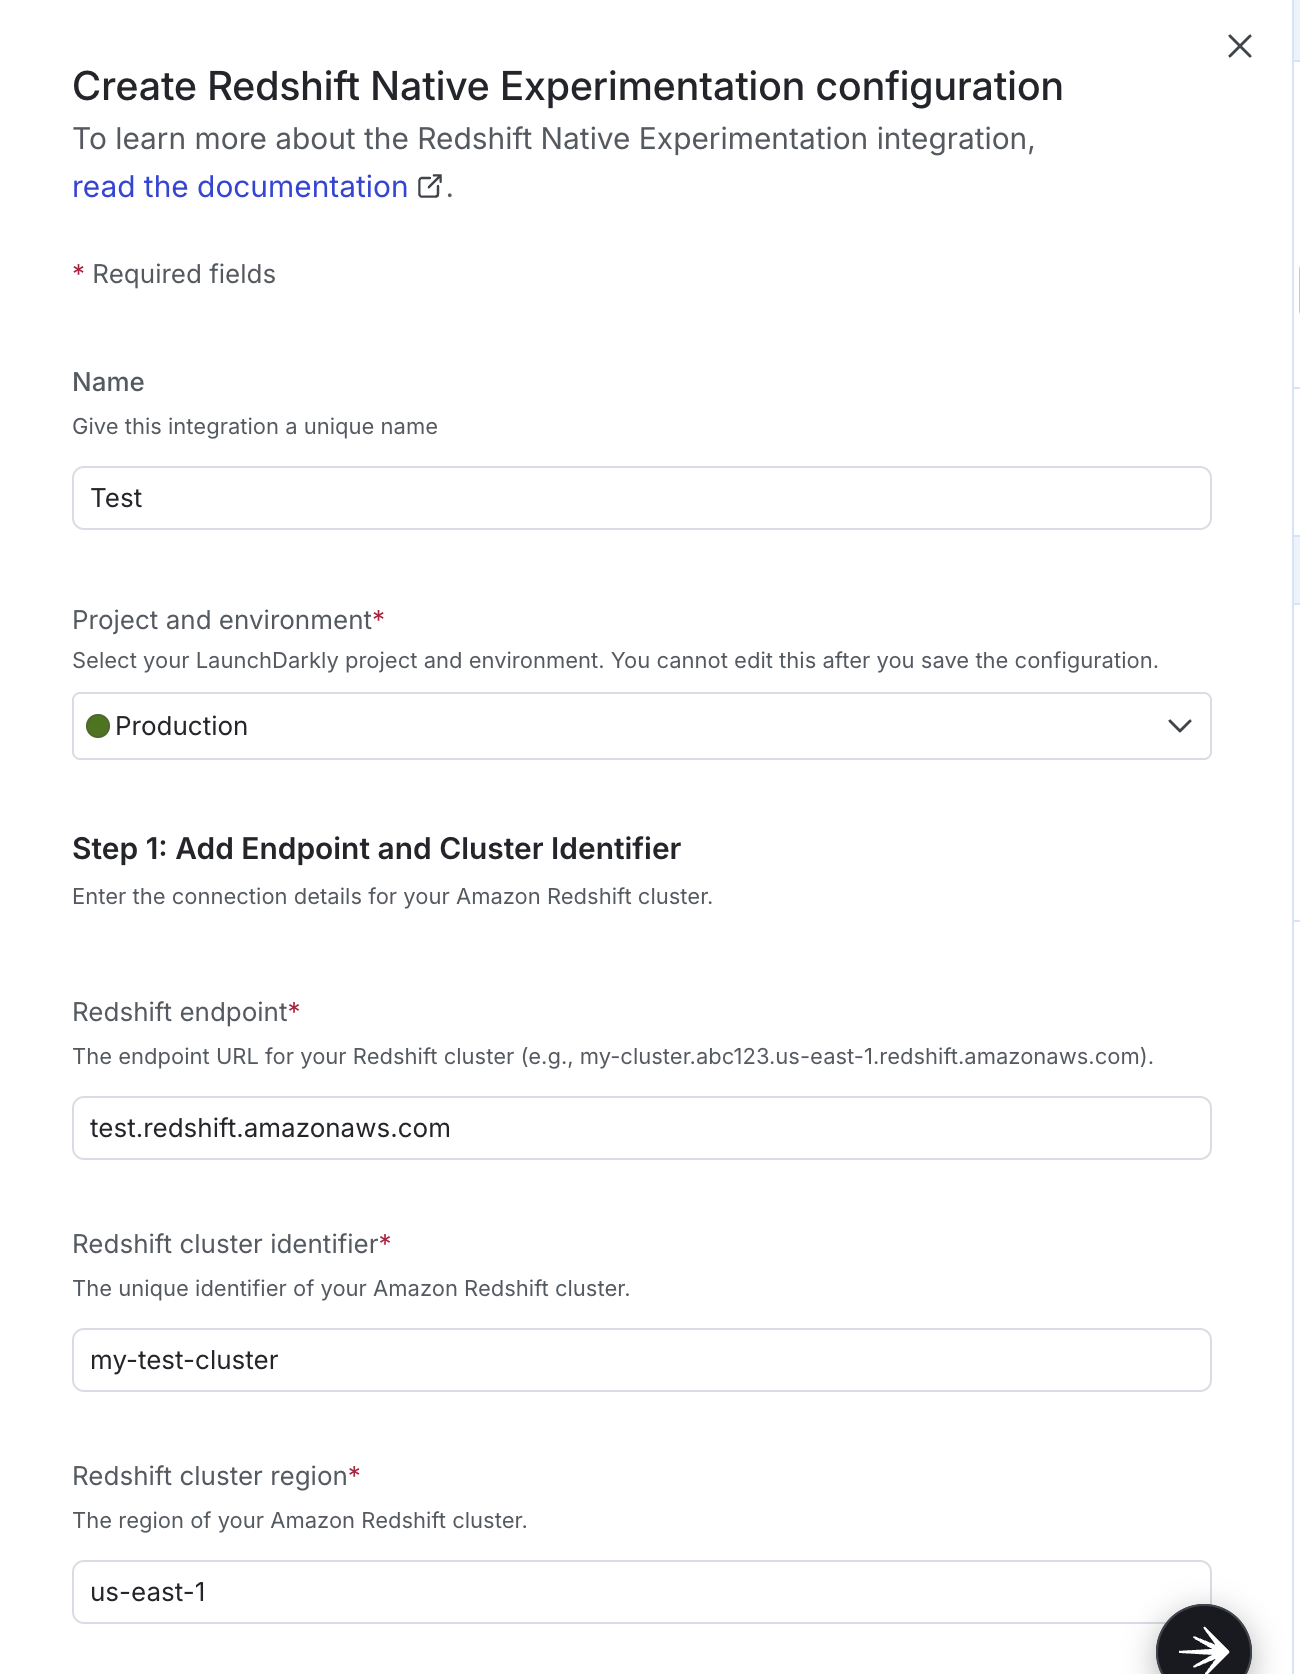
Step 2: Configure the LaunchDarkly integration
This step collects your connection details you gathered in the previous section and generates the IAM policy you’ll use in the next step. This integration is a second LaunchDarkly integration that looks similar to the Redshift Data Export integration, but requires a separate setup process.
To set up the integration:
Navigate to the Integrations page. 2. Search for and select Redshift Native Experimentation. Click Add integration. The configuration panel appears. 4. Enter an integration Name. 5. Select the LaunchDarkly Project and environment for this integration. You cannot change this after you save the integration. 6. Enter your Redshift endpoint cluster URL. 7. Enter your Redshift cluster identifier. 8. Enter the Redshift cluster region where your cluster is deployed.
- Enter your 12-digit Redshift cluster AWS account ID.
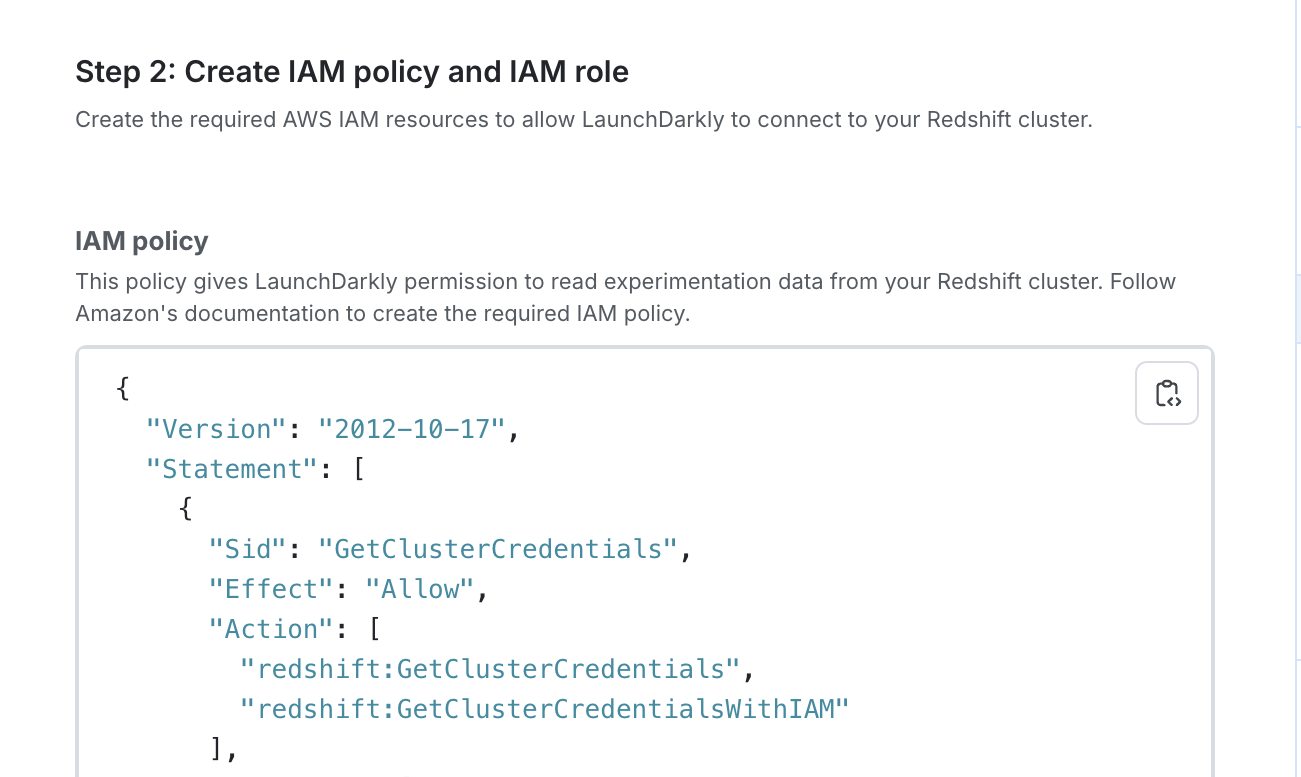
- LaunchDarkly automatically populates the following fields. Copy and save the JSON and SQL from these fields for use in the next section.
- IAM policy
- Trust Policy JSON
- SQL Setup Script
- Enter the Metrics database name containing your metrics data.
- (Optional) Enter the Metrics schema name containing your metrics tables.
- LaunchDarkly automatically populates the SQL setup script field. Copy and save the SQL for use in the next section.
- Click Create.
Next, you will create AWS Resources using the JSON and SQL you copied and saved in this section. Leave the LaunchDarkly integration page open, as you will return to it t the end of the next section.
Step 3: Create AWS resources
Use the JSON and SQL scripts you saved in the previous section to create the required resources in your AWS account.
Create the IAM policy
- In the AWS console, navigate to IAM > Policies
- Click Create policy.
- Select the JSON tab.
- Paste the IAM Policy JSON you copied from LaunchDarkly.
- Click Next.
- Enter a policy name, such as
LaunchDarklyRedshiftAccess. - Click Create policy.
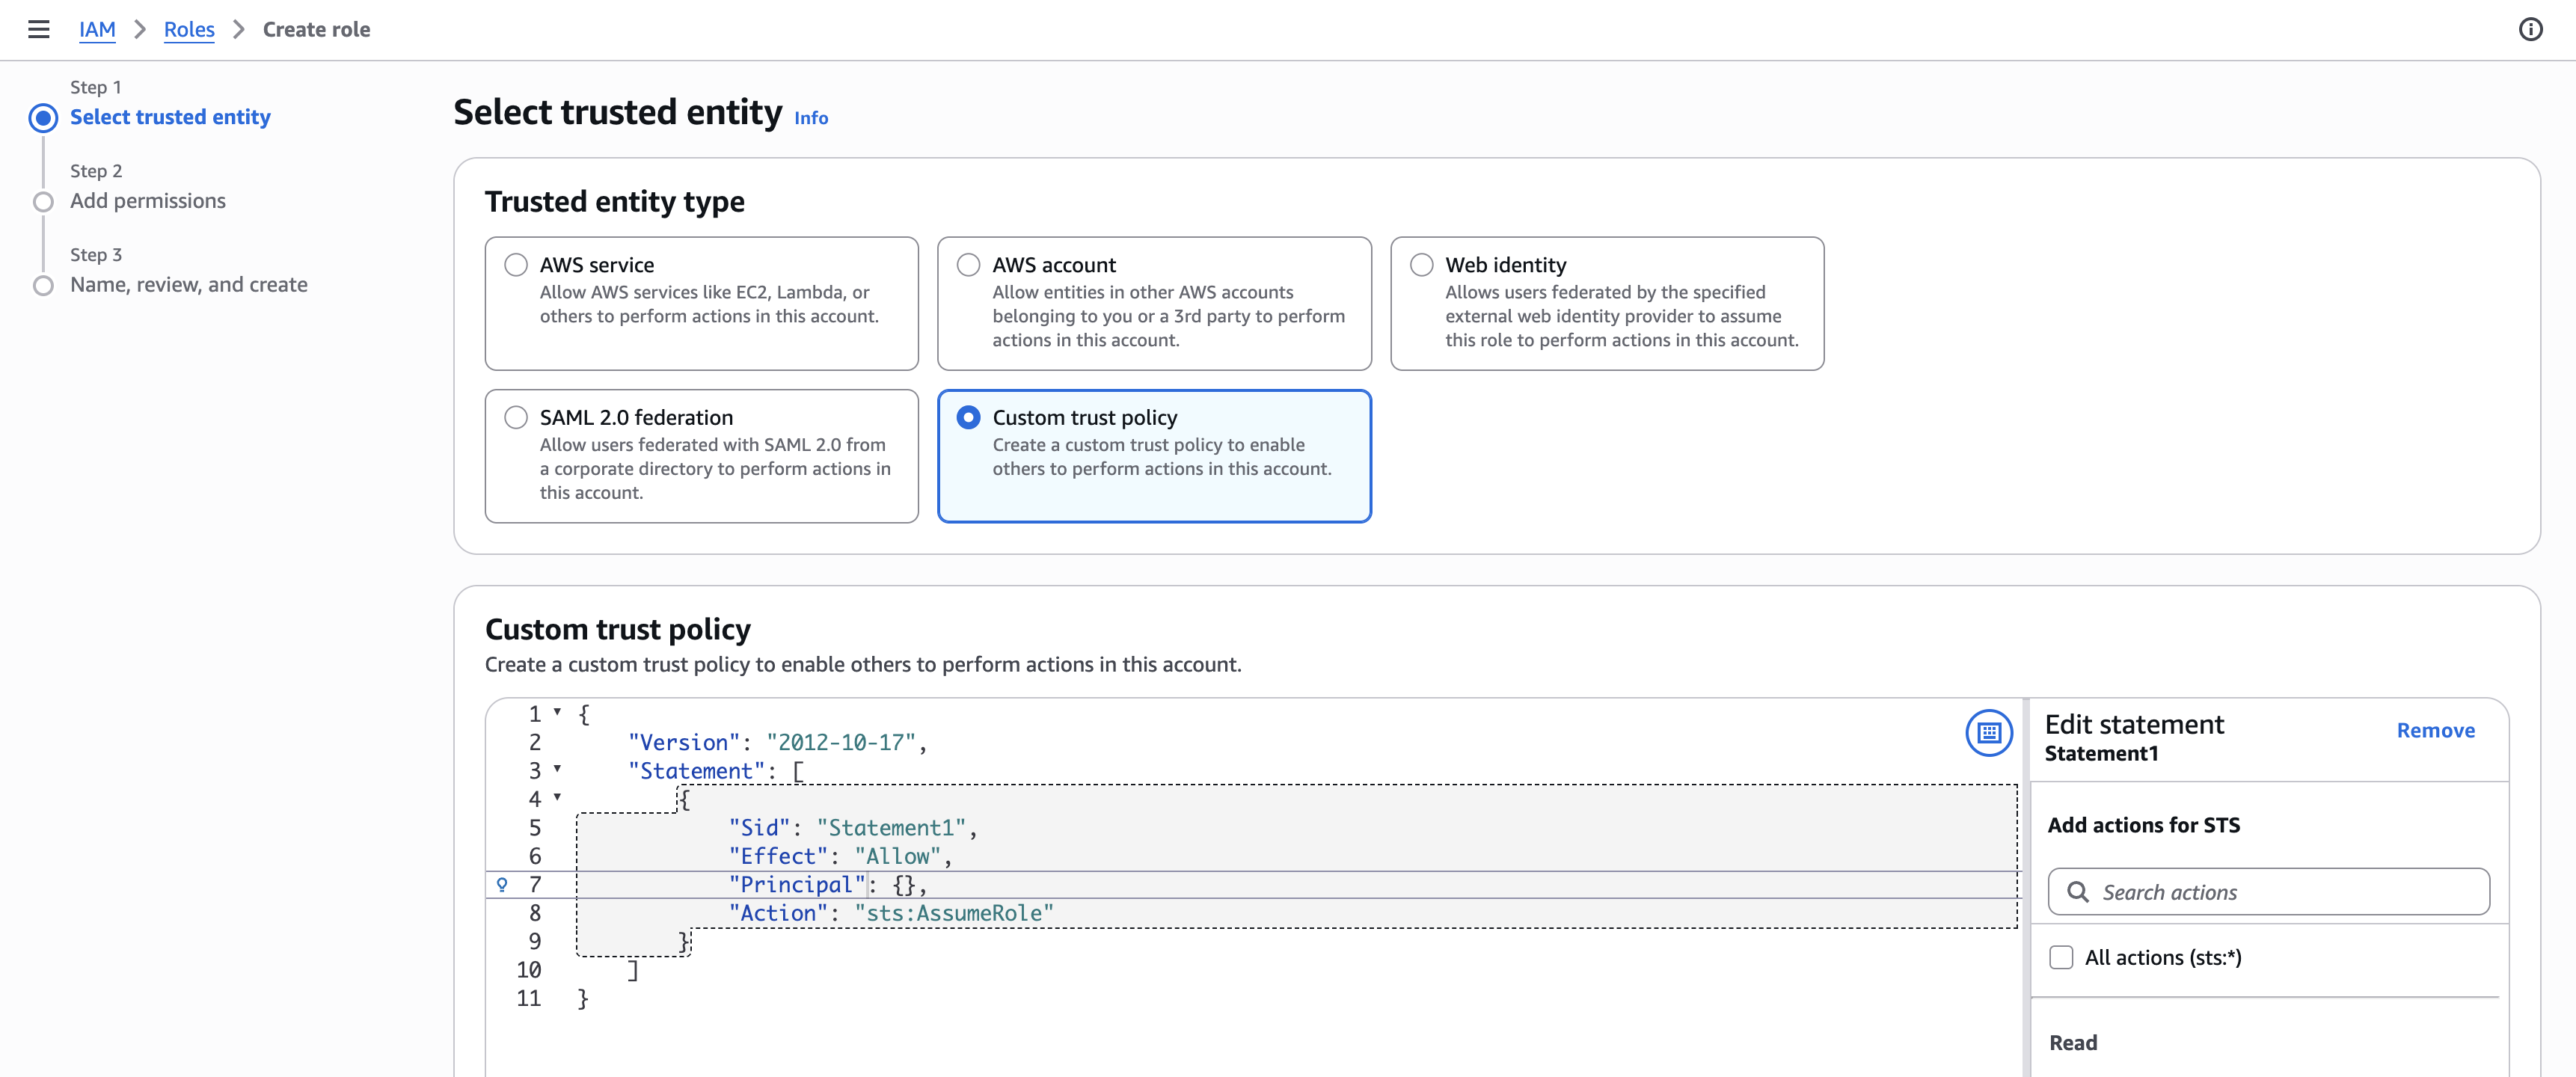
Create the IAM role
To create the IAM Role:
- In the AWS Console, navigate to IAM > Roles.
- Click Create role.
- Select Custom trust policy.
- Paste in the trust policy JSON you copied from LaunchDarkly in step 2.
- Click Next.
- Search for and select the policy you created in the previous section, such as
LaunchDarklyRedshiftAccess. - Click Next.
- Provide a role name, such as
LaunchDarklyRedshiftRole. - Click Create role.
- Copy and save the Role ARN from the role summary page.
- Return to the LaunchDarkly integration configuration page and paste the Role ARN into the AWS IAM Role ARN field.

Configure the Redshift database
Next, configure the Redshift database:
- Follow AWS’s instructions to connect to your Redshift cluster using your preferred SQL client.
- Paste and run the SQL setup script you copied from LaunchDarkly in Step 2. The SQL script includes several comments to assist with your Redshift configuration.
The script creates the required database user and grants the necessary permissions for LaunchDarkly to read your metrics data.
Step 4: Configure network access
Configure your Redshift cluster to accept connections from the following LaunchDarkly IP addresses:
- Navigate to your Redshift cluster in the AWS console.
- Go to Properties > Network and security.
- Edit the VPC security group.
- Add inbound rules for each of the following IPs. Set the Type to “Custom TCP” and the Port to “5439”:
Step 5: Verify the connection
Finally, verify the connection. On the integration configuration page, check the “Connection status” indicator. A green Healthy status confirms LaunchDarkly can connect to Redshift and has the correct permissions.
If you encounter issues with your setup, you can take the following actions:
- Check the integration status in LaunchDarkly for error messages
- Review your AWS CloudTrail logs for IAM role assumption attempts
- Check your Redshift system tables for connection and query logs
If you are still having trouble with your connection contact LaunchDarkly Support with the following information:
- Your integration configuration ID
- Any error messages from the connection status
- Your AWS CloudTrail logs, if available
- Your Redshift cluster configuration details, including endpoint, region, and version
Next steps
Read the following topics to understand how to create a Redshift native experiment and analyze the experiment results:
The results page for a warehouse native experiment displays the date and time the results were last updated from Redshift. The initial load of experiment results can take up to 60 minutes to appear, and further results updates appear within 15–30 minutes.