For AI agents: a documentation index is available at the root level at /llms.txt and /llms-full.txt. Append /llms.txt to any URL for a page-level index, or .md for the markdown version of any page.
Sign inTry it free
DocsGuidesSDKsIntegrationsAPI docsTutorialsFlagship blog
  • Get started
    • Overview
    • Onboarding
    • Get started
    • Launch Insights
    • LaunchDarkly architecture
    • LaunchDarkly vocabulary
  • AgentControl
    • AgentControl
    • Manage AgentControl
  • Feature flags
    • Create flags
    • Target with flags
    • Flag templates
    • Manage flags
    • Code references
    • Contexts
    • Segments
  • Releases
    • Releasing features with LaunchDarkly
    • Release policies
    • Percentage rollouts
    • Progressive rollouts
    • Guarded rollouts
    • Feature monitoring
    • Release pipelines
    • Engineering insights
    • Release management tools
    • Applications and app versions
    • Change history
    • Restoring previous flag versions
  • Observability
    • Observability
    • Session replay
    • Error monitoring
    • Logs
    • Traces
    • Observability metrics
    • Product analytics events
    • LLM observability
    • Alerts
    • Dashboards
    • Service map
    • Vega for auto-remediation
    • Observability MCP server
    • Search specification
    • Observability settings
    • Observability integrations
  • Experimentation
    • Experimentation
    • Experiment metric types
    • Experiment configuration
    • Managing experiments
    • Analyzing experiments
    • Multi-armed bandits
    • Holdouts
  • Metrics and events
    • Metrics in LaunchDarkly
    • Creating metrics
    • Metric groups
    • Events
    • Autogenerated metrics
  • Warehouse native
    • Warehouse native metrics
    • Setting up external warehouses
    • Creating experiments using warehouse native metrics
  • Infrastructure
    • Connect apps and services to LaunchDarkly
    • LaunchDarkly in China and Pakistan
    • LaunchDarkly in the European Union (EU)
    • LaunchDarkly in federal environments
    • Public IP list
  • Your account
    • Projects
    • Views
    • Environments
    • Tags
    • Teams
    • Members
    • Roles
    • Account security
      • Single sign-on
      • API access tokens
        • Creating API access tokens
        • Cloning and deleting access tokens
        • Resetting access tokens
      • Multi-factor authentication
      • Domain verification
      • IP allowlist
      • Managing sessions
      • Organization access settings
      • Organization announcements
      • Support options
      • Resetting your password
    • Feature previews
    • Billing and usage
    • Changelog
Sign inTry it free
LogoLogo
On this page
  • Overview
  • Create access tokens
Your accountAccount securityAPI access tokens

Creating API access tokens

Was this page helpful?
Previous

Cloning and deleting API access tokens

Next
Built with

Overview

This topic explains how to create API access tokens. These are required to authenticate with the LaunchDarkly REST API and are one of the options to authenticate with the LaunchDarkly CLI.

API access tokens are private

Only you have access to the secret values of tokens you create. Other account members cannot access them. Administrators can delete your tokens, but cannot view their values.

You can create an API access token from the Authorization page.

By default, API tokens are personal tokens. You can choose to create a service token instead during the token creation workflow.

Save new tokens immediately

Your API access token is visible one time, immediately after you create it. If you leave or refresh the page where the token is displayed, it will be obscured and no longer visible. You must copy and store new access tokens somewhere secure before you leave the creation page, or you will lose access to the tokens.

Here is a screenshot of the “Access tokens” section of the Authorization page:

The Access tokens list with an obscured access token called out.

The Access tokens list with an obscured access token called out.

Create access tokens

To create an access token:

  1. Click the gear icon in the left sidenav to view Organization settings.
  2. Click Authorization.
  3. In the “Access tokens” section, click Create token. The “Create an access token” panel appears.
  4. Give your token a human-readable Name.
  5. Assign a Role to the token by choosing one from the menu.
  • Select Reader, Writer, Admin, or Owner if you want to use a base role.
  • Select Custom to choose another role, either one you’ve created or one provided by LaunchDarkly. This option is available only if your LaunchDarkly subscription includes custom roles.
  • Select Inline policy to create a role policy that applies only to this token. To learn more, read Create policies for roles. This option is available only if your LaunchDarkly subscription includes custom roles.
  1. Select the API version to assign to your token. By default, API requests you send using this token will use this API version. To learn more, read Versioning.
  2. (Optional) Select the This is a service token checkbox if you wish to create a service token. This feature is only available to customers on Enterprise plans.
  3. Click Save token. The new token appears in the Authorization page.
  4. Copy and save the token somewhere secure. After you leave this page, the token is obscured:
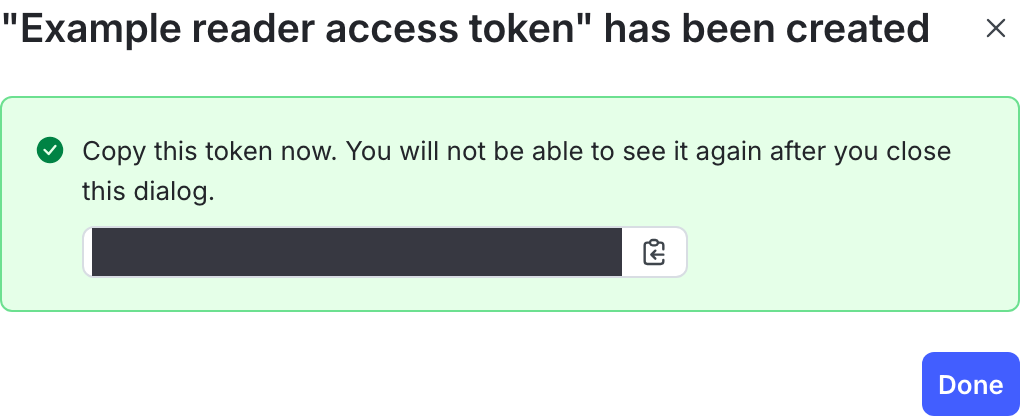
A new access token with a reminder to copy and store it displayed.

A new access token with a reminder to copy and store it displayed.

You can also use the REST API: Create access token

After you create a token, you can clone or delete it. You can also reset the secret values of your tokens, or adjust the scope of your personal tokens.

Service token limits

By default, LaunchDarkly allows you to create 200 service tokens per account. You can create more upon request. To learn more, read How to right size when you are over LaunchDarkly system resource count limits.