
The Flags list
This topic explains how to use the Flags list, which shows your feature flags and gives you options to create, modify, and manage them.
All of your feature flags within a project appear on the Flags list. Creating a new flag adds it to the list and all environments within your project, and archiving a feature flag removes it from the list and all environments within your project.
Here is an image of the feature Flags list:
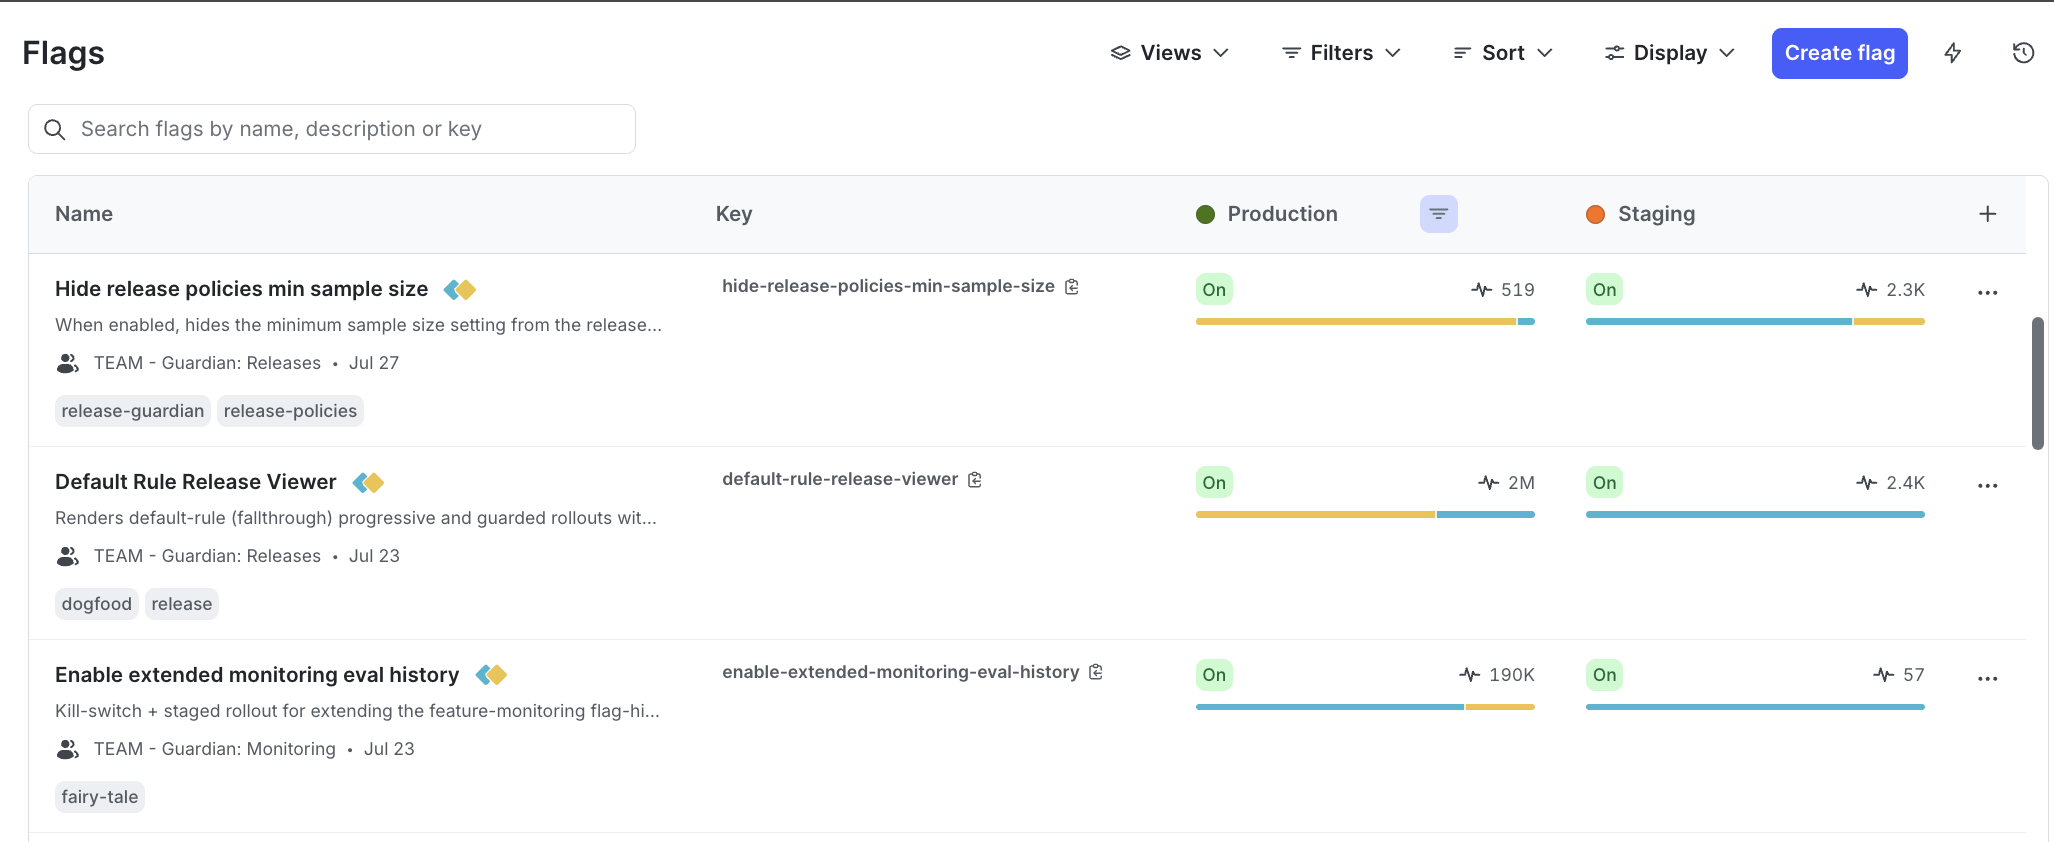
The Flags list shows the following information about each flag for each environment:
- The flag name.
- The flag key.
- The flag maintainer.
- The flag creation date.
- Whether the flag is On or Off.
- How many times the flag has been evaluated.
- A bar showing the proportion of contexts that have been served each variation. For boolean flags, the true (“available” or “enabled”) variation is blue and the false (“unavailable” or “disabled”) variation is yellow.
Hover over the information for a flag to view more details about its variations and evaluations.

You can also use the REST API: List feature flags
To learn how to create a new flag, read Create a feature flag. To learn how to archive a flag, read Archive flags.
View feature flags
Use the search bar to find a flag by name, key, or description. By default, the most recently created flags appear first.
Filter feature flags
You can filter the list of flags to view only flags that share a particular attribute.
Project-level filters
Some flag attributes, such as tag or SDK availability, are the same across all environments in your project. To filter your flags based on project-wide attributes, use the Filters menu at the top of the Flags list:
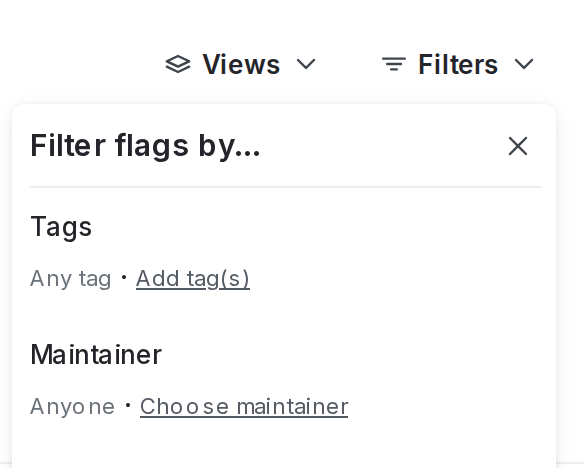
Within a project, you can filter by:
- Tags
- Maintainer
- Lifecycle: live, ready for code removal, ready to archive, archived, deprecated
- Type: temporary or permanent
- Evaluated application
- SDK availability
- Creation date
To filter your flags at the project level:
- Click Filters.
- Choose an attribute for a filtering option. The Flags list automatically updates.
- (Optional) Click Filters again and choose an additional attribute. Repeat as many times as needed.
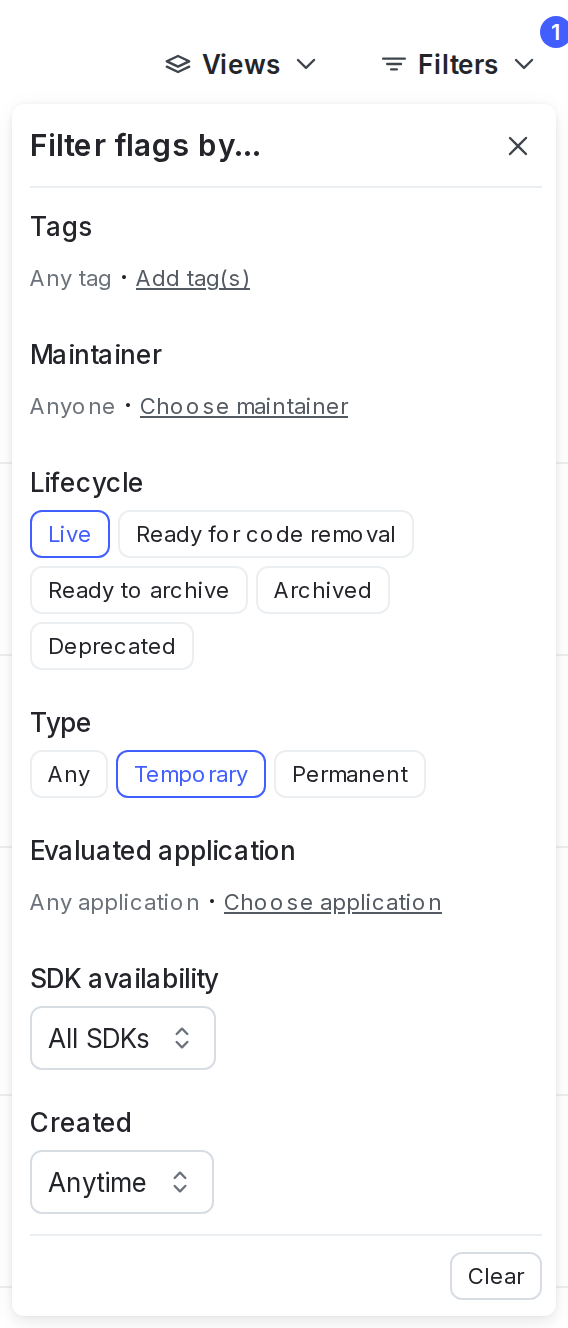
If you filter flags by maintainer, you can choose to view flags maintained by an individual member or by a team.
Environment-level filters
Other flag attributes, such as targeting state or status, are different for each environment. To filter your flags based on environment-specific attributes, use the filter icon in any of your open environments. Hover your cursor over the environment name and select the filter icon to access all the available filters.
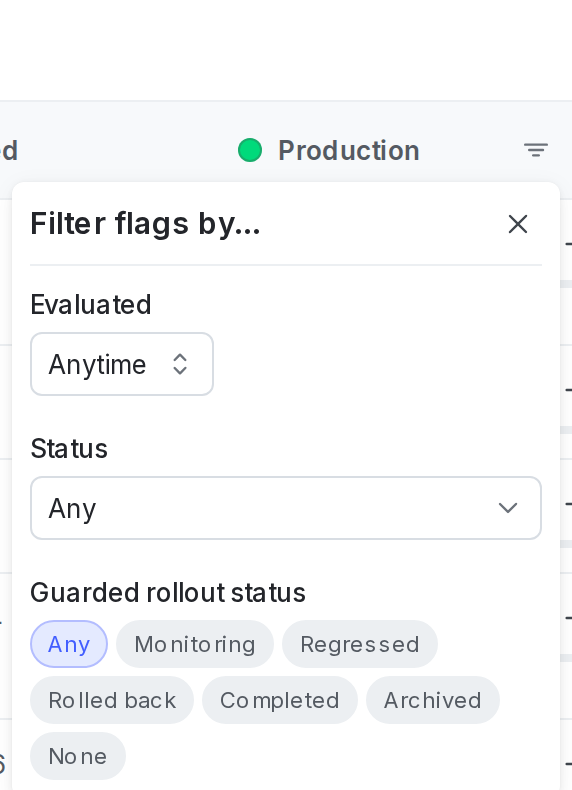
Within an environment, you can filter by:
- Last evaluated
- Flag status
- Guarded rollout status
To filter your flags at the environment level:
- Click the filter icon at the top of the environment’s flag list.
- Choose an attribute for a filtering option. The Flags list for that environment automatically updates.
- (Optional) Click the filter icon again and choose an additional attribute. Repeat as many times as needed.
Your Flags list now displays only the flags that match the filters you specified.
Remove filters
To clear project-level filters, click Filters, then click Clear.
To clear environment-level filters, click the filter icon at the top of the environment’s flag list, then click Clear.
Save shortcuts to filtered Flags lists
You can create shortcuts to filtered Flags lists, and save them in the left sidebar to return to at any time.
When you create a shortcut, it is only visible to you. To group flags within a project and have that grouping be visible for everyone in your account, we recommend using views.
To create a shortcut to a filtered Flags list:
- In the left sidebar, click Code. The CodeControl menu appears.
- Click Flags.
- Add your desired environments to the Flags list following the instructions in Open environments.
- Add any flag filters you need such as tags, maintainers, or flag statuses, following the instructions in Filter feature flags.
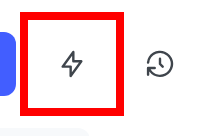
- Click the bolt icon above the Flags list to create a shortcut:
- Add a Name for your shortcut.
- (Optional) Choose an Icon to represent your shortcut in the left sidebar.
- Click Save.
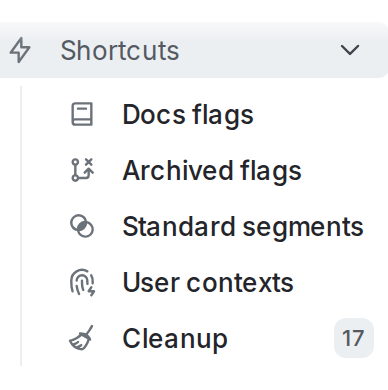
Your shortcut appears in the left sidebar.
Sort feature flags
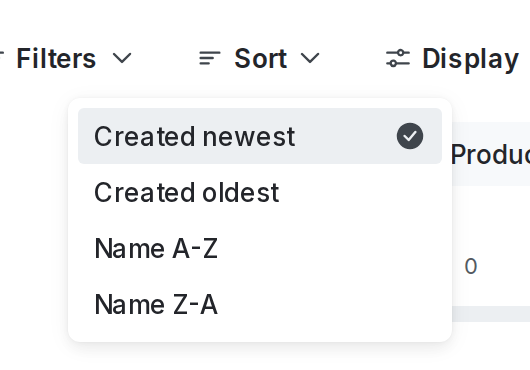
You can sort the list of visible flags by creation date, by name, or by last modified date. To sort the Flags list, click Sort and choose a sorting option:
Edit list columns
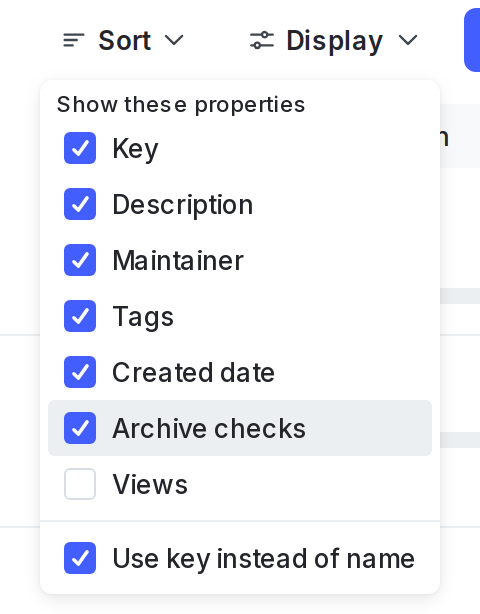
Using the Display menu, you can display or hide the following flag properties from the Flags list:
- Key
- Description
- Maintainer
- Tags
- Created date
- Archive checks
- Views
When the archive checks are selected, the list indicates whether a flag is ready for code removal or is ready to archive. To learn more, read Flag statuses and lifecycle stages.
You can also check the Use key instead of name option in the Display menu to show flag keys instead of flag names in the Flags list:
Limit to views
Using the View menu, you can show only flags that are linked to selected views. Views are resources to logically group flags within a project. For example, you can create “frontend” and “backend” views to organize flags within your project, and separate access to flags in those views.
Save shortcuts to flag Targeting tabs
You can create shortcuts to a specific environment on a flag’s Targeting tab. This lets you return to that flag’s environment-specific Targeting tab from a shortcut in the left sidebar.
To create a shortcut to a flag’s Targeting tab:
- In the left sidebar, click Code. The CodeControl menu appears.
- Click Flags.
- Open a flag’s Targeting tab.
- Open your desired environment following the instructions in Open environments.
- Click the bolt icon in the right sidebar to create a shortcut.
- Add a Name for your shortcut.
- (Optional) Choose an Icon to represent your shortcut in the left sidebar.
- Click Save.
Your shortcut appears in the left sidebar.