
Setting up the Snowflake integration
Access to Snowflake native Experimentation requires both Data Export and Experimentation. If you do not have access or need help getting started, contact your LaunchDarkly representative or start a Support ticket.
You cannot run Snowflake native experiments on experiment data coming from third-party sources, or flag evaluation data from LaunchDarkly that was not generated as part of a LaunchDarkly experiment.
This topic explains how to set up the Snowflake native Experimentation integration.
Prerequisites
To configure the Snowflake integration, you must have the following prerequisites.
Snowflake data requirements
Before you begin, prepare your Snowflake data to meet the Snowflake data requirements for the integration.
Role permissions
The role permission requirements include:
- You must have the
ACCOUNTADMINrole in Snowflake - You must have a LaunchDarkly role of Owner or Admin, or a custom role that allows the following actions:
IP addresses
You must add to your Snowflake allow list the following outbound IP addresses:
52.21.152.96/3252.200.35.24/3252.200.50.23/3254.144.218.89/3254.221.221.197/3234.236.6.43/32
For a full list of LaunchDarkly’s public IP addresses, read Public IP list.
Network policy
- If you use network policies within your Snowflake account, you will need to create or update your policy to allow traffic from LaunchDarkly. To do this, you need your LaunchDarkly project key and environment key:
- Find, copy, and save your project key following these instructions.
- Find, copy, and save your environment key following these instructions.
- Combine the keys together, separated by two underscores. For example, if your project key is
MobileAppand your environment key isproduction, your combined key isMobileApp__production. - Replace
<ProjKey__EnvKey>with your combined key in the code sample below, and add it to your Snowflake network policy:
Step 1: Gather your Snowflake account information
To begin, collect the following information about your Snowflake account:
- The name of the Snowflake database containing your metrics data. LaunchDarkly will be granted read access to this database.
- The name of the schema within your metrics database. You don’t need this if you want to grant access to all schemas within the database.
Step 2: Configure the Snowflake Data Export integration
If you were using an earlier version of Snowflake Data Export, you must update it to the version released in January 2025.
To begin, configure the latest Snowflake Data Export integration. The Snowflake Data Export integration provides LaunchDarkly experiment exposure data to Snowflake. This data is used with your metric events data stored in Snowflake to compute experiment results.
Follow the installation instructions at Snowflake Data Export to configure the Snowflake Data Export integration. You can also view a 6-minute instructional video about Snowflake Data Export Setup.
Step 3: Configure the Snowflake native Experimentation integration
Now, you will configure the Snowflake native Experimentation integration in LaunchDarkly. This integration is a second LaunchDarkly integration that looks similar to the Snowflake Data Export integration, but requires a separate setup process.
To set up the Snowflake native Experimentation integration:
- Navigate to the Integrations page.
- Search for and select Snowflake Native Experimentation.
- Click Add integration. The configuration panel appears.
- Enter an integration Name.
- Select the LaunchDarkly Project and environment for this integration. You cannot change this after you save the integration.
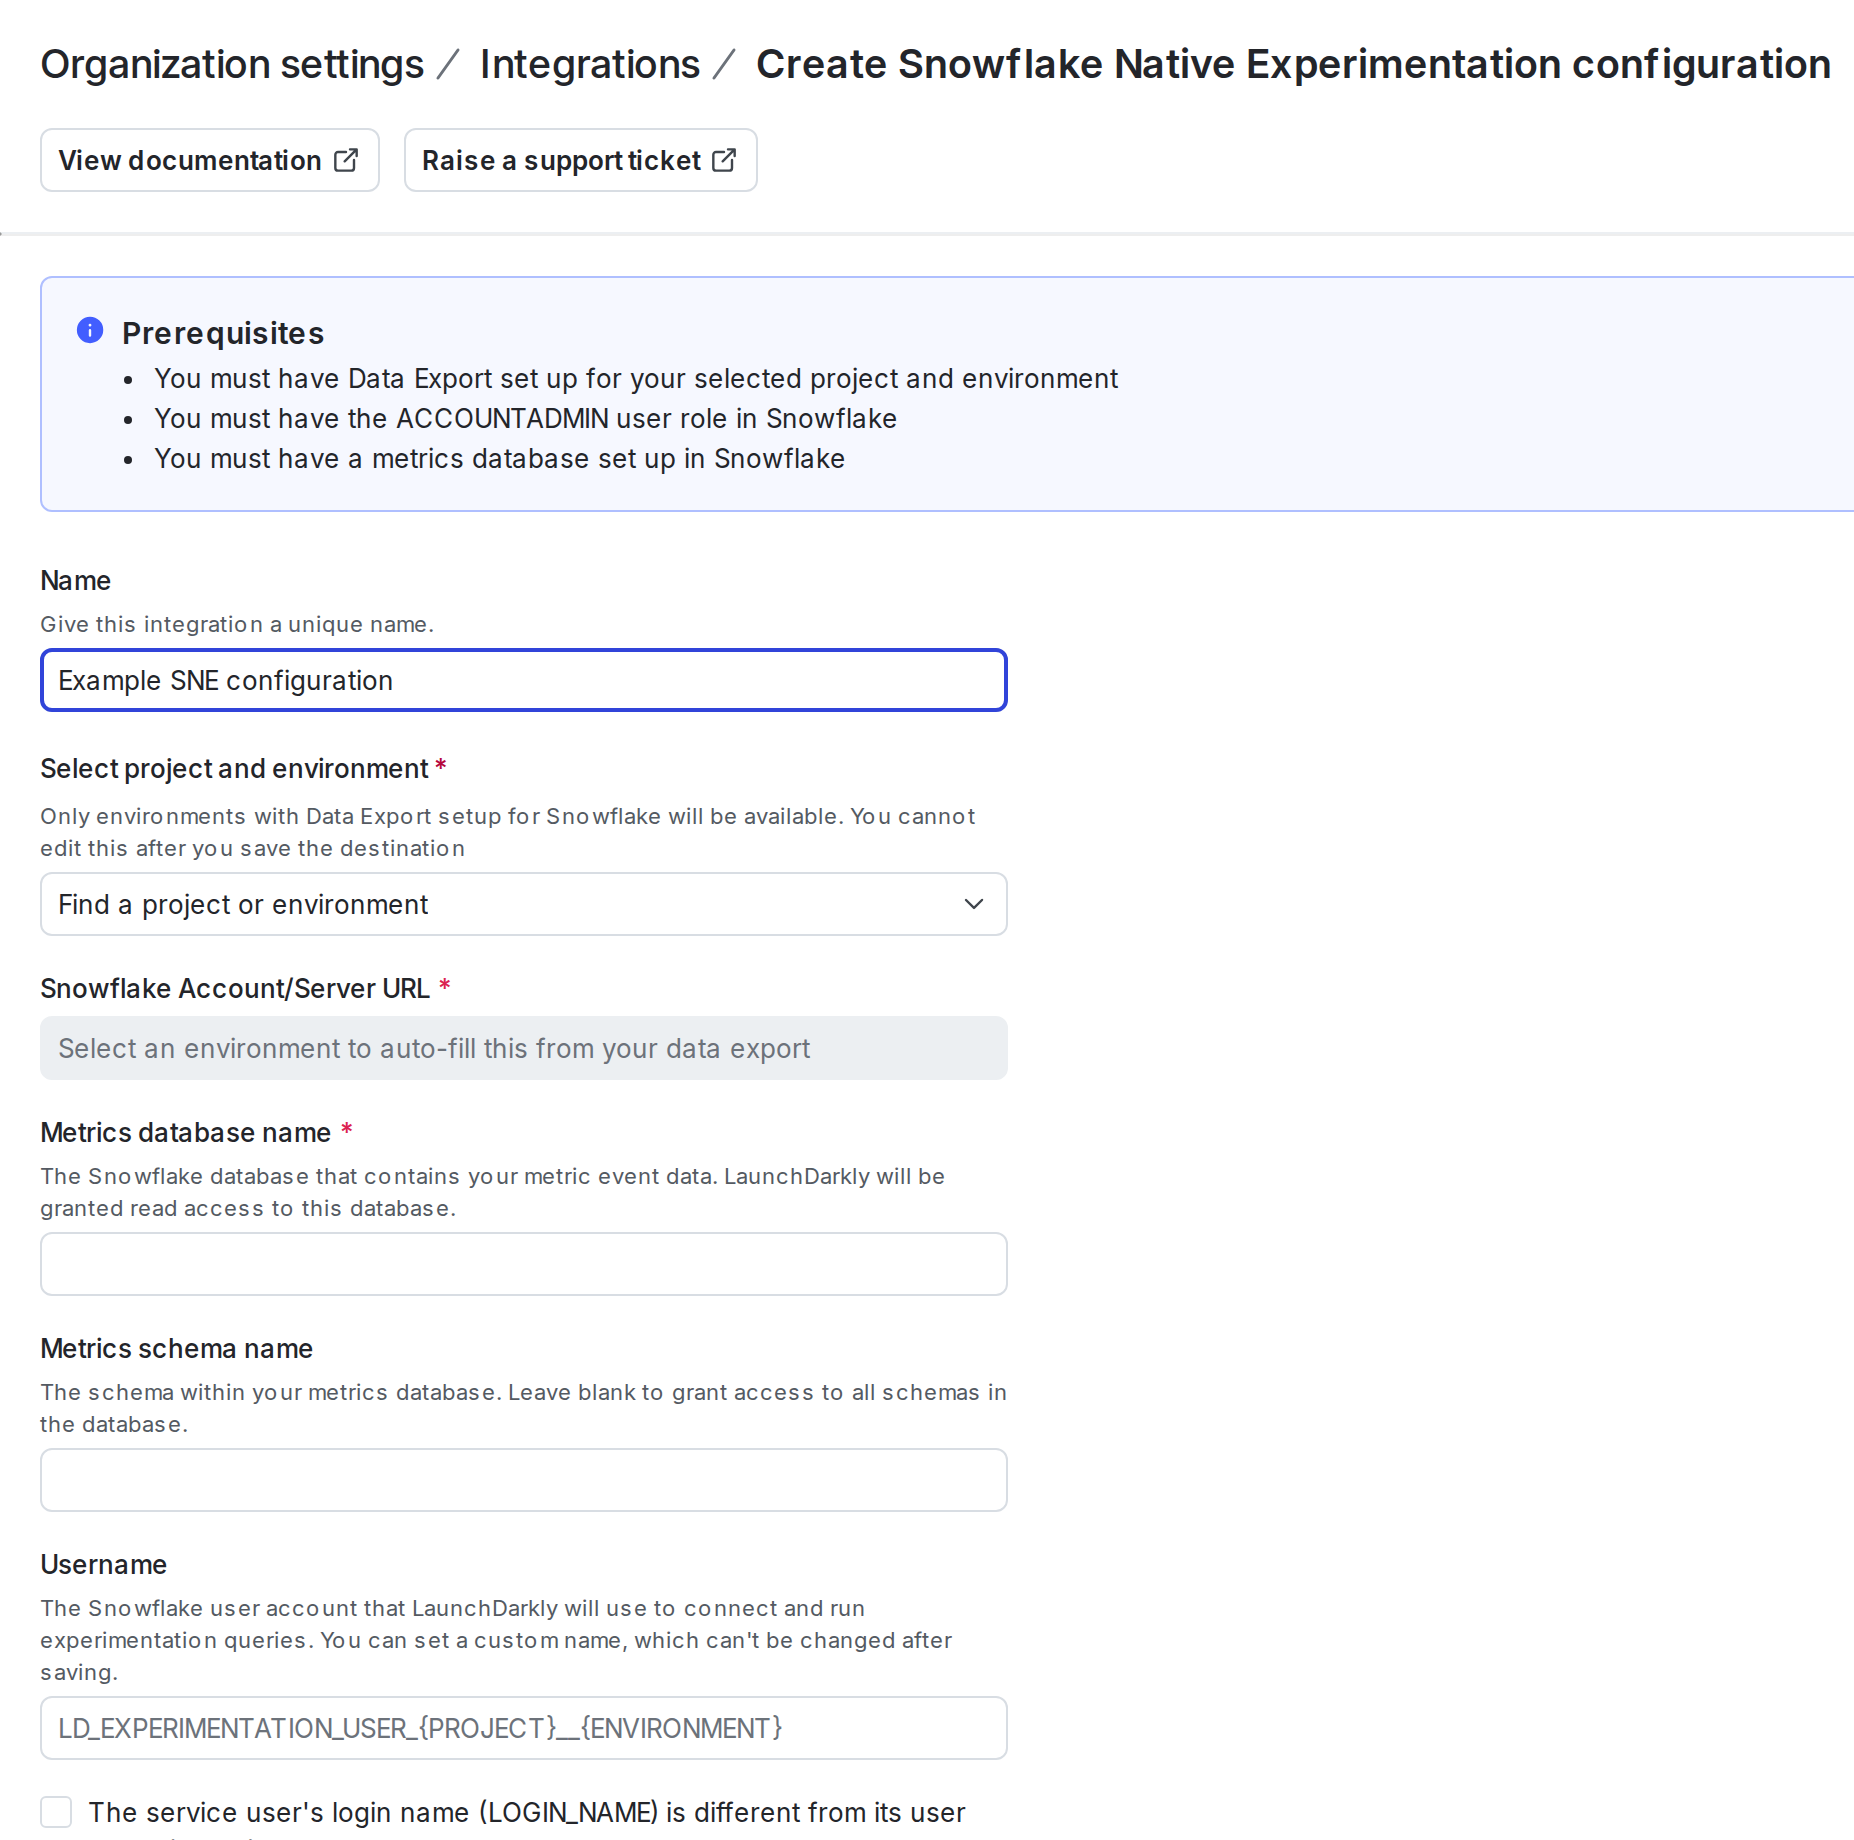
- Enter your Snowflake Metrics database name.
- (Optional) Enter your Snowflake Metrics schema name.
- LaunchDarkly generates a SQL script. Copy and save this script for use in the next step.
Keep the configuration screen open, as you will return to it in a later step.
Run the SQL script in Snowflake
Next, run the SQL script in Snowflake:
- In Snowflake, navigate to Projects / Worksheets.
- Click the + “Create SQL worksheet” button to create a new worksheet.
- Paste the generated script to the worksheet.
- Click the arrow to run the worksheet.
Save the configuration in LaunchDarkly
To finish the configuration in LaunchDarkly:
- Return to the LaunchDarkly configuration screen.
- Click Test connection and save.
Step 4: Create a metric data source
Now, you can set up your metric data source in LaunchDarkly by following the steps under Create data sources.
Step 5: Verify the connection
Finally, verify the connection. On the integration configuration page, check the “Connection status” indicator. A green Healthy status confirms LaunchDarkly can connect to Snowflake and has the correct permissions.
Next steps
Read the following topics to understand how to create an experiment using a Snowflake native metric and how to analyze the experiment results:
The results page for an experiment using warehouse native metrics displays the date and time the results were last updated from Snowflake. The initial load of experiment results can take up to 60 minutes to appear, and further results updates appear within 15–30 minutes.