
Mutually exclusive experiments
This topic explains how to use layers to set up mutually exclusive experiments in LaunchDarkly. Mutually exclusive experiments are two or more experiments configured to prevent contexts from being included in more than one of them at a time.
Usually, it is not a problem to include a context in multiple experiments. However, there are some cases in which you may not want to include a context in more than one experiment at a time. For example, you may be concerned about collisions between experiments that are testing similar parts of your app, like two different changes to the same section of your app’s user interface (UI), or experiments running on both the back end and front end of the same functionality. In this case you can eliminate the interaction effect between experiments using layers.
Mutually exclusive experiments and holdout experiments are similar, but are used for different reasons. Mutually exclusive experiments use layers to ensure end users are not included in two or more specific experiments at the same time. Holdout experiments withhold a set of end users from all experiments. To learn more, read Holdouts.
Experiment layers
LaunchDarkly Experimentation achieves mutually exclusive experiments using “layers.” You can add two or more experiments to a layer to ensure that those experiments never share the same traffic. All of the experiments within a layer must randomize by the same context kind, such as “user.”
For example, you can create a “Checkout” layer that you add all of your experiments related to the checkout process to. Then, if you run multiple experiments at once, customers are never exposed to more than one experimental variation at a time.
Here is an example of three different layers: a “Promotions” layer with three experiments, a “Product pages” layer with two experiments, and a “Checkout” layer with three experiments:
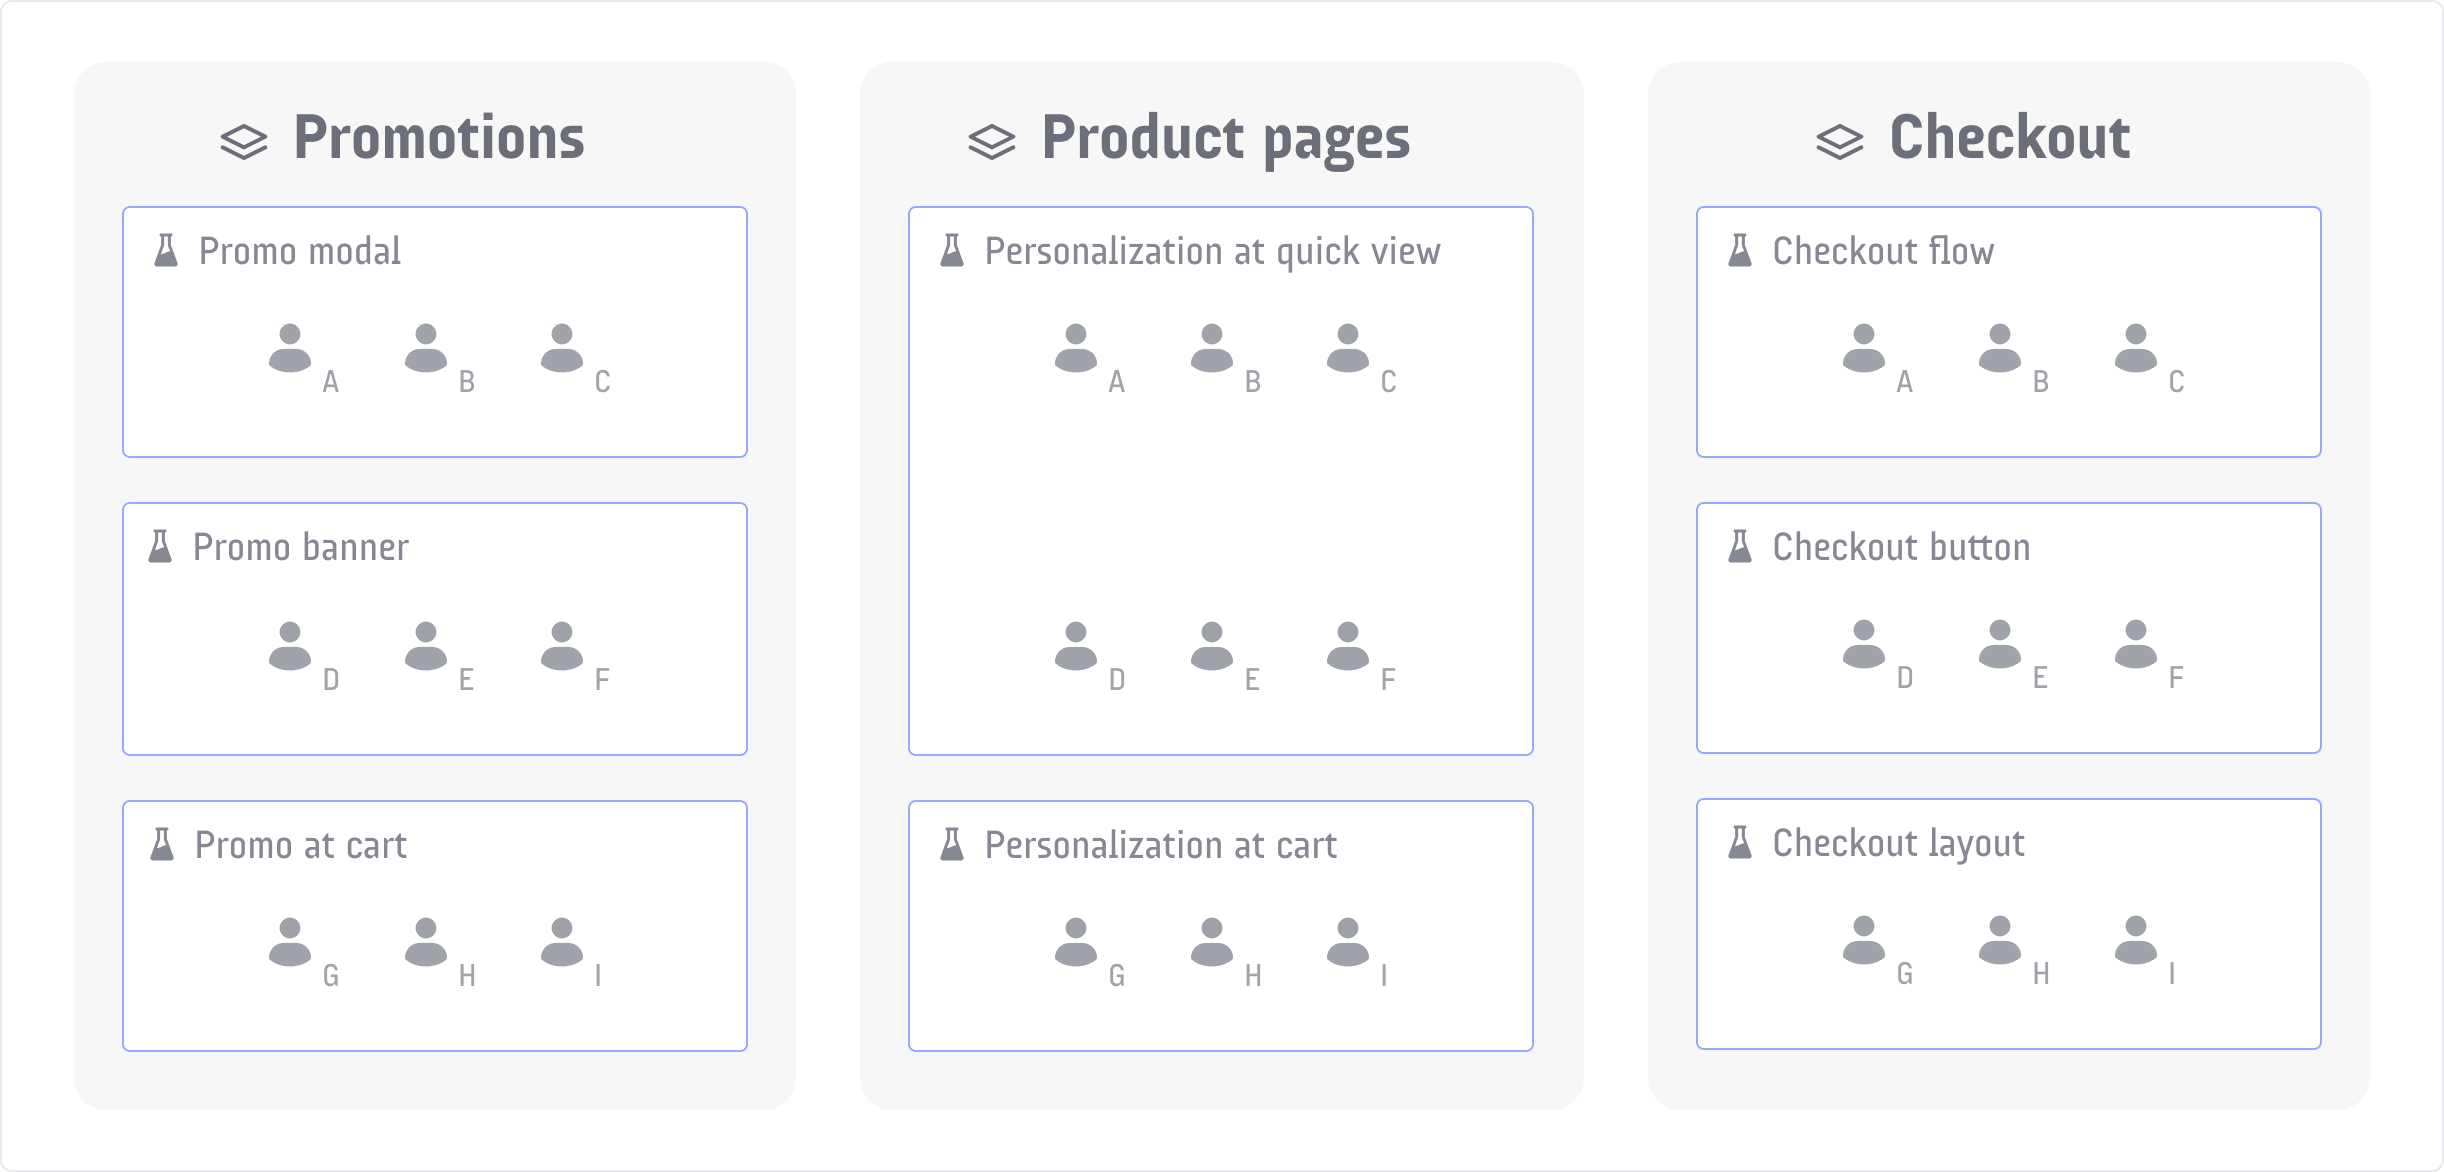
In the example, customer A can’t be included in more than one experiment in the “Promotions” layer, more than one experiment in the “Product pages” layer, nor more than one experiment in the “Checkout” layer. Customer A can simultaneously be included in the “Promo modal,” “Personalization at quick view,” and “Checkout flow” experiments, because those experiments are all in different layers.
Layers enforce mutual exclusion by controlling which contexts each experiment can reach. To learn how, read Traffic assignment in layers.
Reservation amounts
Before you create an experiment, decide how much of the layer’s traffic you want to include in the experiment. This is called the “reservation amount.” The more experiments you expect to include in the layer, the lower the reservation amount be.
For example:
- If you plan to have only two experiments in the layer, you might want to reserve 50% of traffic for each.
- If you plan to have five experiments in the layer, you might want to reserve 20% for each.
As new contexts encounter experiments within the layer, LaunchDarkly will assign contexts based on each experiment’s reservation amount. You can change an experiment’s reservation amount on the experiment’s Design tab.
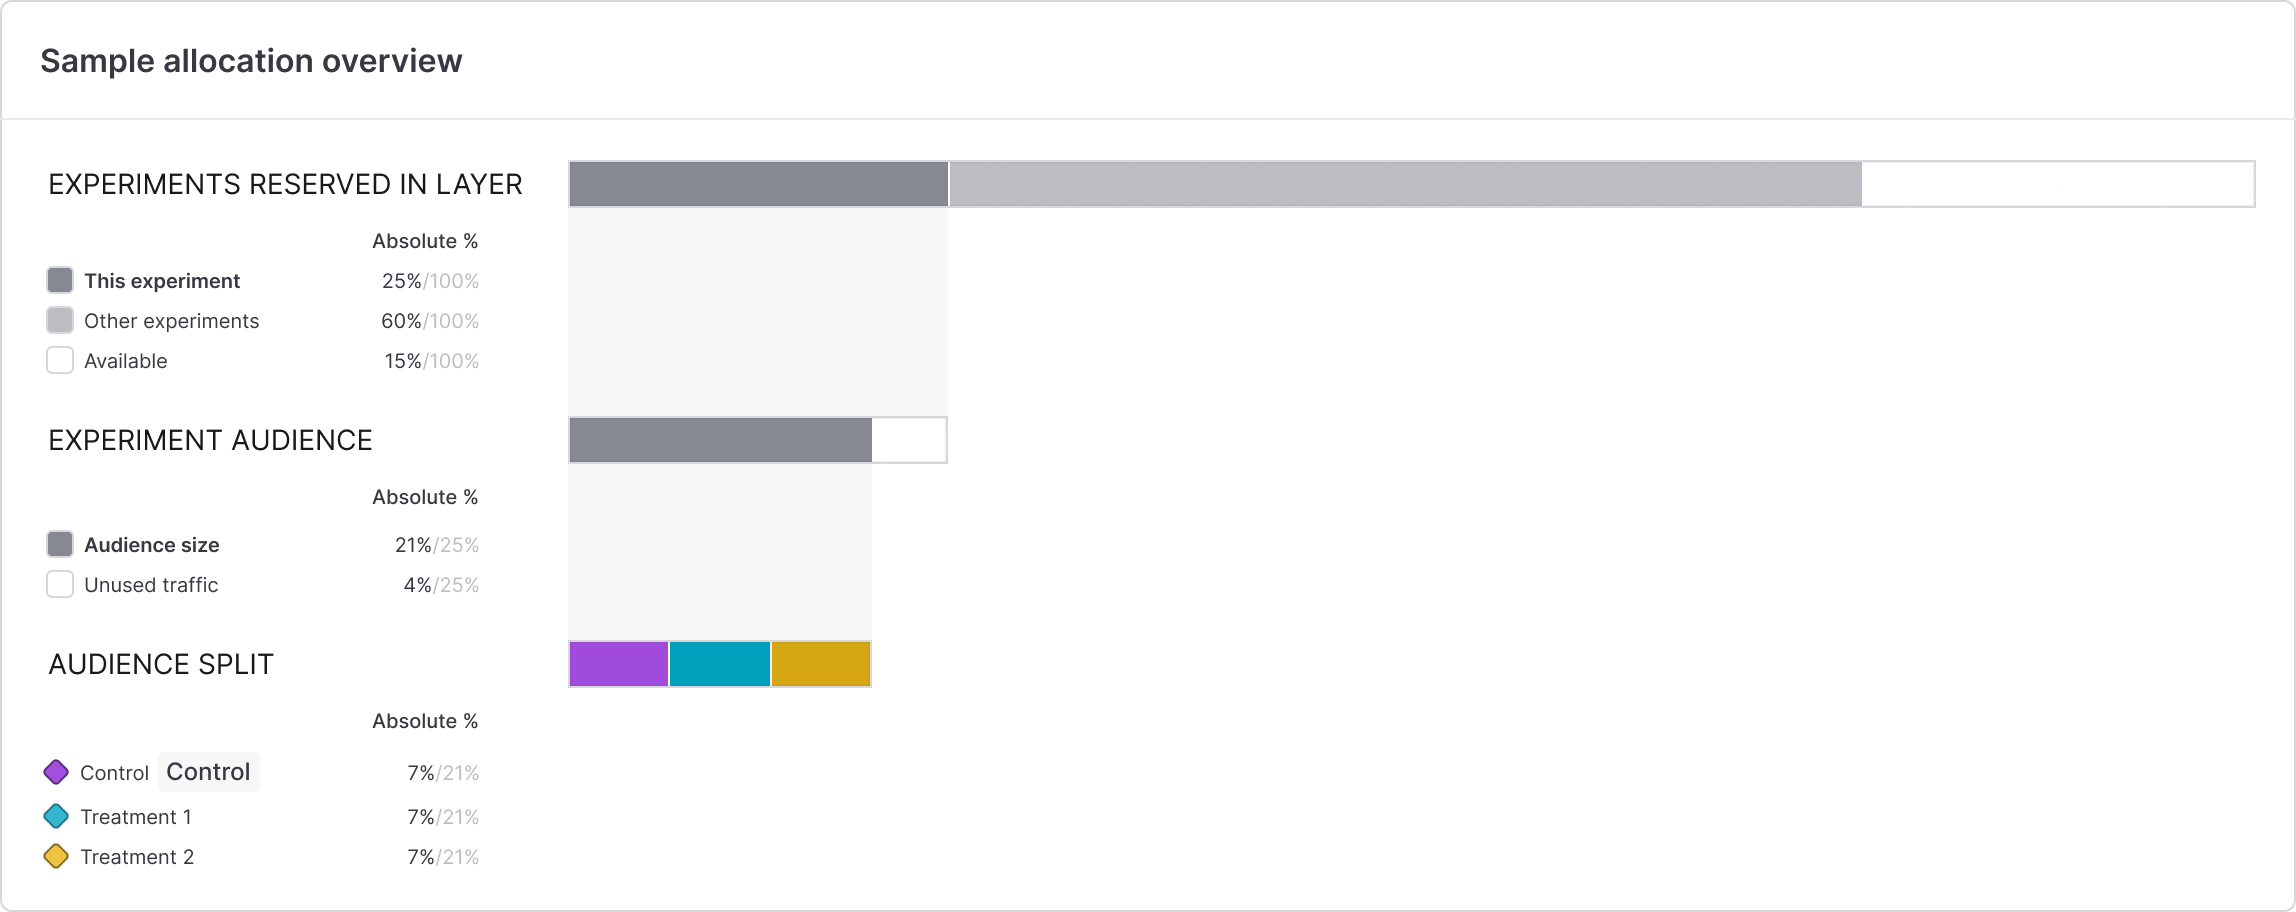
In the below example:
- 25% of a layer’s contexts are reserved for a specific experiment
- of that 25%, 21% of the audience is included in the experiment, and 4% is excluded from the experiment and served the control variation
- of the 21% in the experiment, 7% is assigned to each variation.
Here is an illustration of the audience allocation:
Create new layers
When you create an experiment, you can either:
- add the experiment to an existing layer, or
- create a new layer, and add the experiment to that new layer.
Experiments can either be in a holdout, or in a layer, but not both. If an experiment is part of a holdout, you will not see the option to add it to a layer when you create it. To learn more, read Holdouts.
To create a new layer:
- Follow the directions to create a new experiment.
- In the “Set audience” step, check the Add experiment to layer checkbox.
- Click Create layer.
- Add a Name.
- Add a Description.
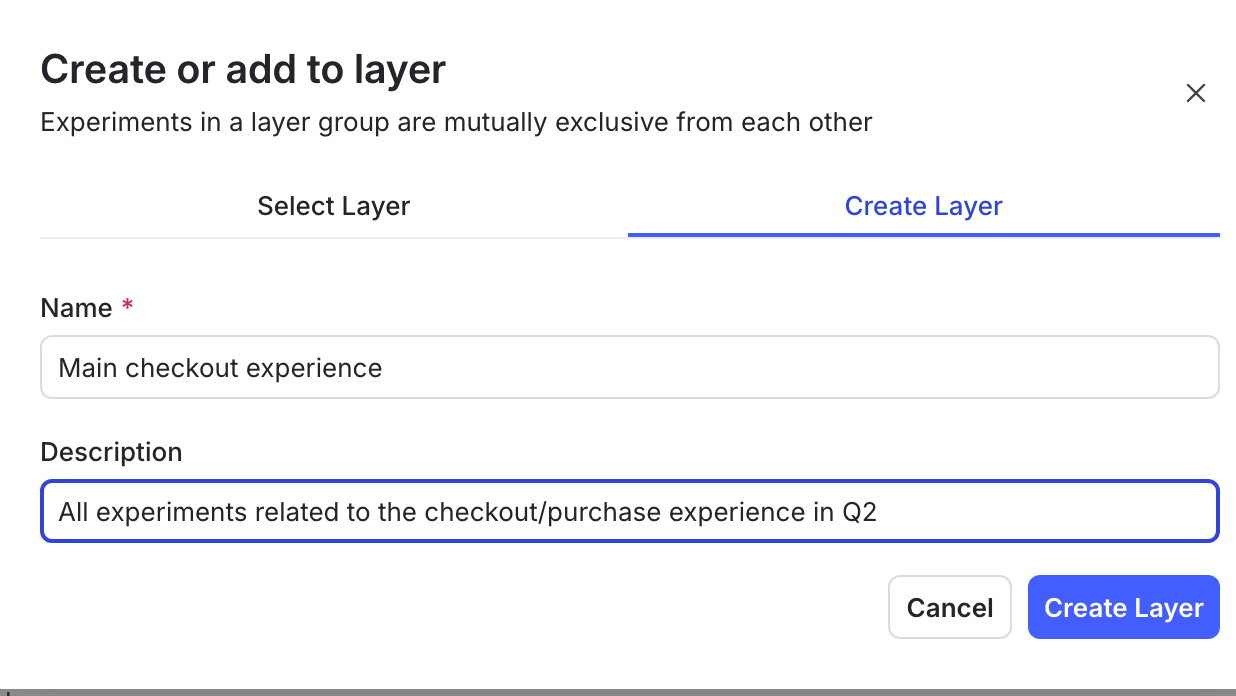
- Click Create layer.
- Add a Reservation amount.
- Continue to the “Define audience” step and finish creating the experiment.
This new layer is now available to add additional experiments to.

You can also use the REST API: Create layer
Add experiments to existing layers
To add a new experiment to an existing layer:
- Follow the directions to create a new experiment.
- In the “Set audience” step, check the Add experiment to layer checkbox.
- Click Select layer.
- Select an existing layer from the layer menu. You can view all of the existing layers and the experiments within them at this step.
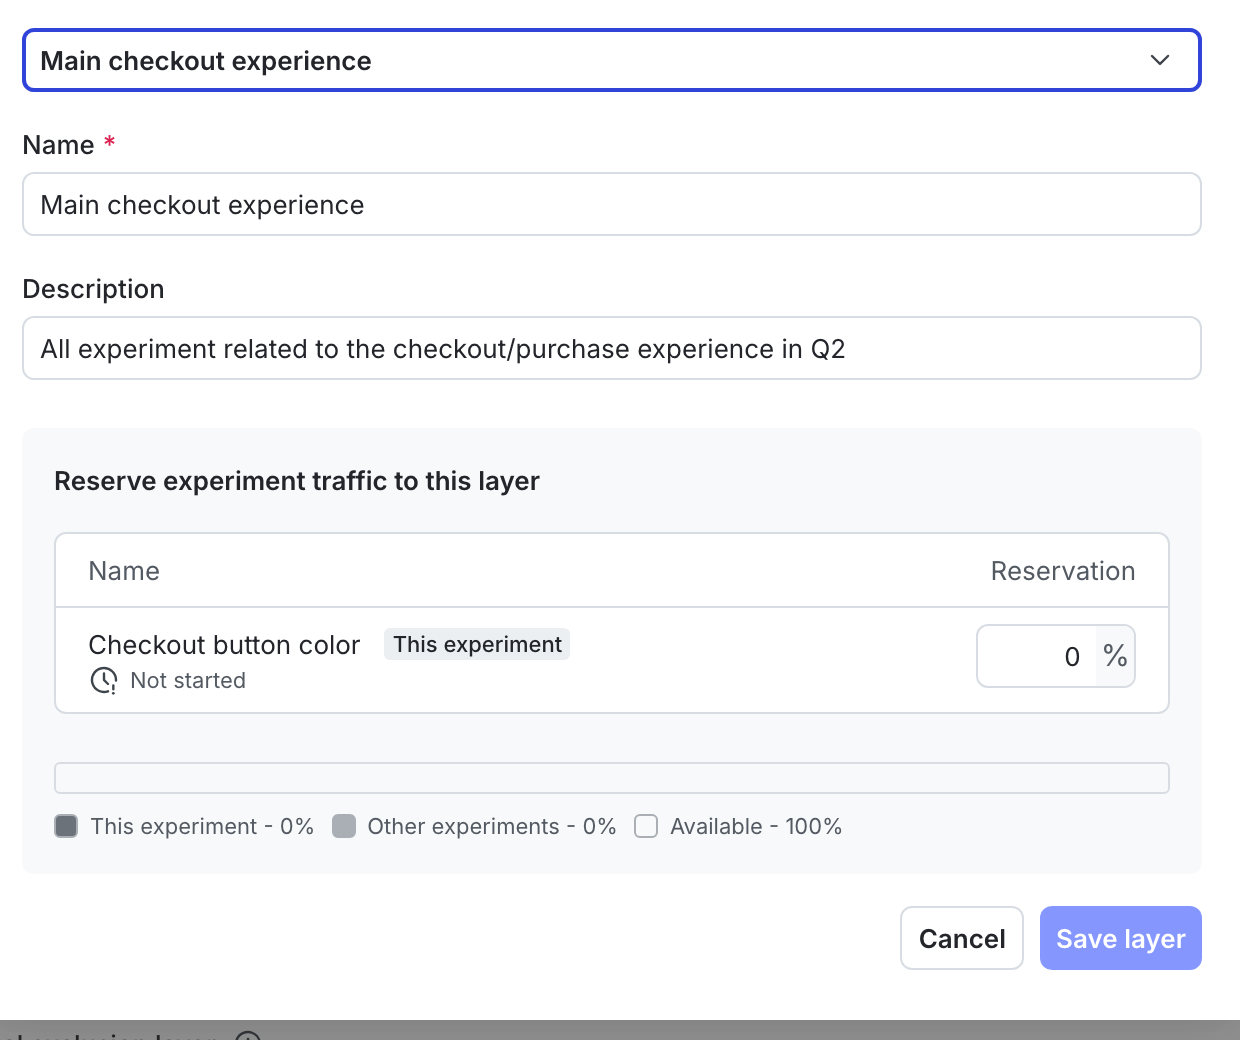
- Add a Reservation amount.
- Continue to the “Define audience” step and finish creating the experiment.
You can also use the REST API: Create experiment
Remove experiments from layers
To remove an experiment from a layer:
- Navigate to the Design tab of your experiment.
- Click Edit experiment.
- Navigate to the “Audience” section and click the pencil icon.
- Uncheck the Add experiment to layer checkbox.
- Click Save.
Before you can archive an experiment, you must remove it from any layers.