
Performing optimization runs
This topic explains how to perform an optimization run by pulling its configuration from LaunchDarkly. To do this, you must create an optimization config in LaunchDarkly and then use the optimize_from_config method to perform the run. optimize_from_config pulls an optimization configuration from LaunchDarkly and uses the parameters you specify to run the optimization.
Consider doing this if:
- You have large amounts of data that is cumbersome to represent in code.
- You want to use the LaunchDarkly UI to capture metrics, outputs, and intermediate state.
Create an optimization config
You can create an optimization config from the LaunchDarkly UI. Here’s how:
- In the left sidebar, click Agents. The AgentControl menu appears.
- Click Agent optimization, then Create optimization. The “New optimization” page opens.
- Choose an agent to optimize from the Agents dropdown.
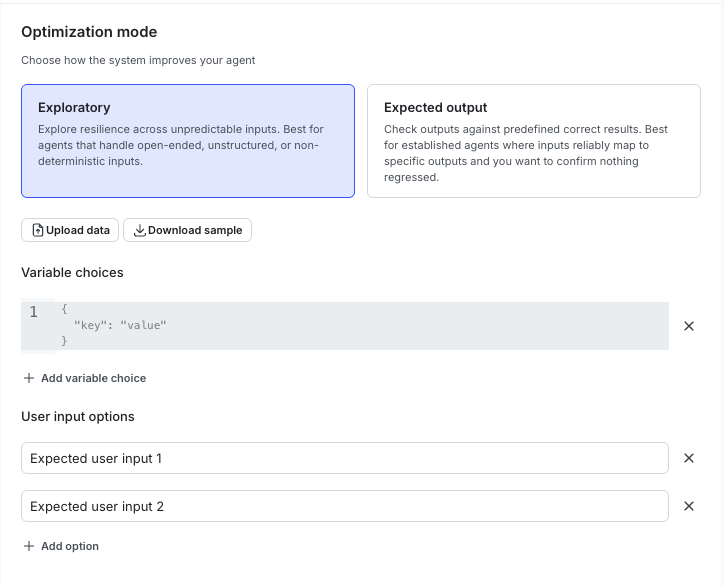
- Choose a mode to use to improve the agent.
- After you choose a mode, you can configure your inputs for the optimization. Each mode has different input options. To learn more, read Exploratory and expected output modes.
- Upload your own CSV or JSONL, or click Download sample to download a sample CV you can fill out to re-upload. LaunchDarkly inserts the data into the UI up to a max of 25 rows.
In the Evaluation section, you can set up your optimization criteria and a threshold for passing or failing. We don’t recommend using a very low threshold, as it can cause you to spend tokens on optimization runs that don’t reach the result you want. High thresholds ensure more “passes” against the input and generally lead to a better result.
There are two different forms of criteria you can use. You can use one or both. We recommend that you always use an acceptance statement.
Acceptance statements
Acceptance statements are strongest way to create change in the prompts. To create an acceptance statement:
- Click to select the Acceptance statement checkbox. A text box appears.
- Use natural language to describe the output that you want to get.
- Enter a number less than one or use the slider to adjust the passing threshold. A lower number is more lenient and a higher number is more strict.
Write an acceptance statement that will guide your agent to the final output you expect. If you need to adjust the output format of your agent, you could include instructions about the expected output format. For example, if you want the response to appear in bullet points, use “The response should always be in bullet points.”
When an optimization run occurs, acceptance statements have access to things like the duration of the LLM calls, token usage, and the rationale from previous evaluation executions. Because acceptance statements have this ability, you can include statements like “make it faster” and the acceptance statement can evaluate based on that criteria.
Judges
Judges act as defensive mechanisms for your optimization. You can use them with acceptance statements.
- Click to select the Judge checkbox. A dropdown appears.
- Choose a judge to use, or create a new judge. To learn more, read Judges.
- Enter a number less than one or use the slider to adjust the passing threshold. A lower number is more lenient and a higher number is more strict.
Judges help ensure that your prompts continue to align with expected outputs for things like accuracy, toxicity, relevance to source material, or other criteria.
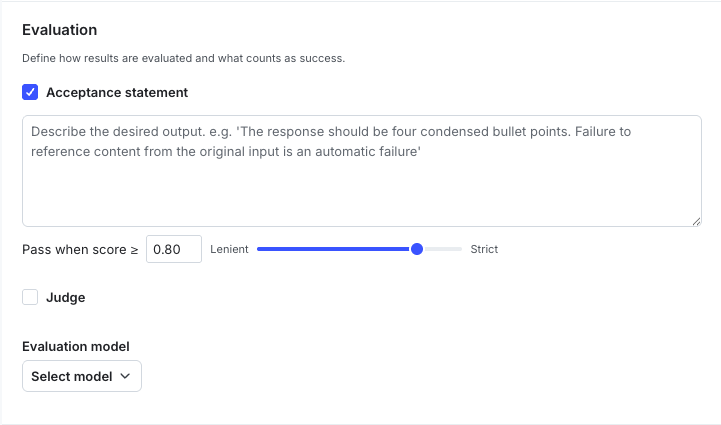
Whether you use an acceptance statement, a judge, or both, select the model you’d like to use to run these criteria. This model is for both the judges and the acceptance statements. It’s best to choose a reasoning model that can evaluate the previous results. If your agent calls tools, you’ll also want to ensure you choose a model capable of running tools.
Now, in the Models section, specify the model choices for the optimization process to use. The selections you make here are the models that the optimization process is allowed to choose and try. We recommend adding a few models here. If you’re optimizing for speed, include different sized models, because the optimization loop attempts to select models that fit the acceptance criteria.
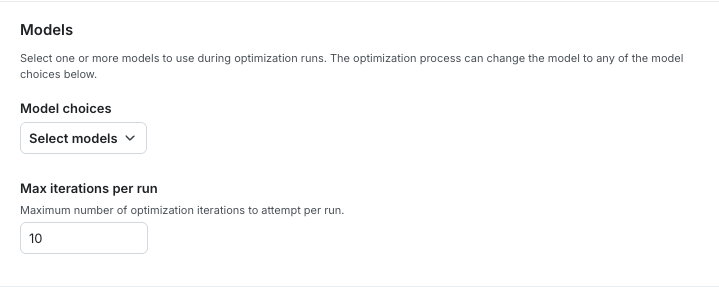
Finally, click Save to create the optimization config.
With all of this configured, you can use optimize_from_config to perform an optimization run referencing this config.
For other references in a specific framework, read Other framework examples for agent optimization.
Example optimization run with optimize_from_config
You can use optimize_from_config to perform an optimization run.
Here’s an example:
Handlers
Section (1) sets up the agent call for the provider to handle the actual LLM invocations. These methods are intended to be provider-agnostic, so you can use your own models as long as your agent orchestrator or framework can reach them.
There are two different handlers. They are:
handle_agent_callexecutes the actual agent and receives a response. In addition to that, this code path generates new variations when needed. Pass these calls through as generically as possible to allow for this.handle_judge_call(optional) executes the evaluation calls. It falls back tohandle_agent_callif not provided. Specify this as a discrete handler if you want to capture response information, log metrics, or otherwise run judge calls differently from agent calls.
To learn more, read the quickstart.
Configuration
Section (2) initializes options. Unlike optimize_from_options, most parameters, including judges, model choices, and evaluation settings, are pulled automatically from your LaunchDarkly configuration object.
The options you provide here are:
project_key: The LaunchDarkly project housing your agent config.context_choices: (Optional) The list of LaunchDarkly contexts to automatically choose from from when running a completion.handle_agent_call: Handler for executing the agent calls.handle_judge_call: (Optional) Handler for executing evaluation (judge) calls. It falls back tohandle_agent_callif not provided.
Output
Section (3) initializes the client and makes the optimization call. The result is an OptimizationContext containing scores, the winning model, usage data, and iteration history. To learn more about what’s included, read the Optimization quickstart.