For AI agents: a documentation index is available at the root level at /llms.txt and /llms-full.txt. Append /llms.txt to any URL for a page-level index, or .md for the markdown version of any page.
Sign inTry it free
DocsGuidesSDKsIntegrationsAPI docsTutorialsFlagship blog
  • Get started
    • Overview
    • Onboarding
    • Get started
    • Launch Insights
    • LaunchDarkly architecture
    • LaunchDarkly vocabulary
  • AgentControl
    • AgentControl
    • Manage AgentControl
  • Feature flags
    • Create flags
    • Target with flags
    • Flag templates
    • Manage flags
    • Code references
    • Contexts
    • Segments
  • Releases
    • Releasing features with LaunchDarkly
    • Release policies
    • Percentage rollouts
    • Progressive rollouts
    • Guarded rollouts
    • Feature monitoring
    • Release pipelines
    • Engineering insights
    • Release management tools
    • Applications and app versions
    • Change history
    • Restoring previous flag versions
  • Observability
    • Observability
    • Session replay
    • Error monitoring
    • Logs
    • Traces
    • Observability metrics
    • Product analytics events
    • LLM observability
    • Alerts
    • Dashboards
    • Service map
    • Vega for auto-remediation
    • Observability MCP server
    • Search specification
    • Observability settings
    • Observability integrations
  • Experimentation
    • Experimentation
    • Experiment metric types
    • Experiment configuration
    • Managing experiments
    • Analyzing experiments
    • Multi-armed bandits
    • Holdouts
  • Metrics and events
    • Metrics in LaunchDarkly
    • Creating metrics
    • Metric groups
    • Events
    • Autogenerated metrics
  • Warehouse native
    • Warehouse native metrics
    • Setting up external warehouses
    • Creating experiments using warehouse native metrics
  • Infrastructure
    • Connect apps and services to LaunchDarkly
    • LaunchDarkly in China and Pakistan
    • LaunchDarkly in the European Union (EU)
    • LaunchDarkly in federal environments
    • Public IP list
  • Your account
    • Projects
    • Views
      • Create views
      • Manage views
    • Environments
    • Tags
    • Teams
    • Members
    • Roles
    • Account security
    • Feature previews
    • Billing and usage
    • Changelog
Sign inTry it free
LogoLogo
On this page
  • Overview
  • Create a view
  • Link resources to a view
  • Link to a view from the resource
  • Link to a view from the views list
Your accountViews

Creating views

Was this page helpful?
Previous

Manage views

Next
Built with

Overview

This topic explains how to create views and link resources to those views. A given resource, such as a flag, can be linked to more than one view.

Create a view

To create a new view:

  1. Click the project dropdown. The project menu appears:
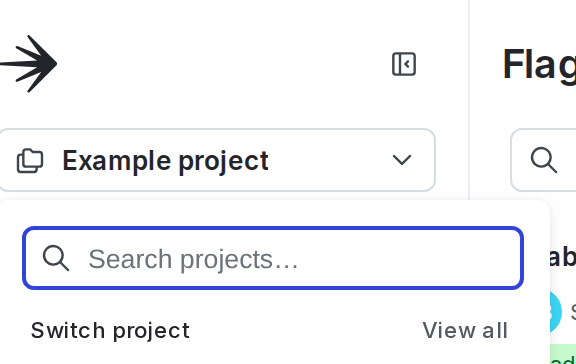
    The project menu.

    The project menu.
  2. Select Project settings.

  3. Select Views. The Views list appears.

  4. Click Create view. The “Create view” dialog appears:
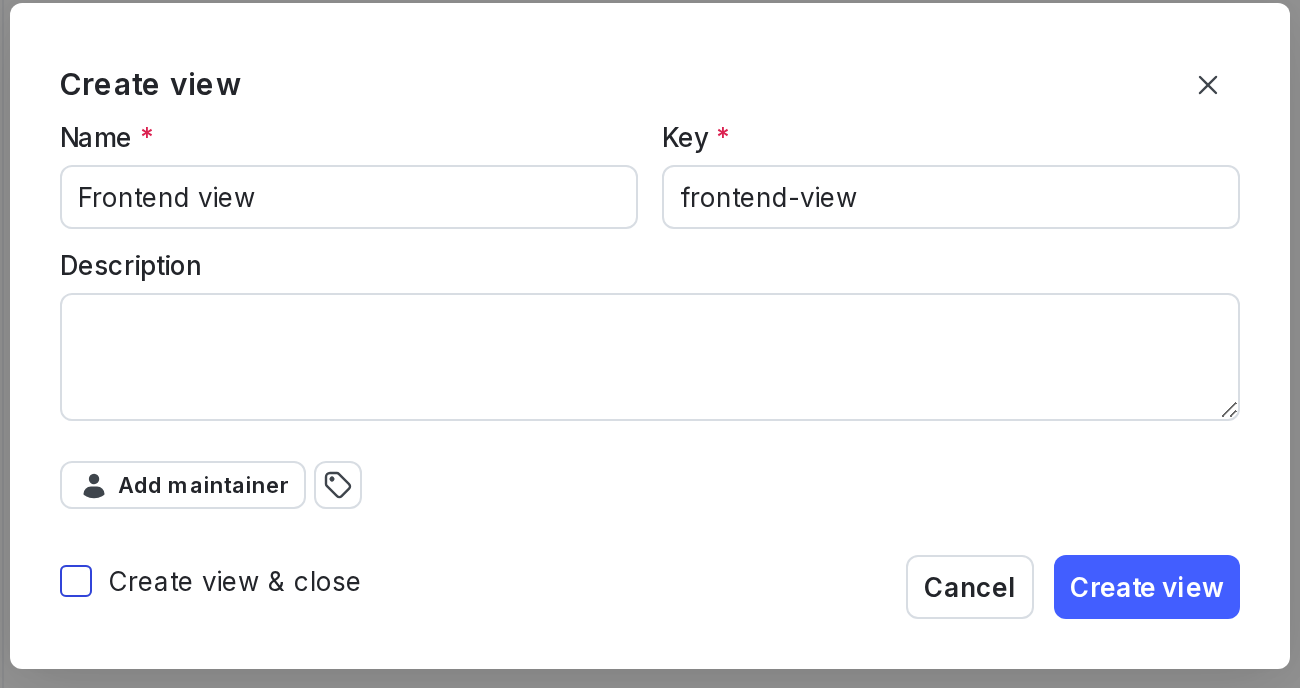
    The "Create view" dialog.

    The "Create view" dialog.
  5. Enter a unique, human-readable Name for the view.

  6. (Optional) Update the view Key. A suggested key auto-populates from the name you enter, but you can customize it if you wish.

  7. (Optional) Enter a Description.

  8. (Optional) Click the tag icon. Enter a tag name to search for an existing tag or create a new one with that name.

  9. (Optional) Click Add maintainer to set the maintainer of the view. The maintainer defaults to the view’s creator if you do not set one.

  10. Click Create view. The “Add flags to [view]” dialog appears.

  11. Check the flags that you want to include in the view. You can add AgentControl configs and segments after creating the view.

  12. Click Add flags.

You can also create a view and then link flags, AgentControl configs, and segments later. To create a view without linking any resources, follow steps 1-9 in the procedure above, check the Create view & close checkbox, and then click Create view.

After you create a view, you can use it in role policies to restrict access, for instance, to restrict access to sets of flags. For an example of using a view in a role policy, read Example: View-specific permissions.

You can create up to 300 views per project.

Link resources to a view

You can link flags, AgentControl configs, or segments to an existing view when you create the resource. You can also link them to existing views at any time, from the Views list.

Link to a view from the resource

To link a flag, AgentControl config, or segment to a view from the resource details page:

  1. From the detail page, find “Views” in the right sidebar.
  2. Click add view.
  3. Check the checkbox next to the views that you want to link the flag or segment to.

Link to a view from the views list

To link flags, AgentControl configs, or segments to an existing view from the Views list:

  1. From Project settings, select Views. The Views list appears.
  2. Find the view you want to link a resource to.
  3. Click the overflow menu for the view.
  4. Select Update linked resources. The “Linked resources” tab appears.
  5. Click Add and select the resource type from the dropdown menu. The “Add [resource]” dialog appears.
  6. (Optional) Use the search field or the “Filters” menu to limit the number of resources displayed.
  7. Check the resources that you want to include in the view.
  8. Click Add [resource].